Slack
Slack is a widely utilized platform for team collaboration and messaging within businesses and organizations. It serves as a centralized tool to enhance communication and foster collaboration among team members.
You must have an account in Slack.
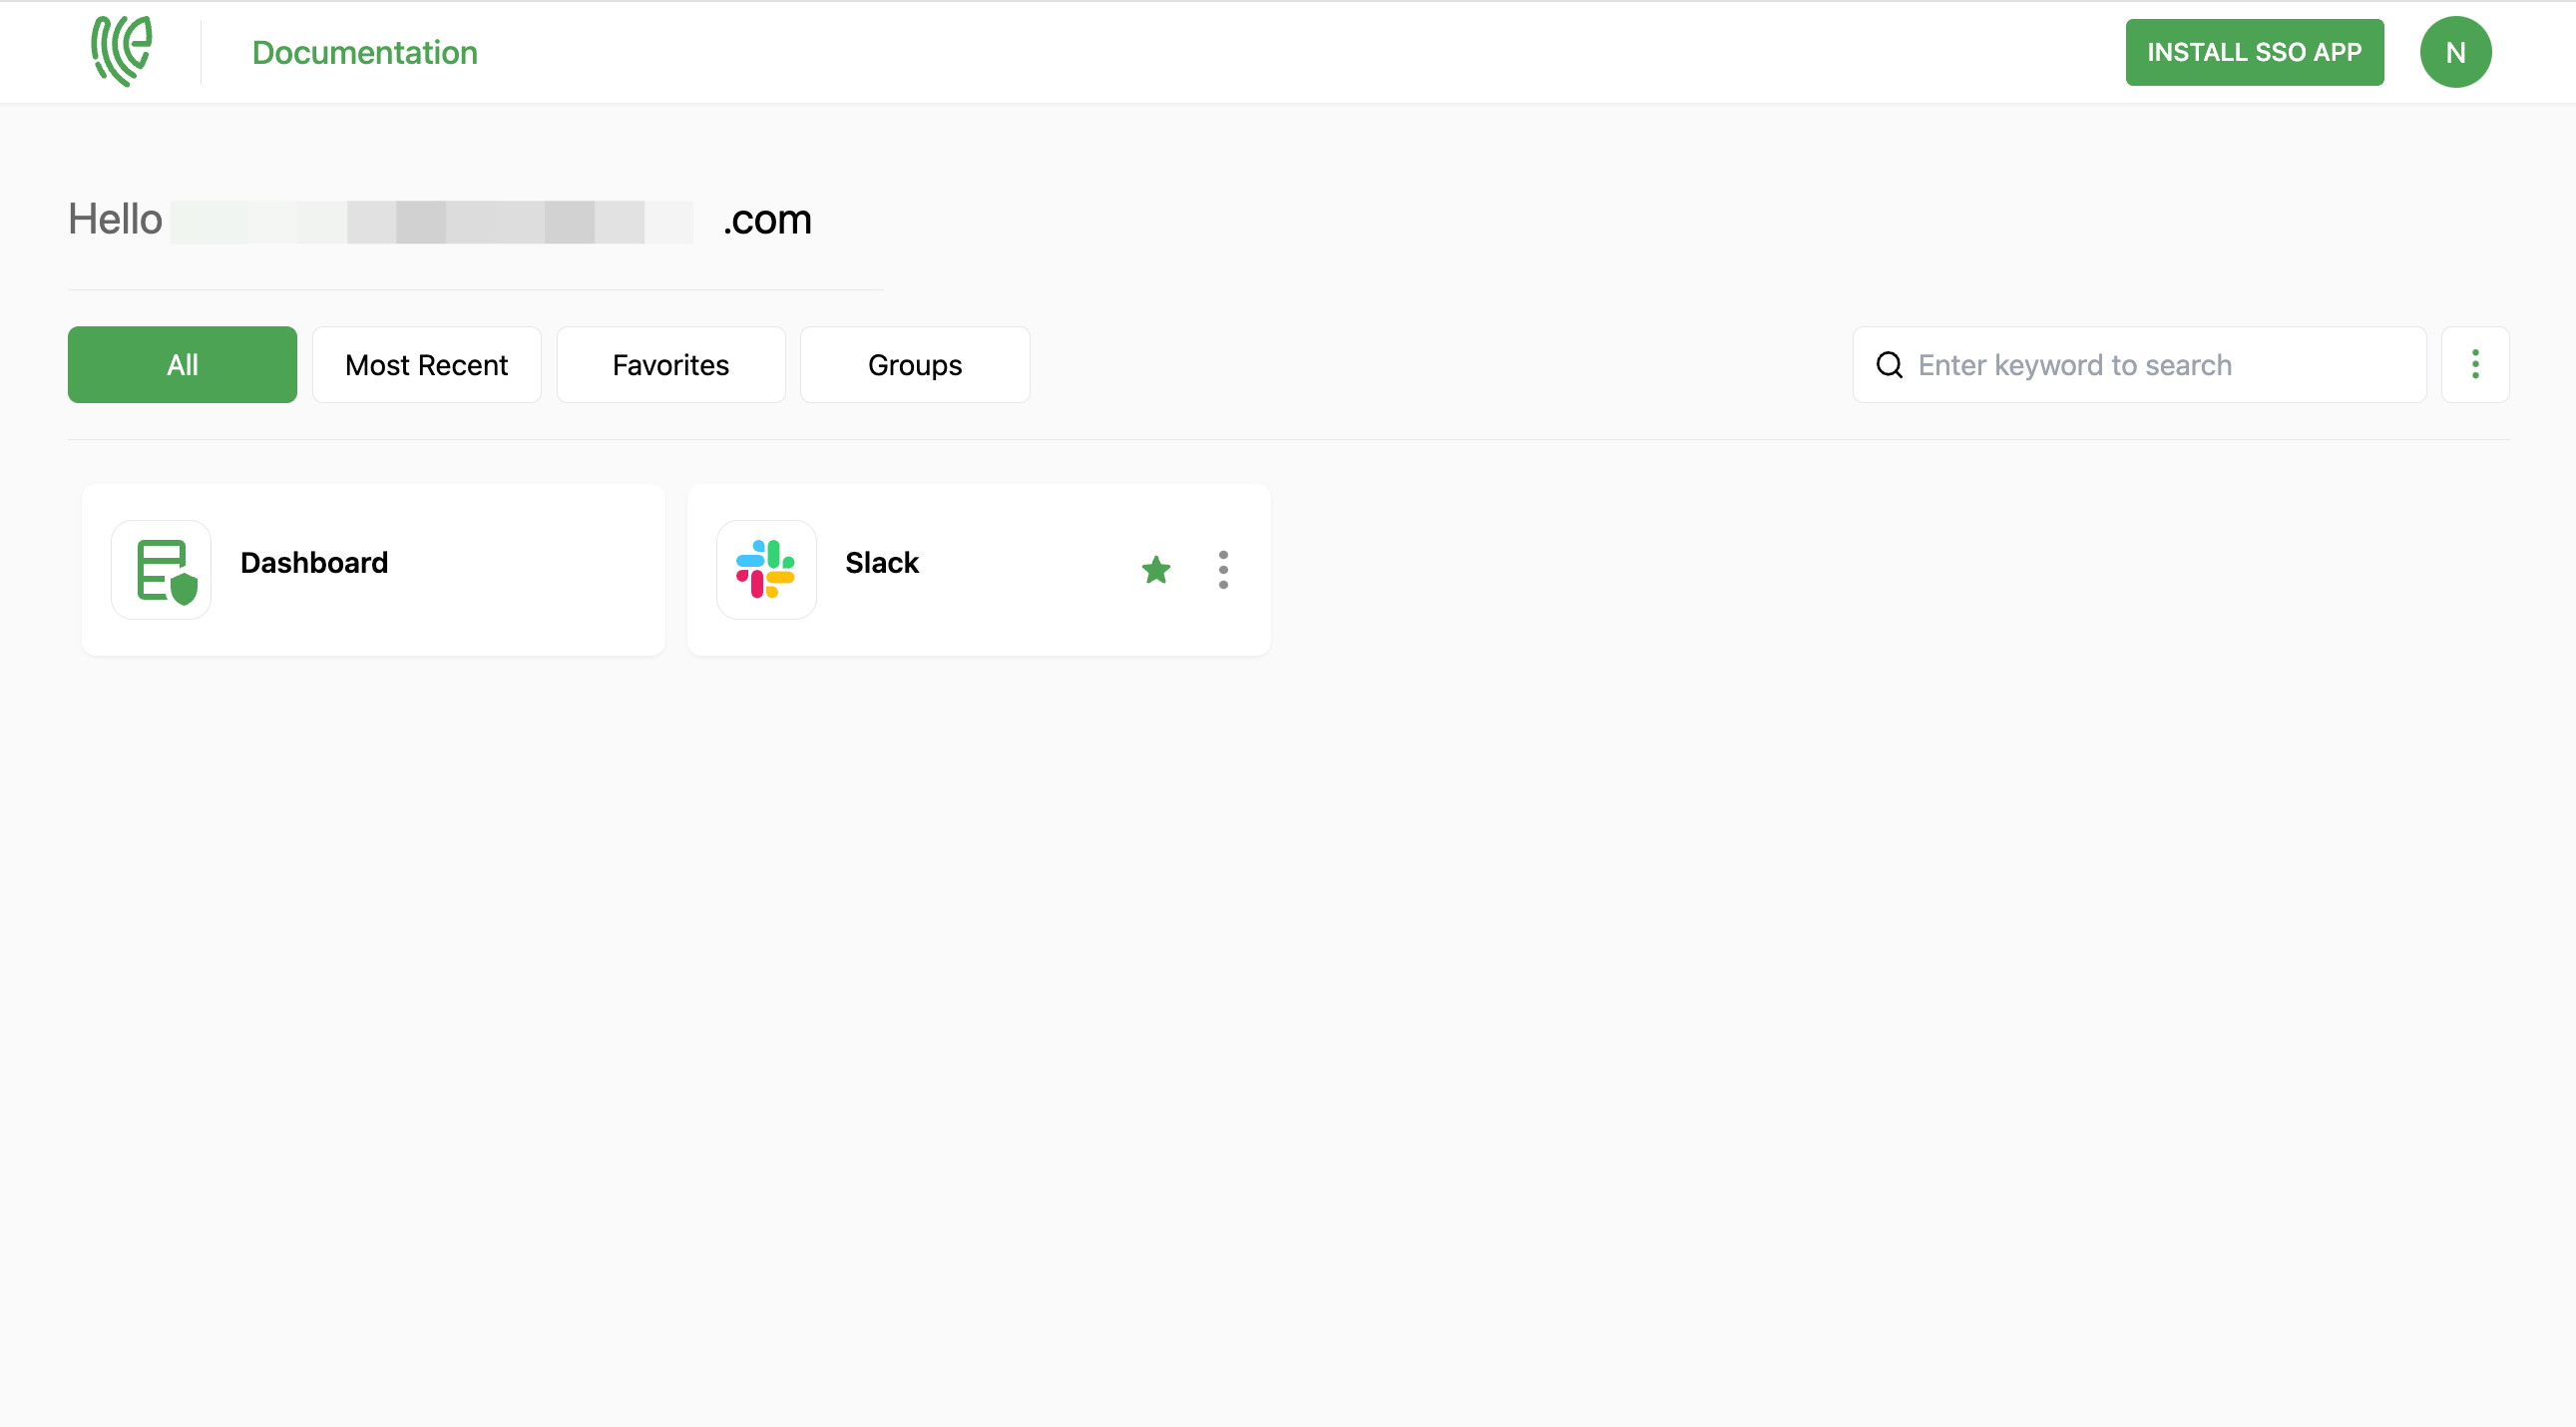
1 Go to Dashboard > Marketplace > SSO Integrations.
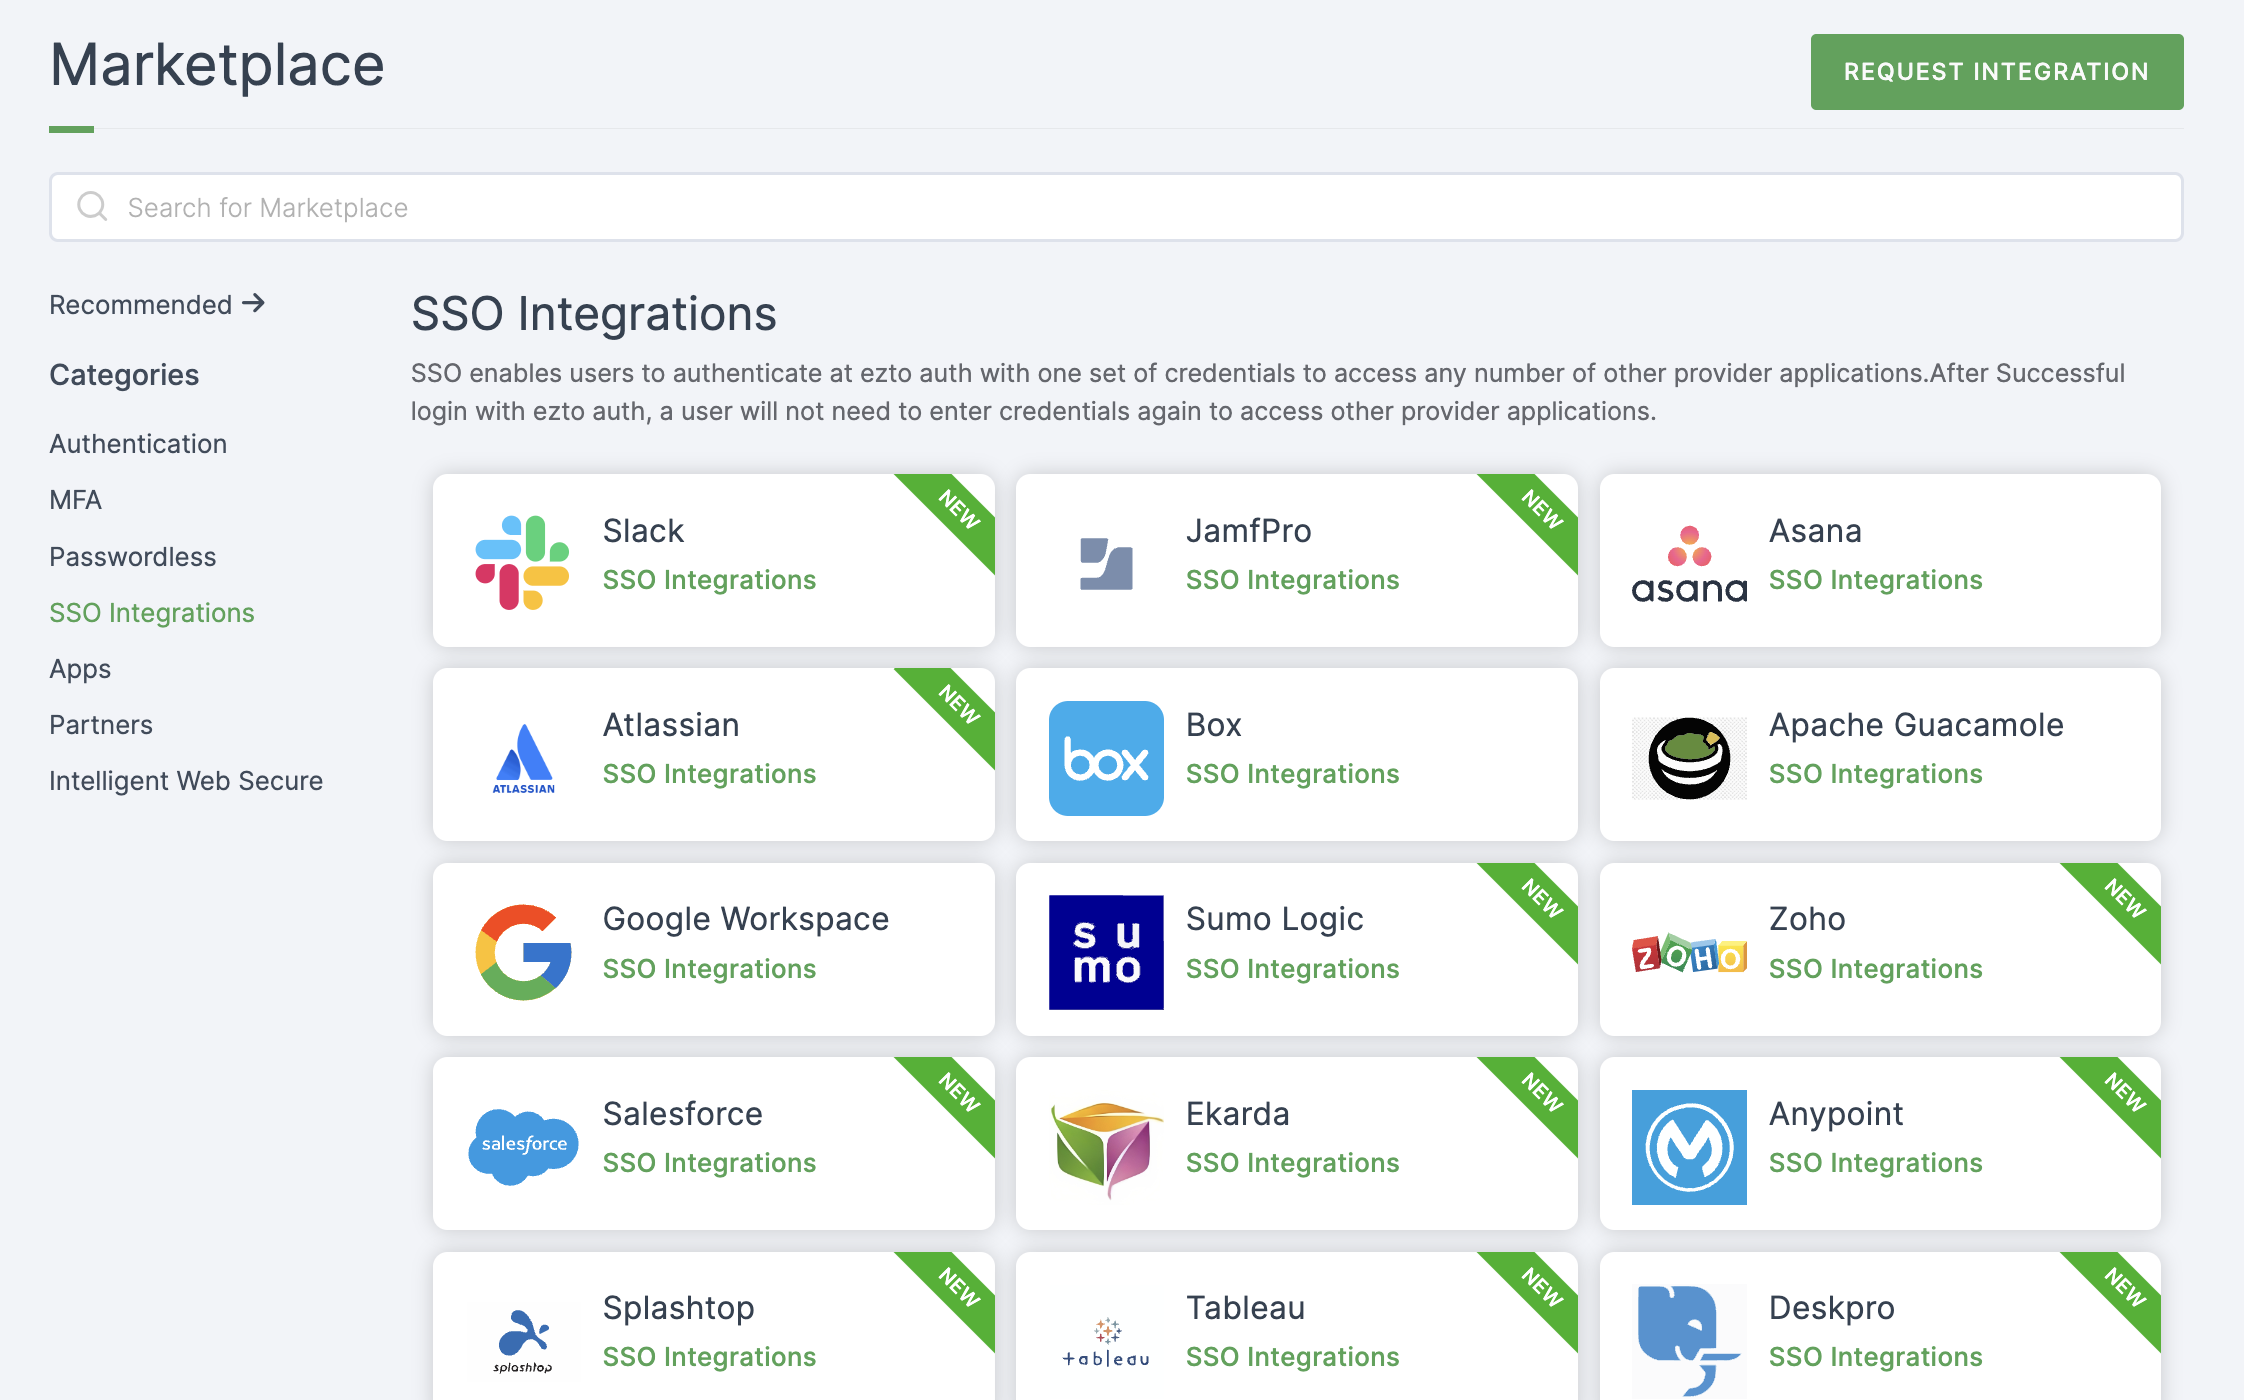
2 Select Slack from the list.
3 You'll land on the overview page, with an additional tab: Installation (providing a step-by-step installation guide).
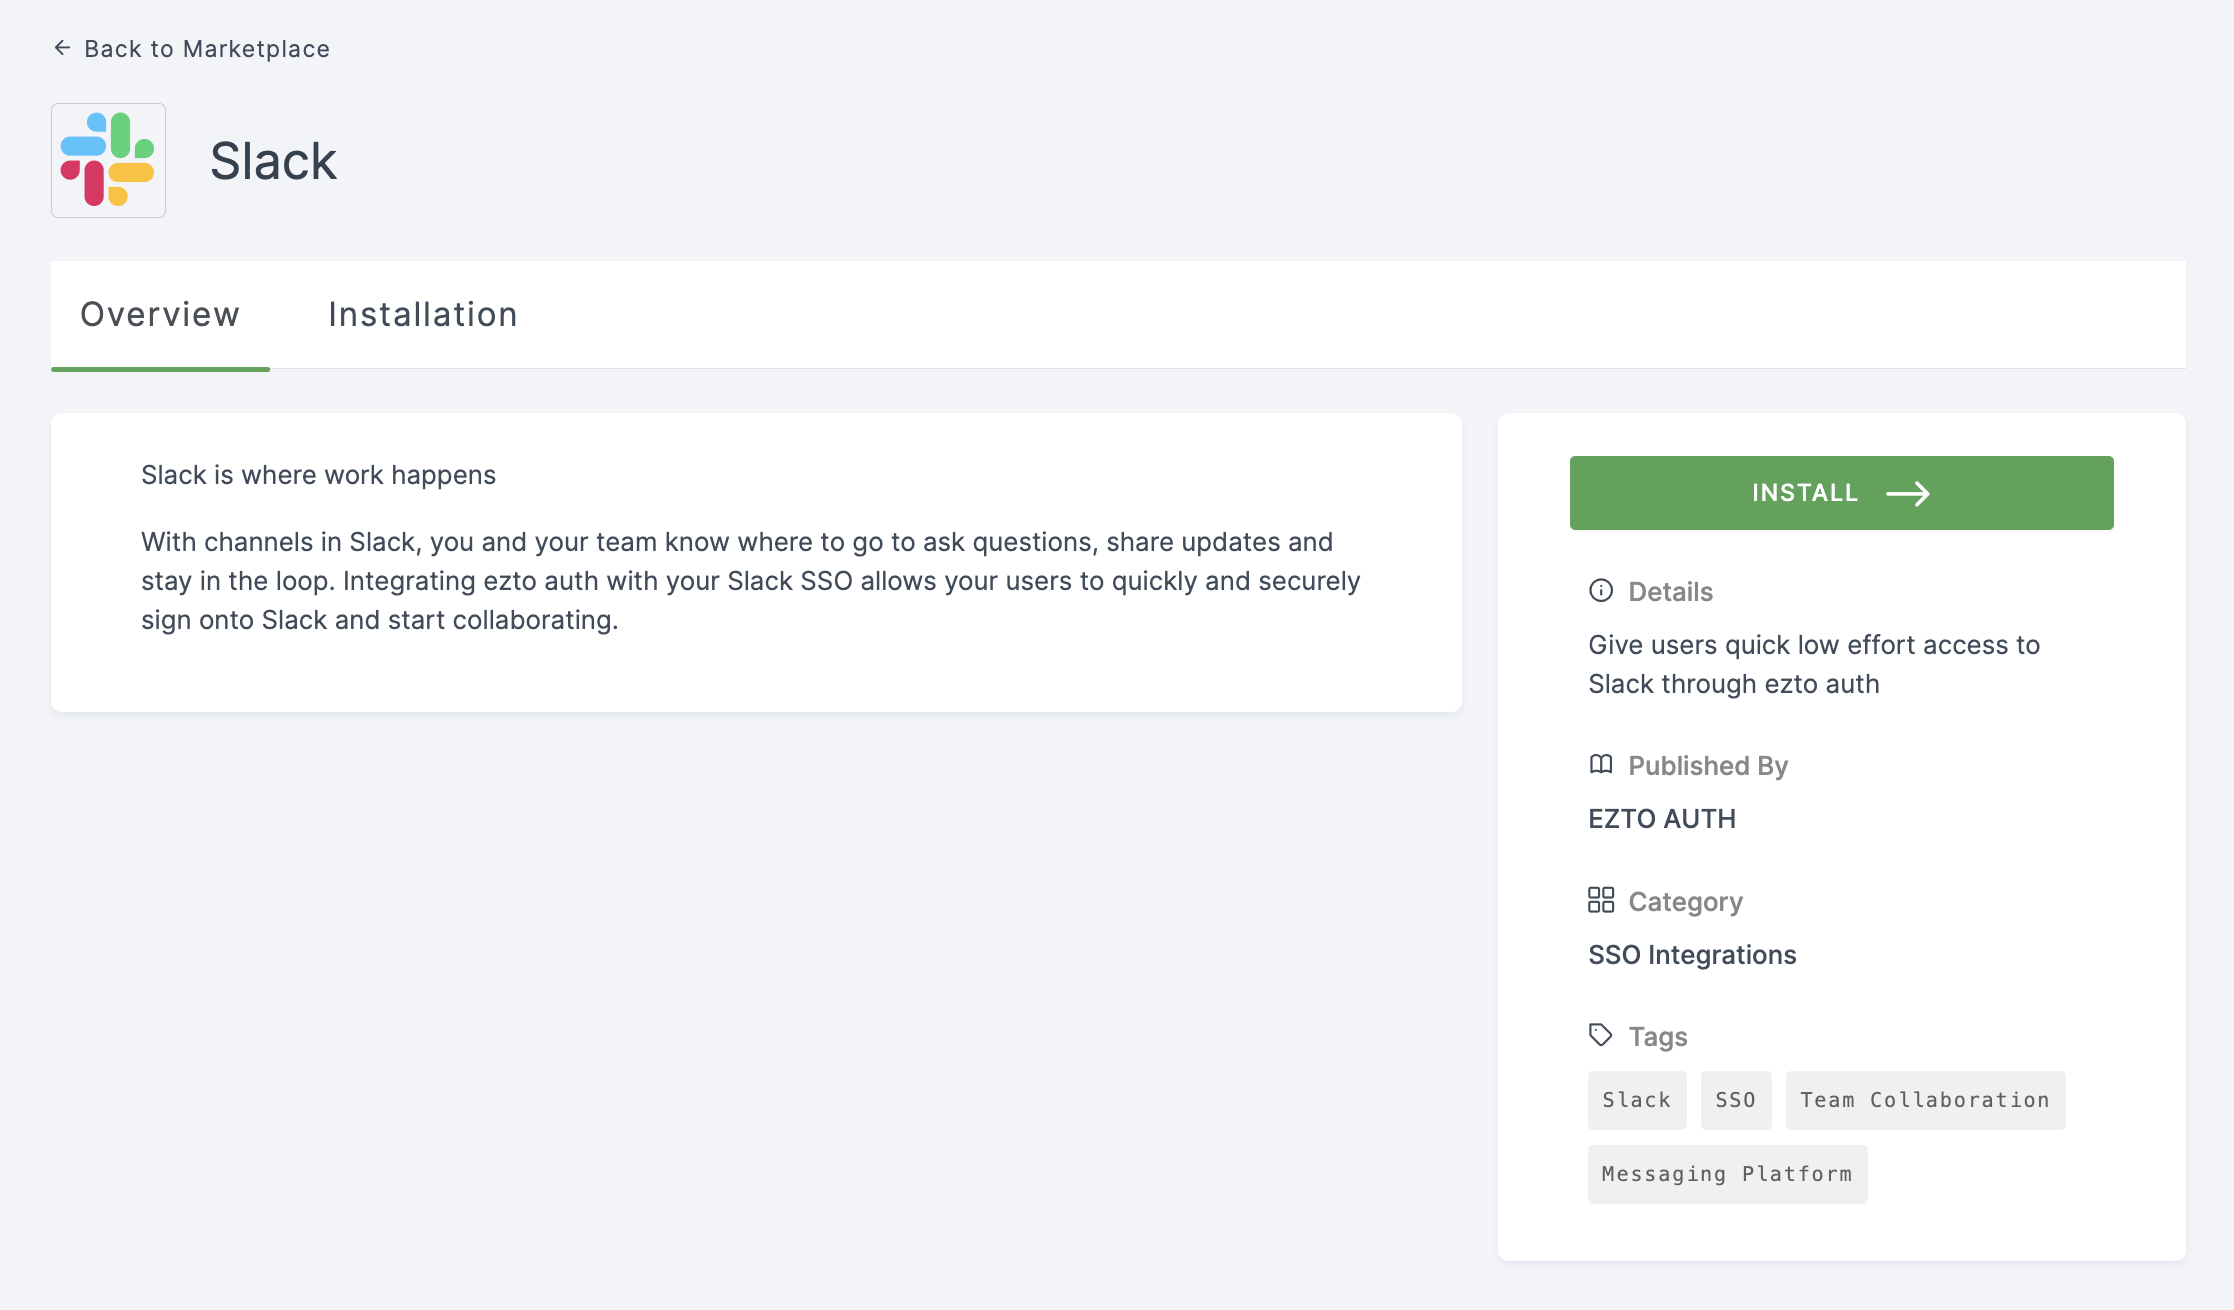
4 Click on INSTALL.
5 Provide a Name for the Slack SSO flow and enter the Team Name.
::: note
Leave the Service Provider Issuer field empty, as the default https://slack.com will be applied.
:::
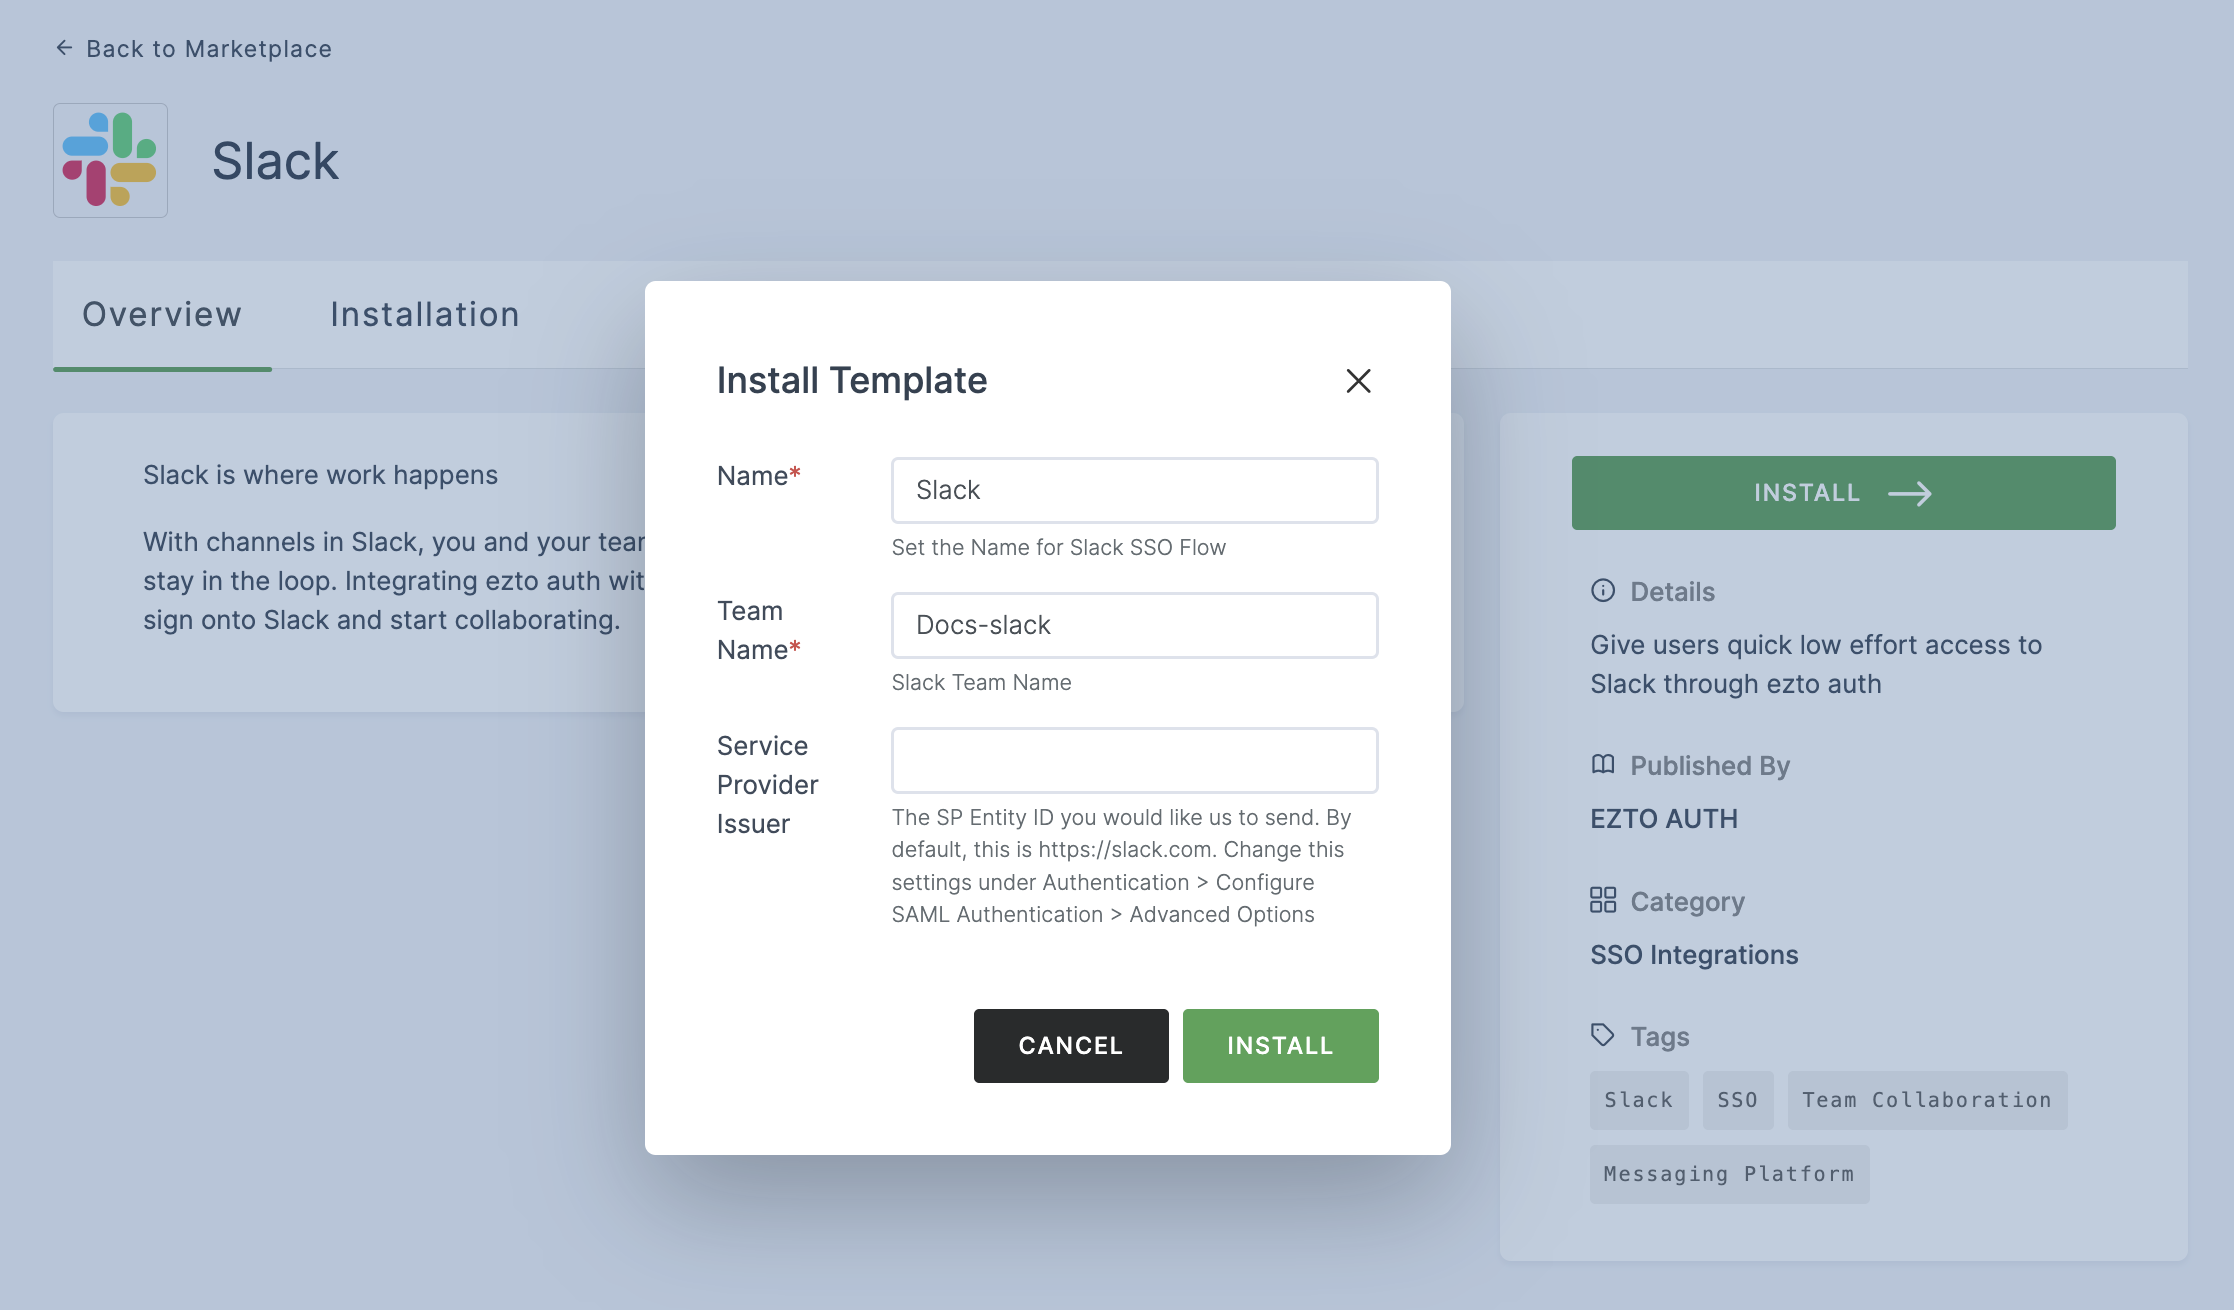
6 Once the configurations are provided, click on INSTALL.
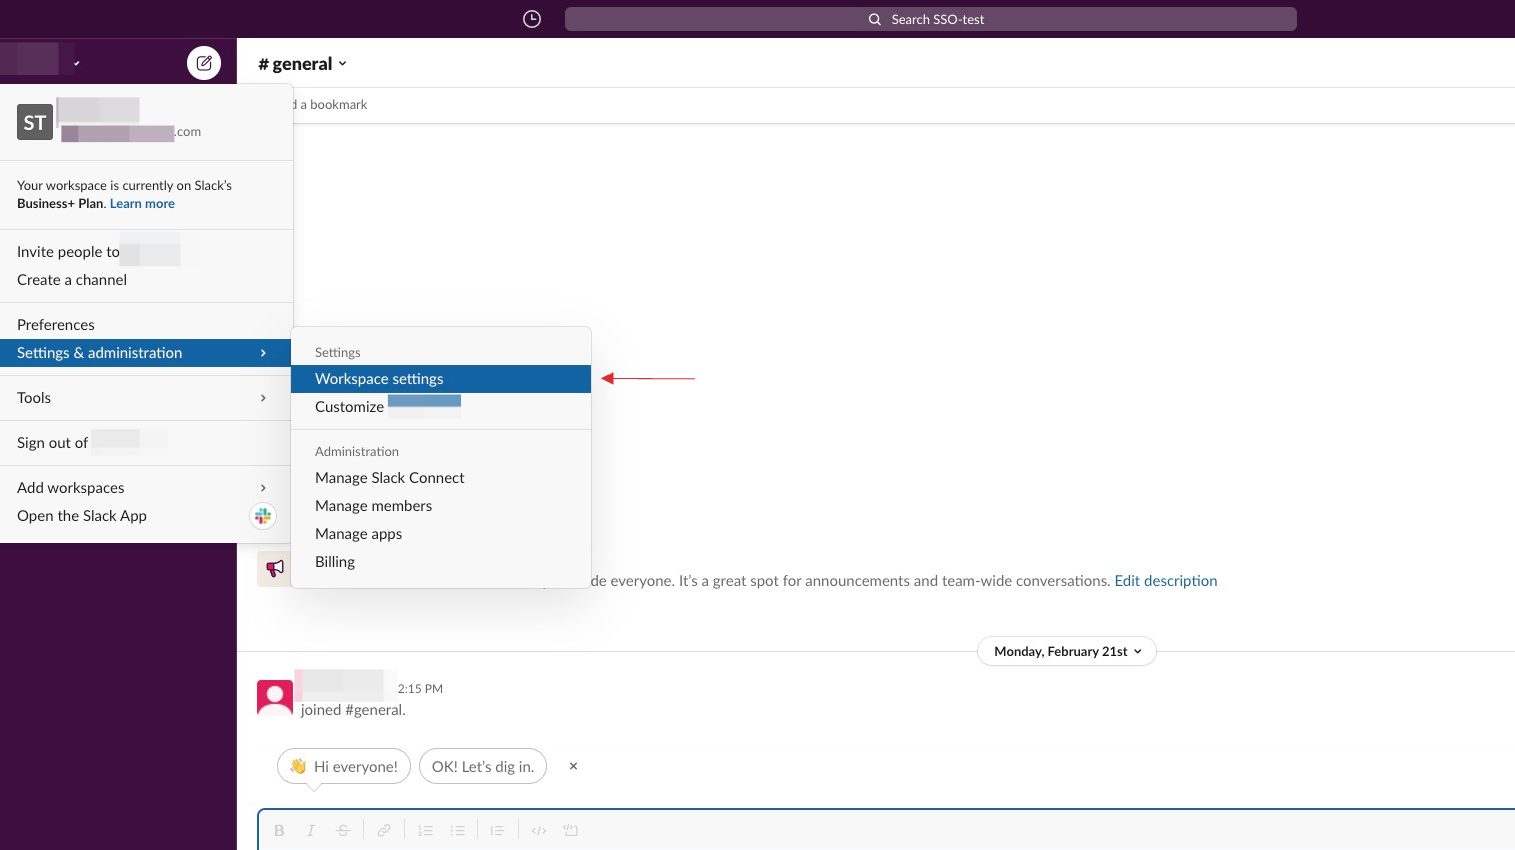
7 To enable Slack SSO login, go to your Slack account.
8 Navigate to Settings & Administration, then click on Workspace settings.
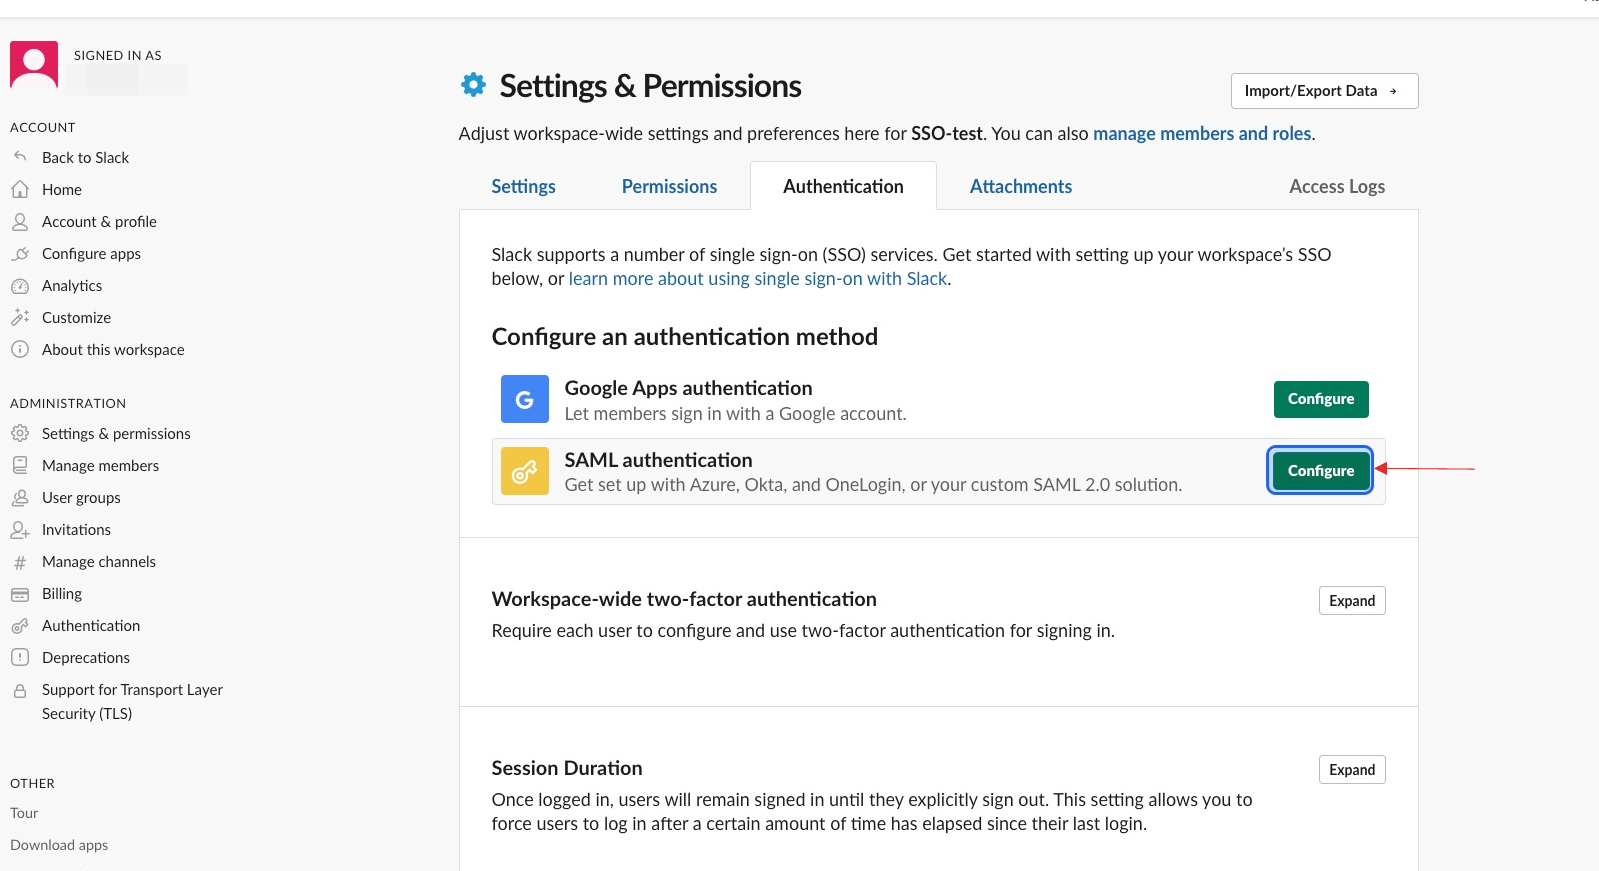
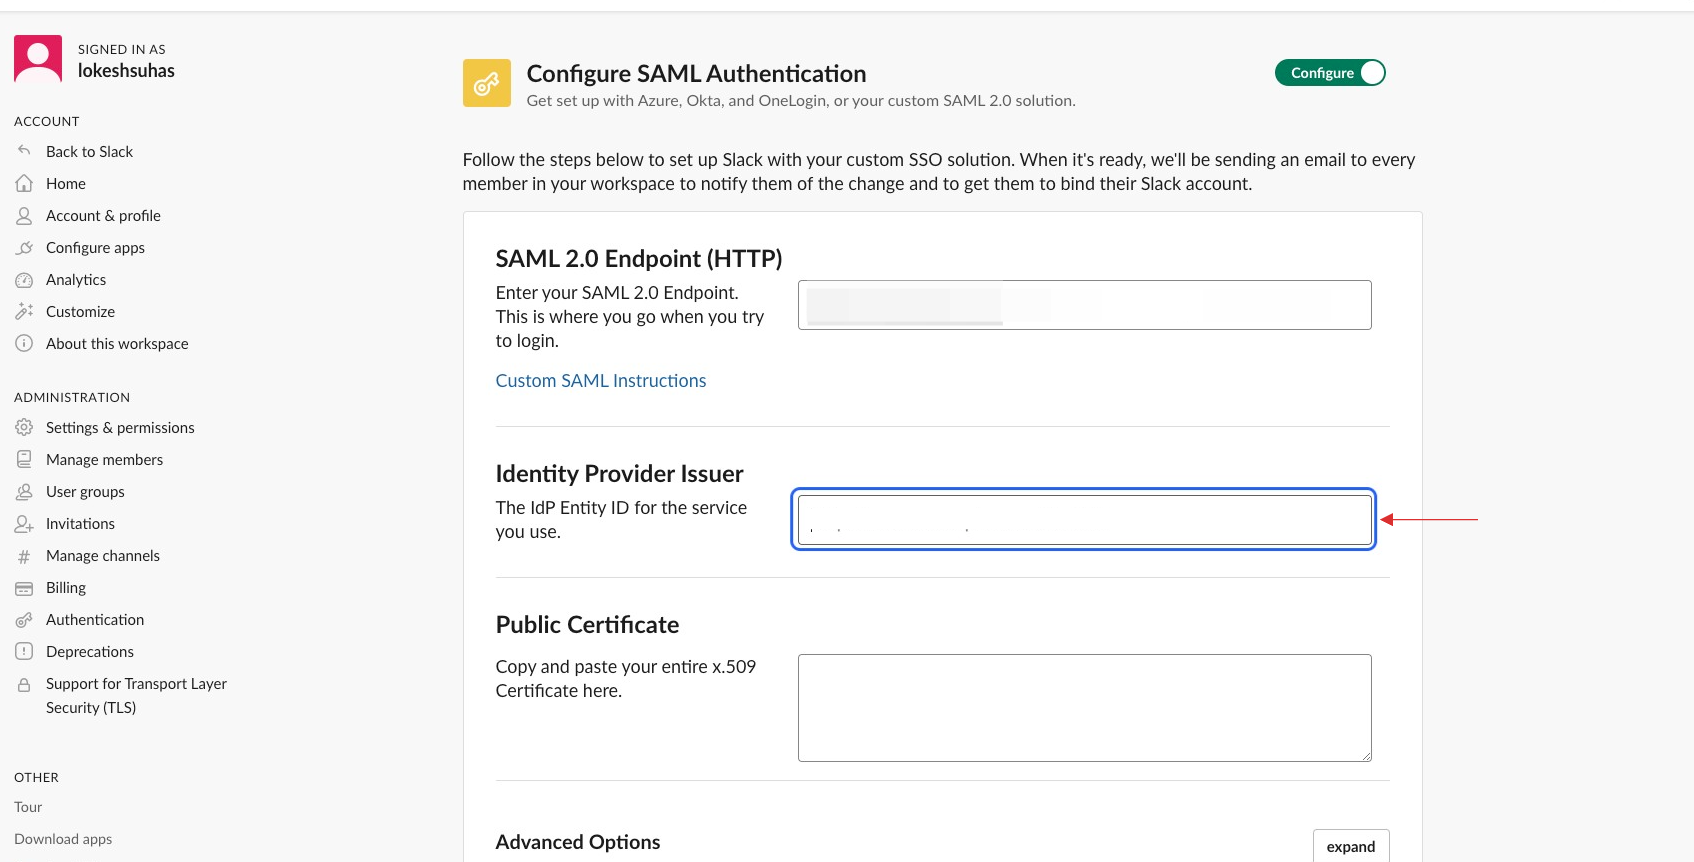
9 Click on Authentication, and then click on Configure for SAML authentication.
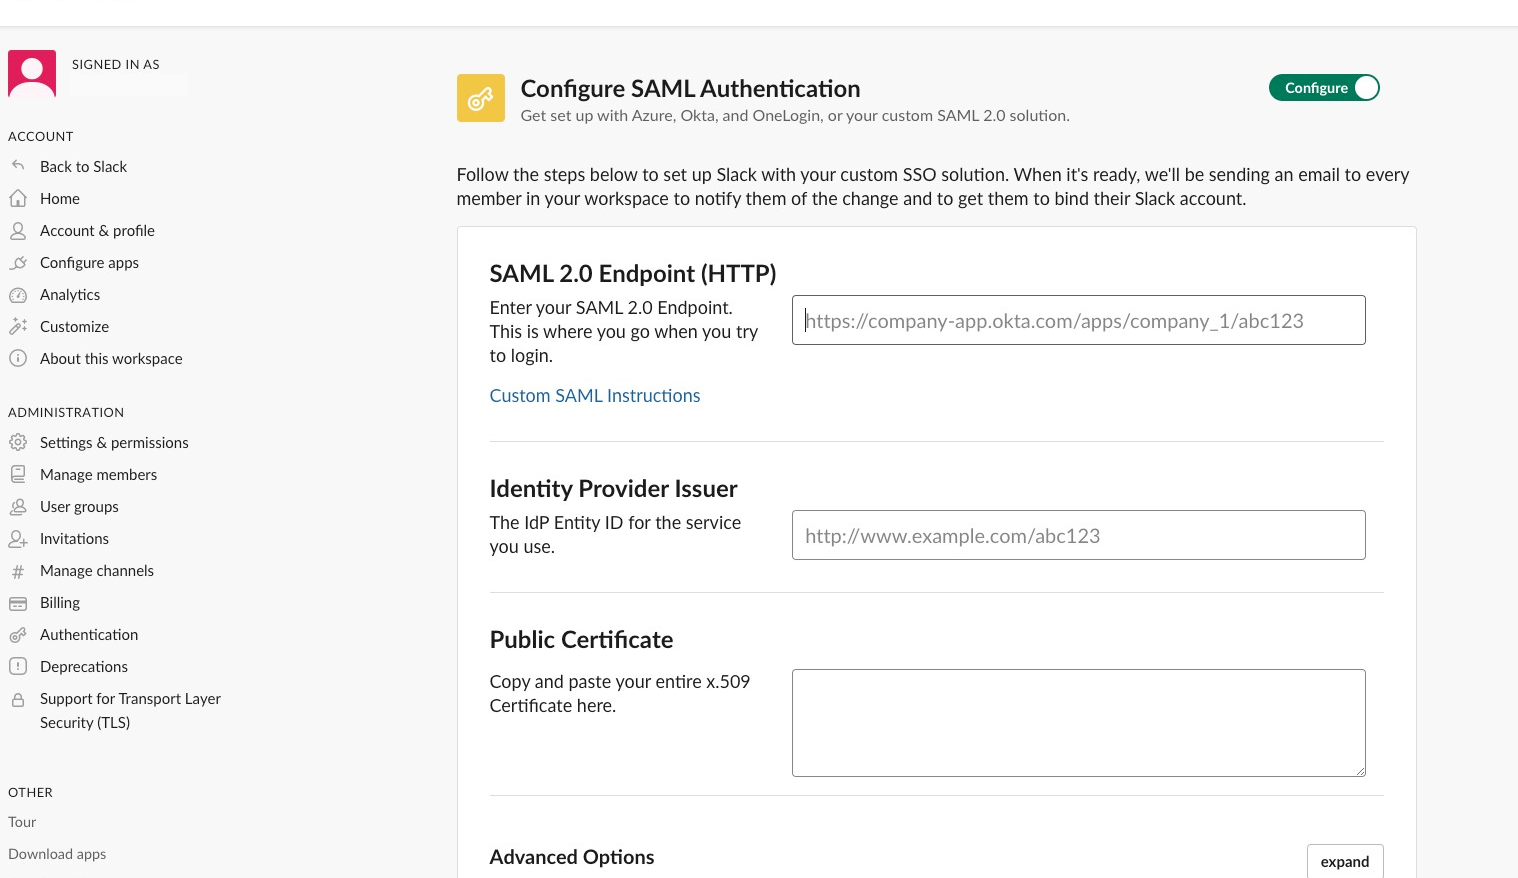
10 The configurations for SAML authenication will be displayed.
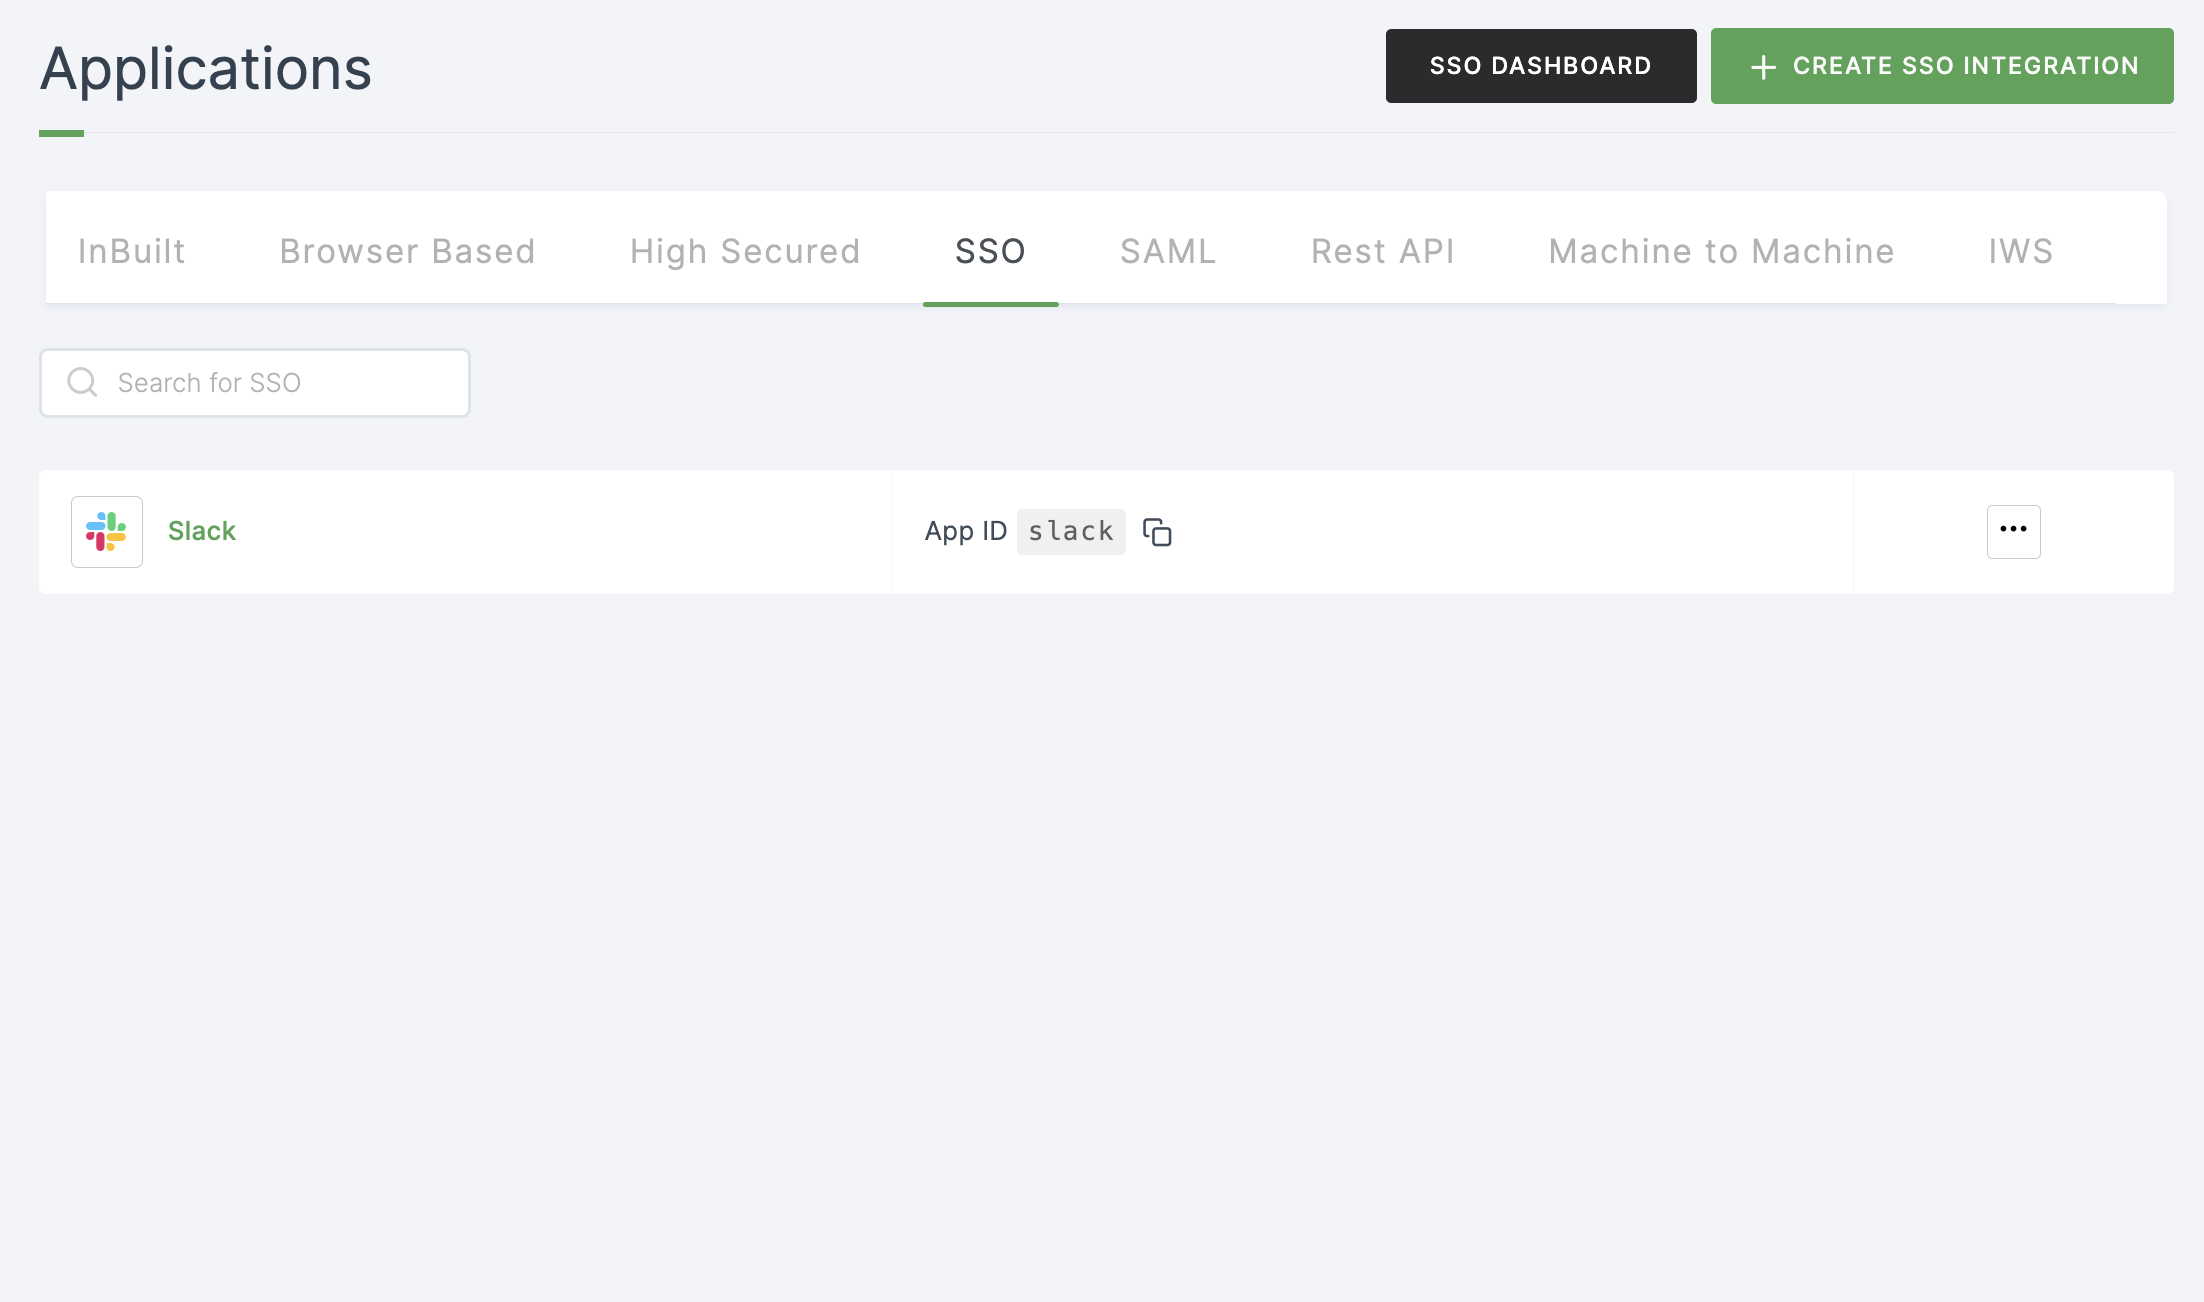
11 Return to your dashboard, go to Applications > SSO, and click on the created Slack SSO.
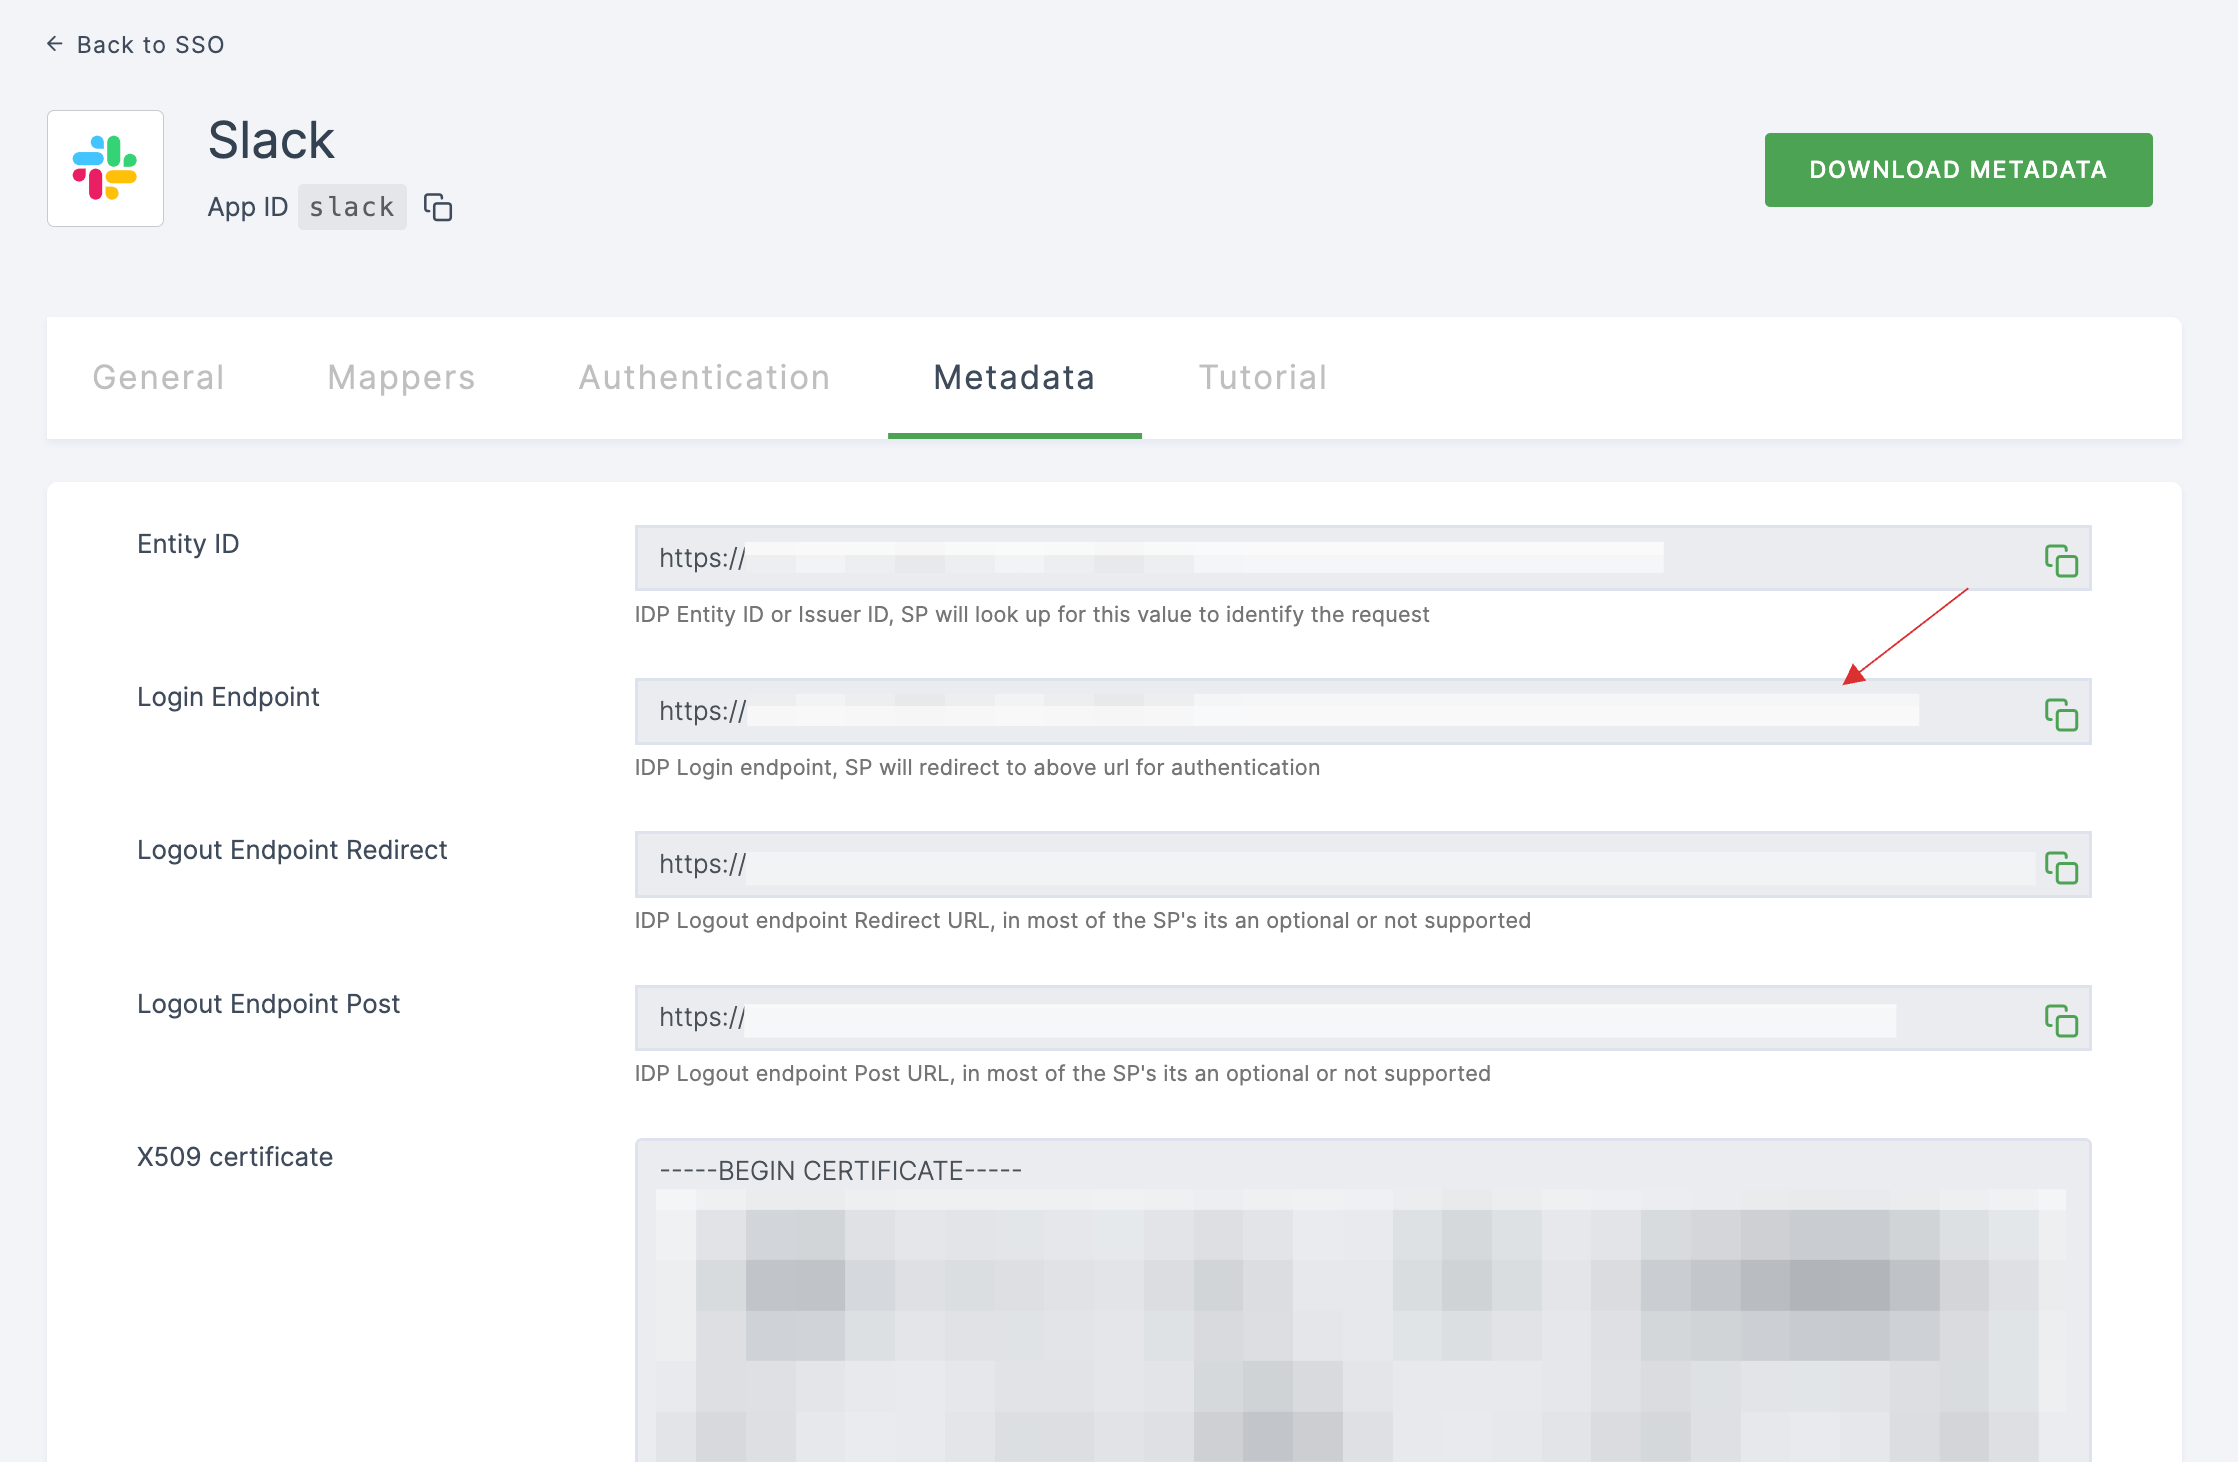
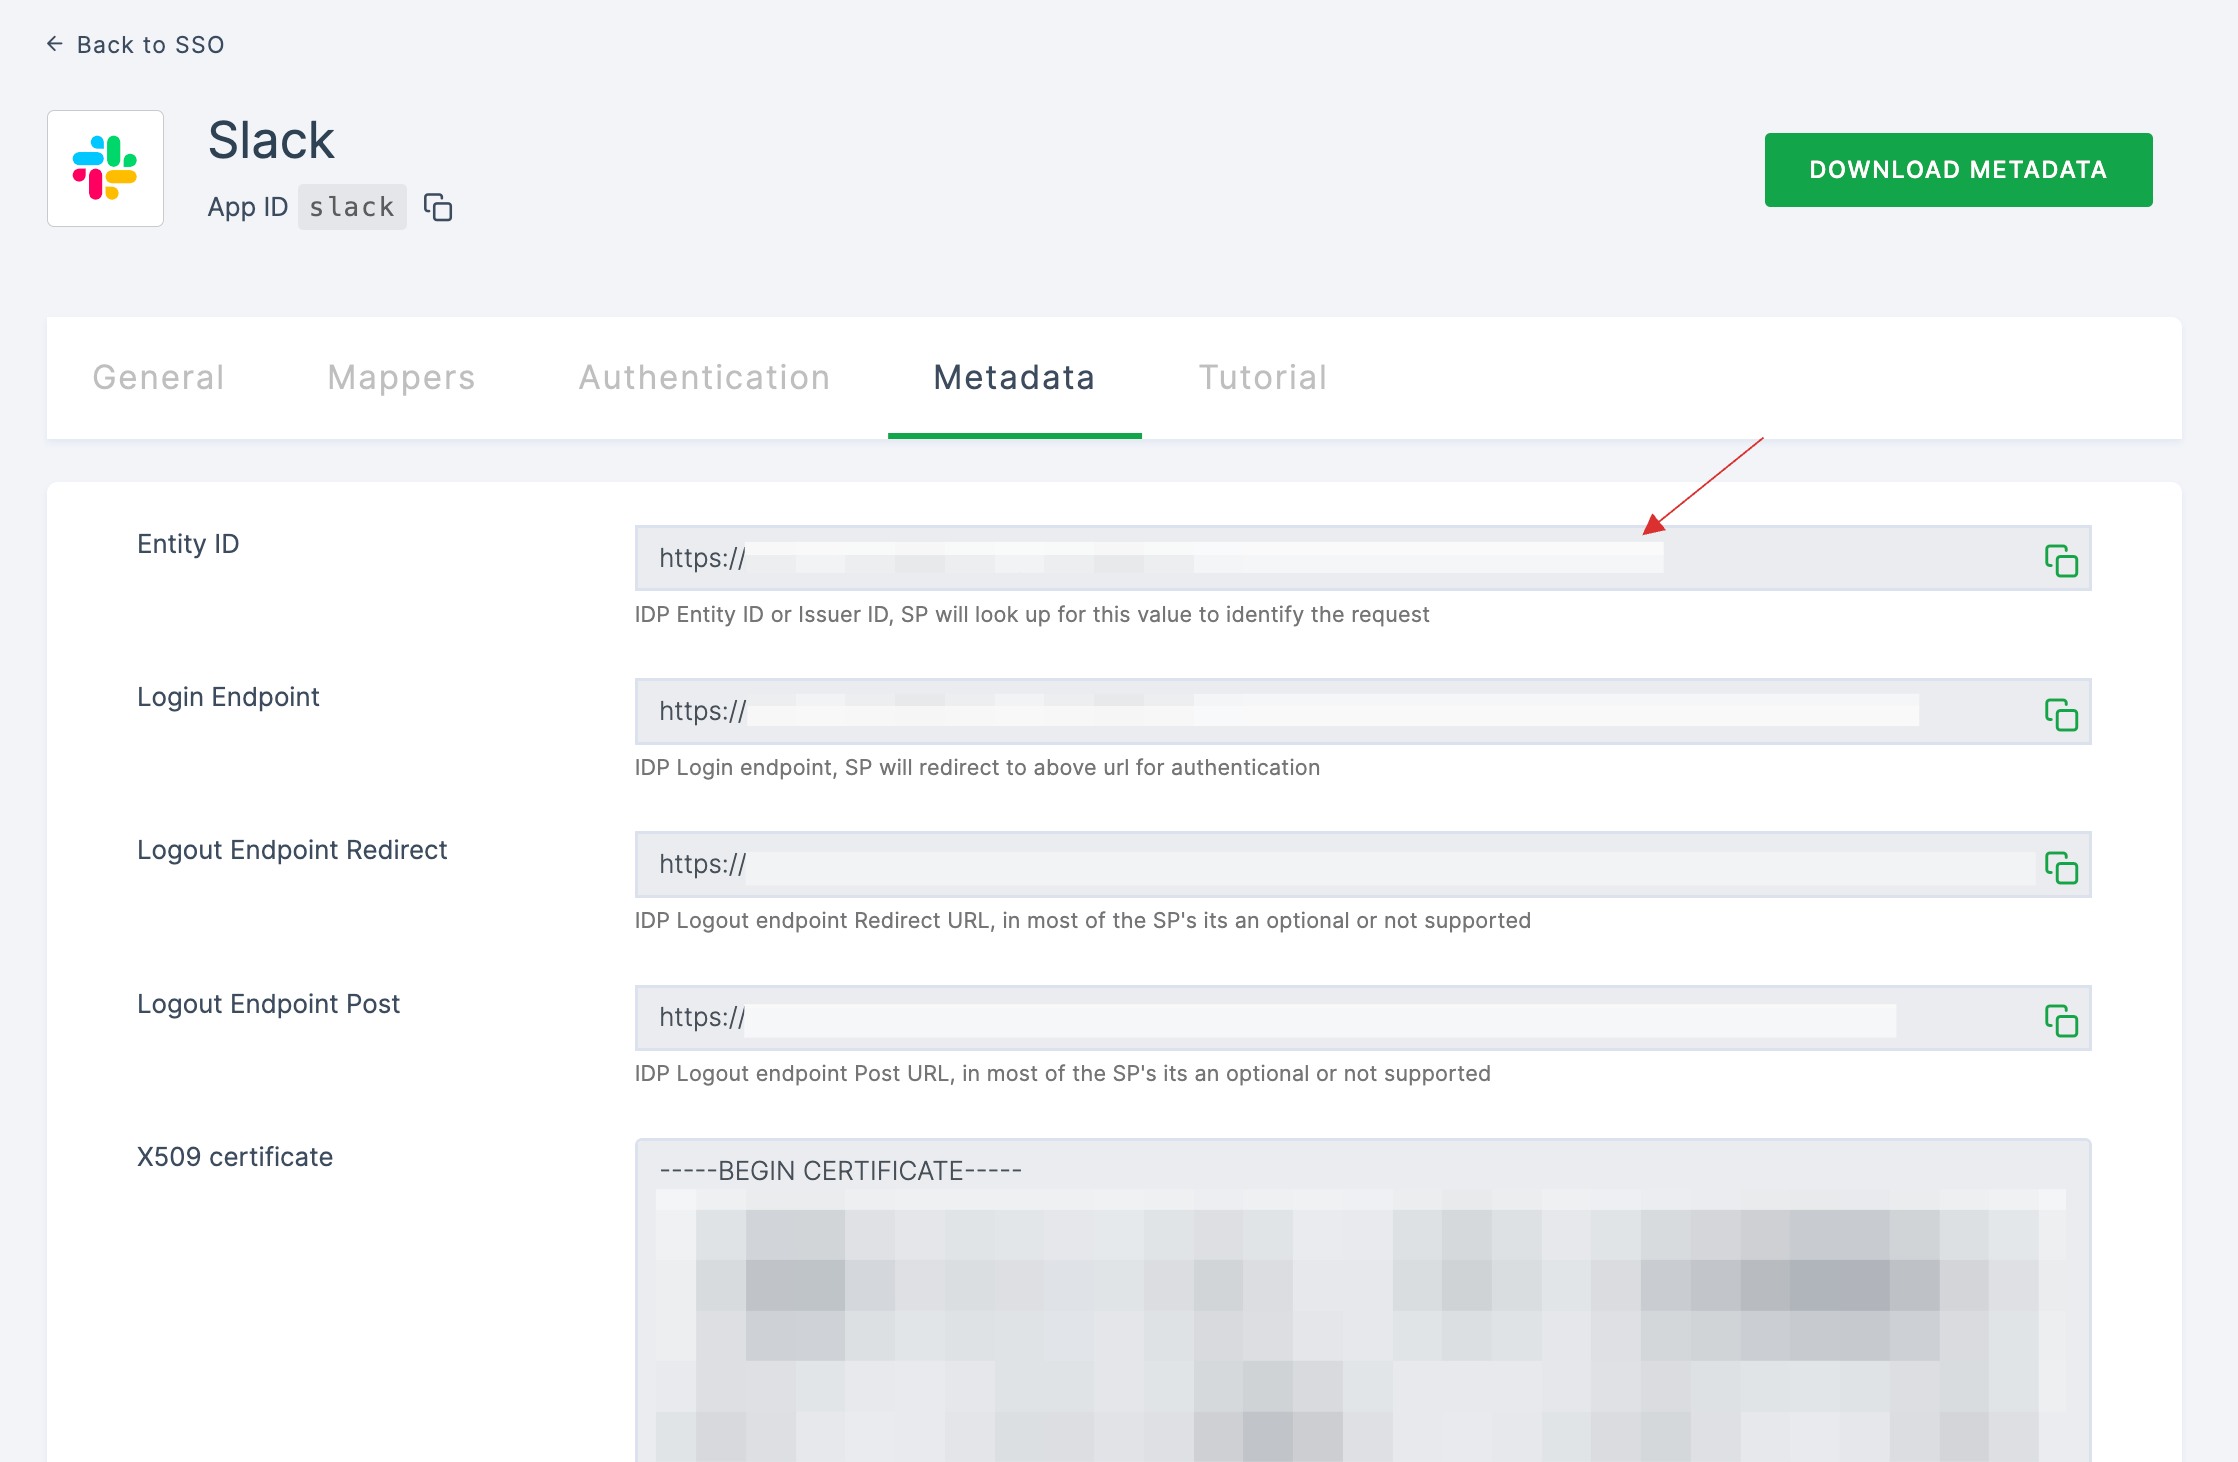
12 Click on Metadata, where the list of endpoints for the particular SSO will be available. Copy the Login Endpoint.
13 Switch to Slack, paste the Login Endpoint in SAML 2.0 Endpoint(HTTP).

14 Return to your dashboard, copy the Entity ID.
15 Switch to Slack, paste the Entity ID in Identity Provider Issuer.
16 Return to your dashboard, copy the X509 certificate.
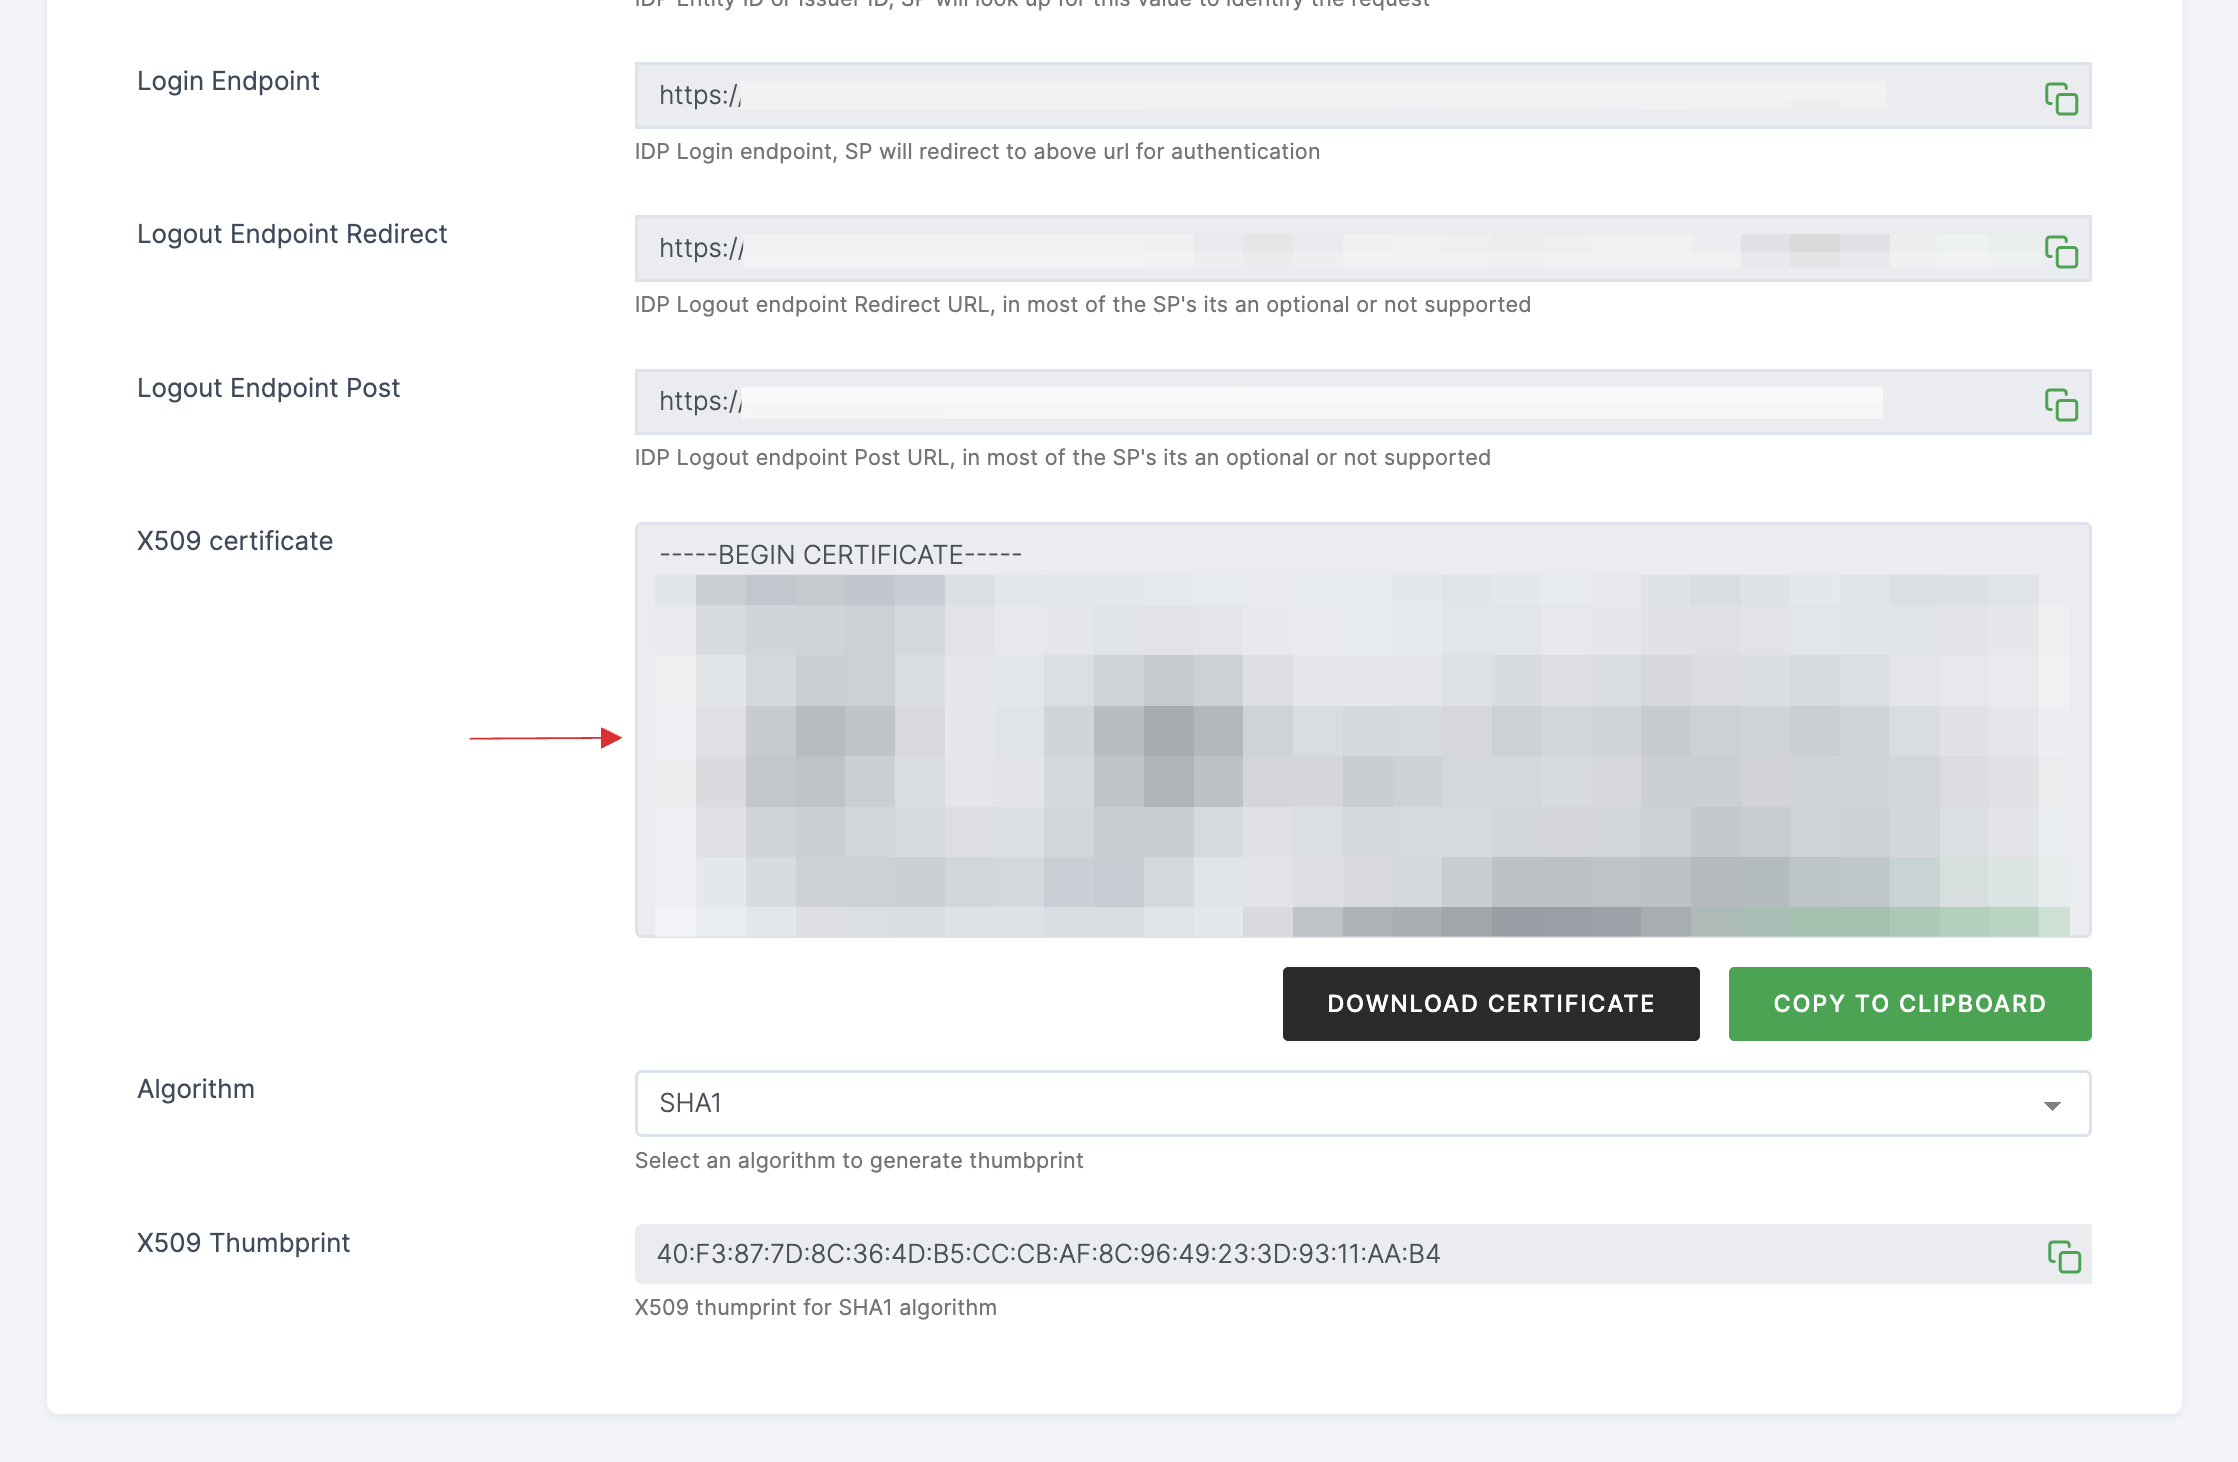
17 Switch to Slack, paste the copied X509 certificate in Public Certificate, and click on expand.
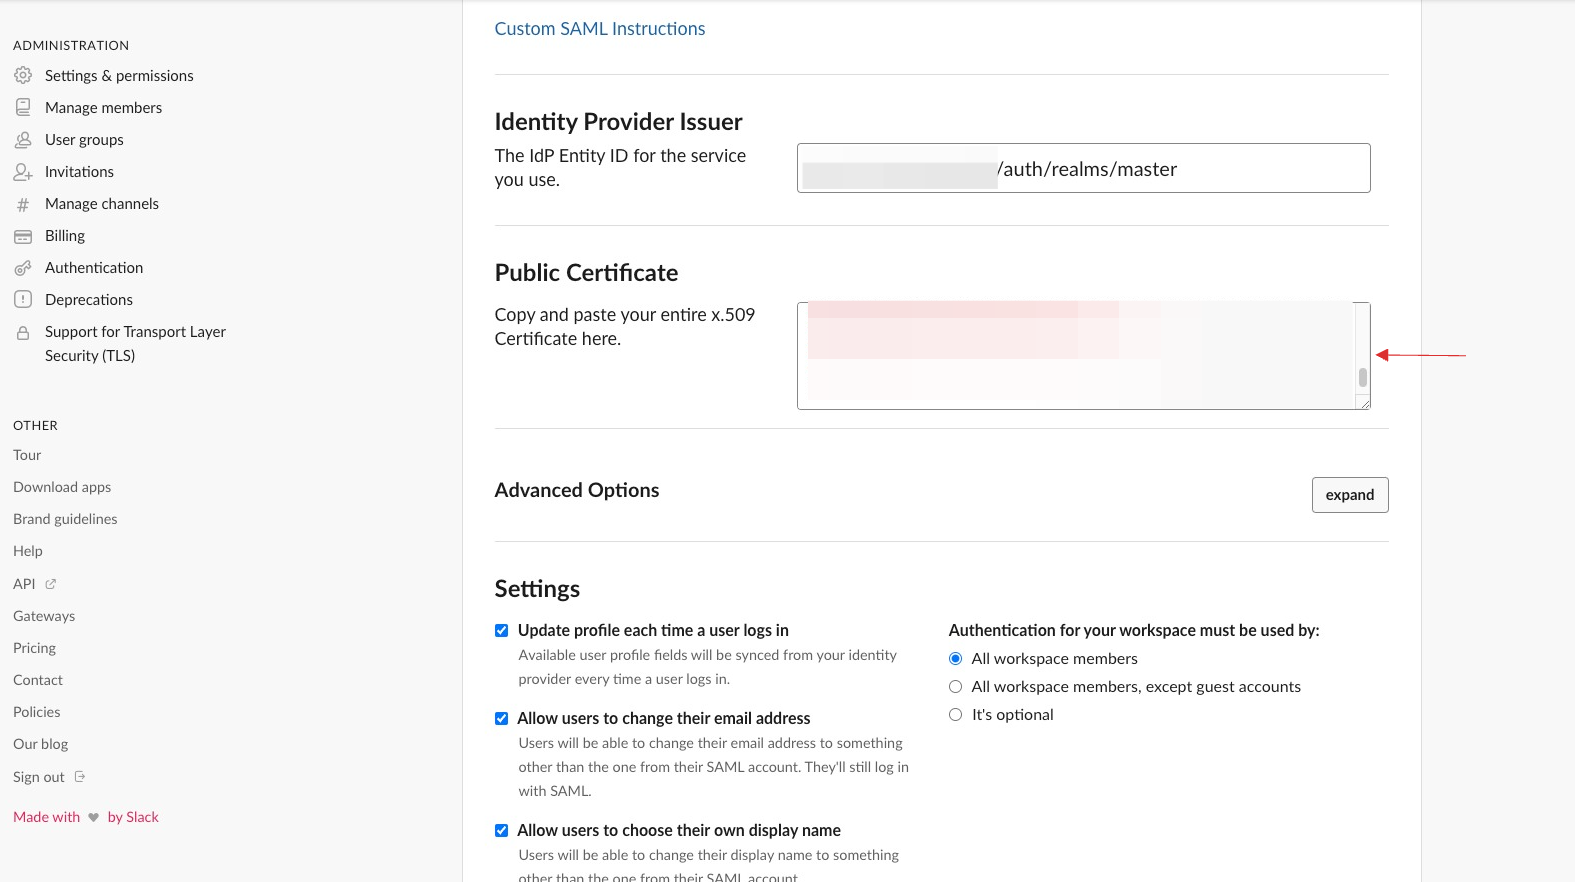
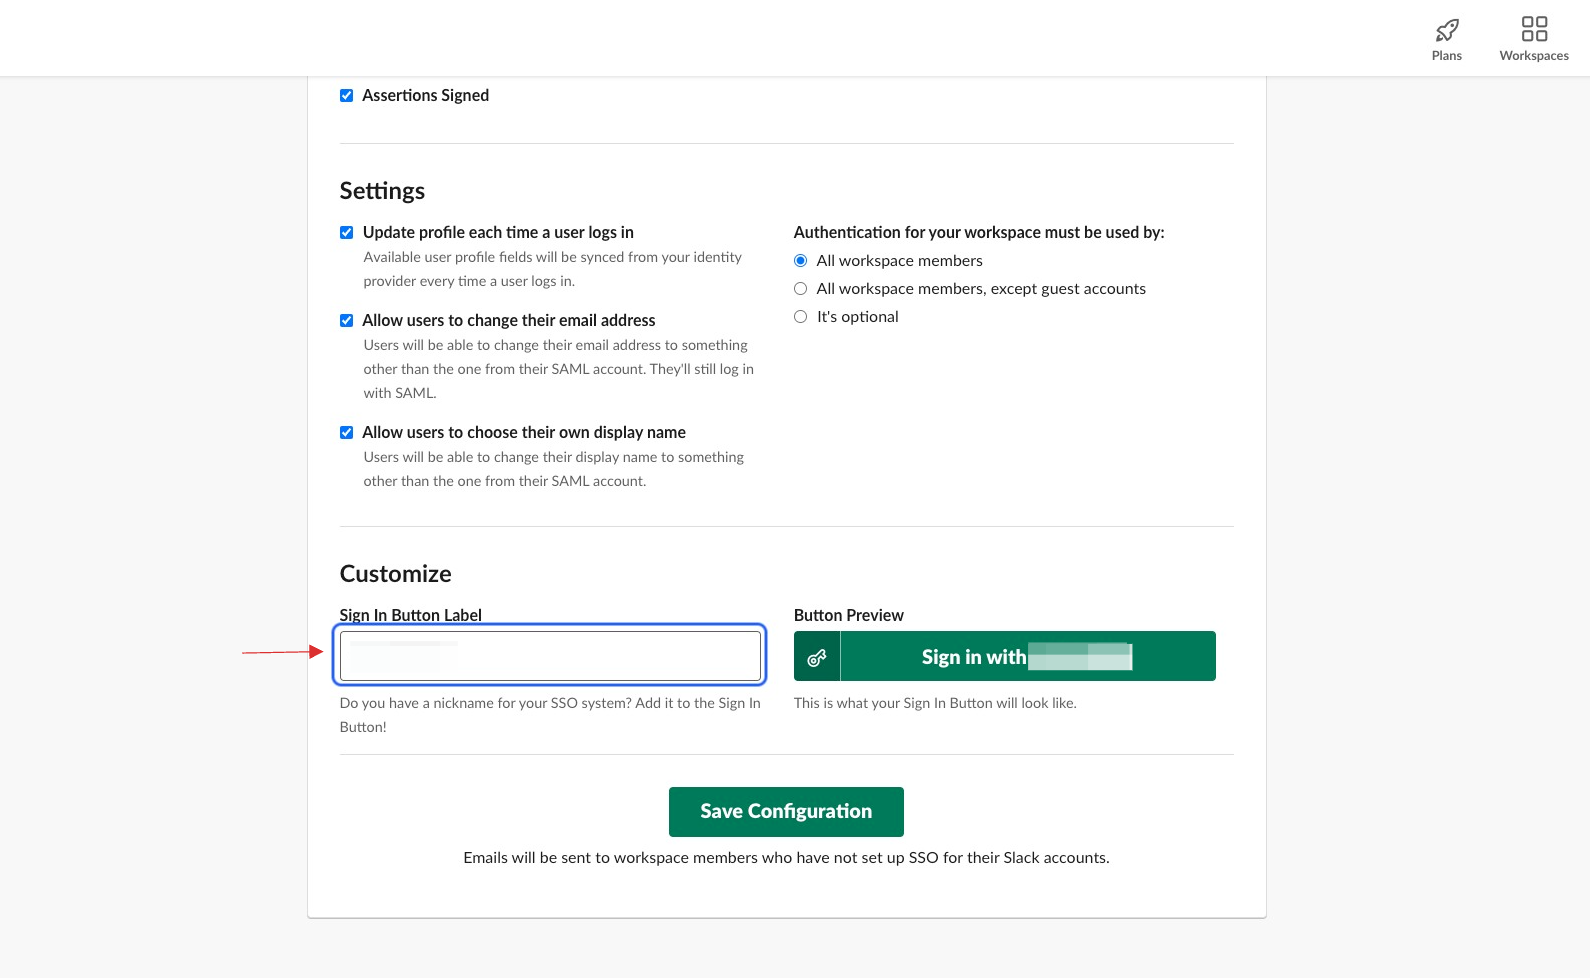
18 The Advanced Options will be displayed. Uncheck the Sign AuthnRequest option, choose Don't send this value for AuthnContextClassRef and check Responses Signed and Assertions Signed.

19 Scroll down, locate Customize and provide a name under Sign in Button Label.
20 Click on Save Configuration, and you will be redirected to your Dashboard Login Page.
21 The SAML configuration will be successfully completed.
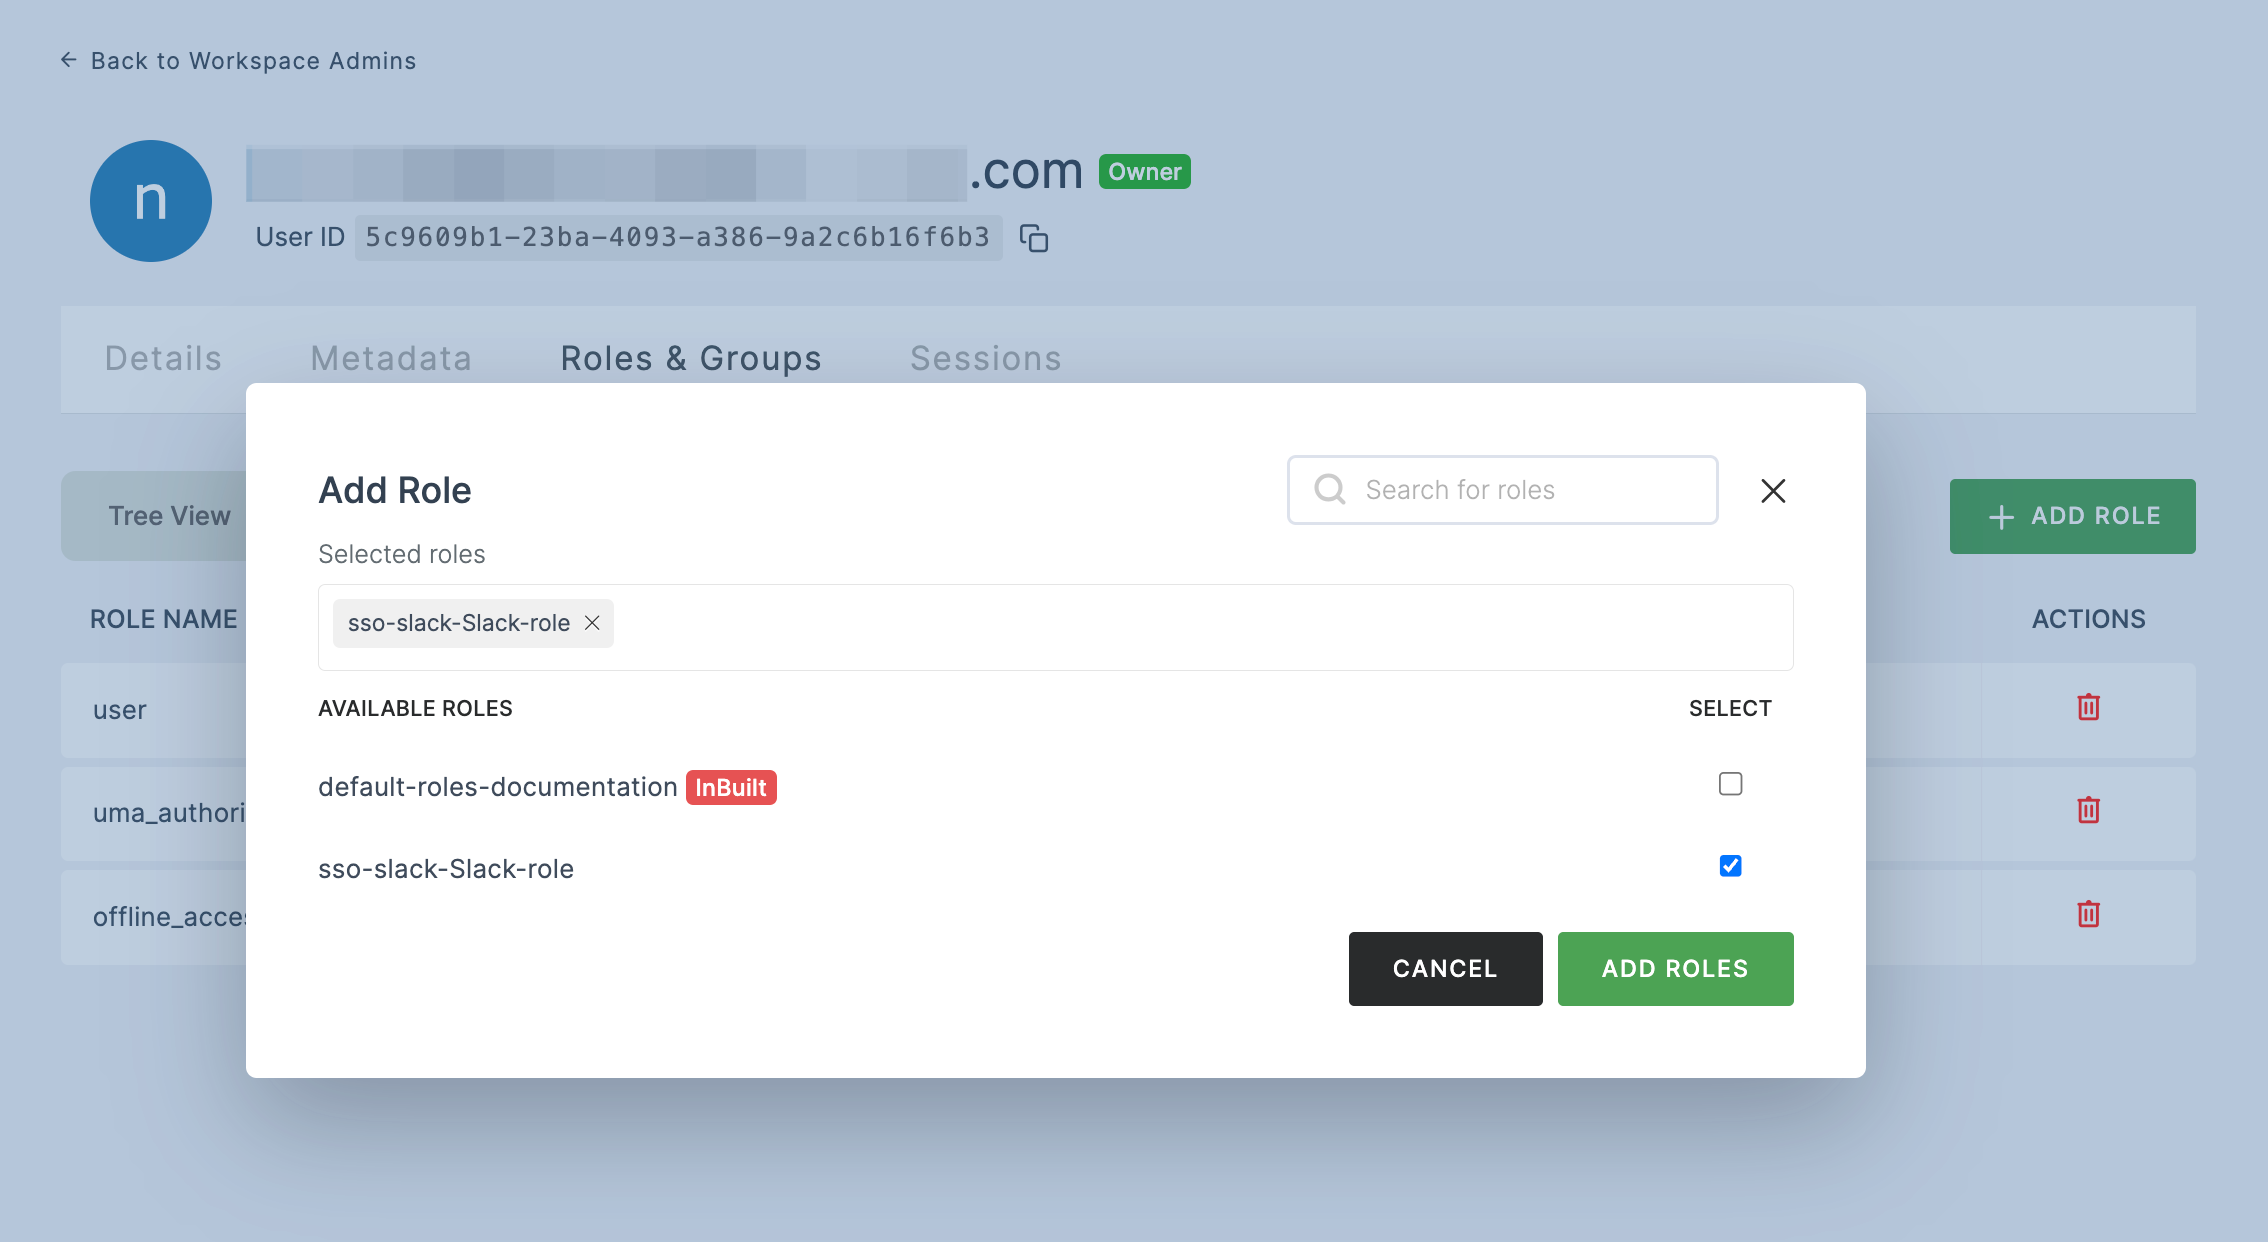
22 Return to your dashboard, assign a user with Slack role. To do so, navigate to Users or Workspace Admins, click on the user you want to assign the role.
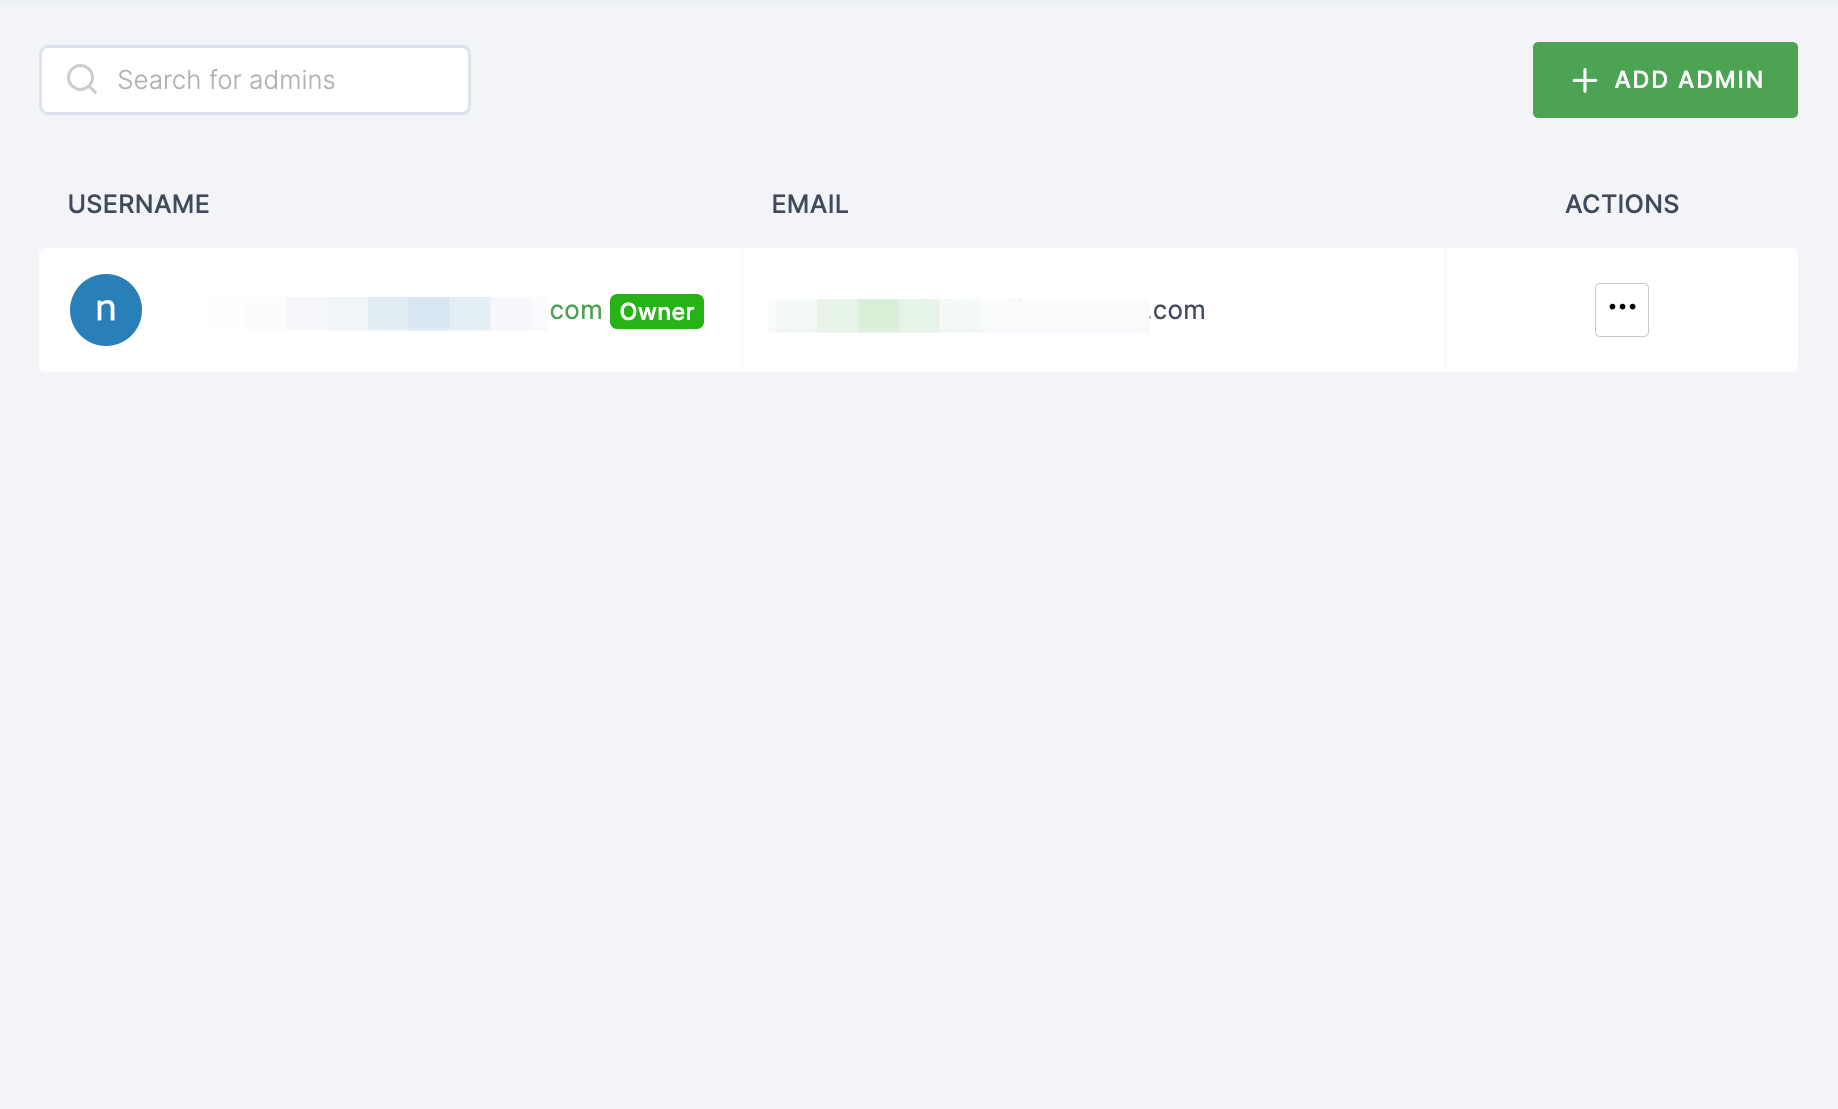
23 You will be taken to the user's Details tab, click on Roles & Groups.
24 Select List View and click on + ADD ROLE.
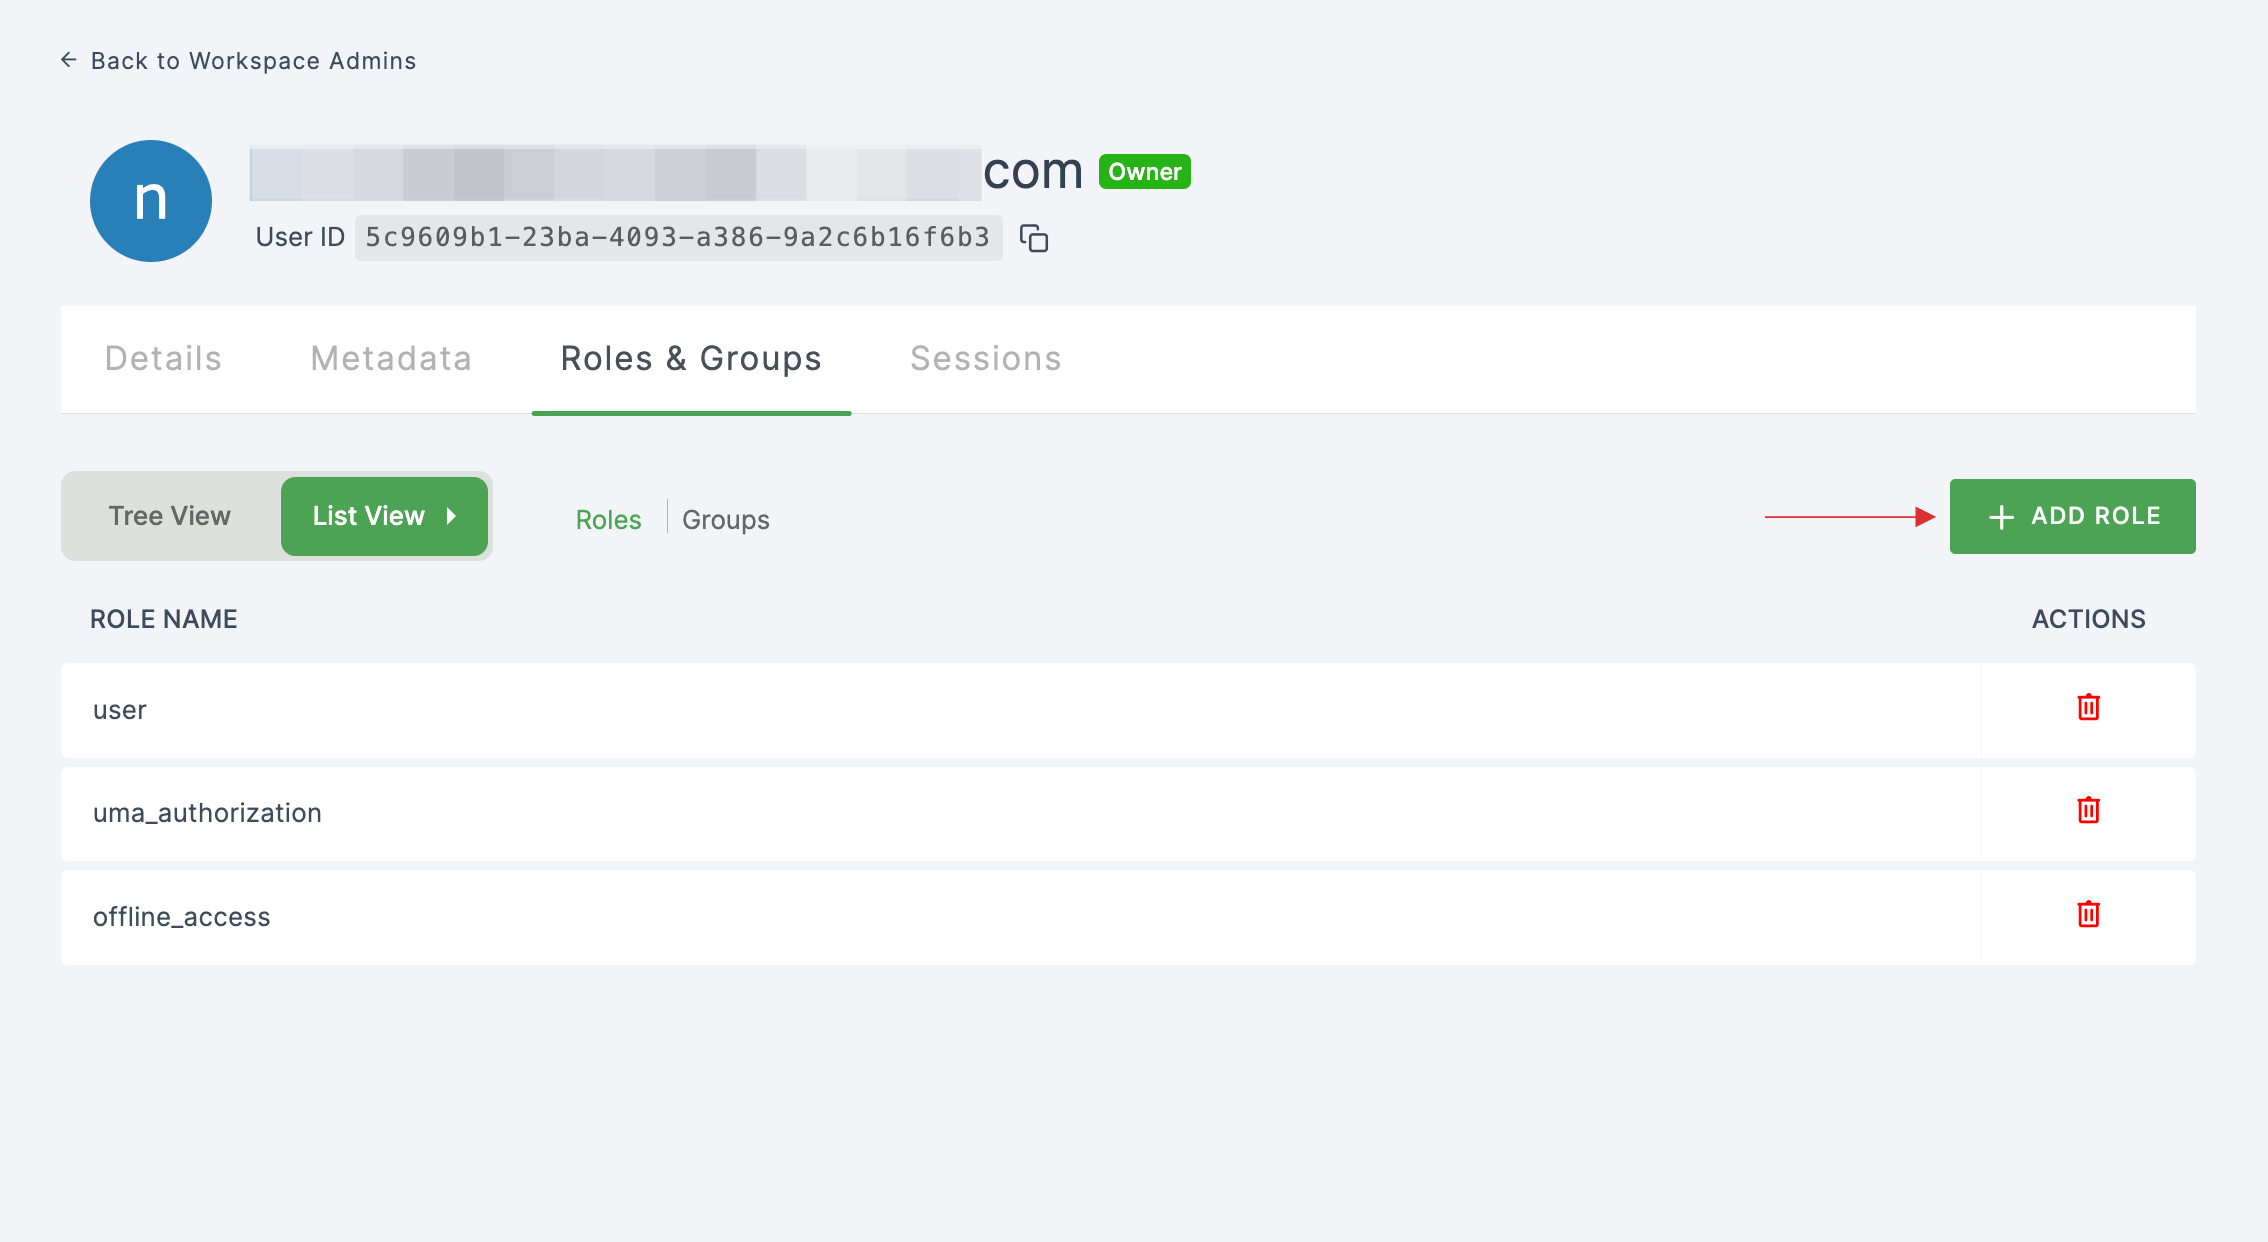
25 The available roles will appear; select sso-slack-Slack-role and click on ADD ROLES.
26 To verify whether SSO has been successfully enabled, go to Applications > SSO, click on SSO DASHBOARD button.

27 The Slack SSO will be enabled successfully.