Anypoint
Anypoint facilitates the seamless connection of various applications, data sources, and devices within an organization.
You must have an account in Anypoint.
1 Go to Dashboard > Marketplace > SSO Integrations.
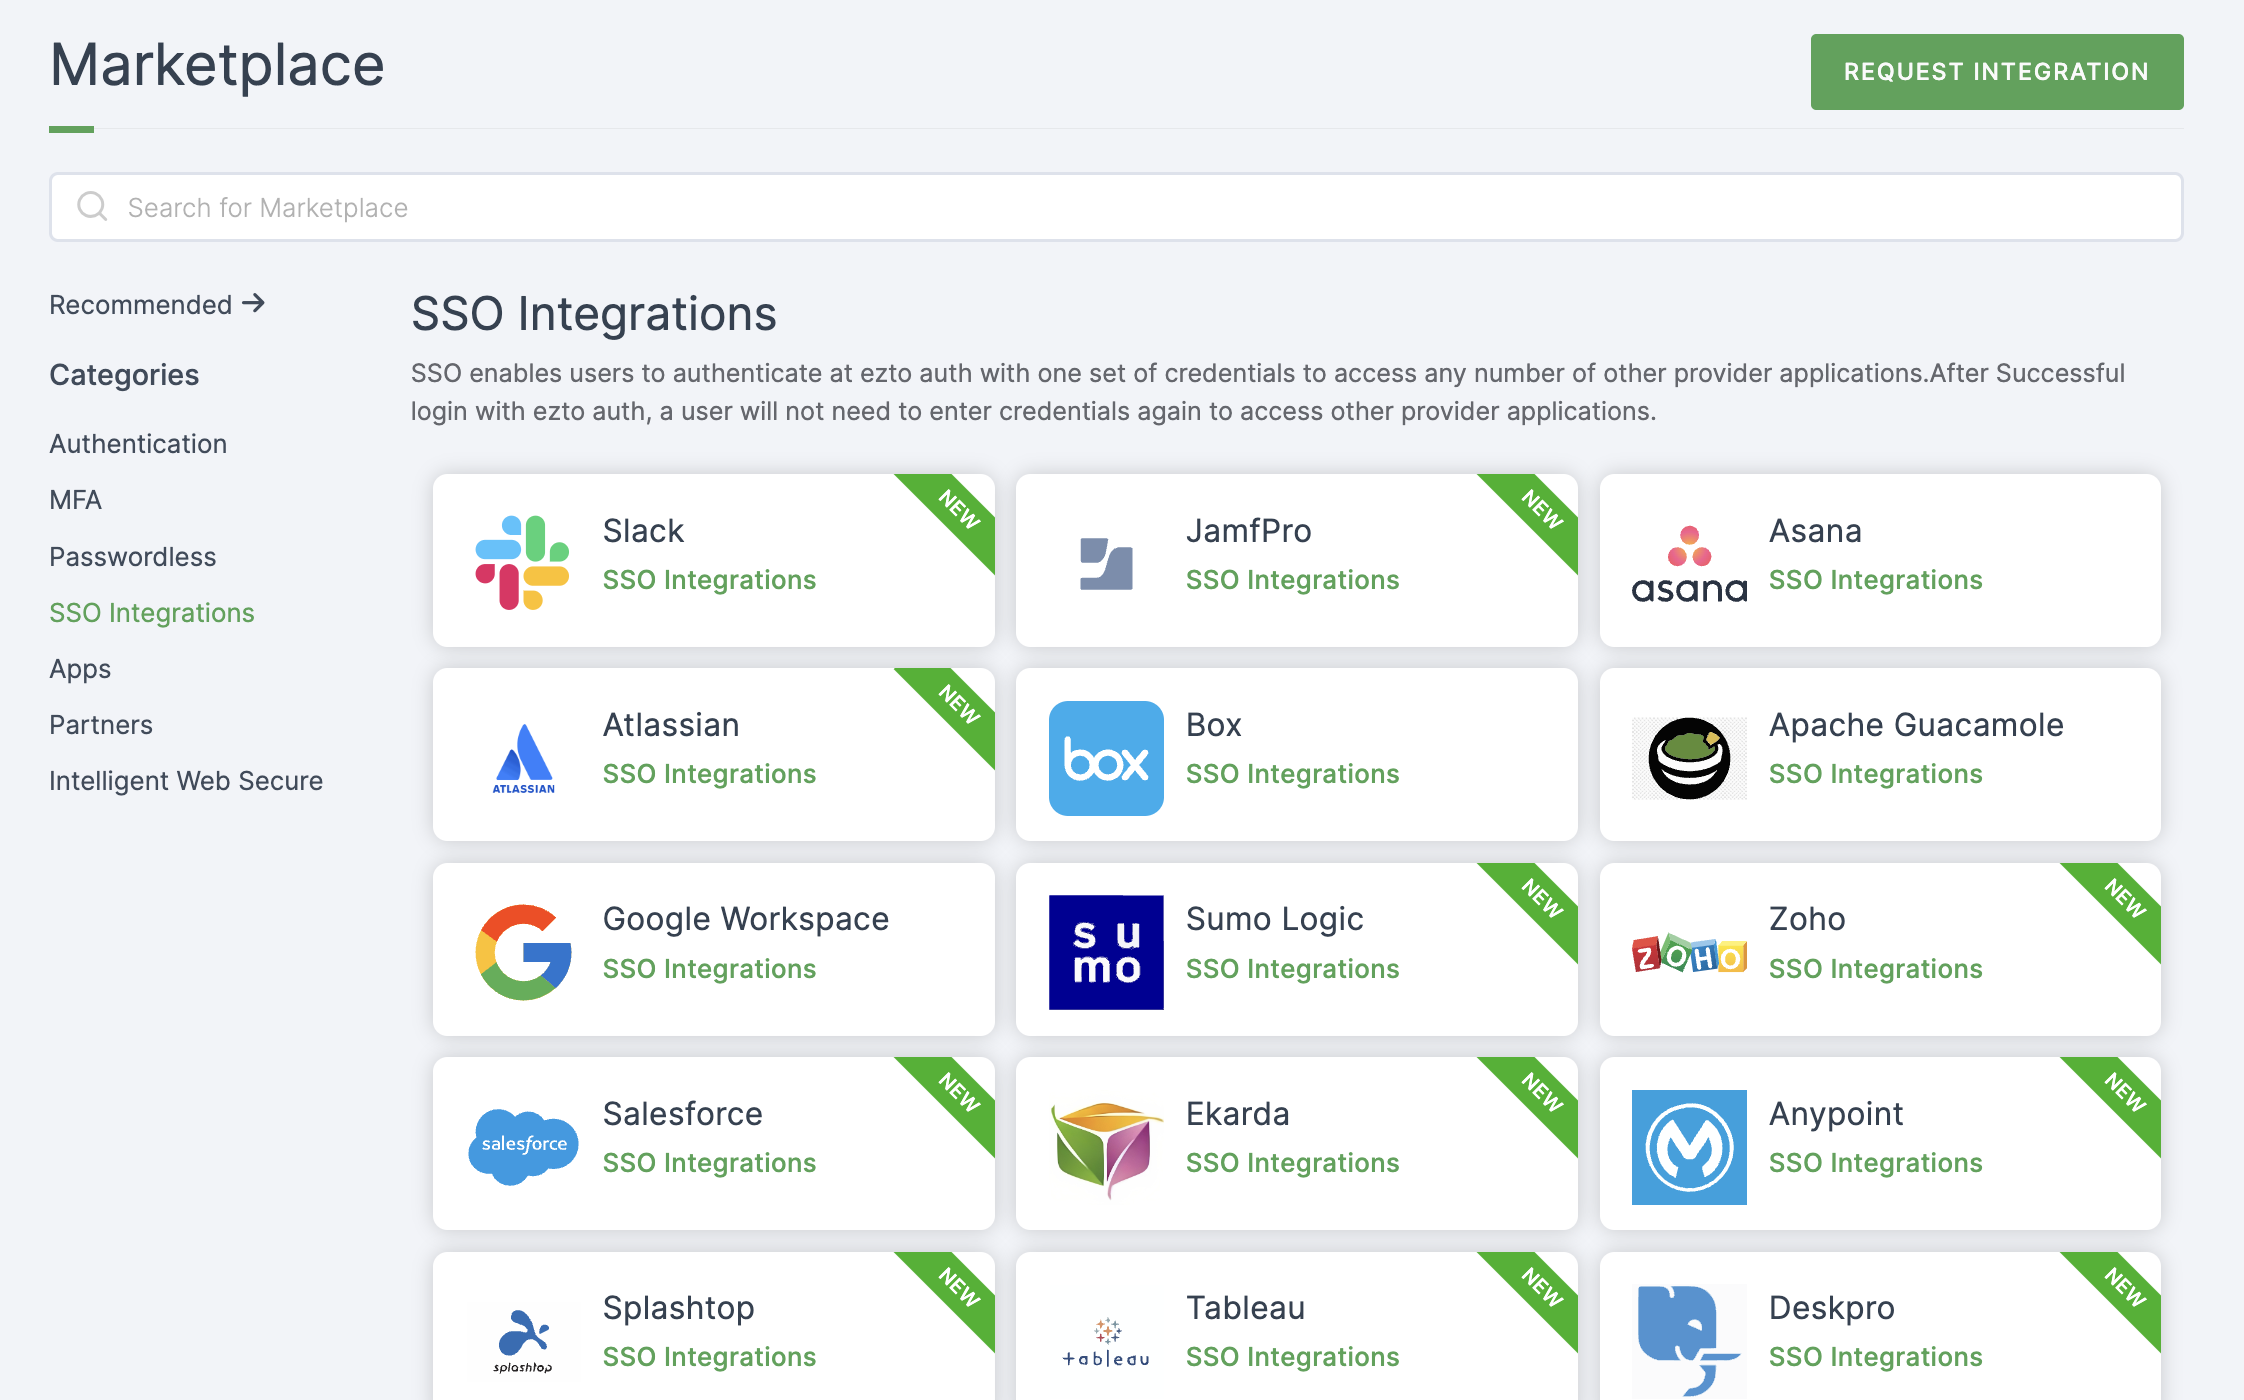
2 Select Splashtop from the list.
3 You'll land on the overview page, with an additional tab: Installation (providing a step-by-step installation guide).
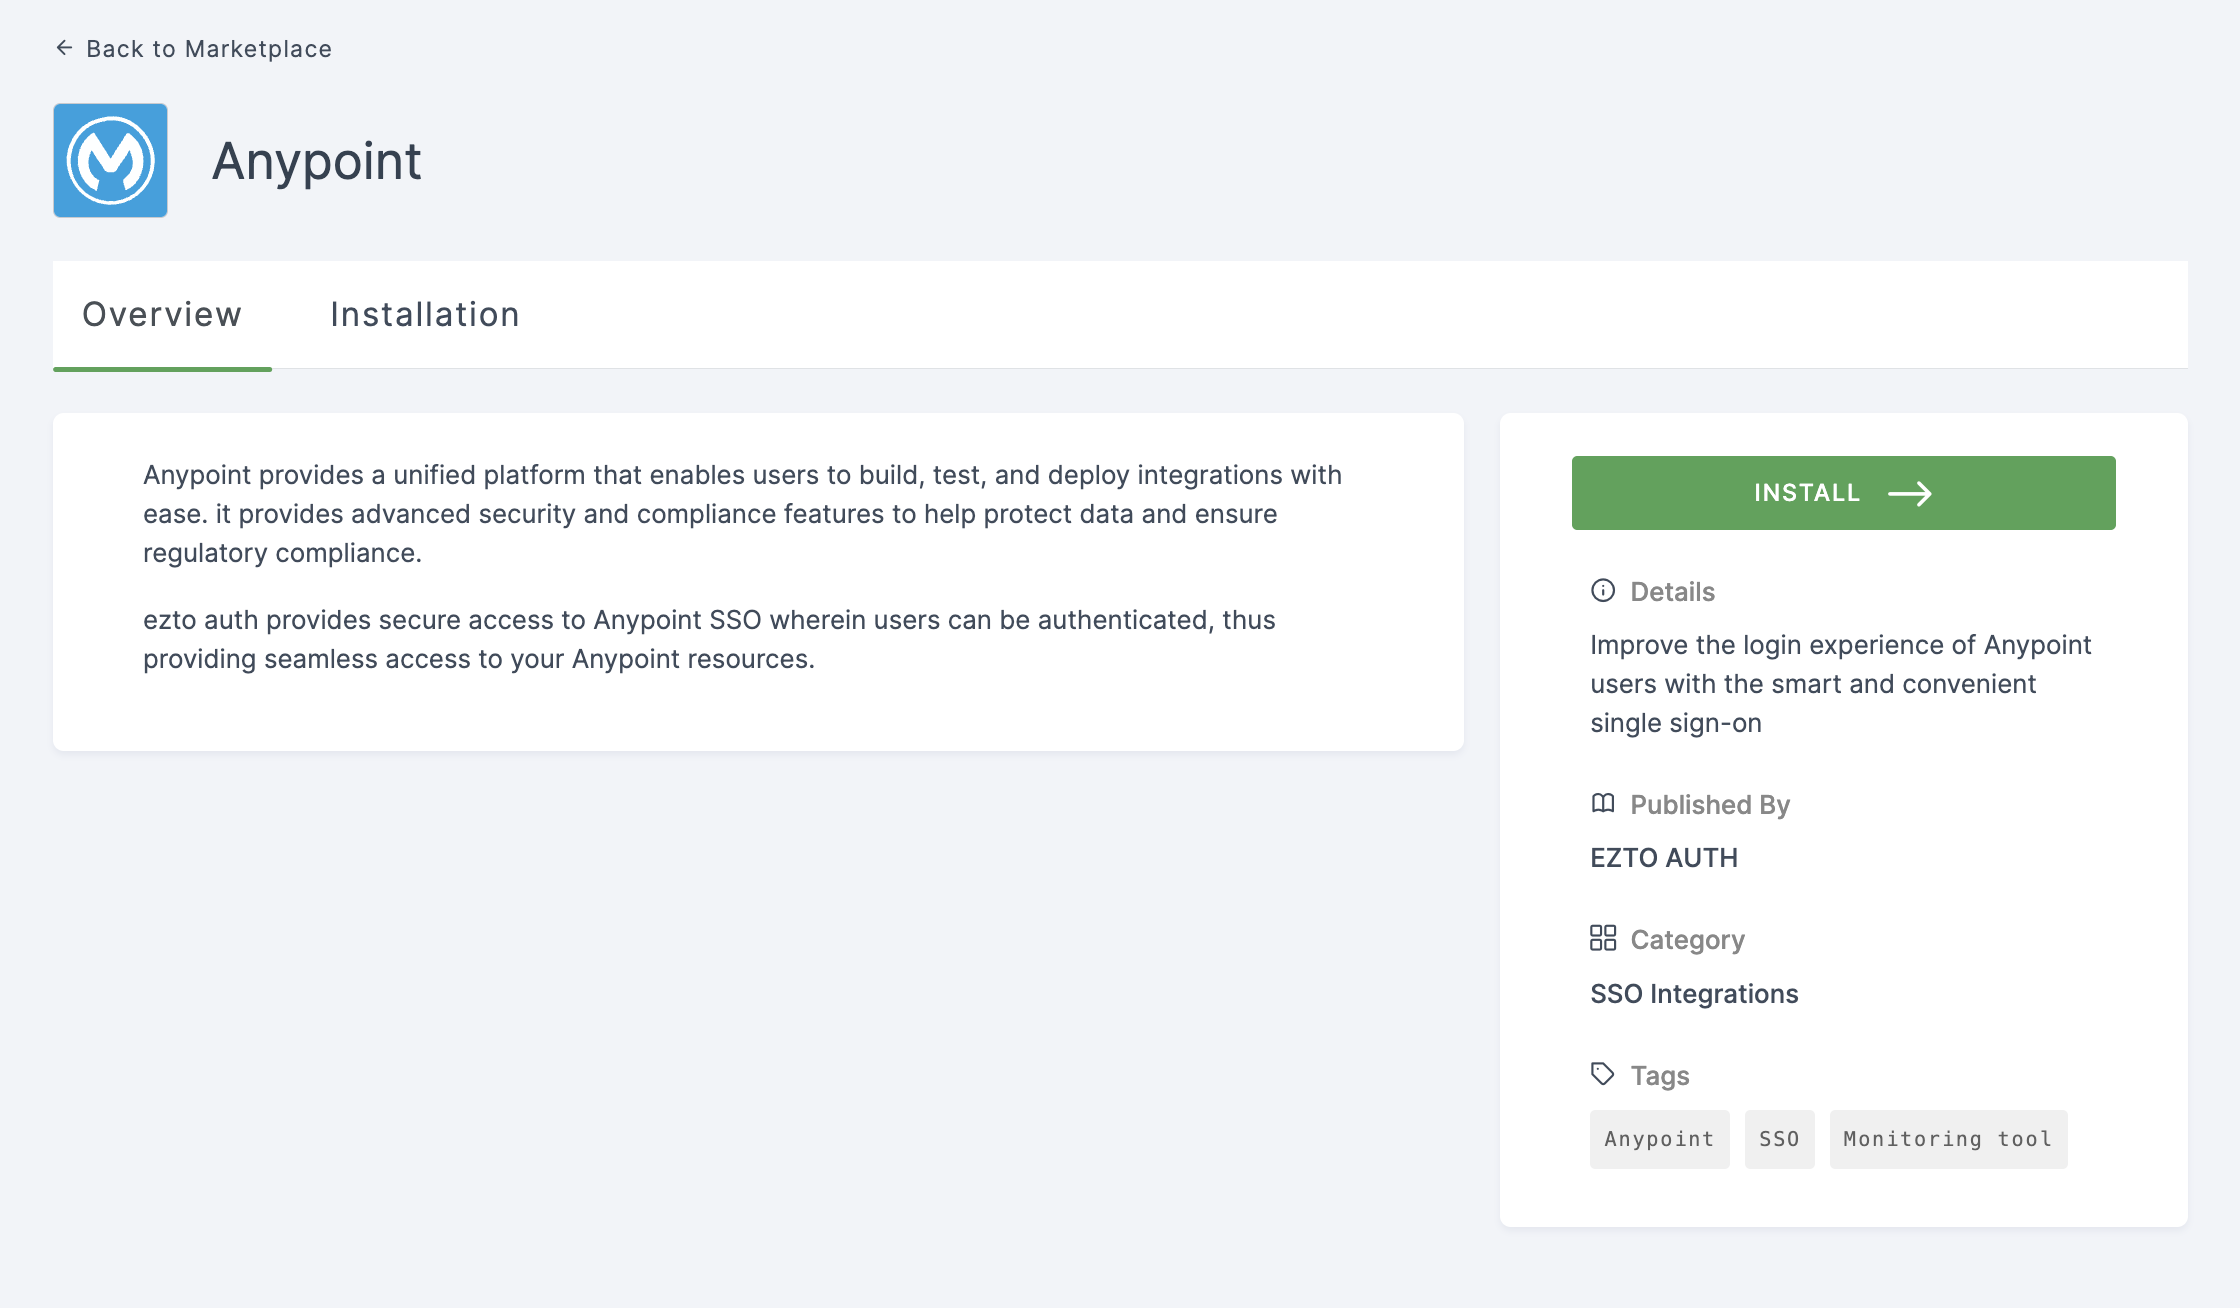
4 Click on INSTALL.
5 Provide a Name and for Organization Name, go to your Anypoint Dashboard.
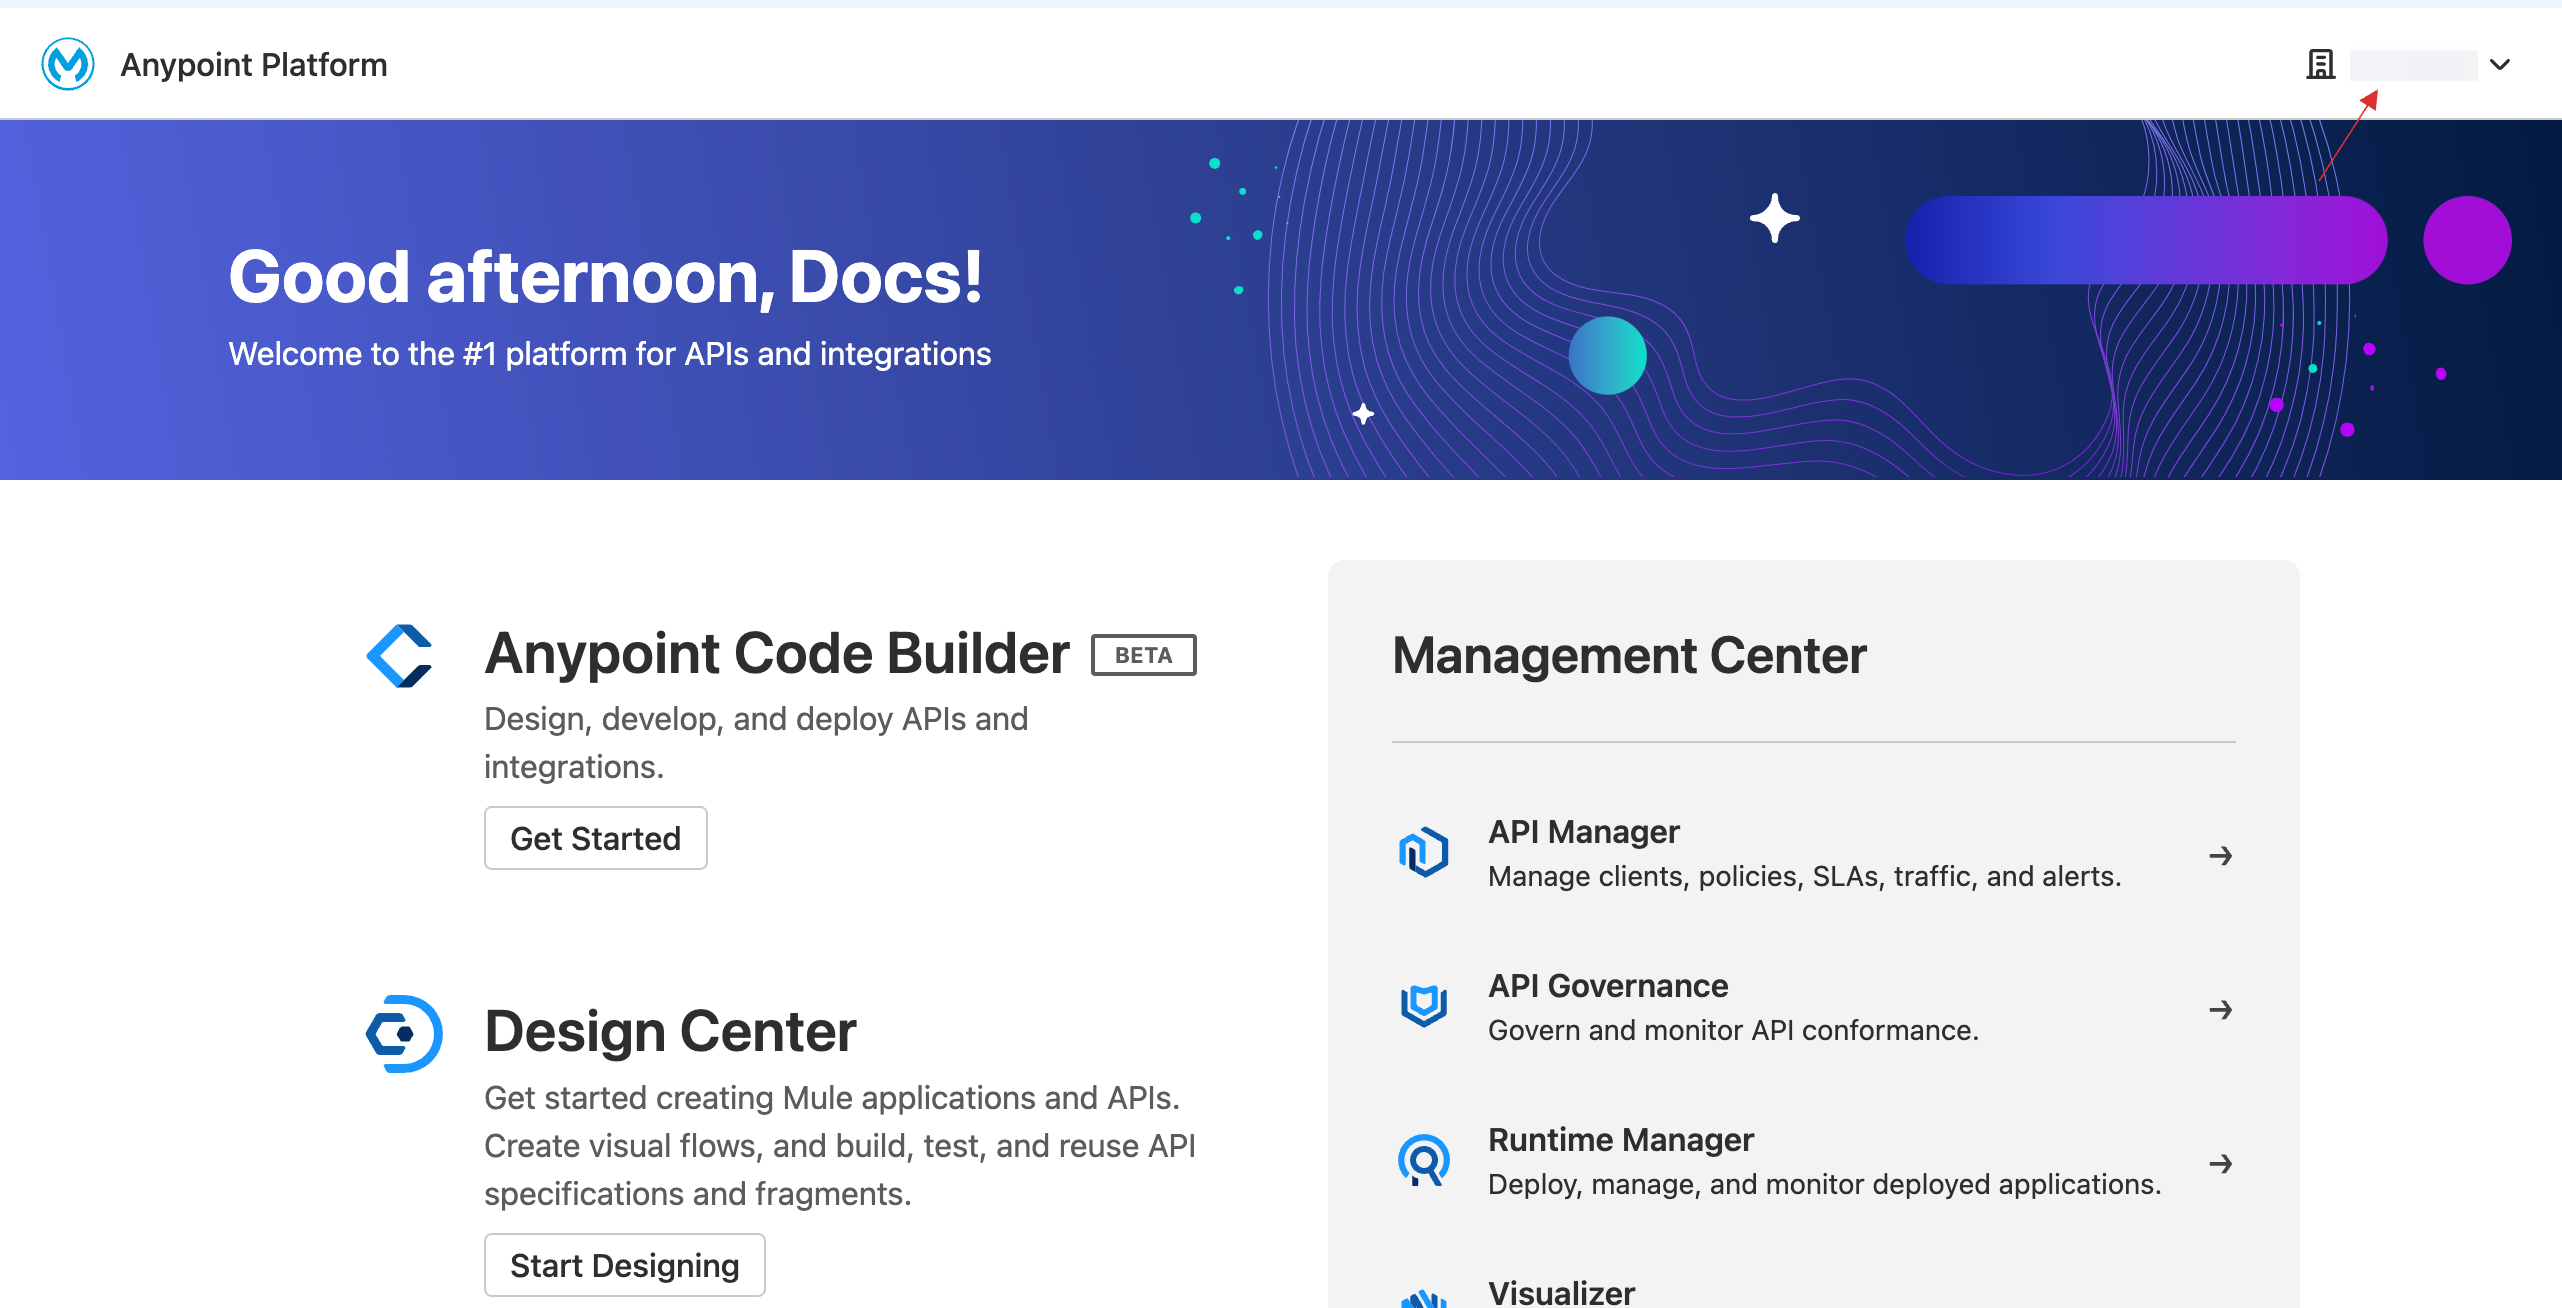
6 You can view Organization Name in the top right.
7 Return to your dashboard, provide the Organization Name.
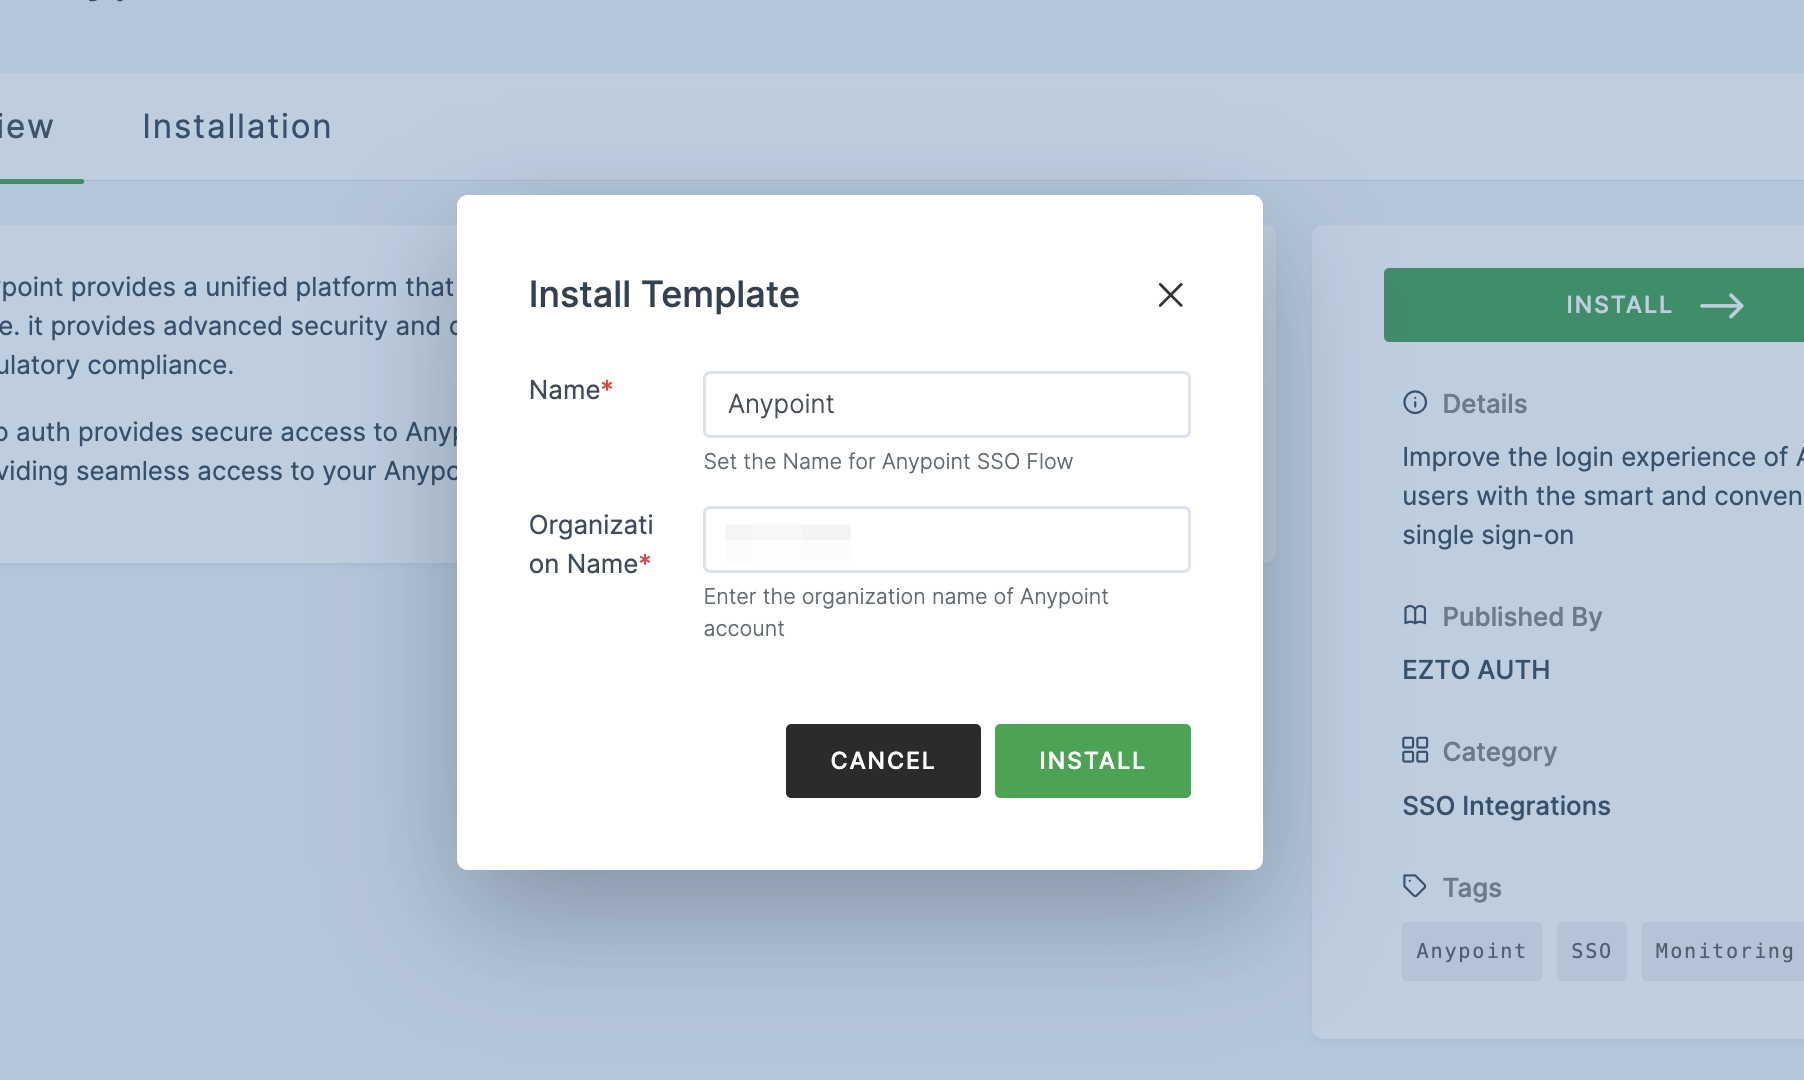
8 Once the configurations are provided, click on INSTALL.
9 To enable Anypoint SSO login, go to Applications > SSO, and click on the created Anypoint SSO.
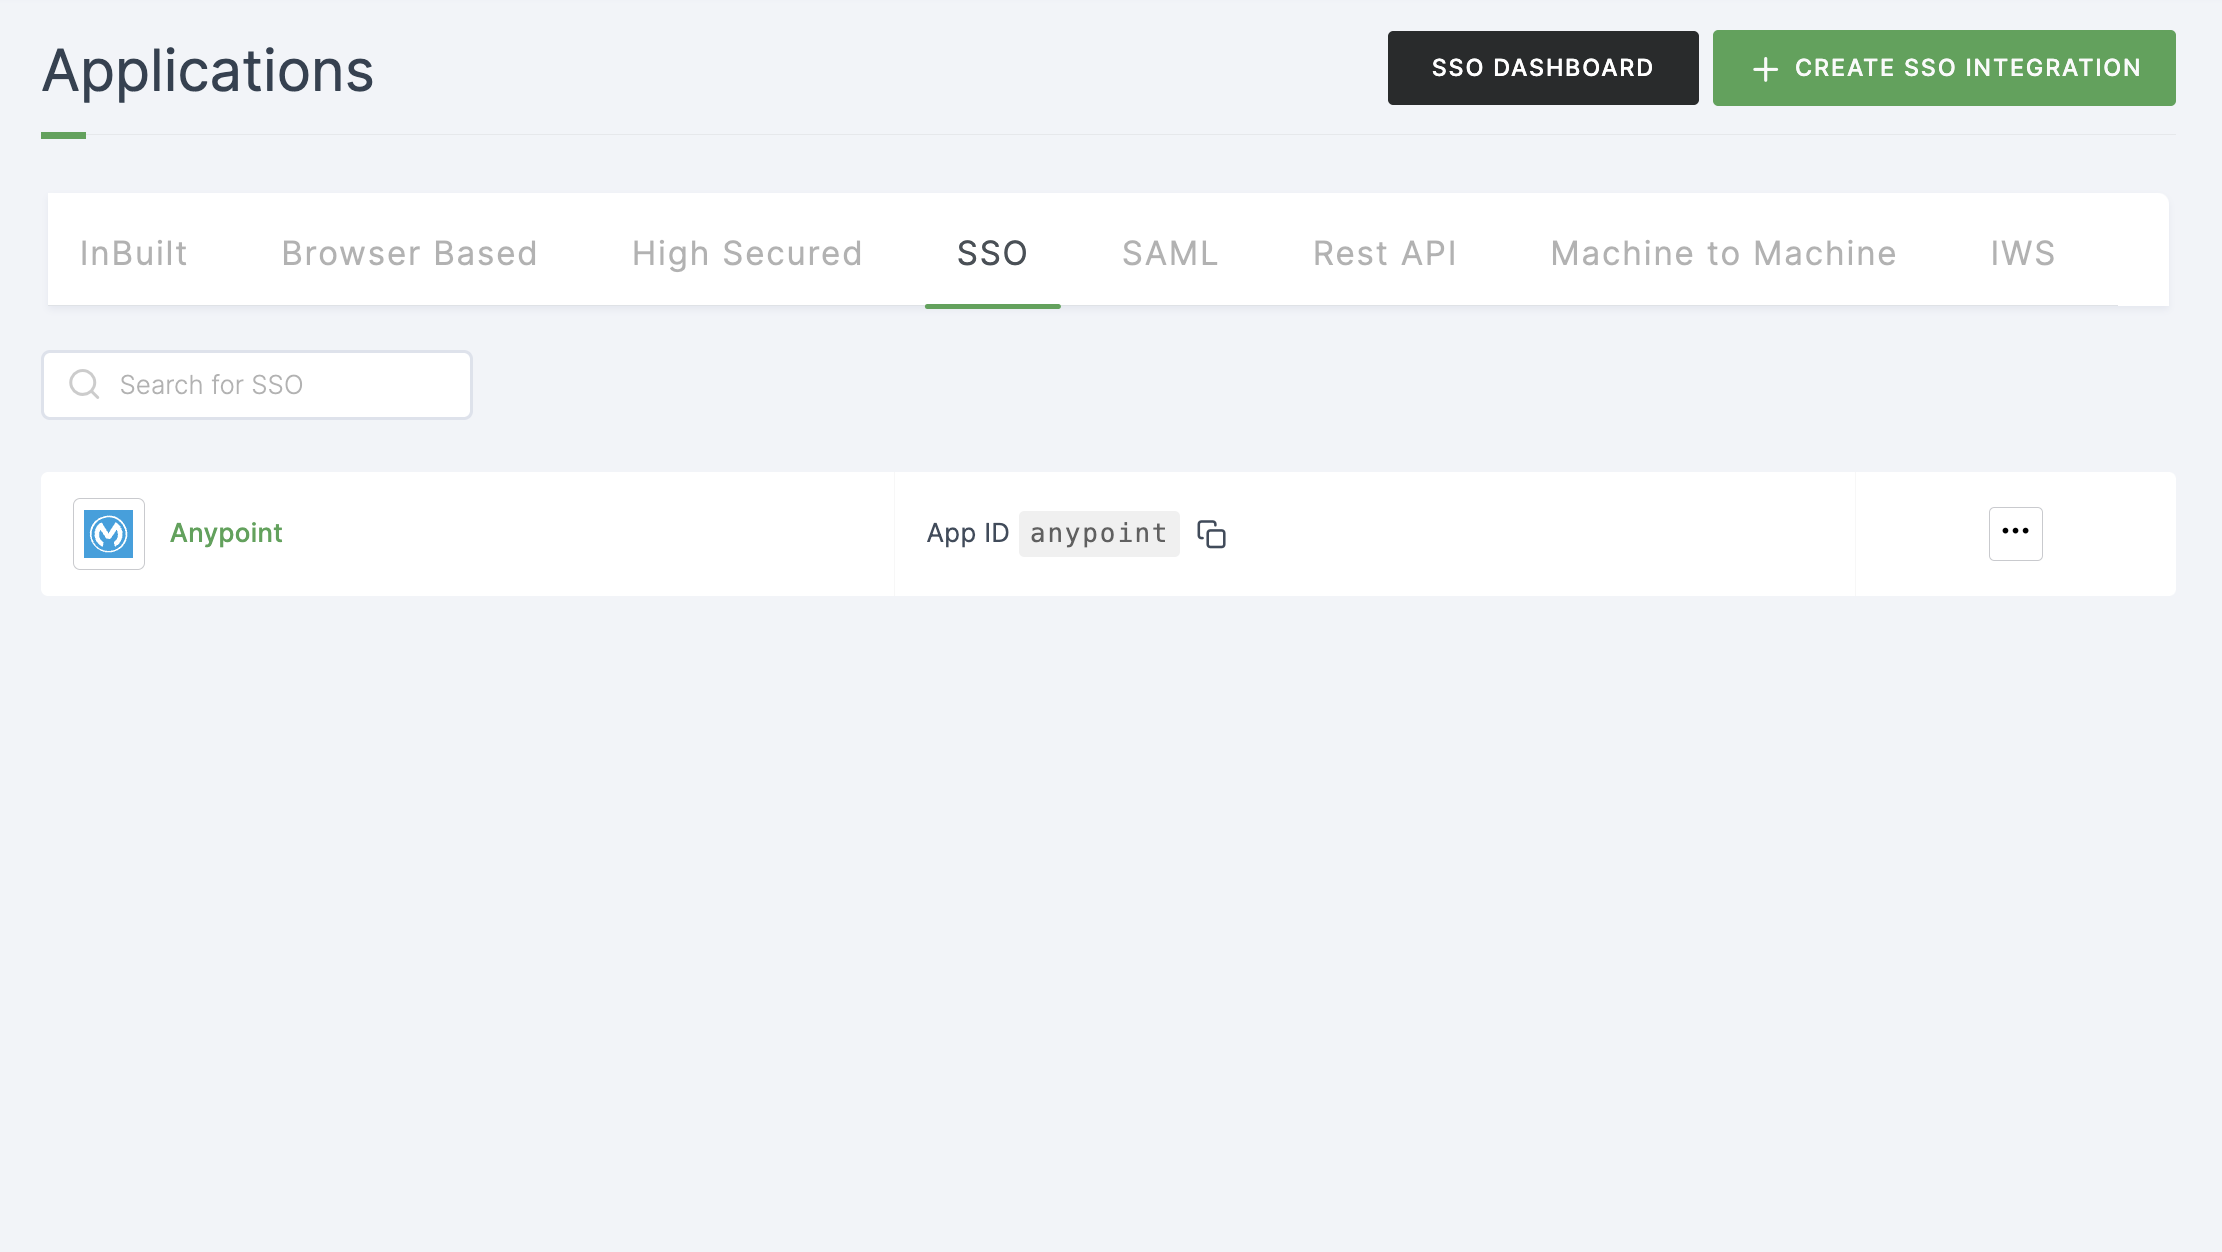
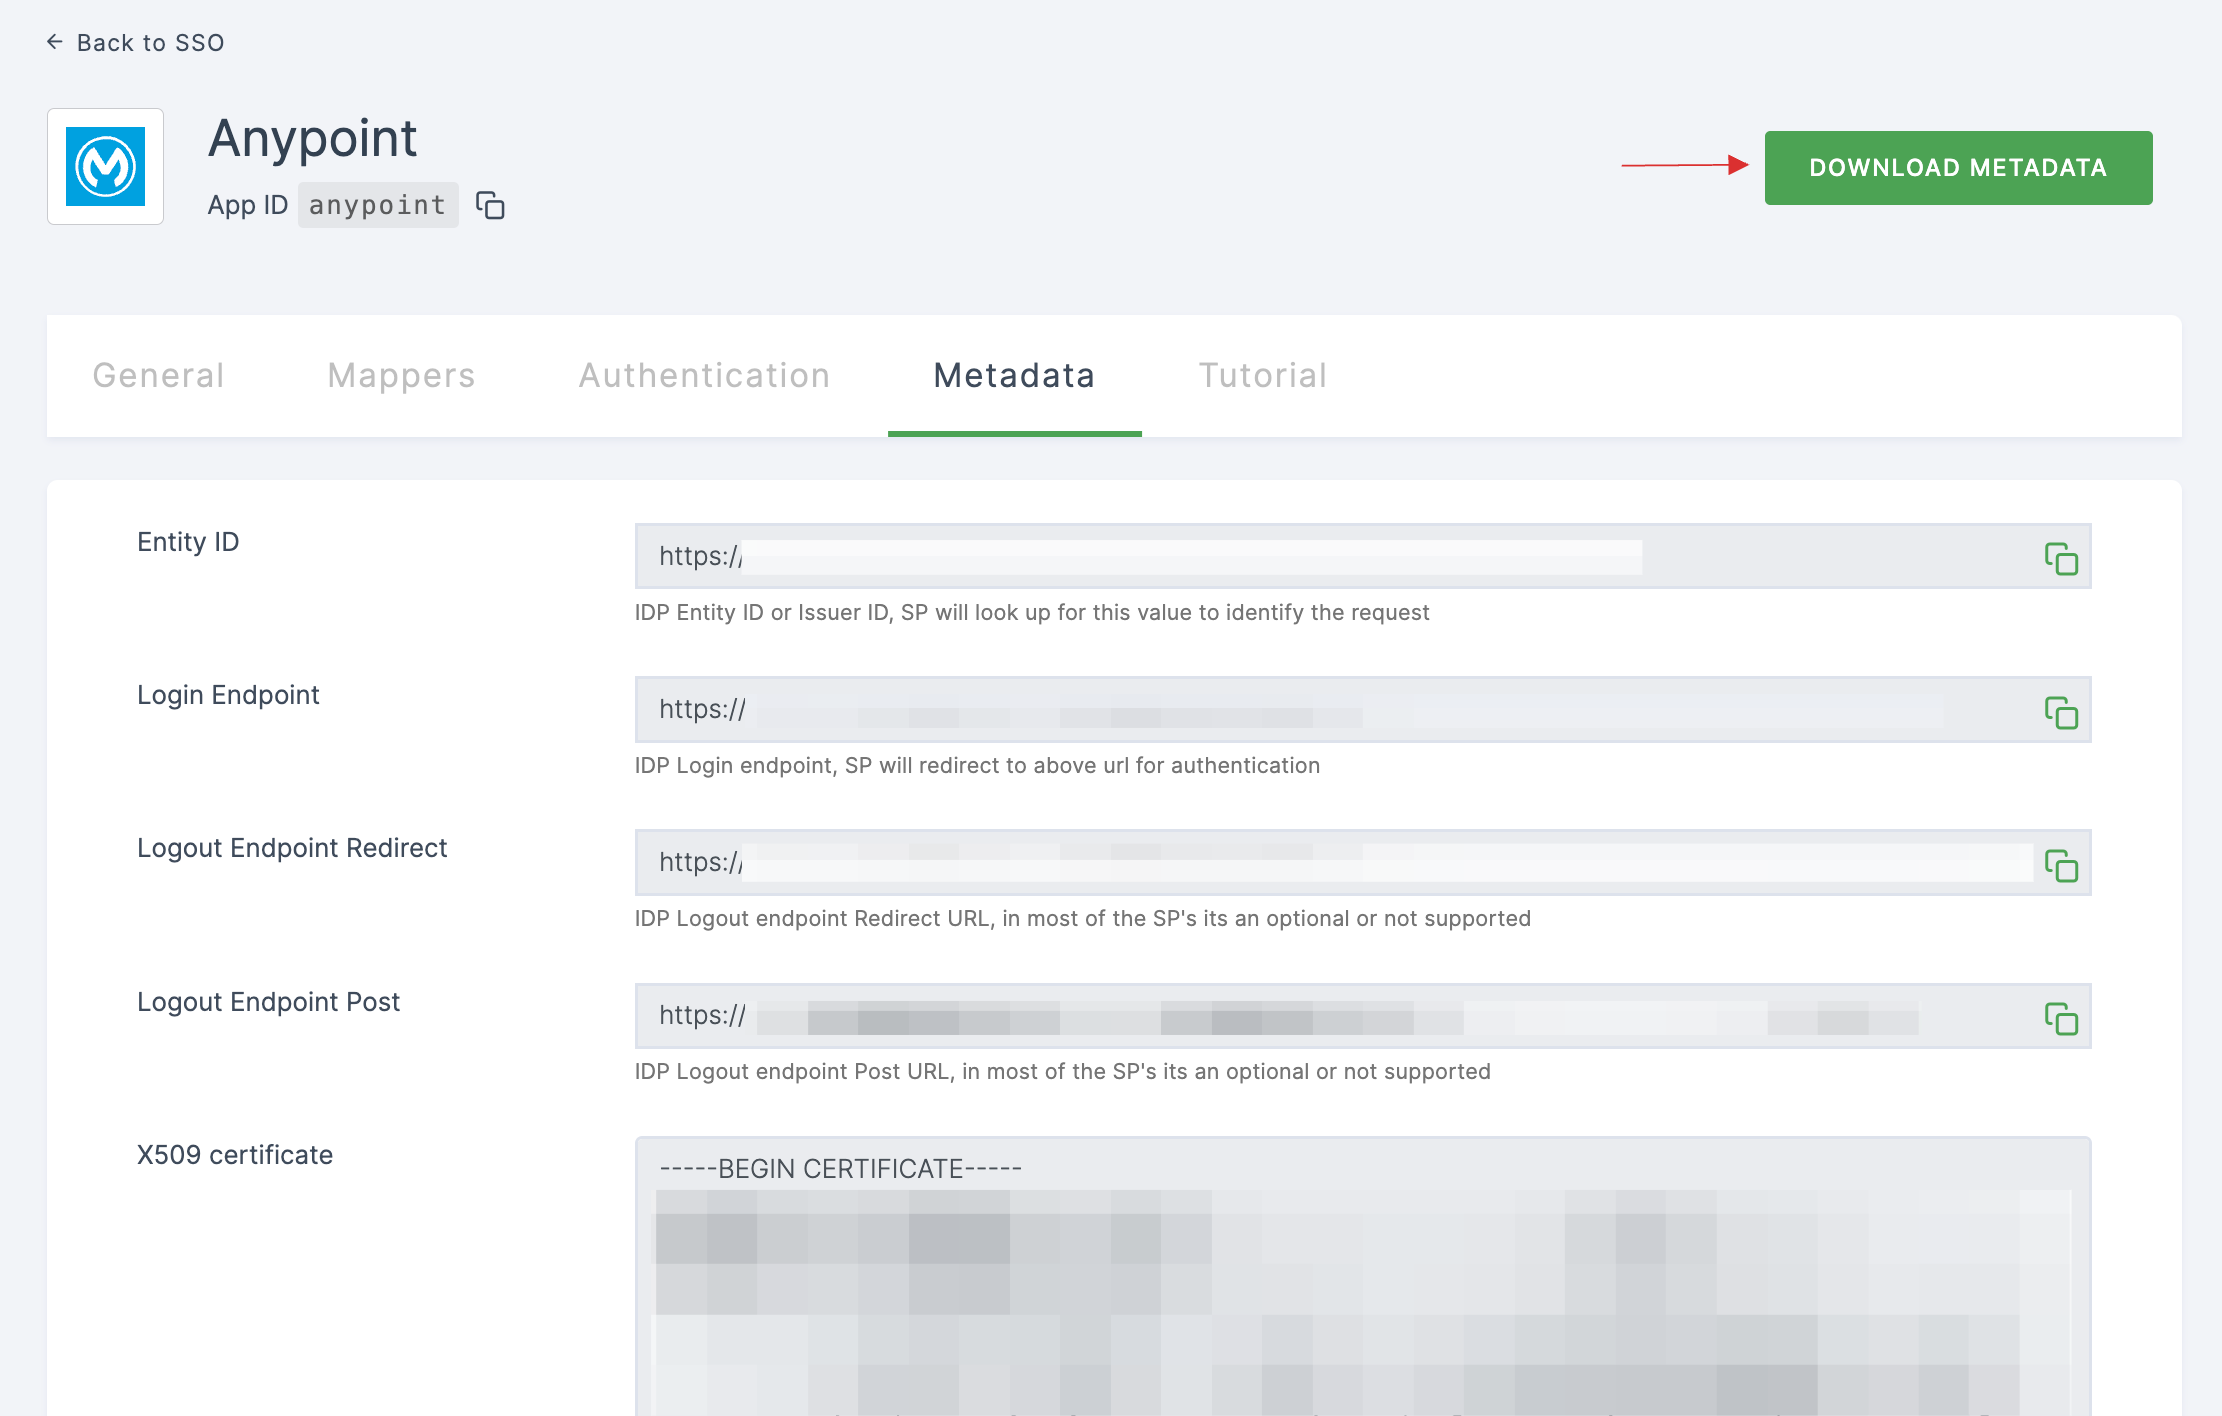
10 Click on Metadata, where the list of endpoints for the particular SSO will be available. Click on DOWNLOAD METADATA.
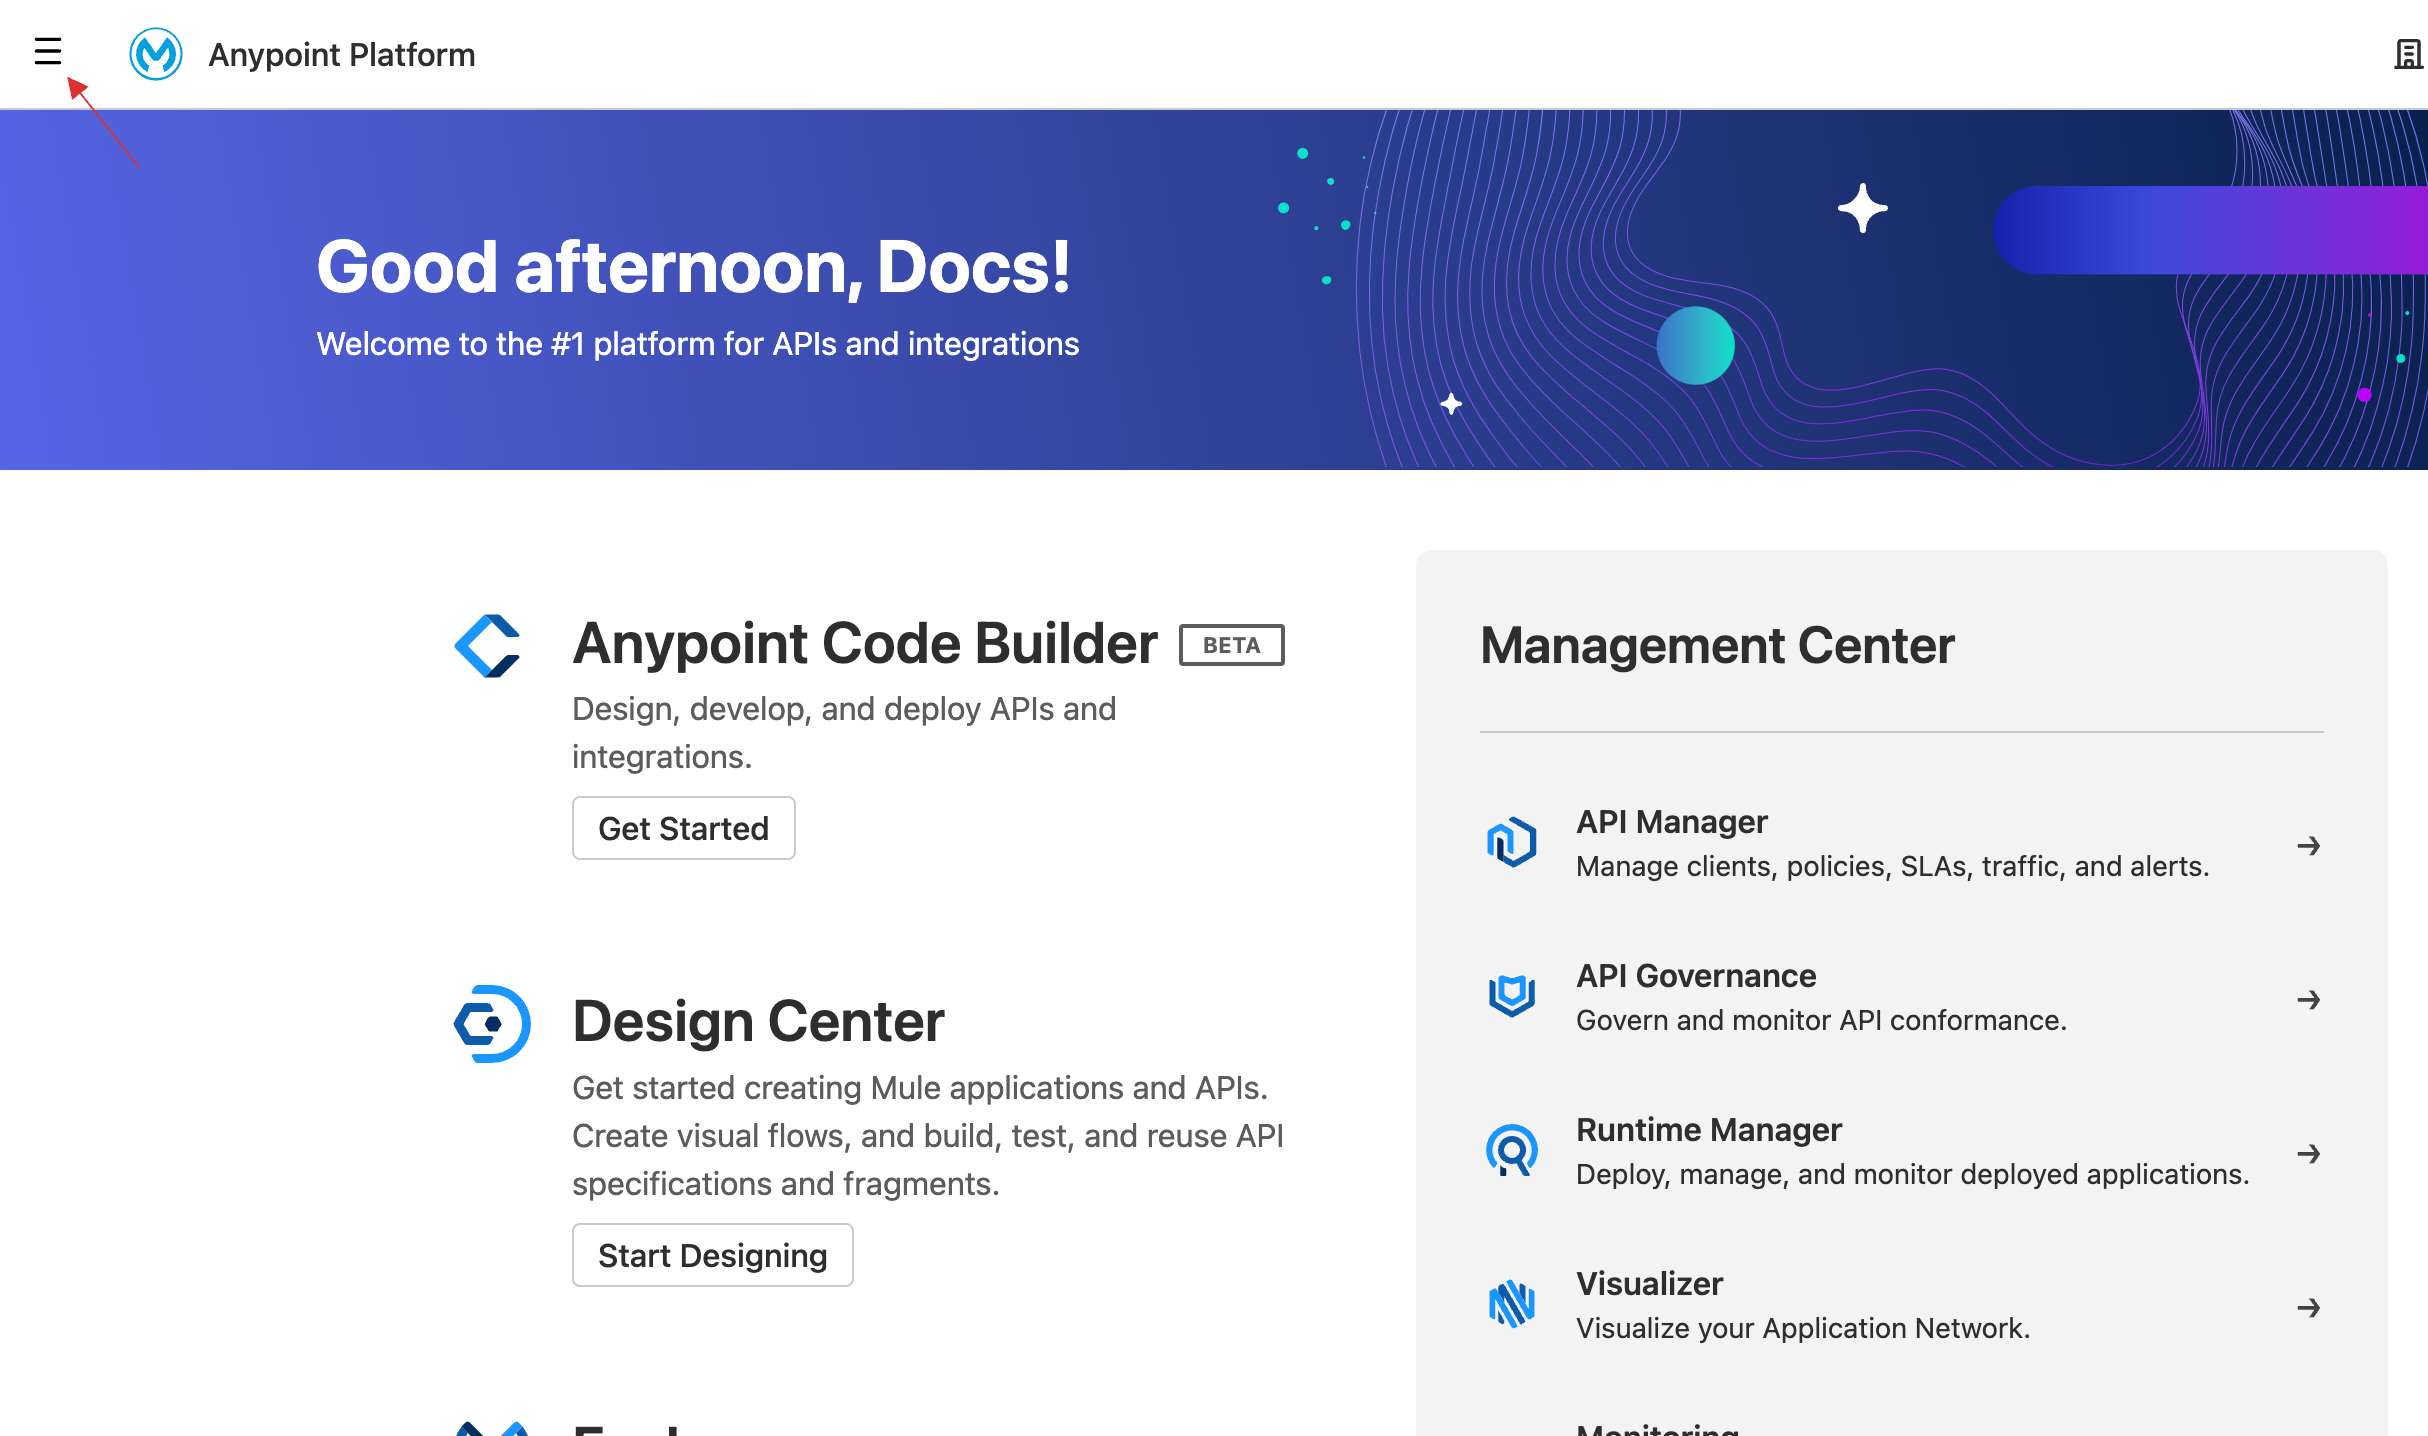
11 Switch to Anypoint, click on the top left corner's menu icon.
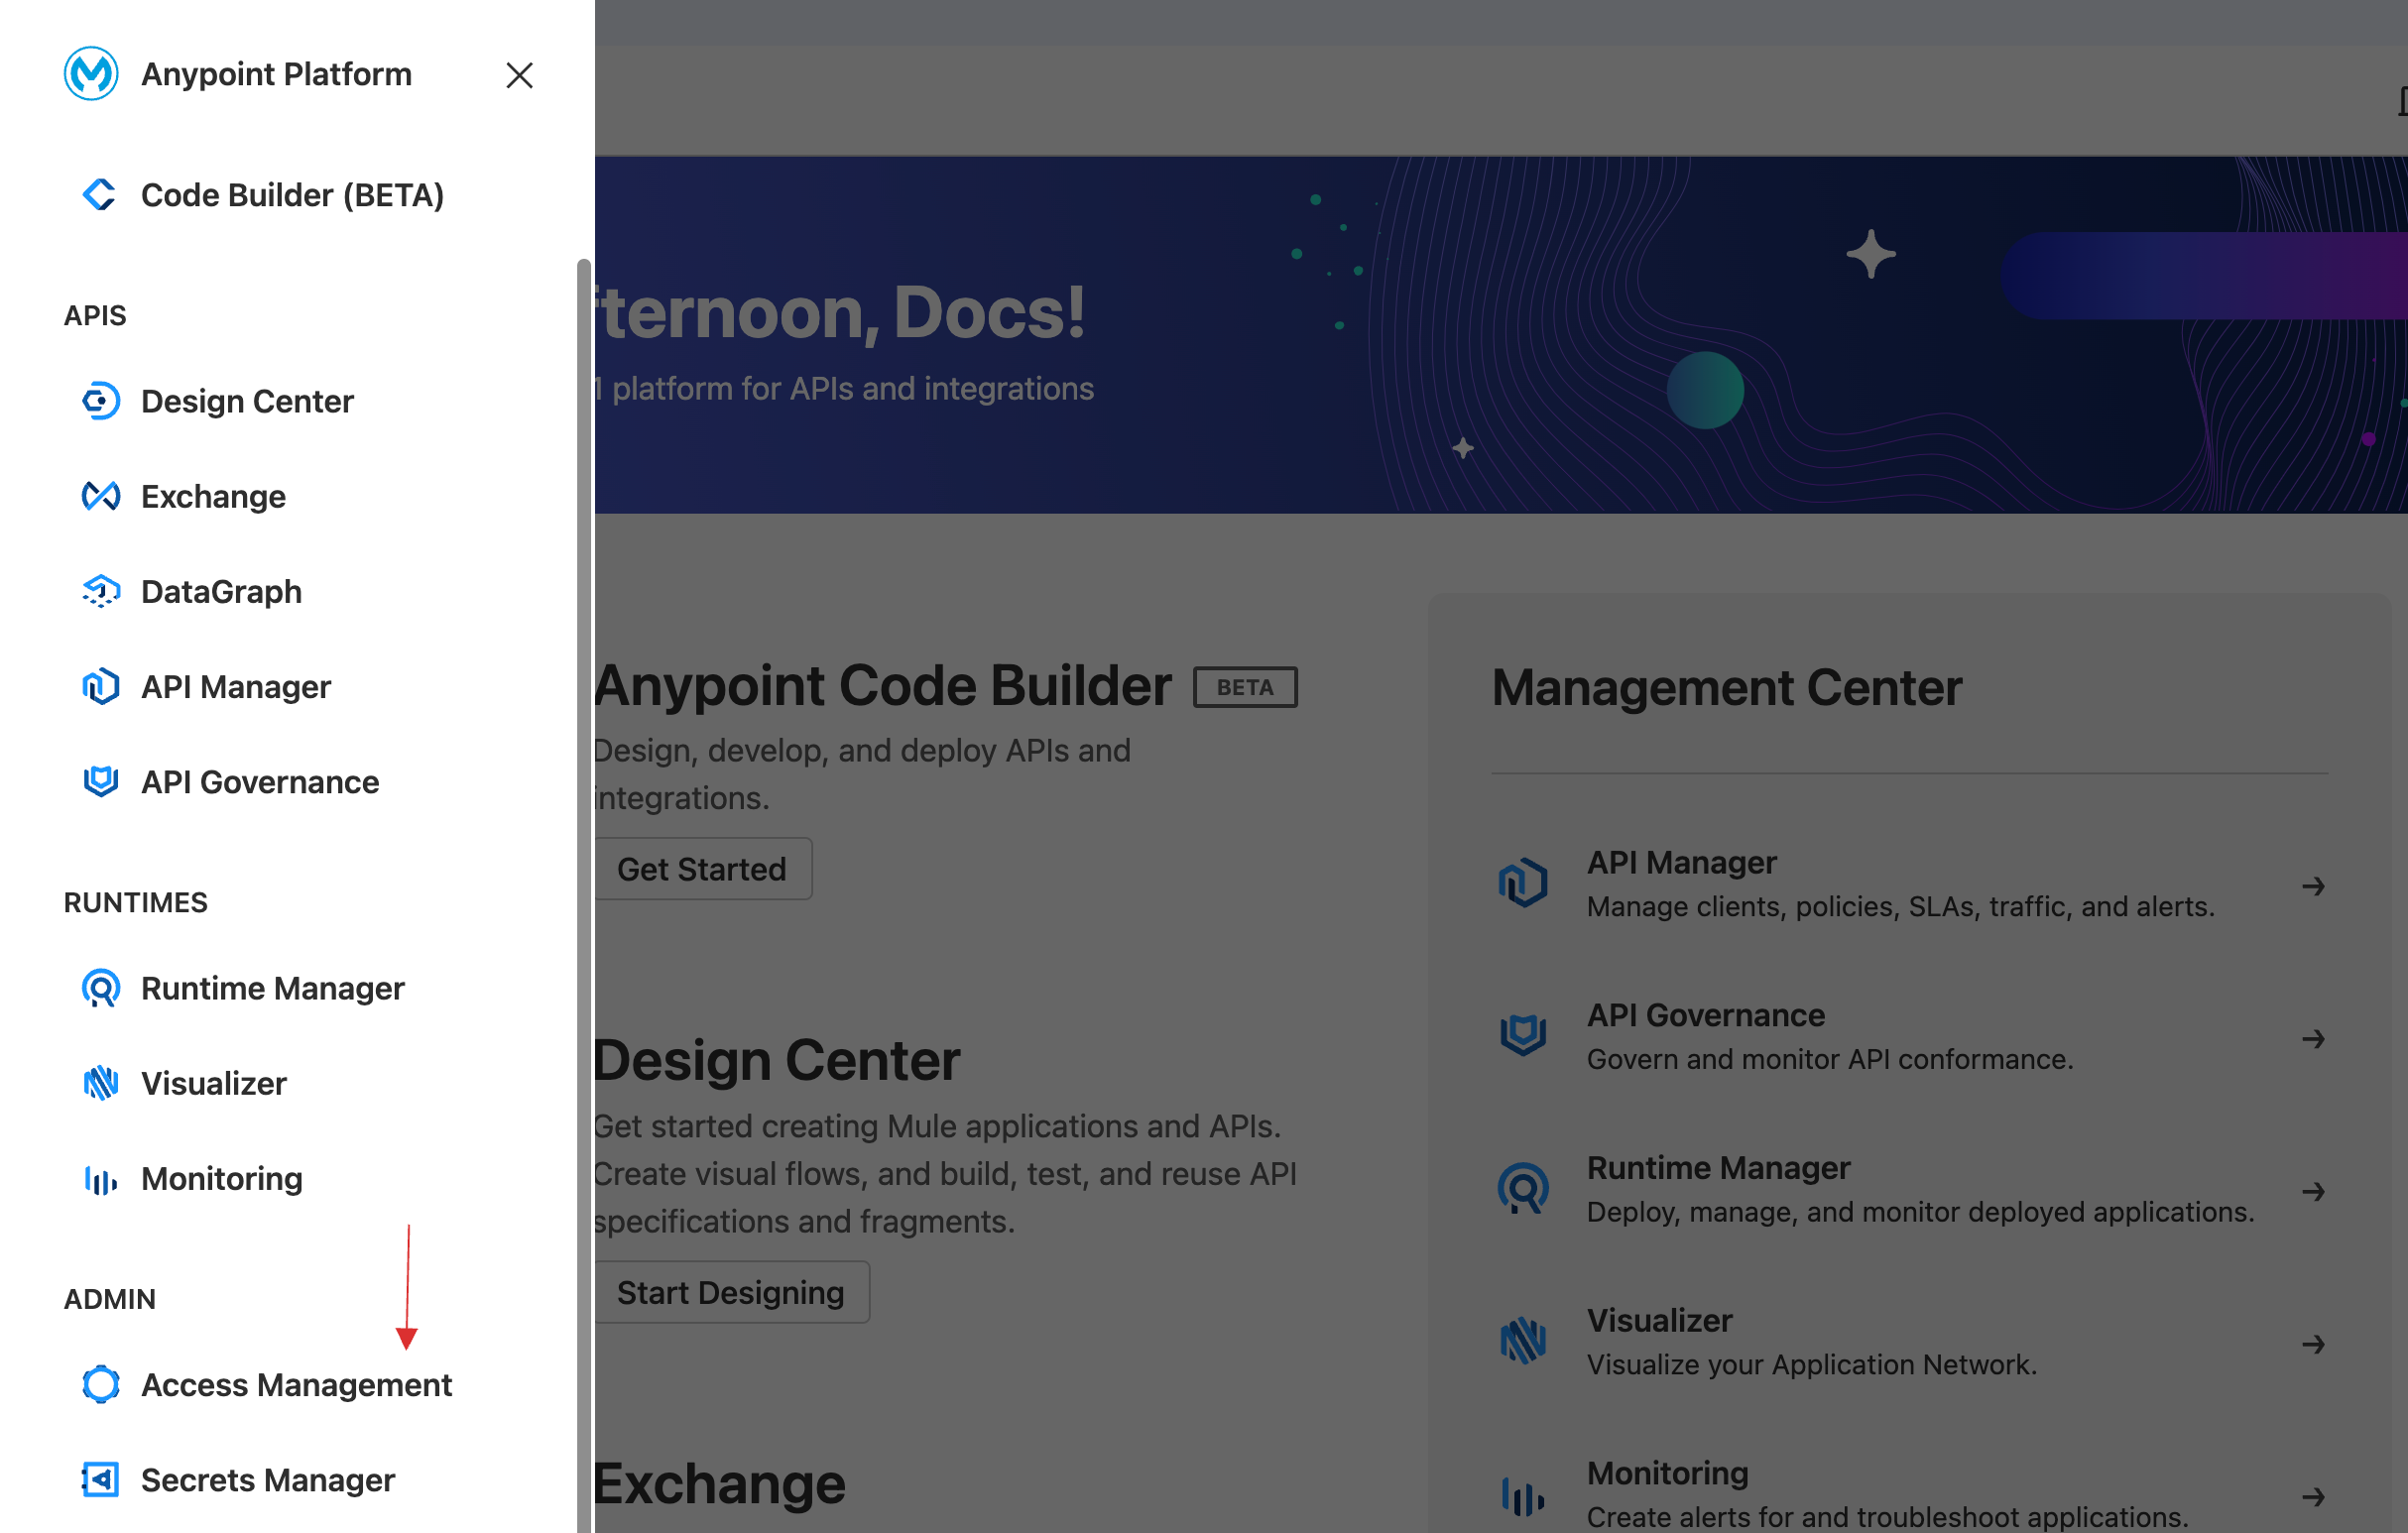
12 Click on Access Management.
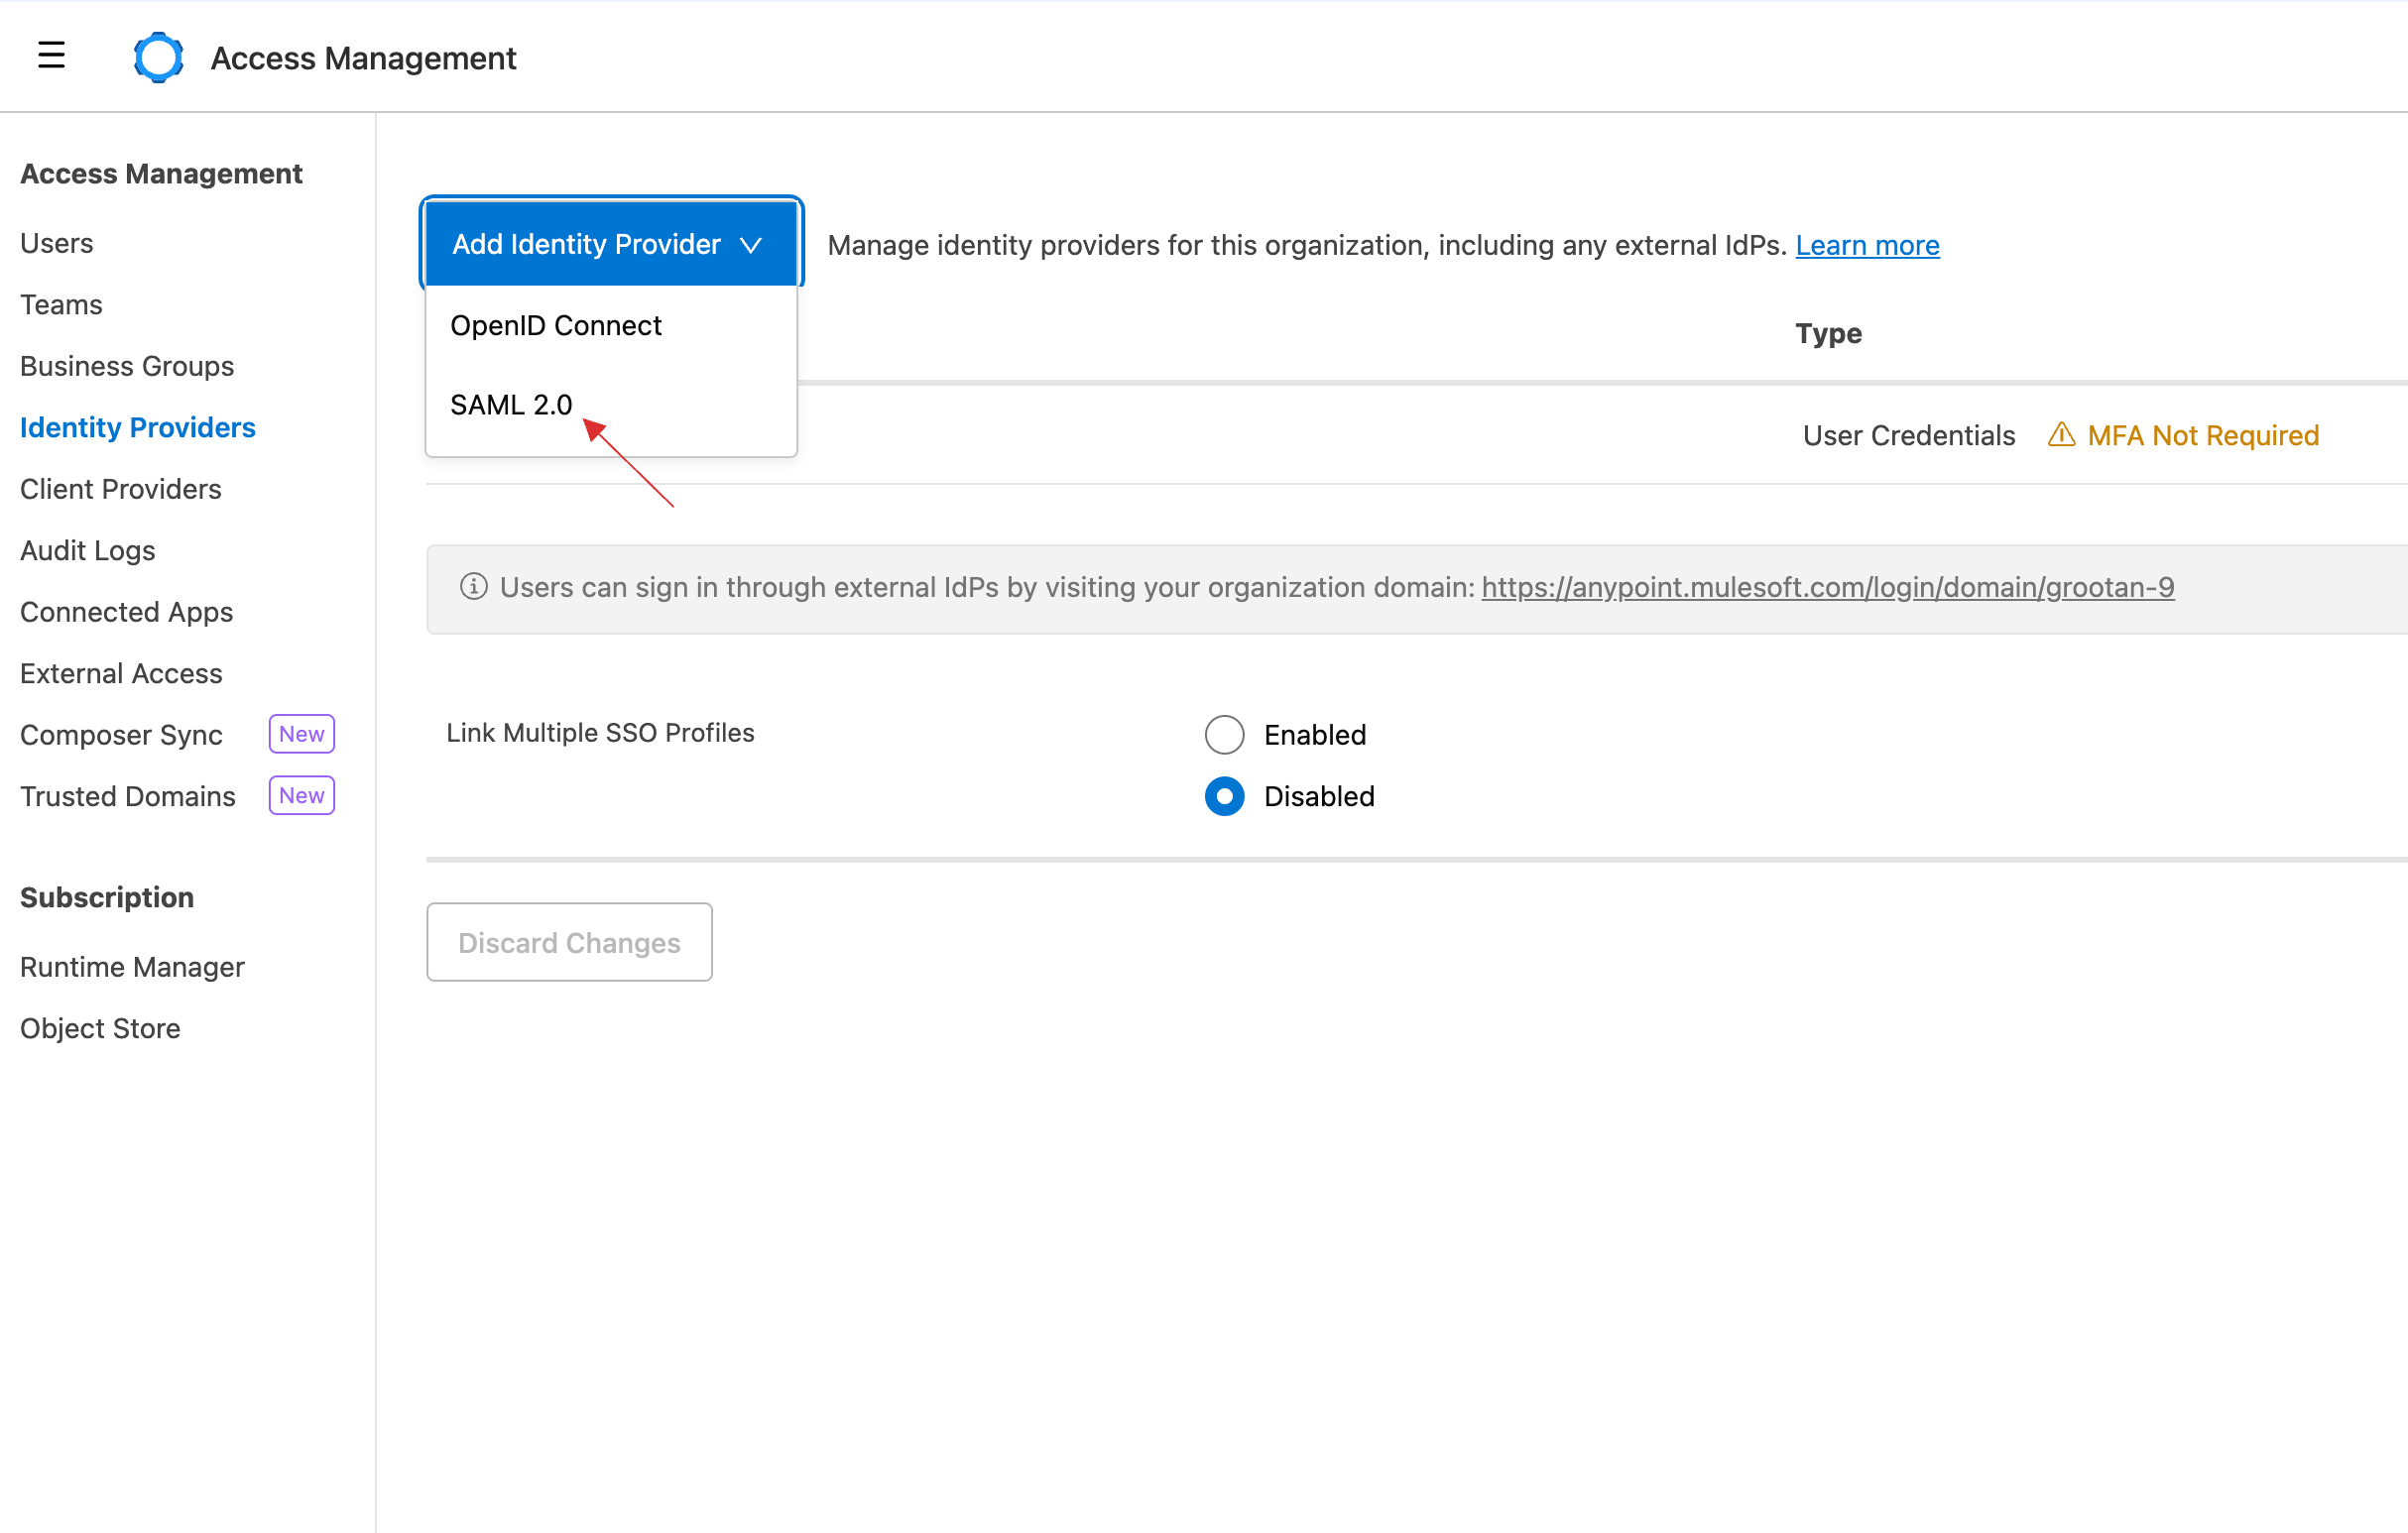
13 Click on Identity Providers > Add Identity Provider, and select SAML 2.0 from the drop-down.
14 The SAML Configuration will be displayed; click on Choose file to upload the downloaded Metadata XML file.
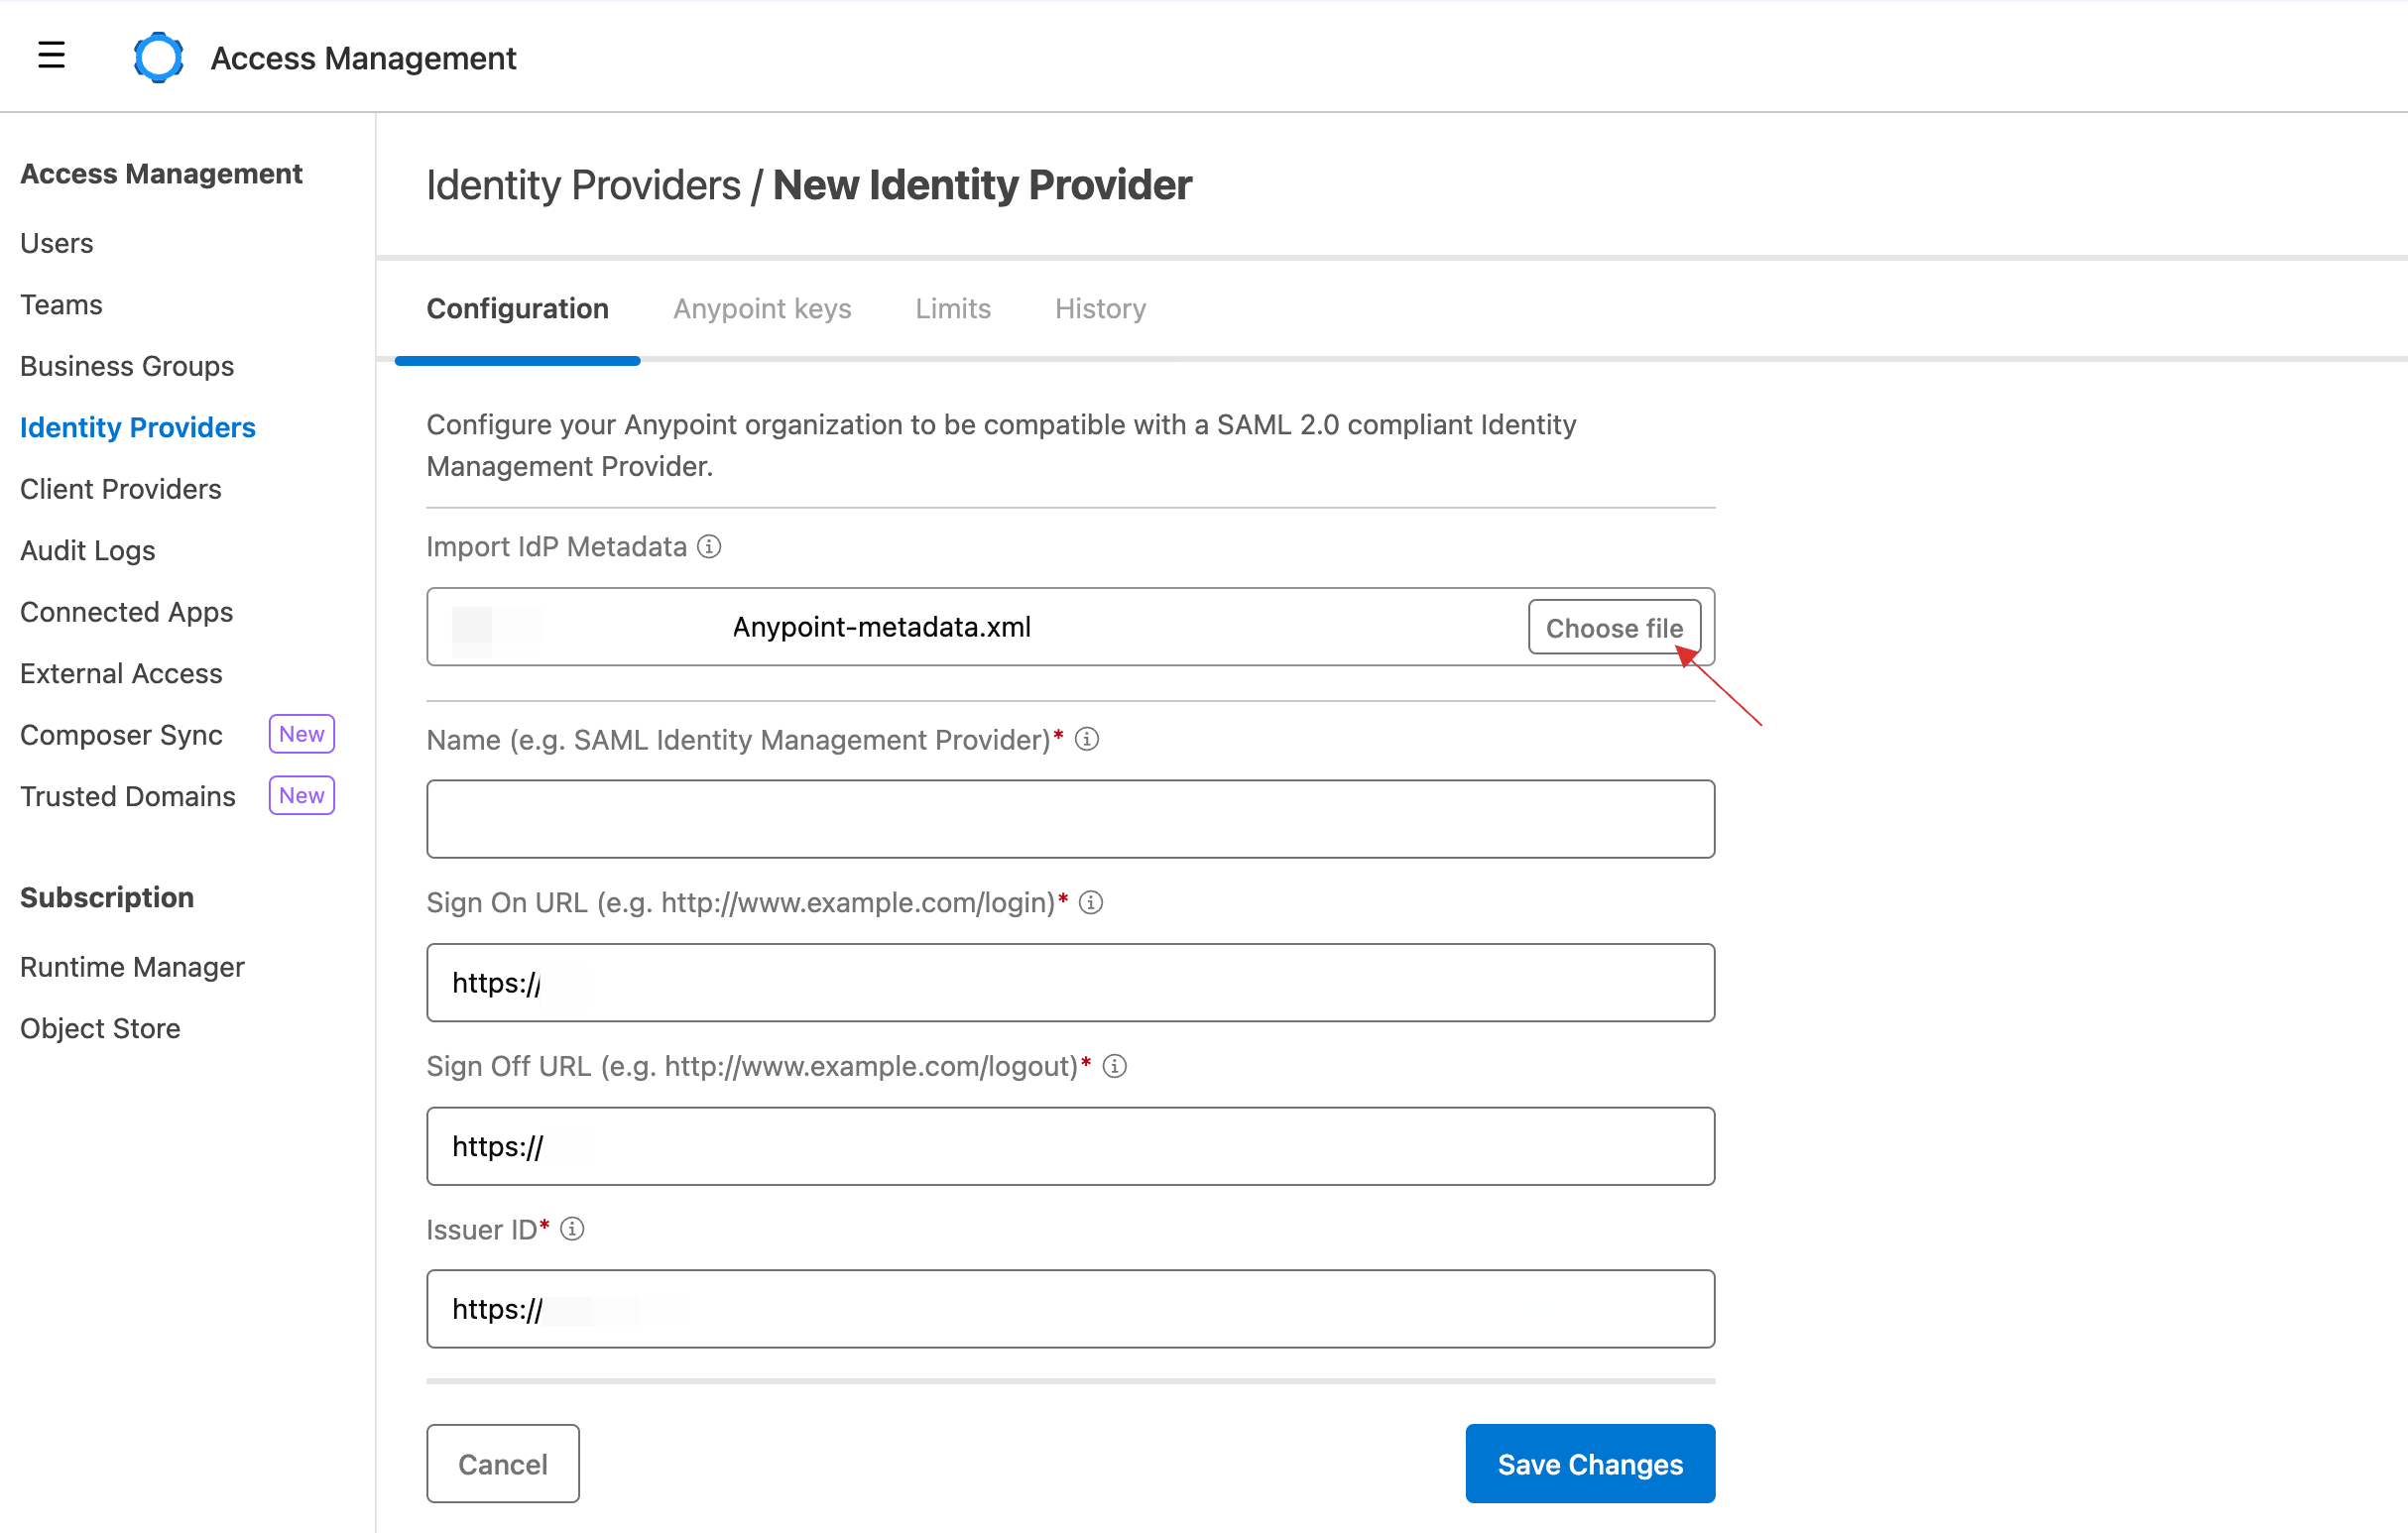
15 Provide a Name.
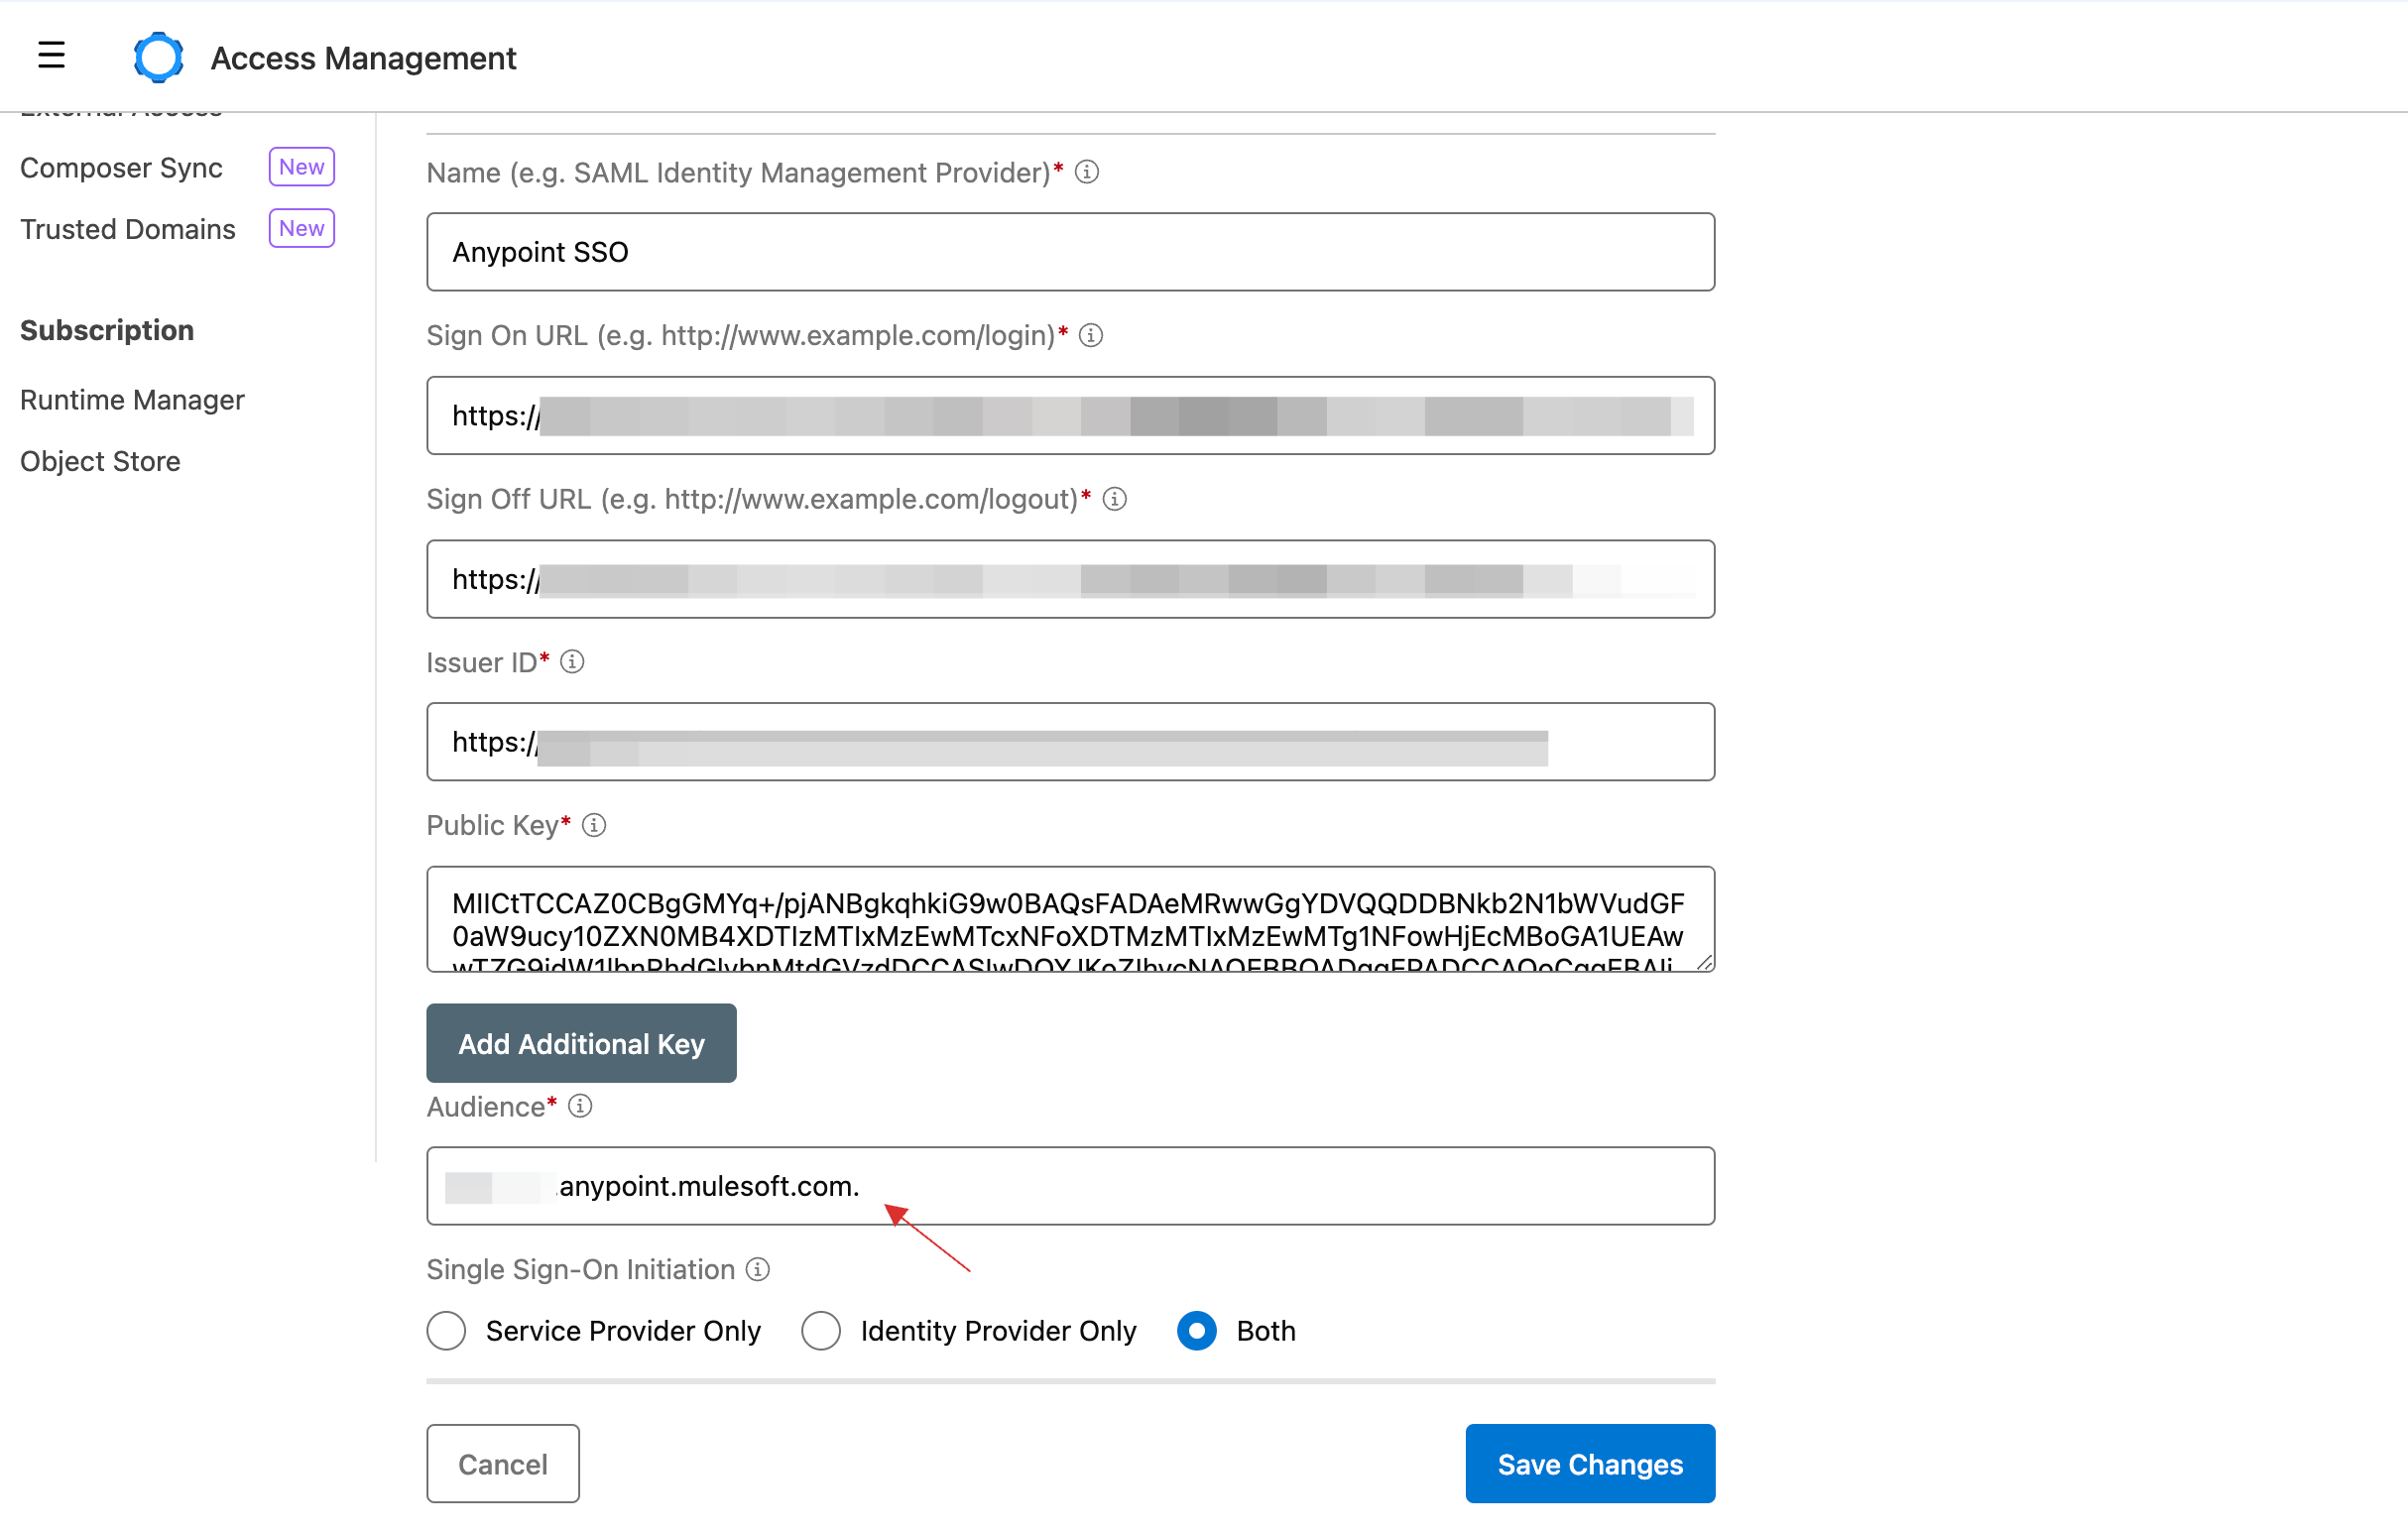
16 For the Audience URL, use {your organization name}.anypoint.mulesoft.com
17 Click on Save Changes.
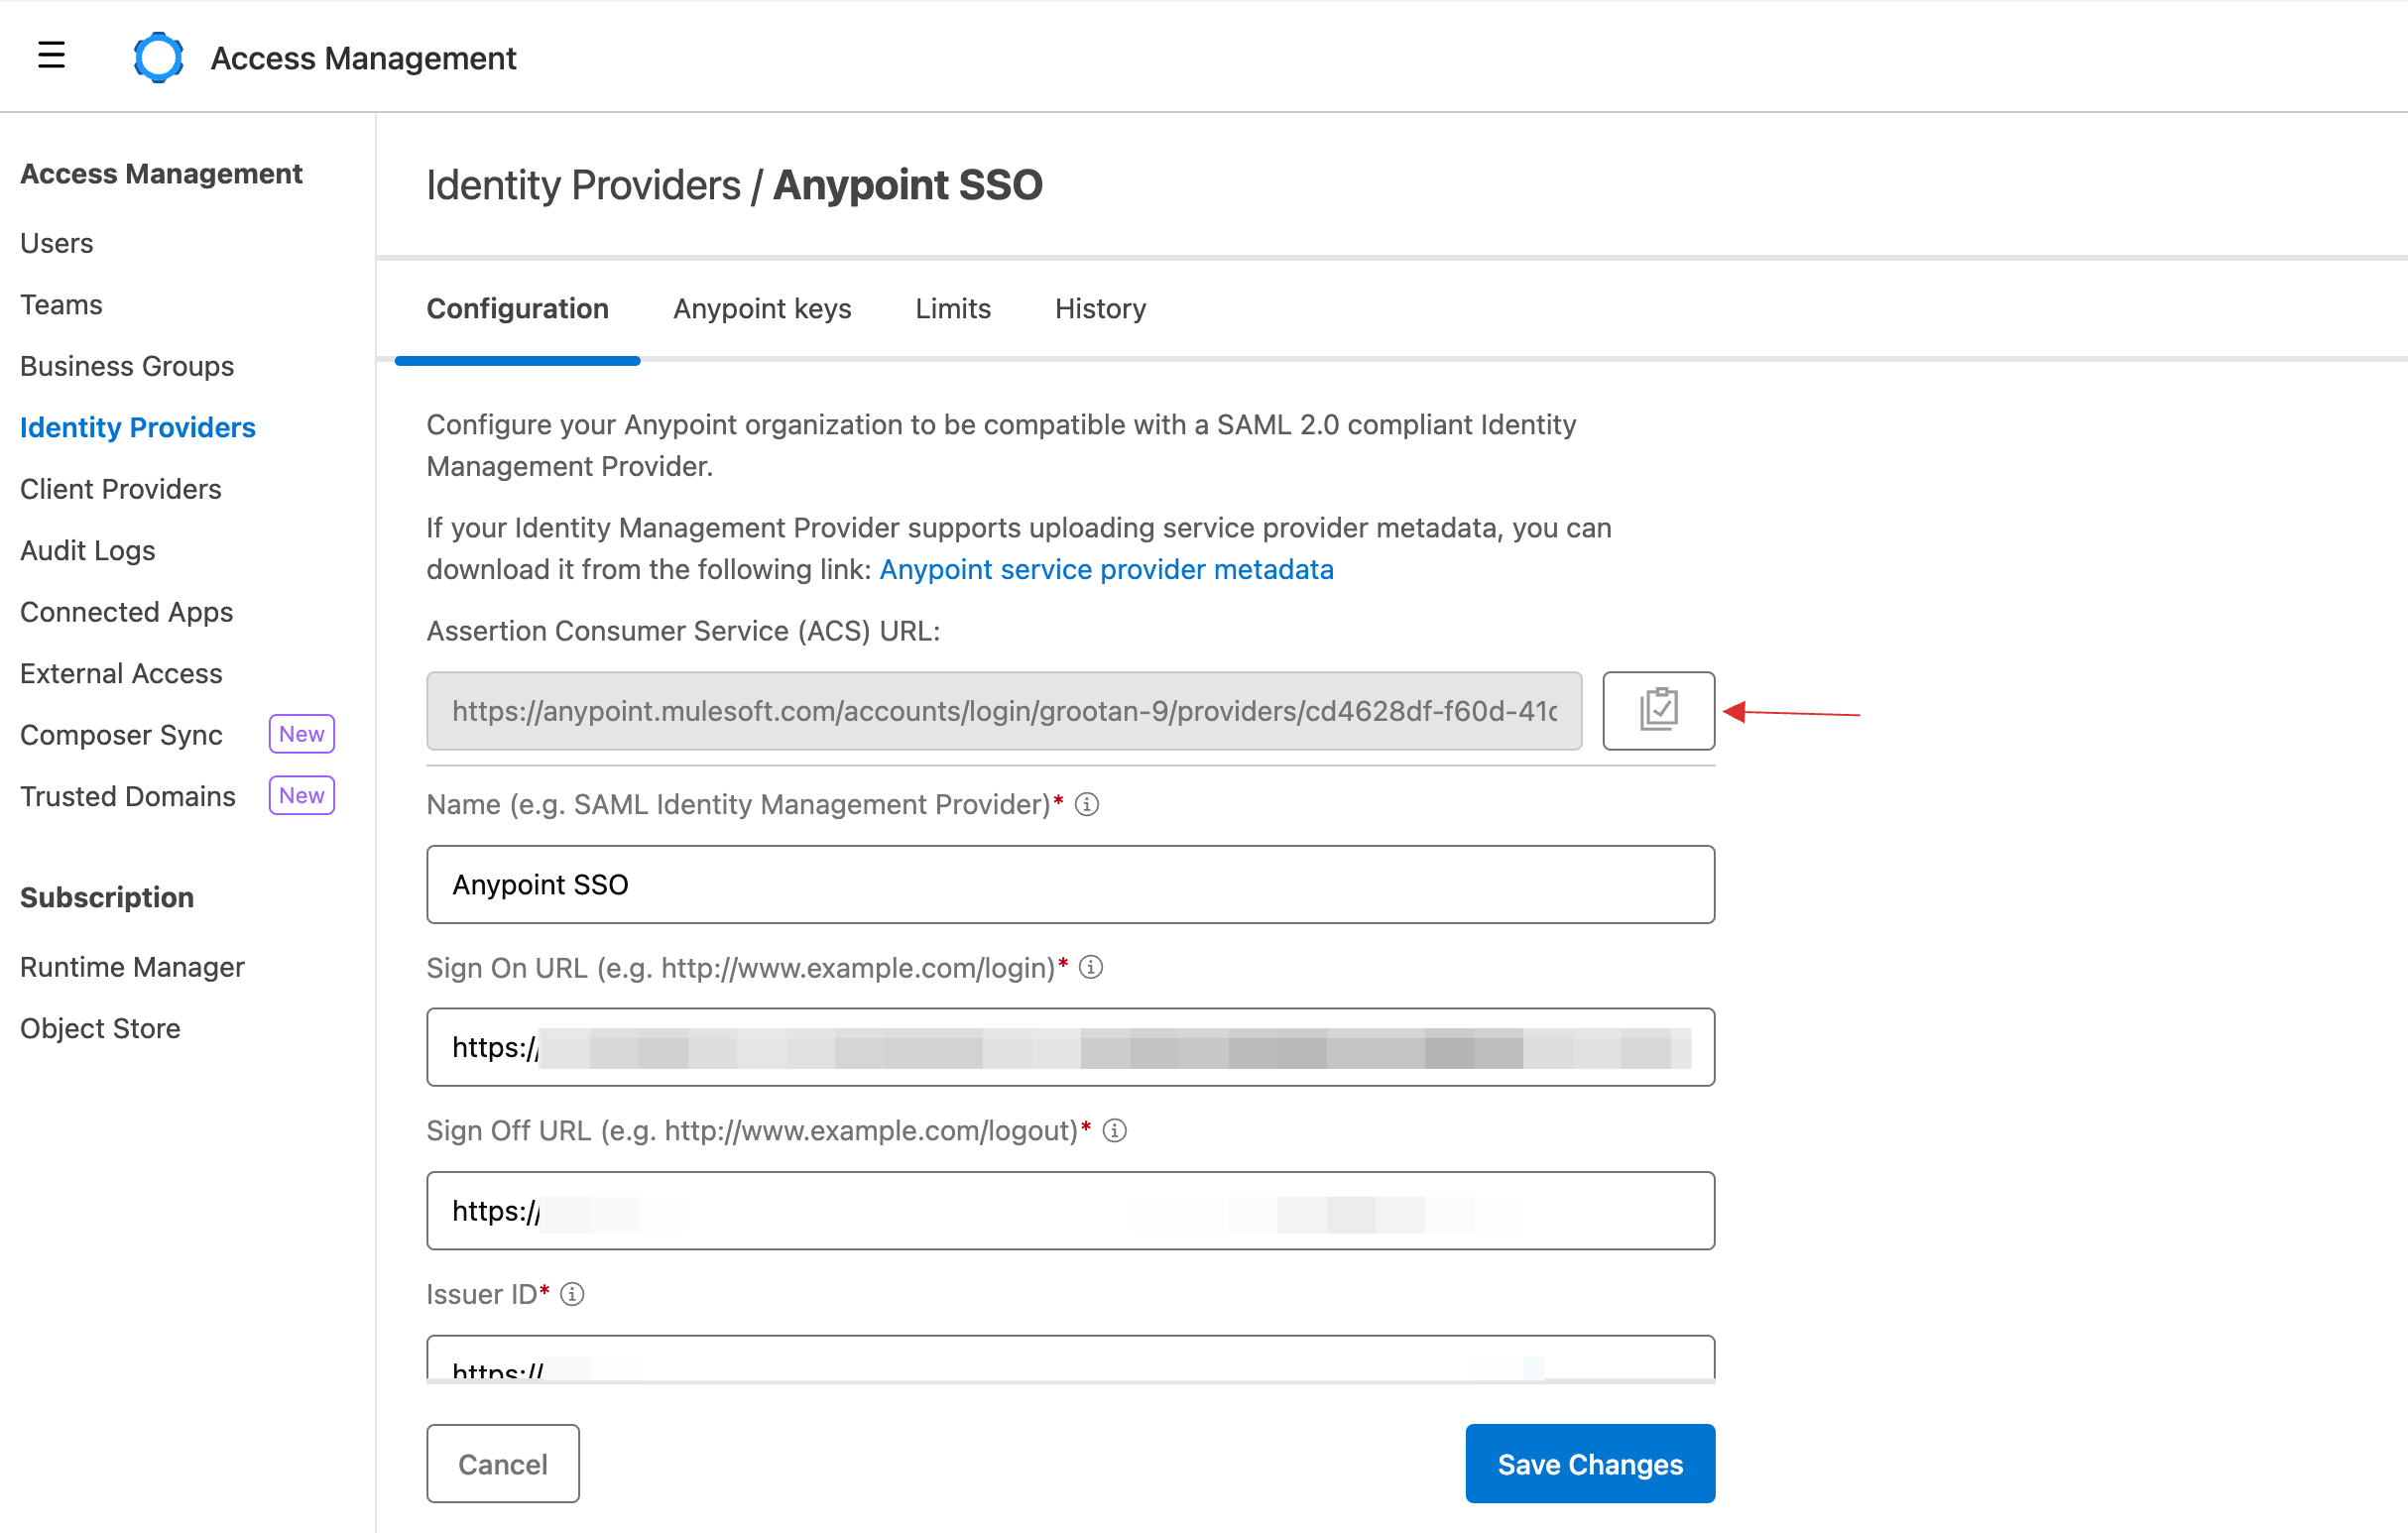
18 Click on the created Identity Provider. Copy the ACS URL.
19 Return to your dashboard, go to Applications > SSO, and click on the created Anypoint SSO.
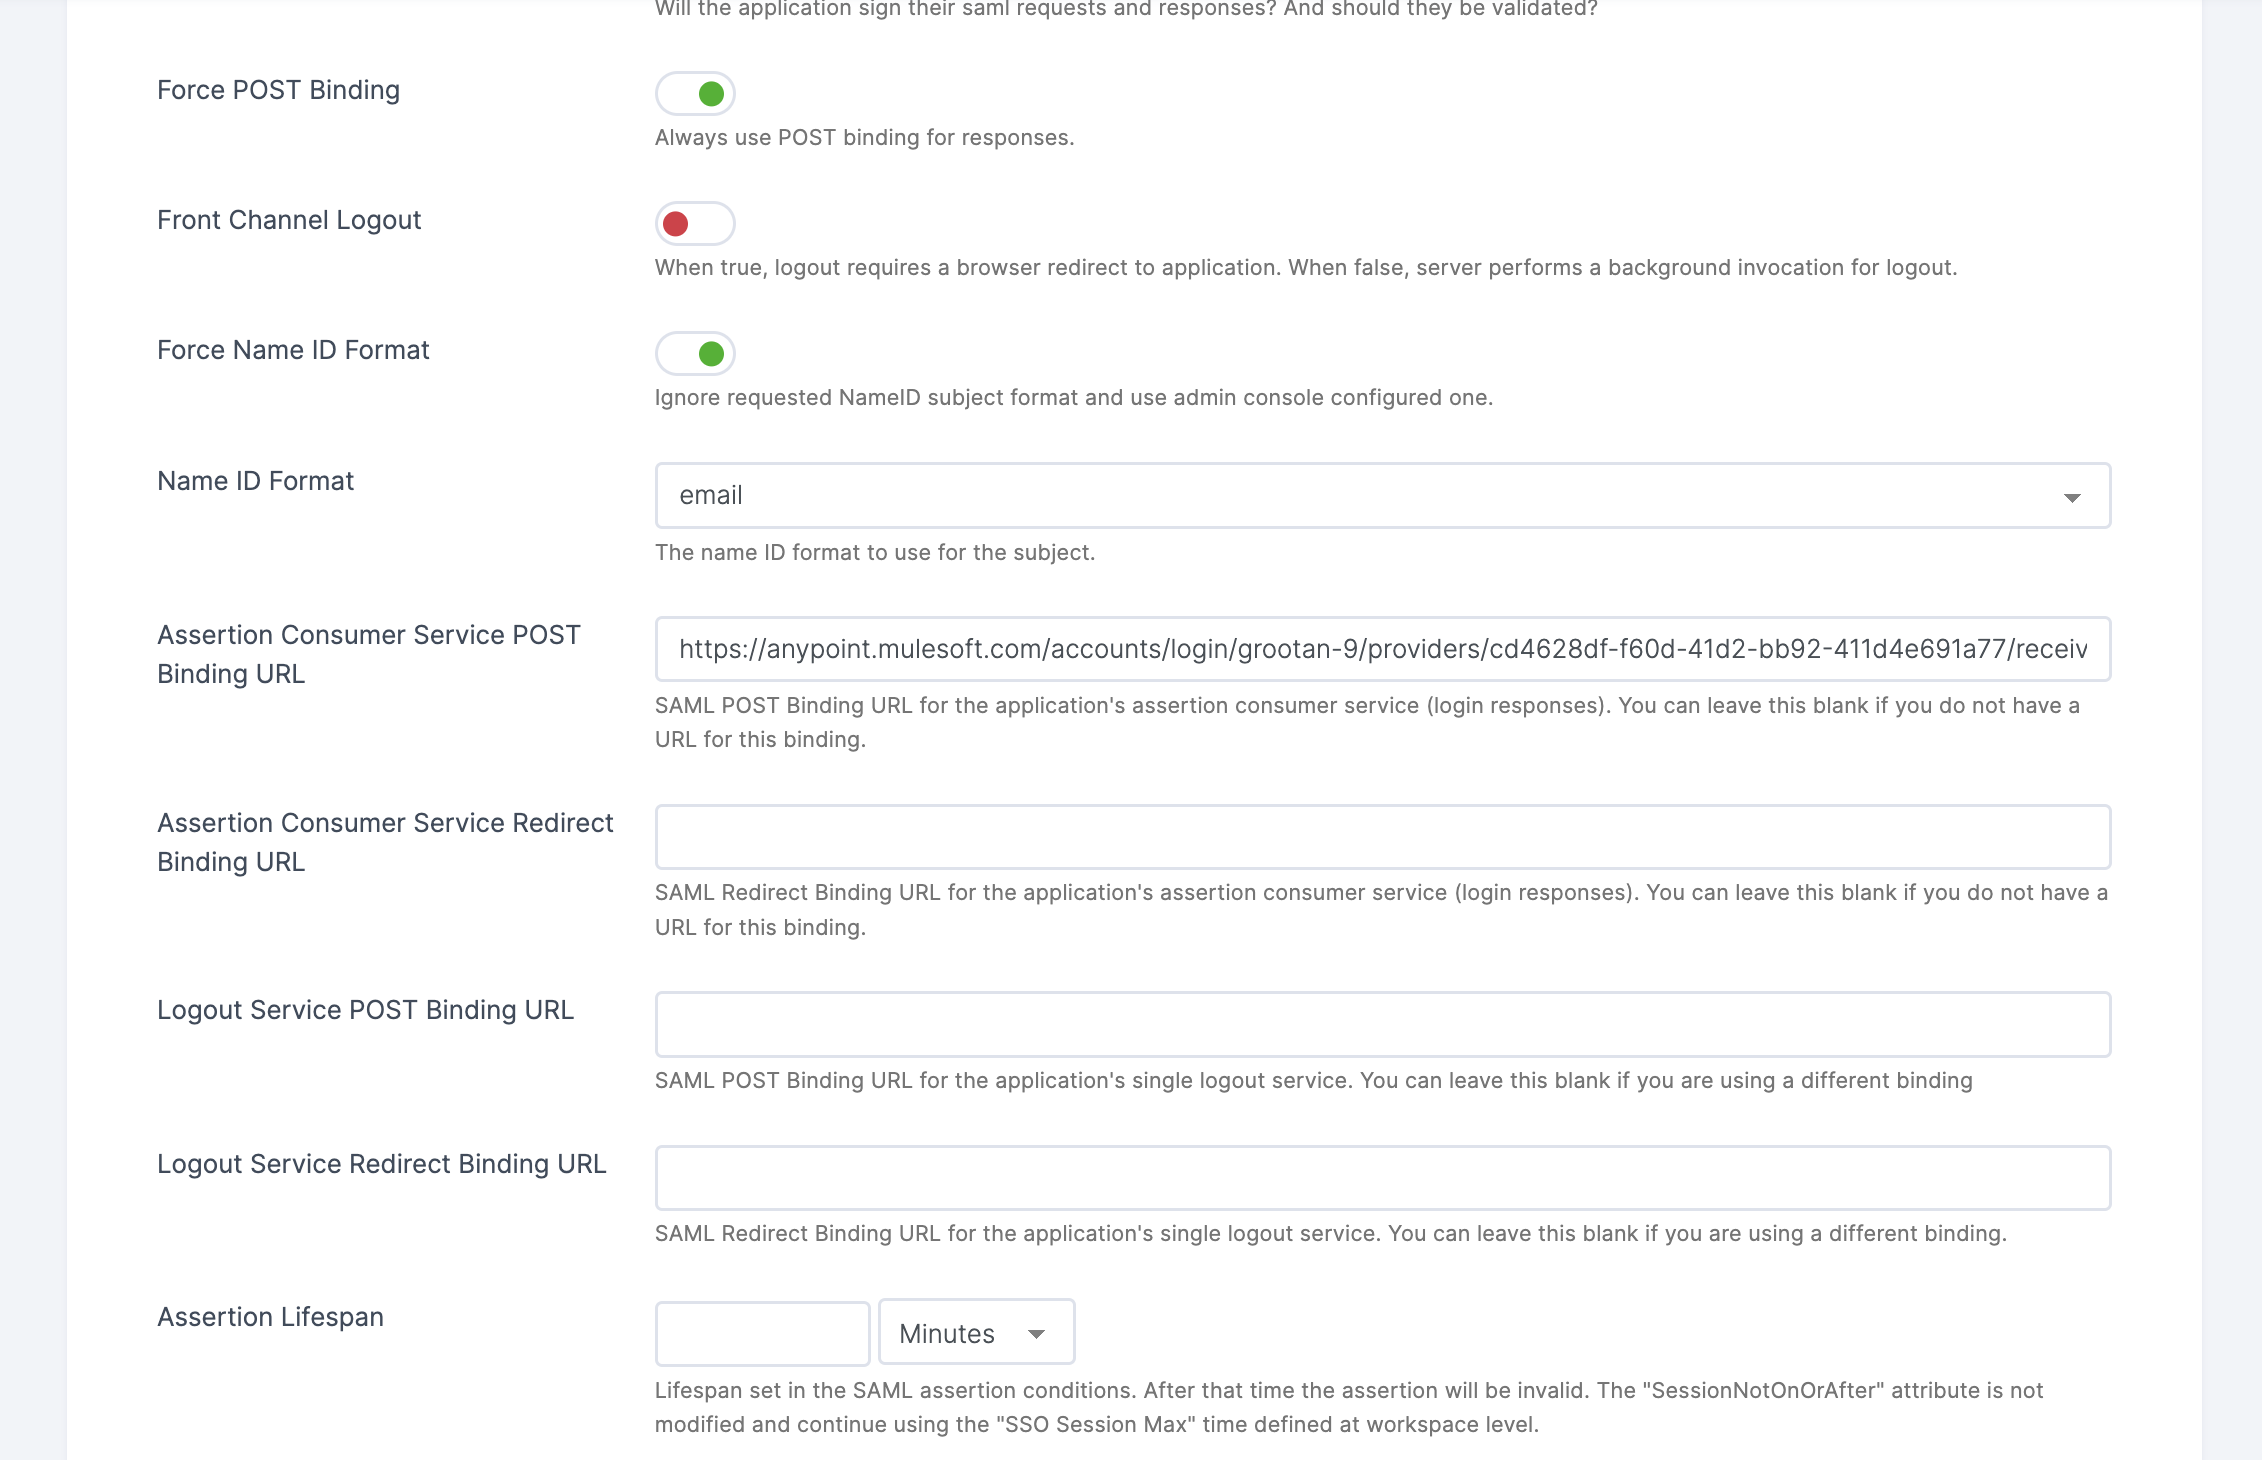
20 You will be directed to the SSO's General tab.
21 Scroll down, click on Advanced Settings.
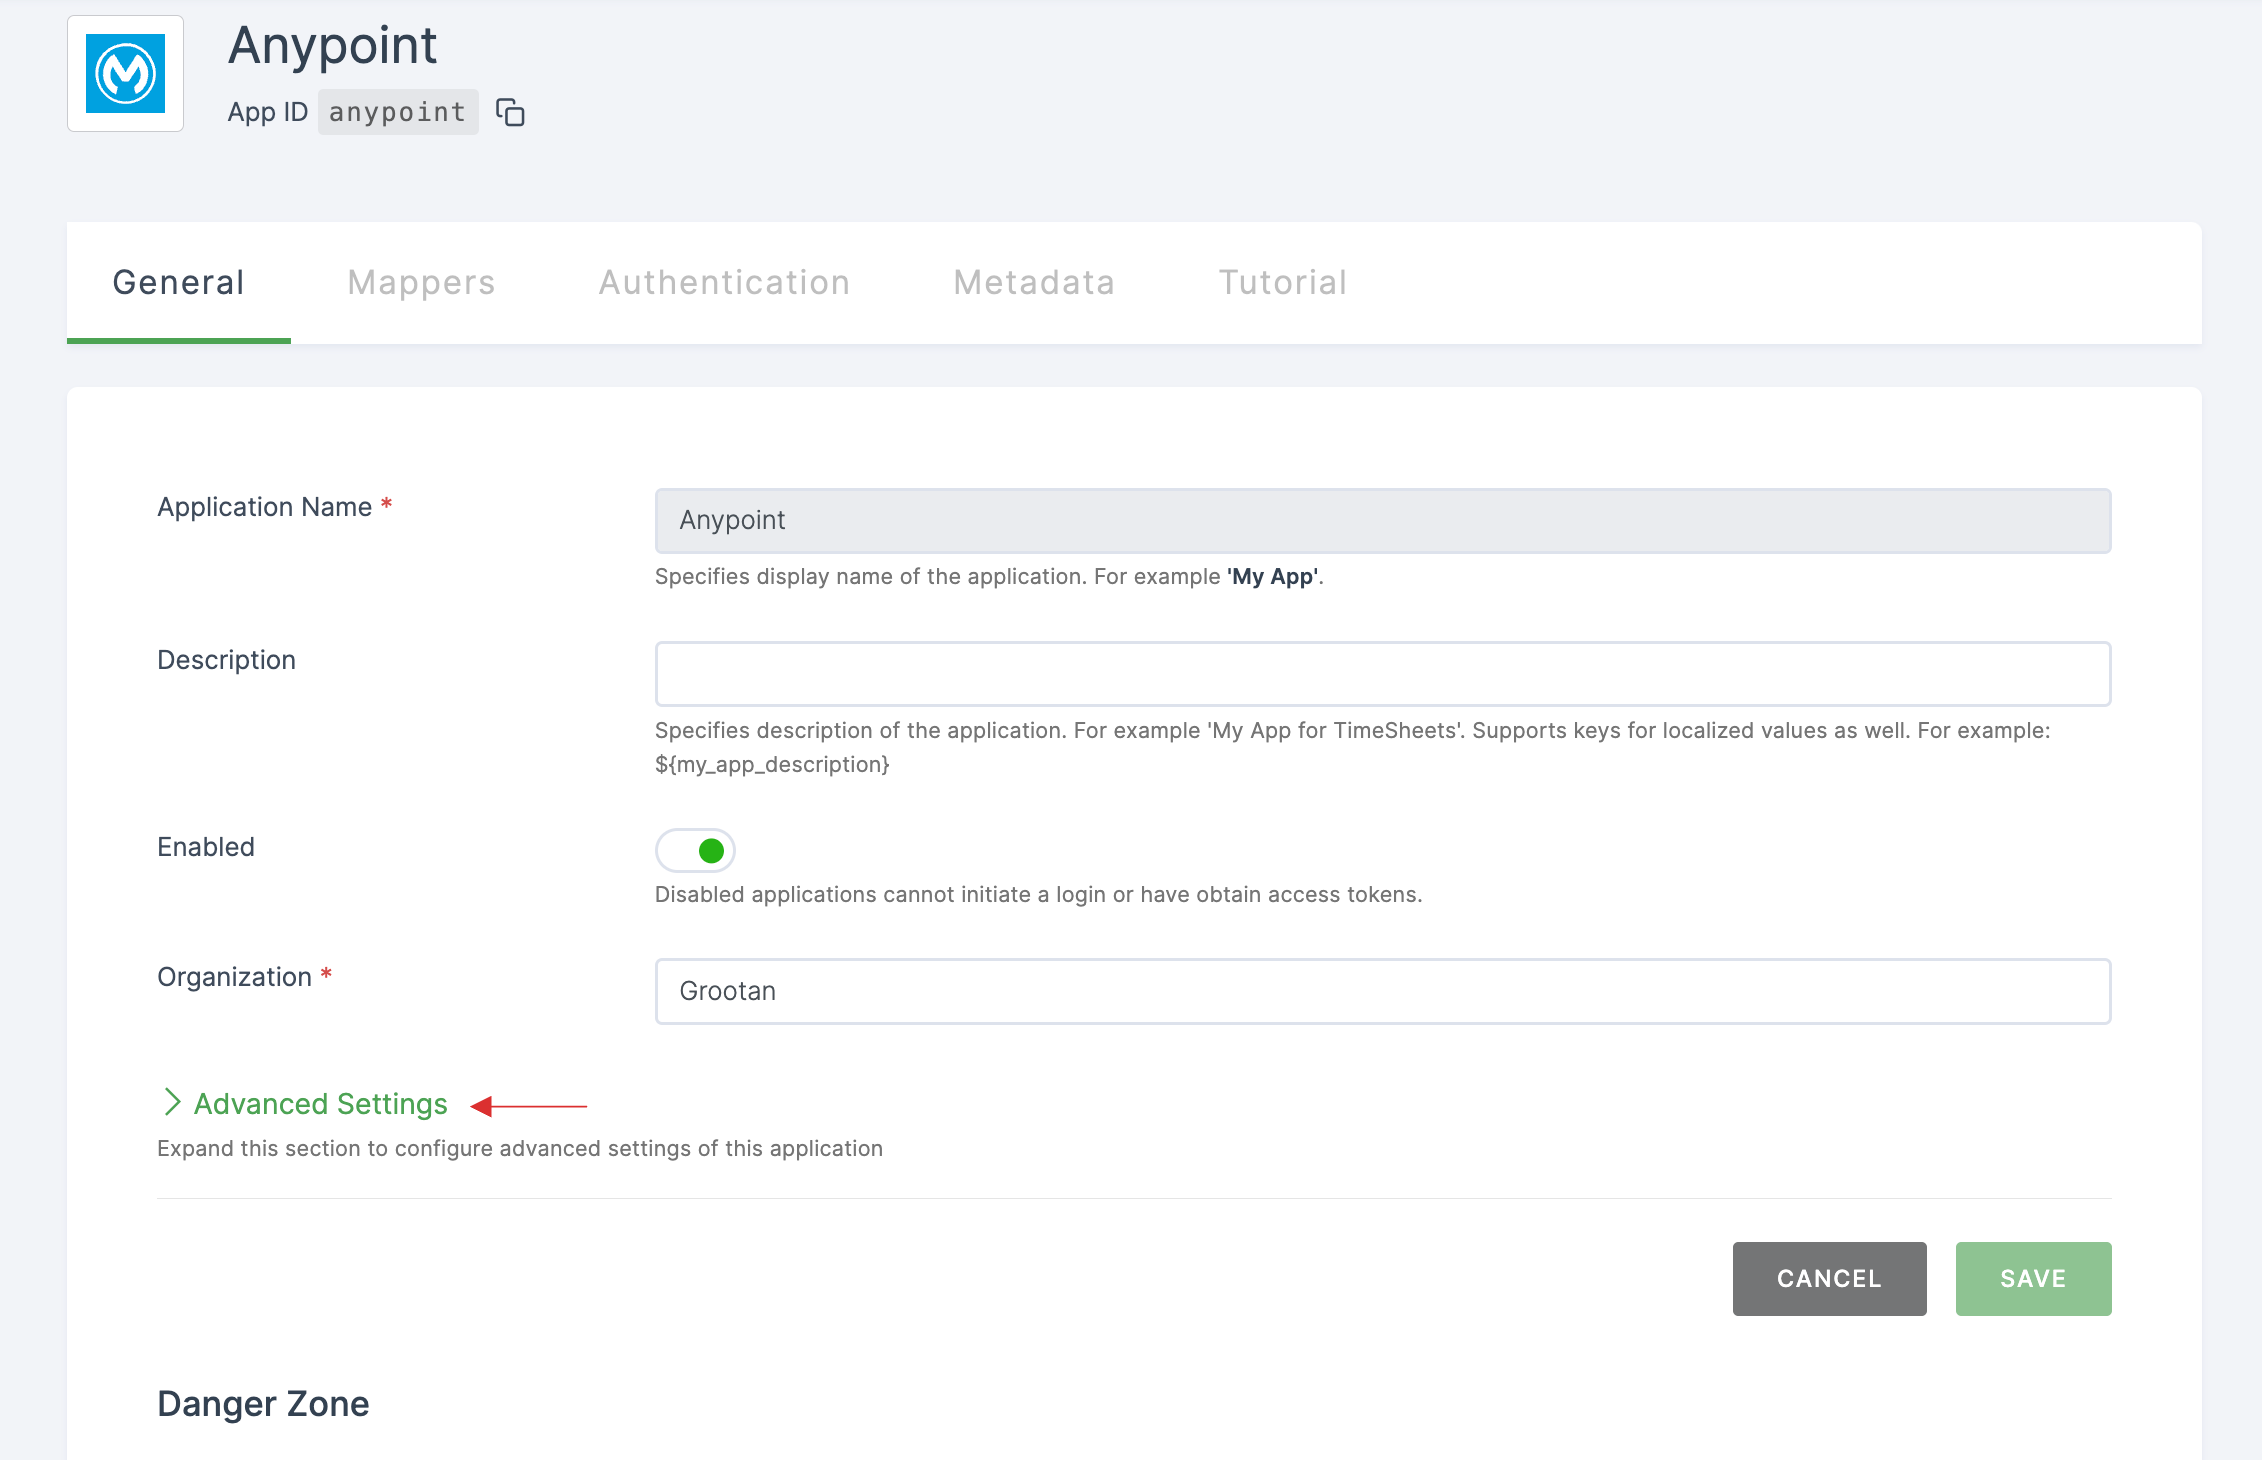
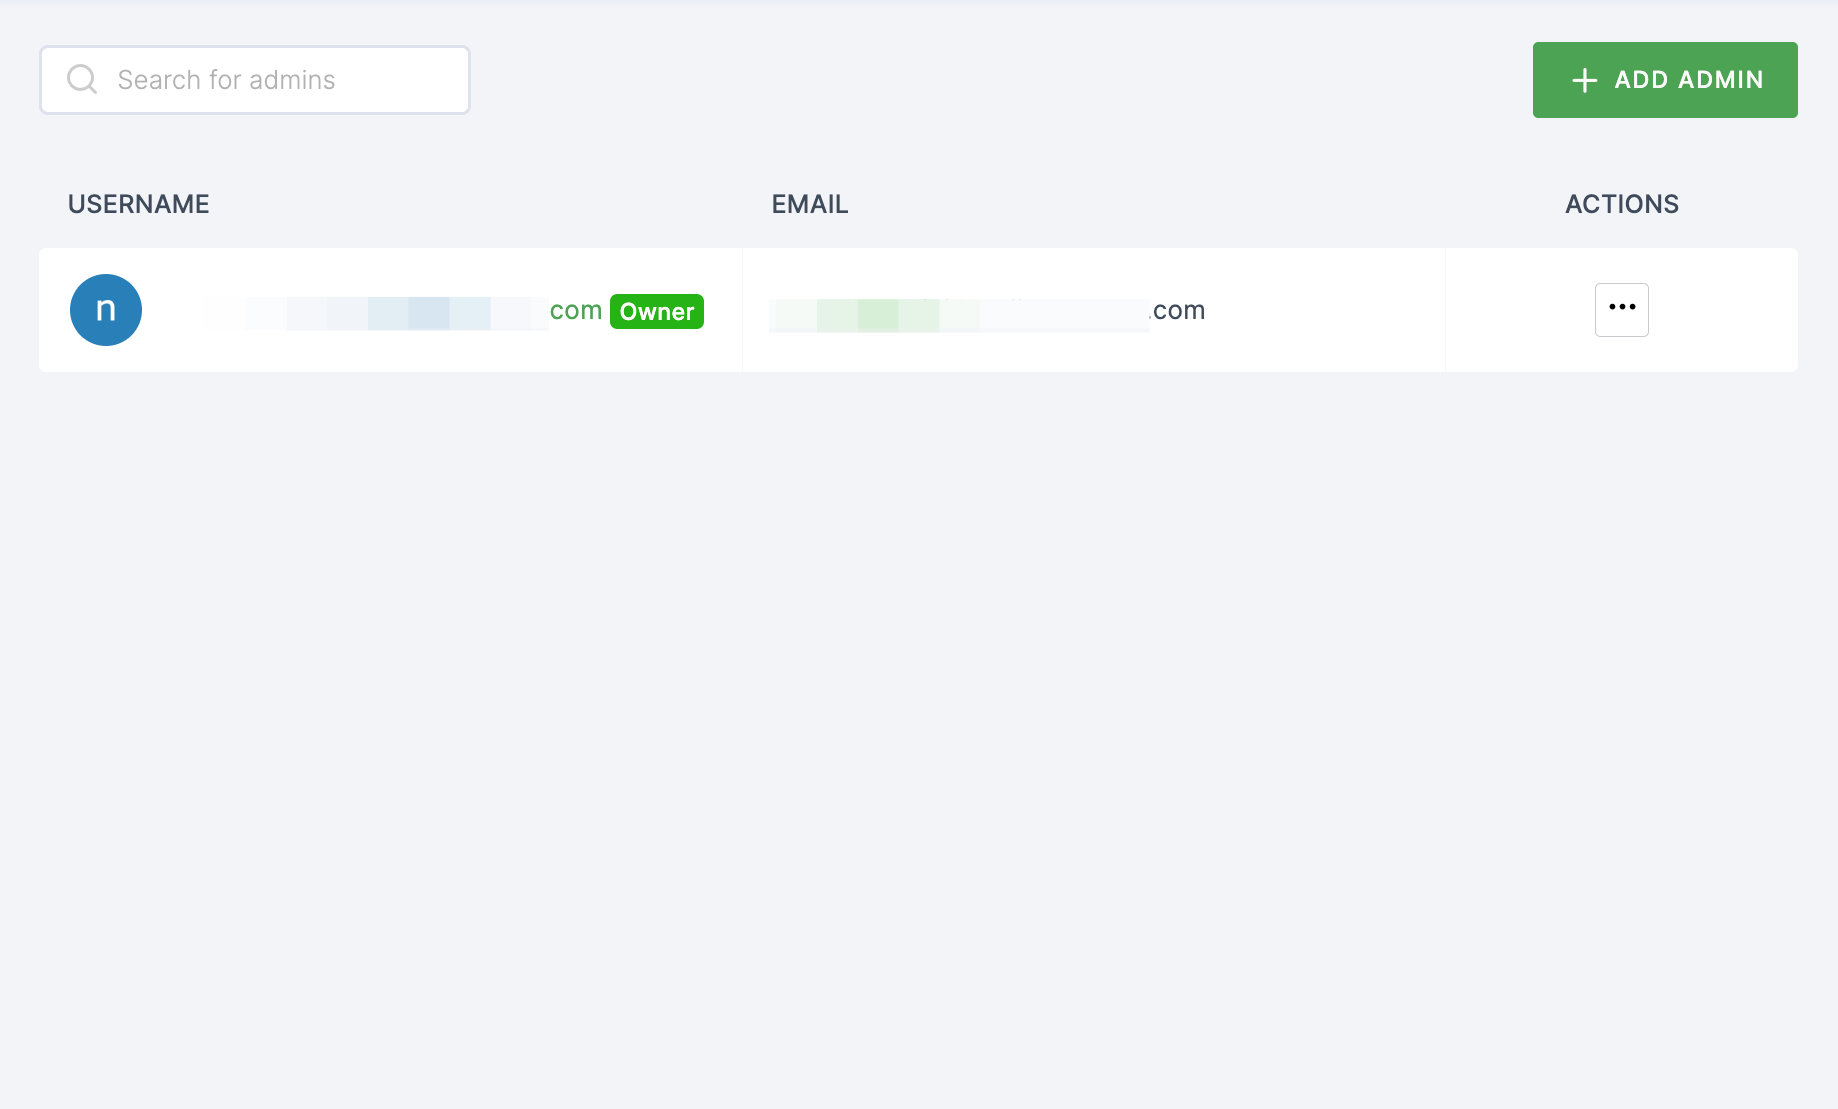
22 Paste the ACS URL into the Assertion Consumer Service POST Binding URL field.
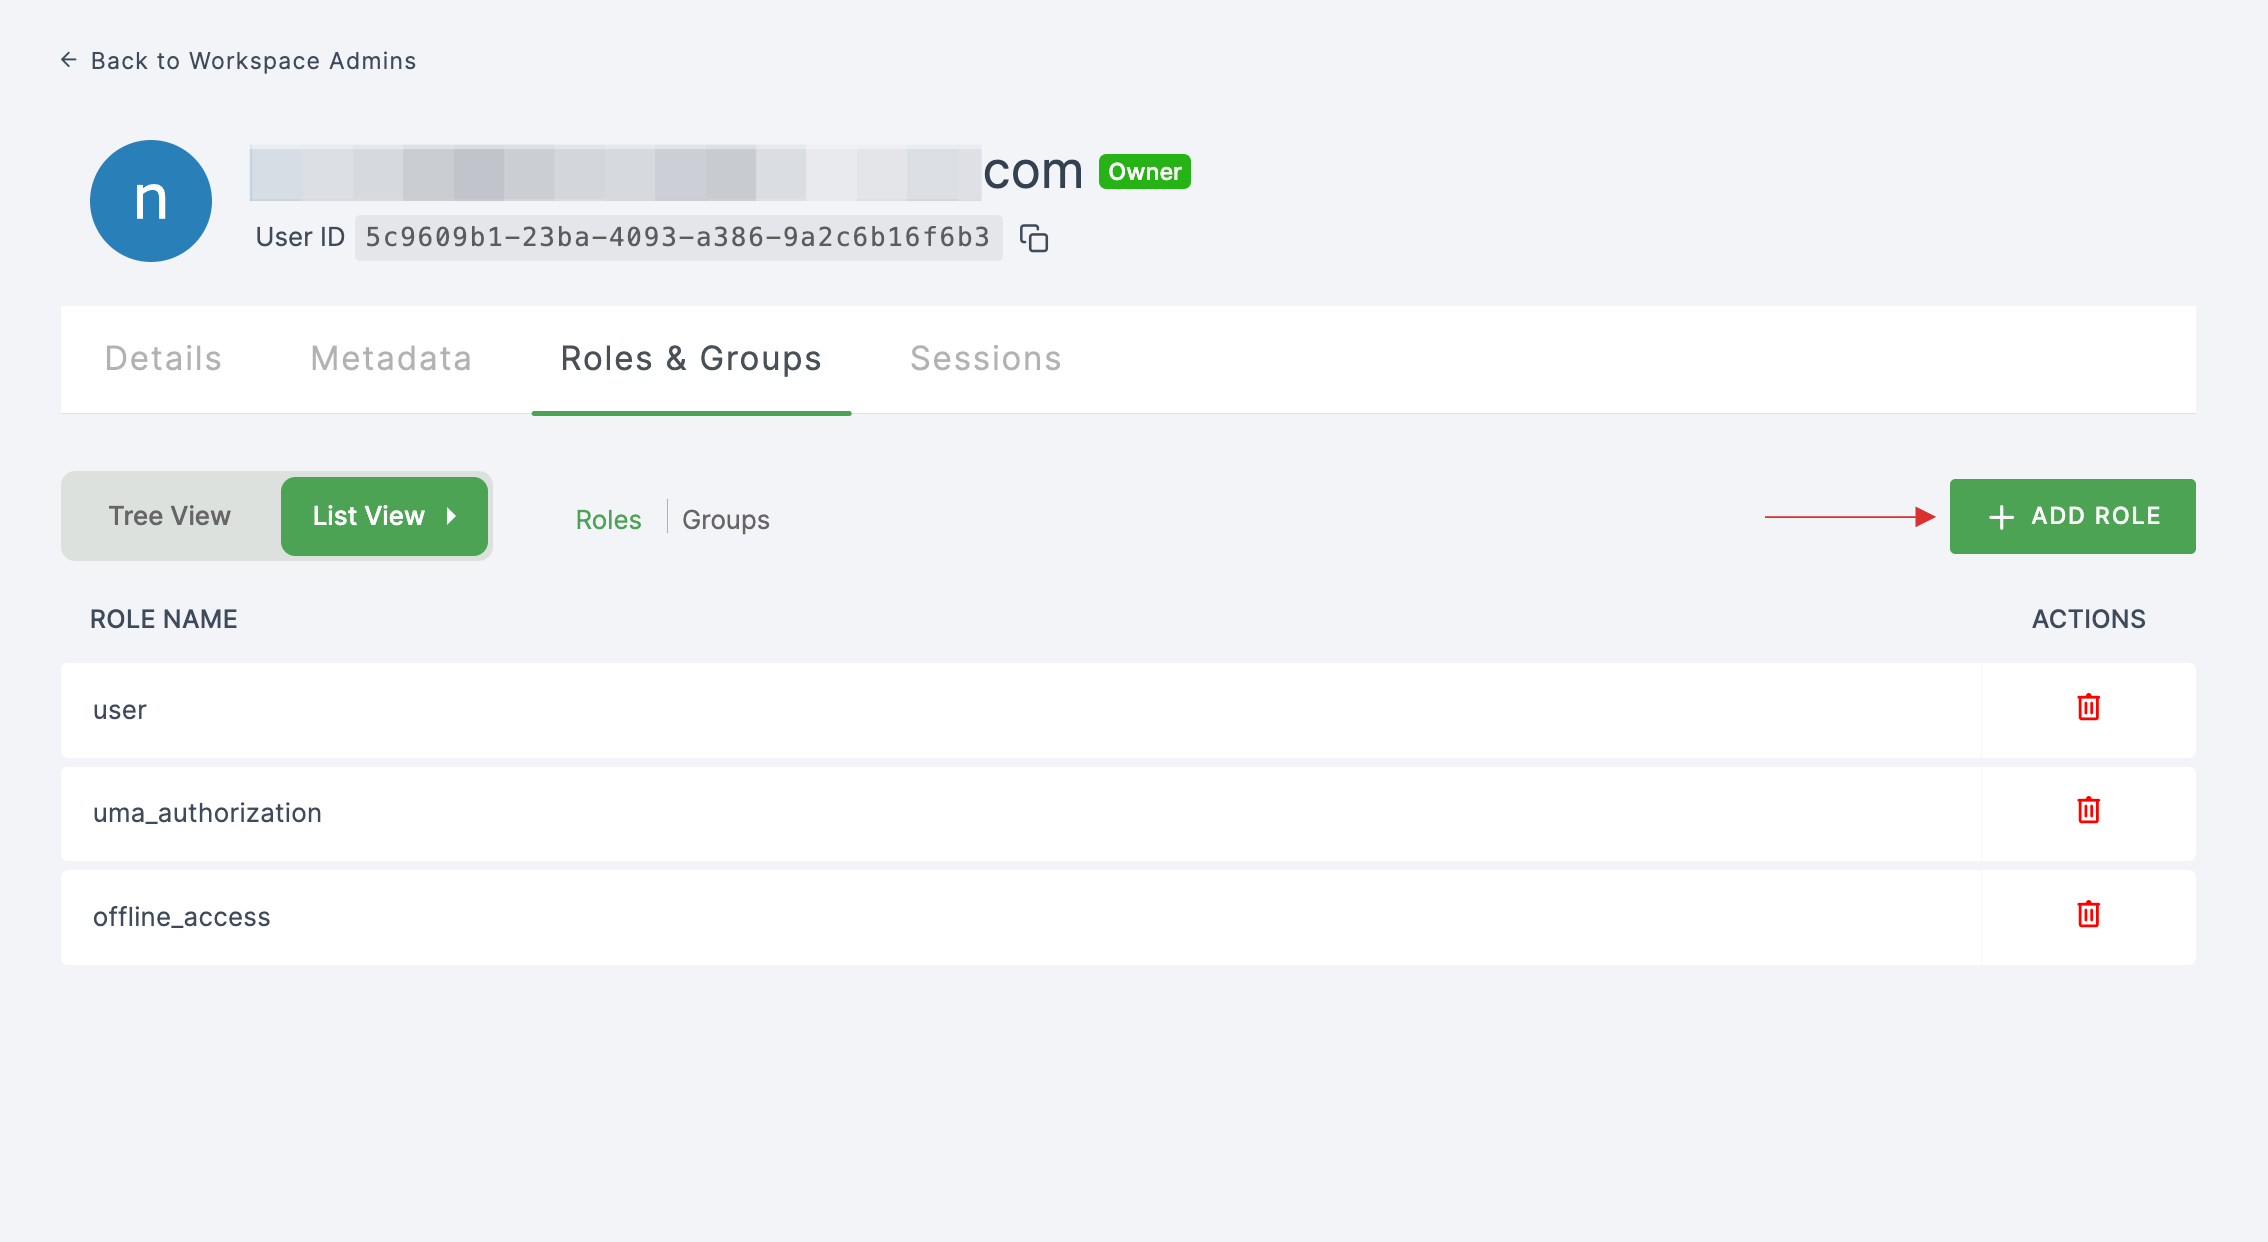
23 Scroll down, click on SAVE.
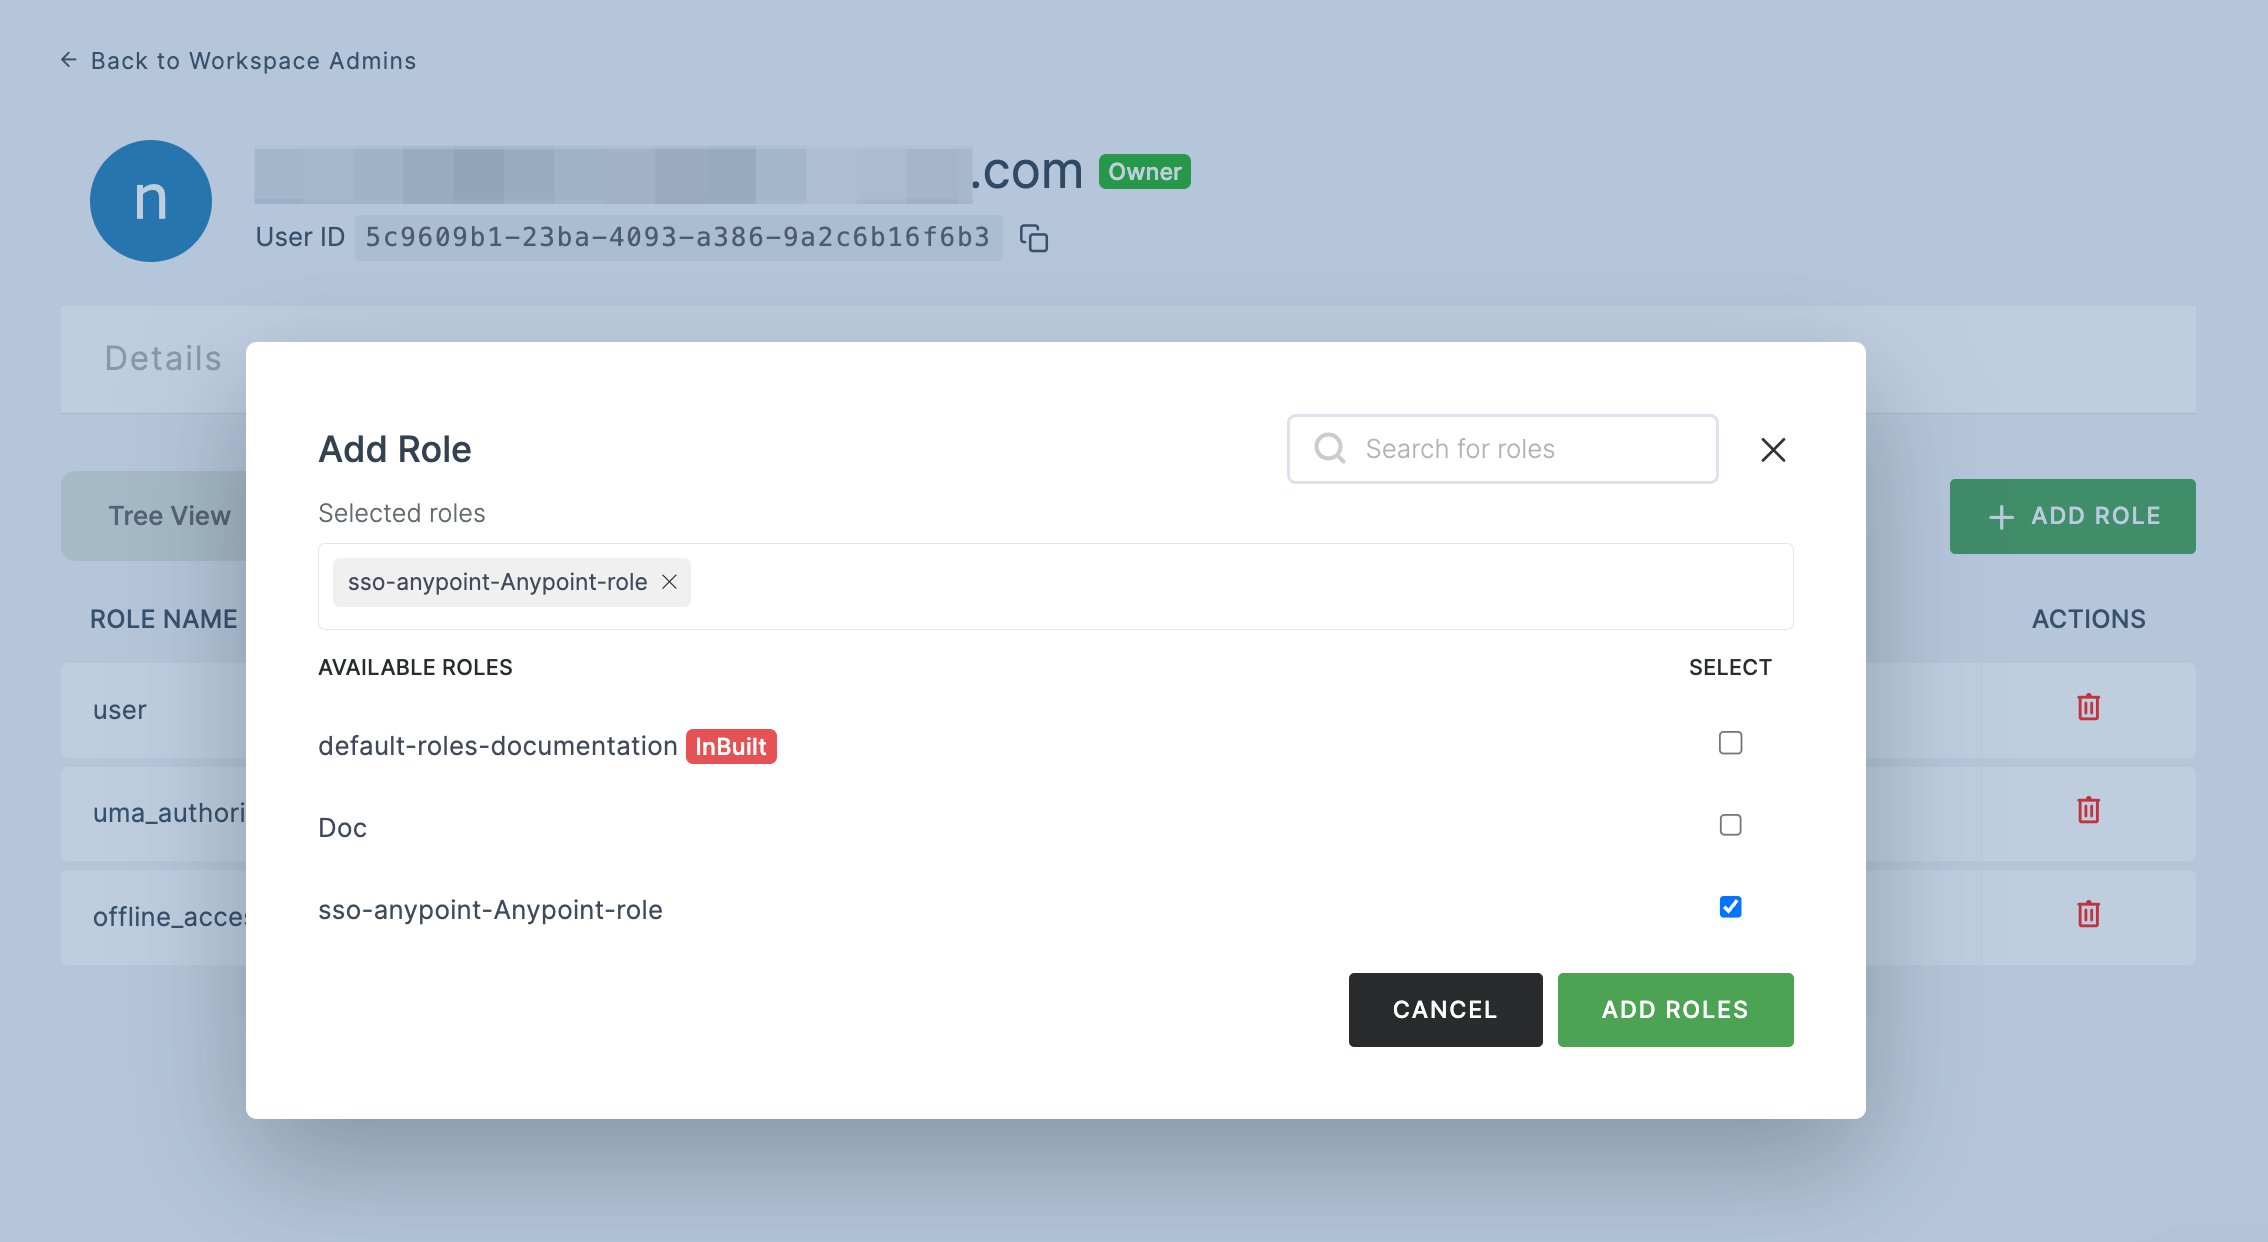
24 Assign a user with Anypoint role. To do so, navigate to Users or Workspace Admins, click on the user you want to assign the role.
25 You will be taken to the user's Details tab, click on Roles & Groups.
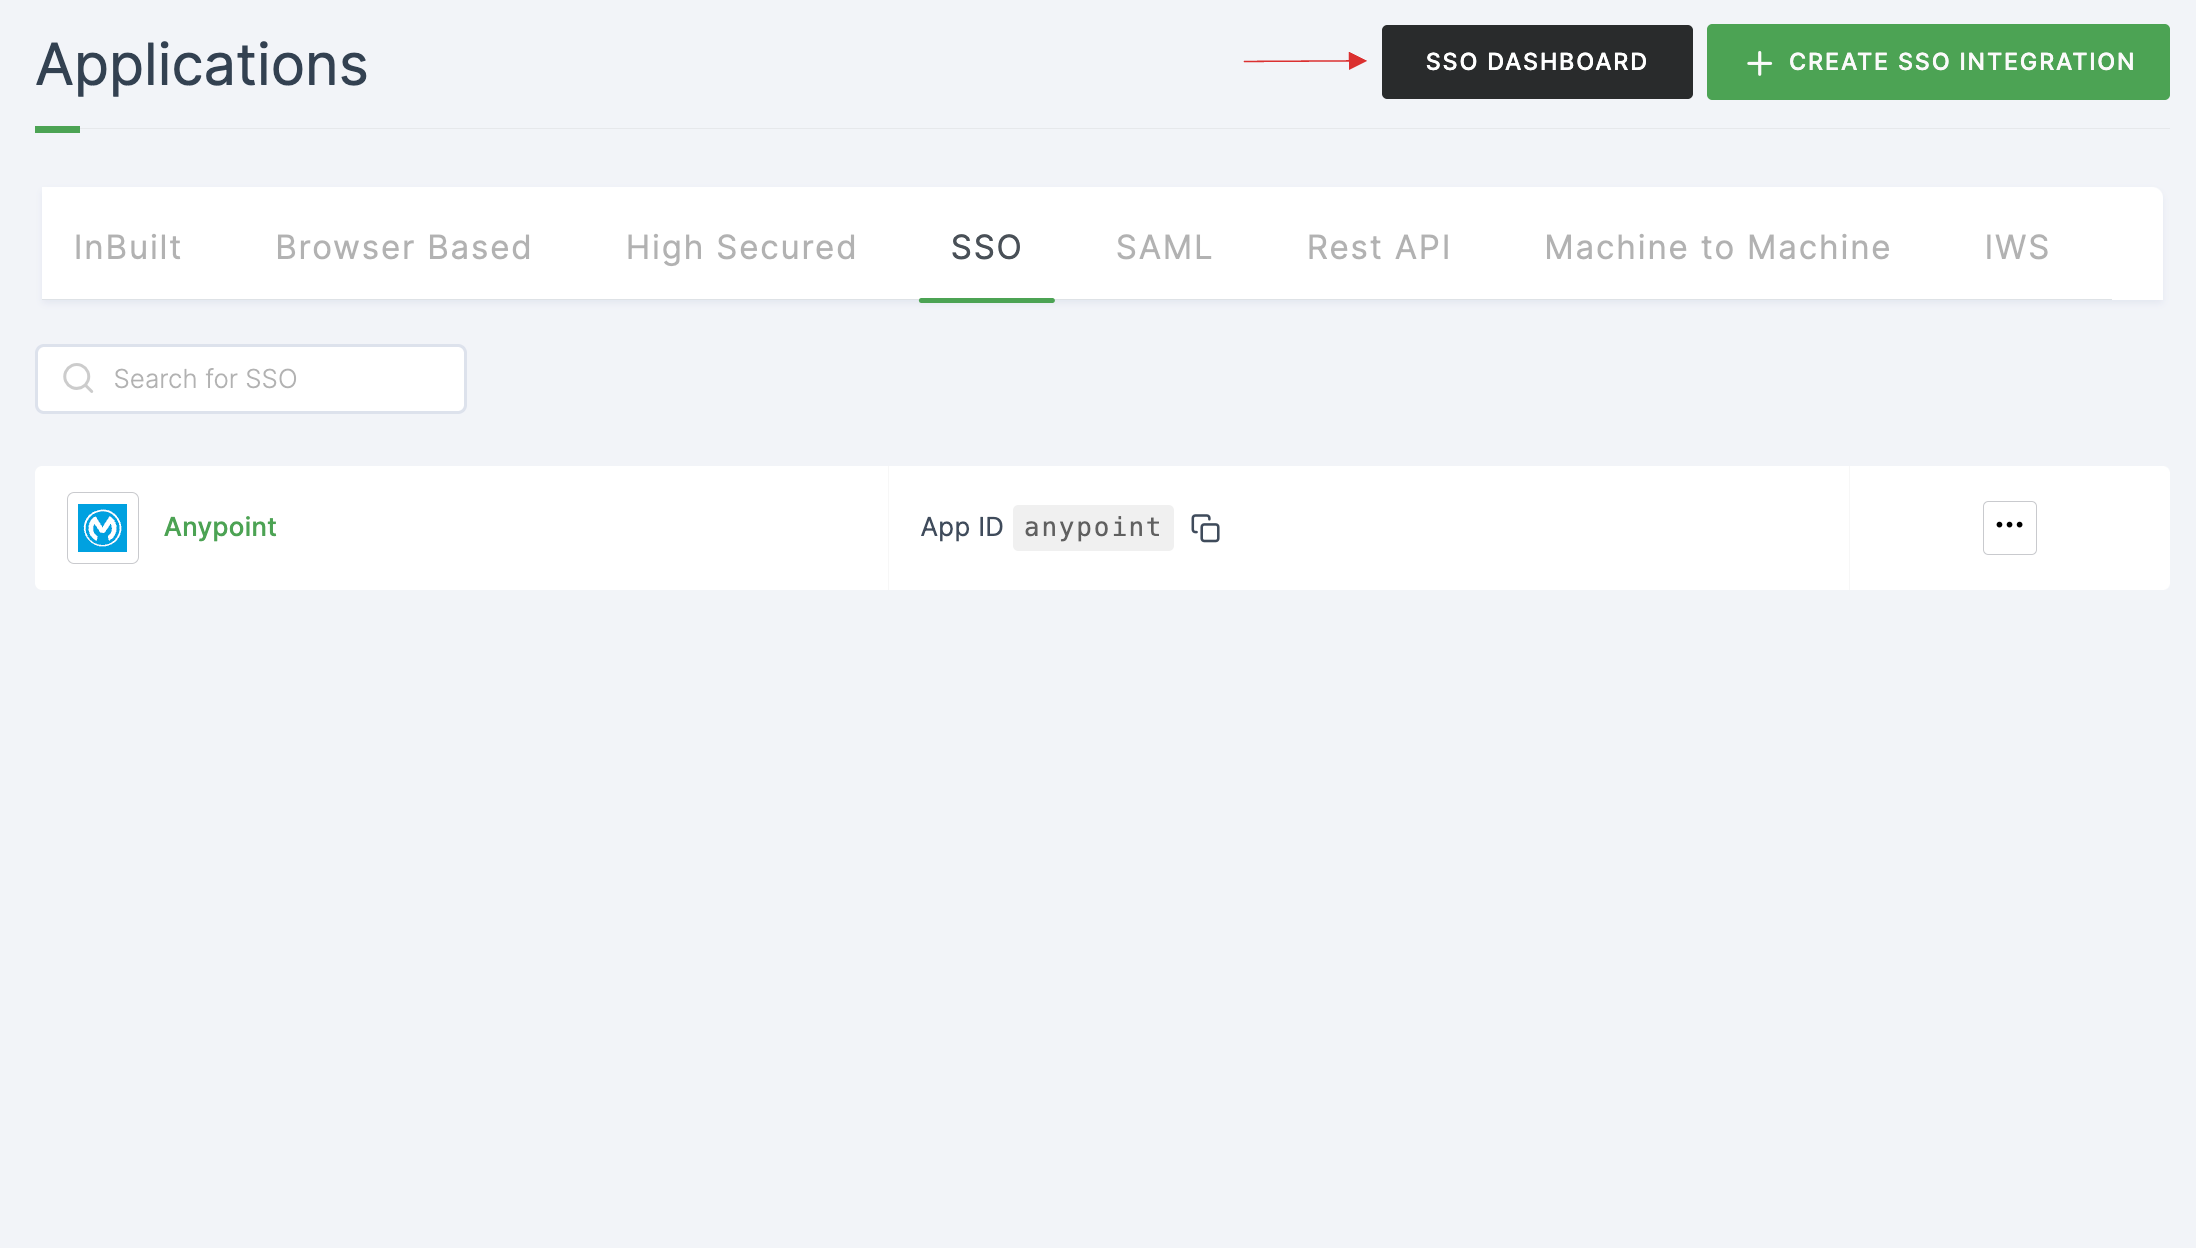
26 Select List View and click on + ADD ROLE.
27 The available roles will appear; select sso-anypoint-Anypoint-role and click on ADD ROLES.
28 To verify whether SSO has been successfully enabled, go to Applications > SSO, click on SSO DASHBOARD button.
29 The Anypoint SSO will be enabled successfully.
