DigiLocker
This DigiLocker verification provides an efficient way to access and verify digital documents stored in DigiLocker. By connecting directly to DigiLocker, this module simplifies the process of retrieving documents for verification purposes, ensuring that each document is validated securely.
How to Setup
1 Navigate to Workspace > Workflows, and click on the flow created for DigiLocker. If you need understanding in creating a workflow, refer to the step-by-step guide here.
2 Hover over the plus (+) symbol and select Workflow. From the list, click DigiLocker to add it.
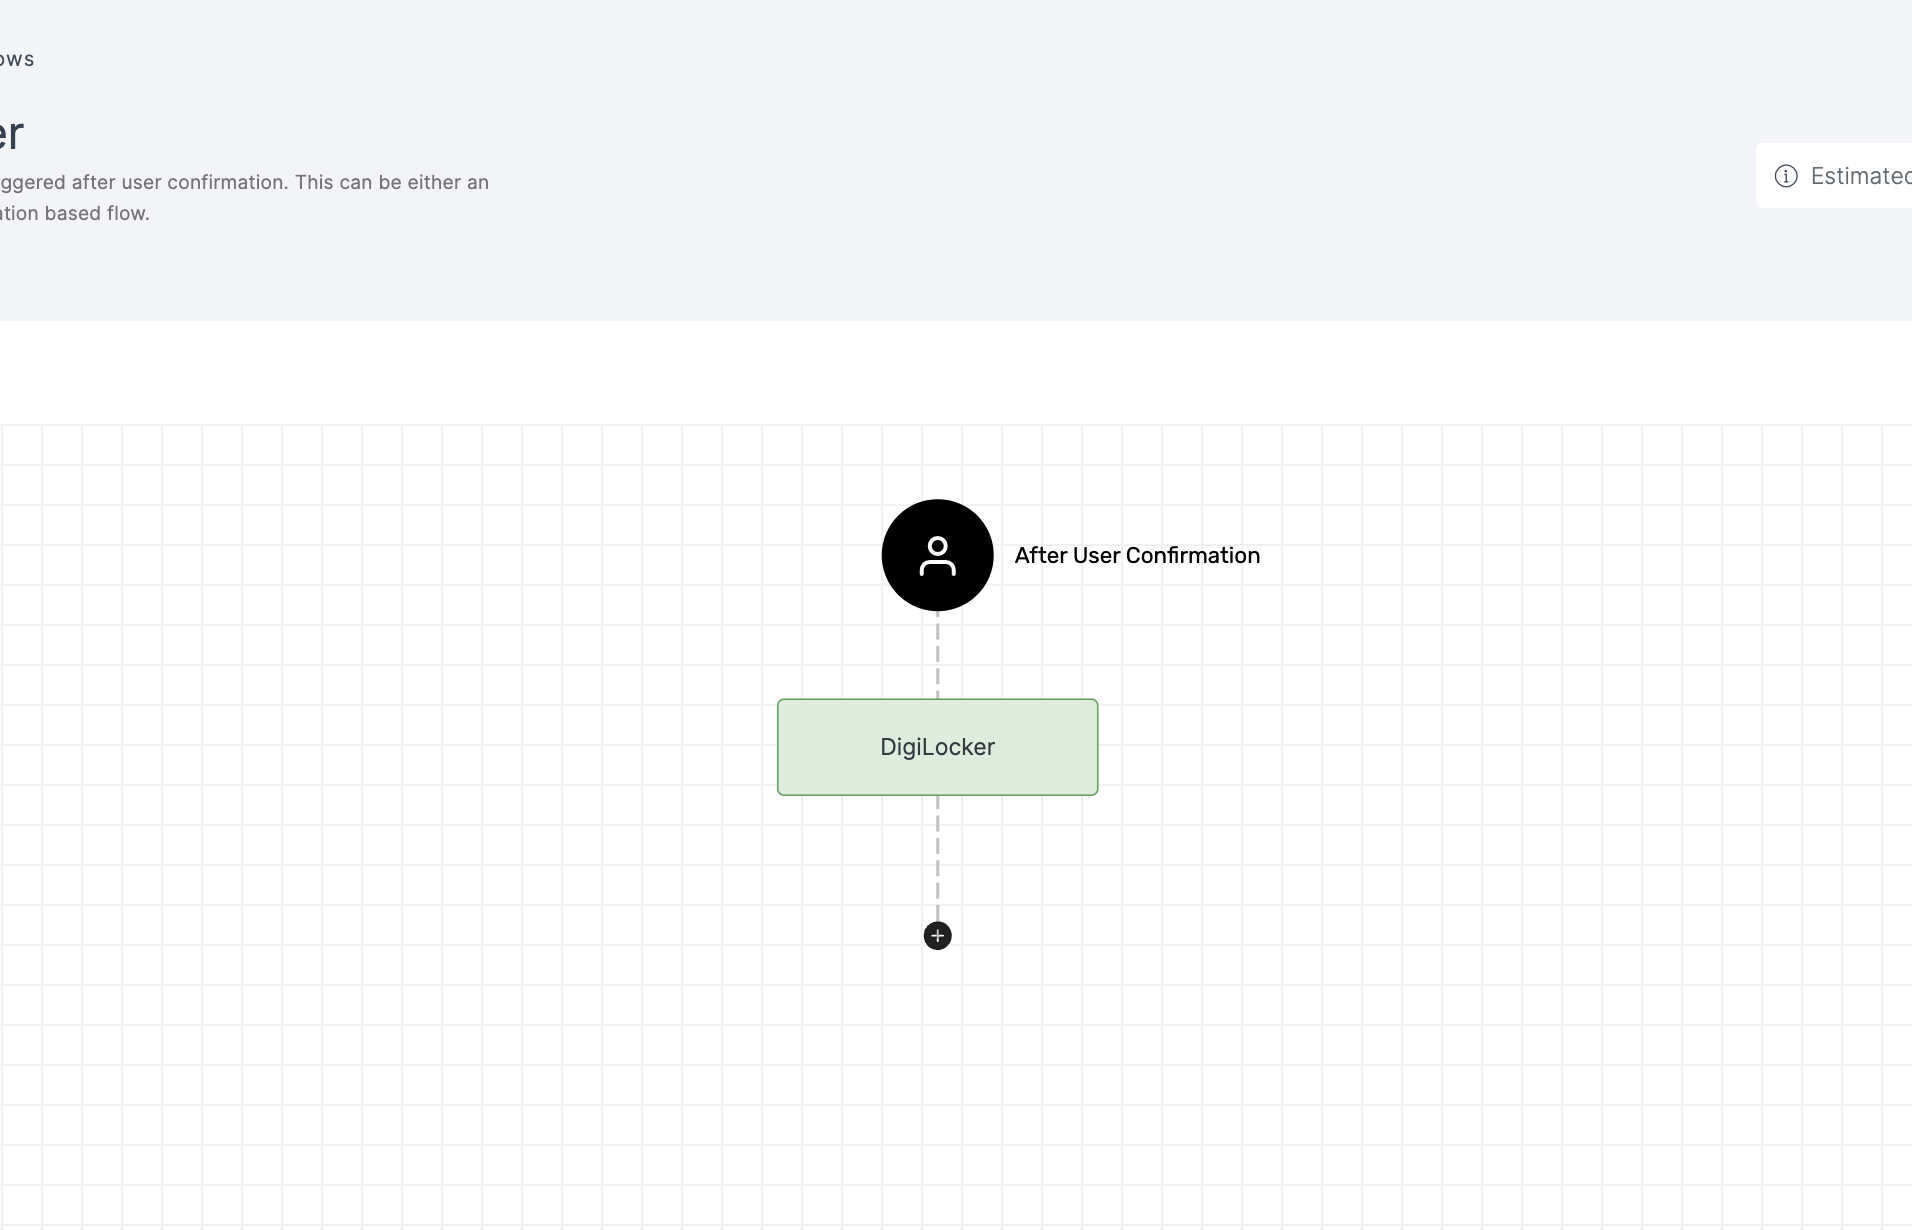
3 Click on the newly added workflow, then select the General tab to customize your preferences.
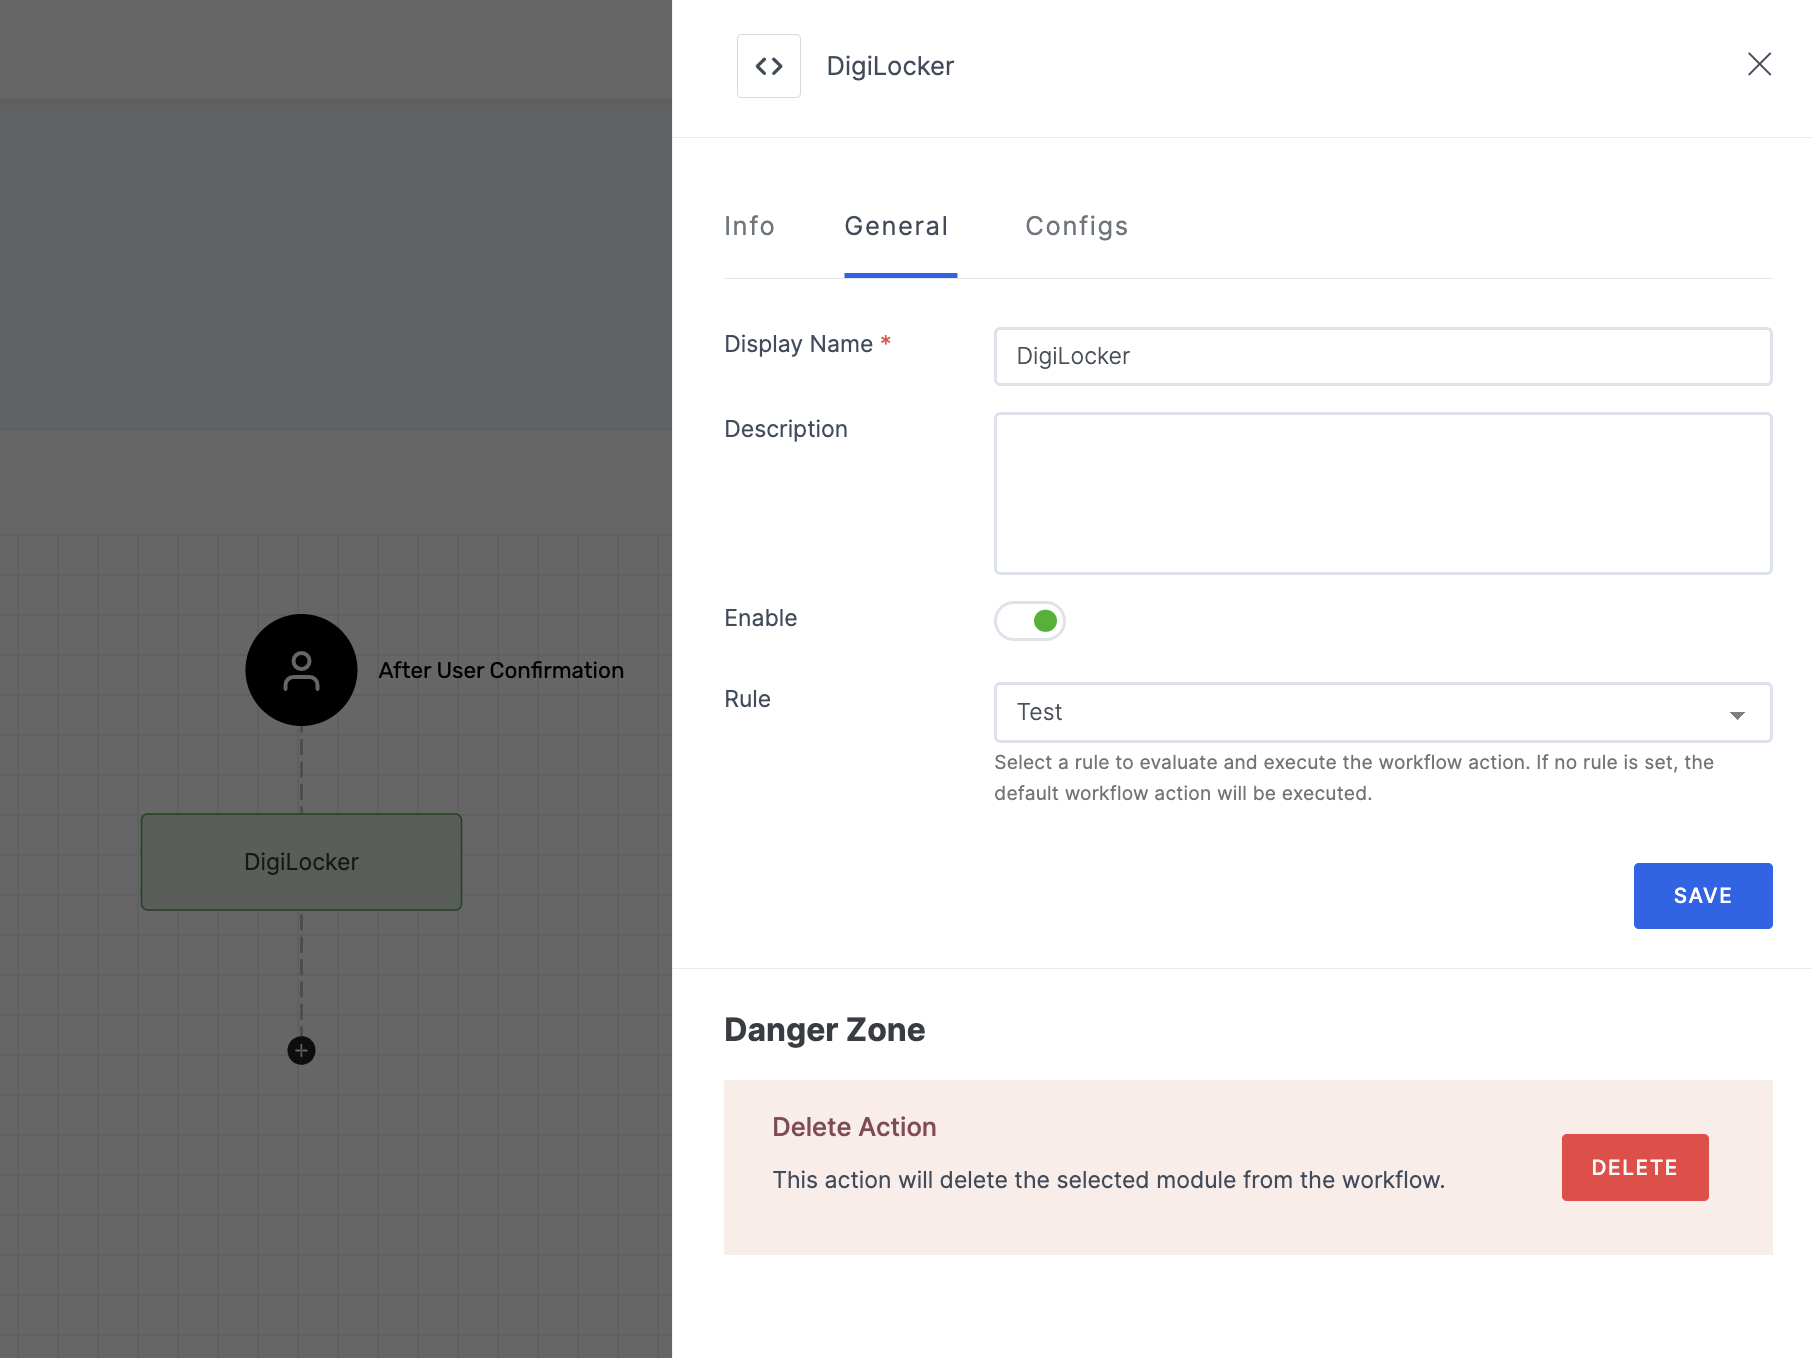
Manage General
(*) Indicates an action to be mandatory.
| Name | Description |
|---|---|
| Display Name* | Set a name to the workflow for easy identification. |
| Description | Summarize the purpose and functionality of this workflow module. |
| Enable | This toggle is enabled by default. When enabled, the particular workflow module begins its execution. Conversely, if disabled, the workflow module remains inactive and won't proceed. |
| Rule | This determines the criteria for triggering the particular workflow module. When the selected rule is evaluated, and is satisfied, the workflow proceeds as provided. If not, the workflow will not be executed. Note: If no rules are set, the workflow defaults to its standard action without any rule. For more information about the rules, refer here. |
4 Then, click on the Configs tab to set the necessary configurations.
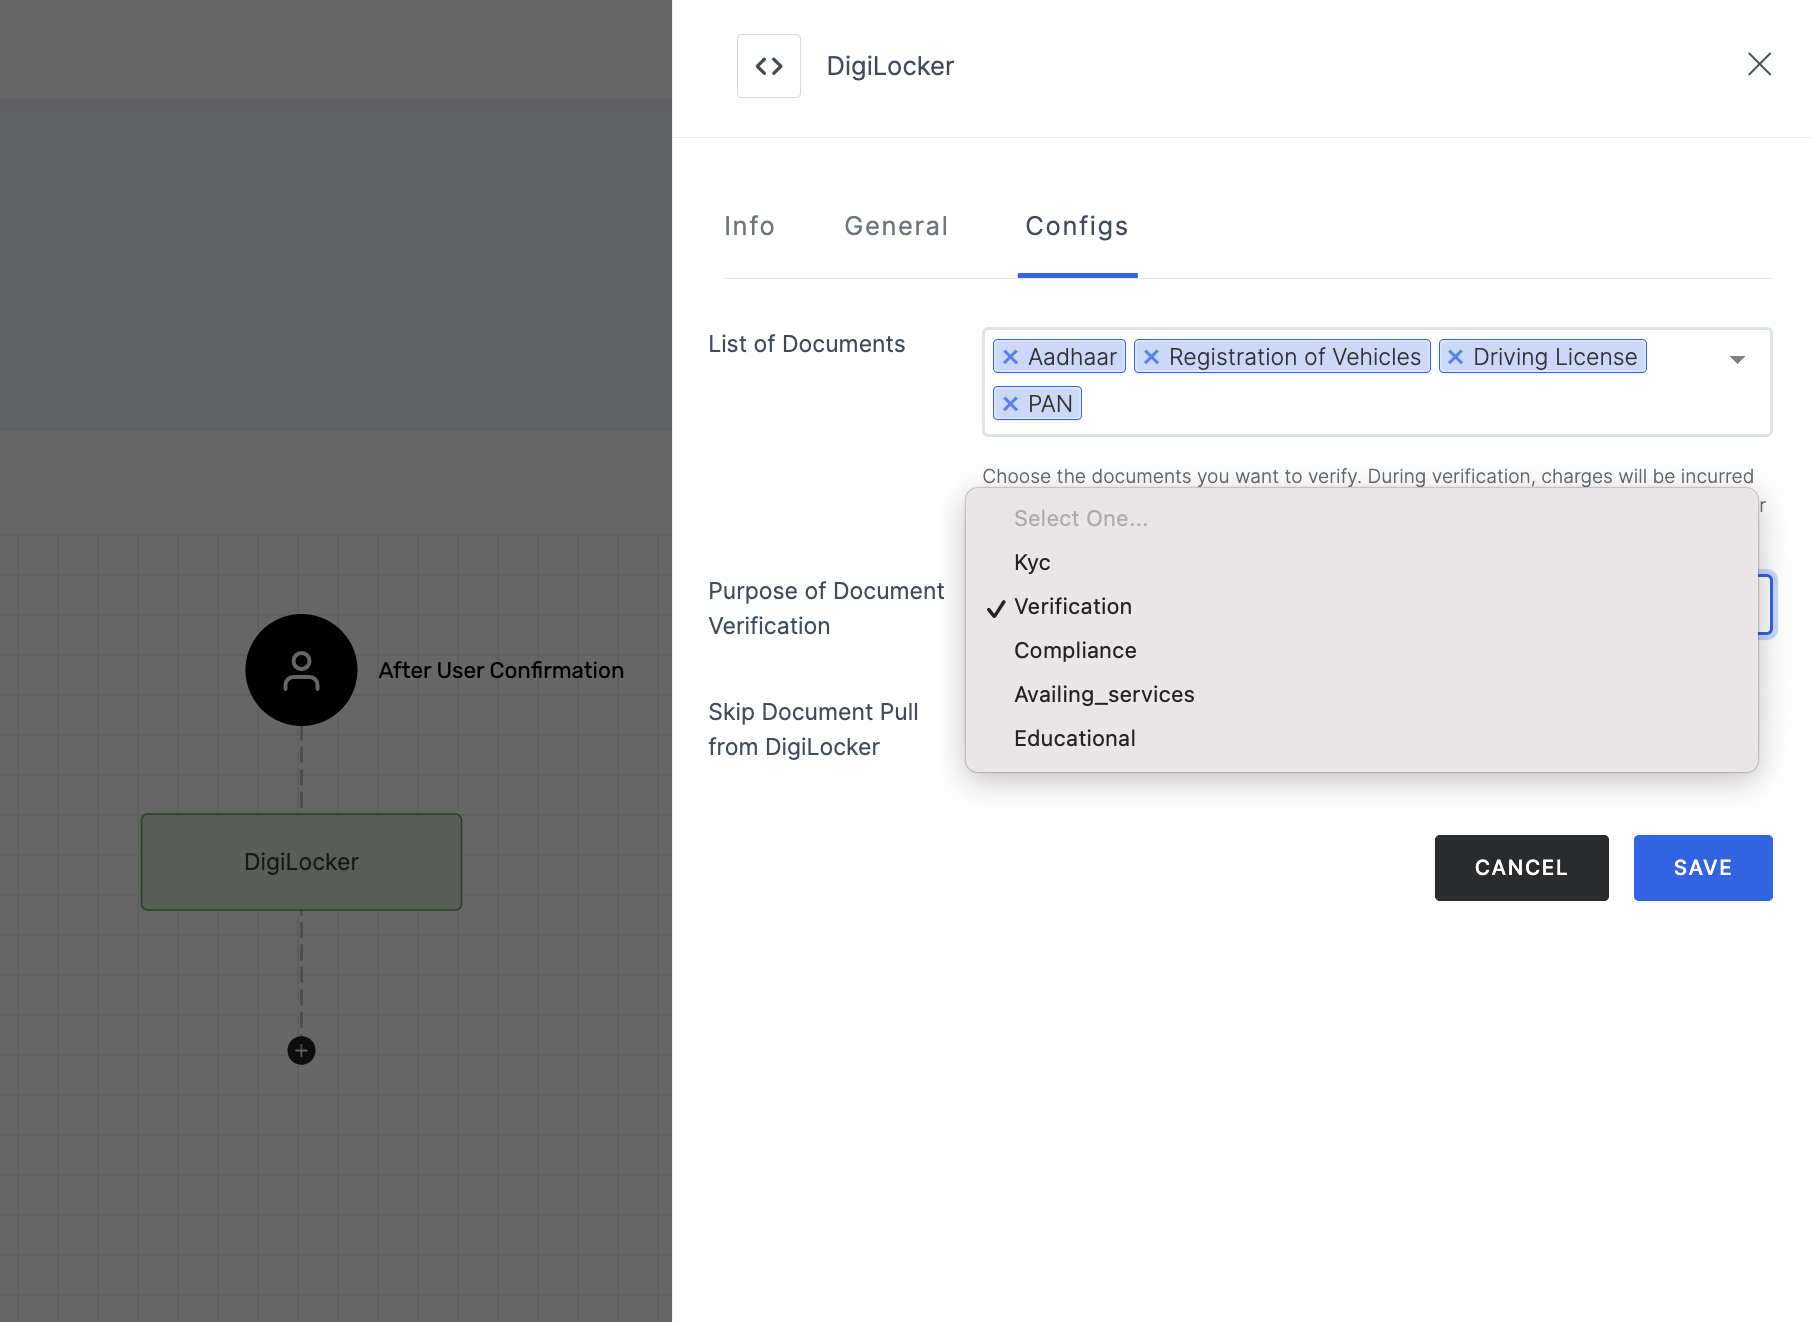
Manage Configs
(*) Indicates an action to be mandatory.
| Name | Description |
|---|---|
| List of Documents | From the drop-down, select the documents you want to verify. The available options are Aadhaar, Registration of Vehicles, PAN, and Driving License. Note: Registration of Vehicles is applicable only for Tamil Nadu state. |
| Purpose of Document Verification | Choose the purpose for verifying the documents in DigiLocker, based on the following:
|
| Skip Document Pull from DigiLocker | Enable this toggle to avoid attempting to fetch documents that are not available in DigiLocker, reducing unnecessary fetch attempts. |
| Error Codes | For error codes related to DigiLocker, see here. |
5 After you've configured everything needed, click on SAVE.
6 Proceed to attach the workflow to the relevant application for execution. Refer to the instructions on how to attach a workflow to an application here.
Expected Result
Based on the provided configuration, the information that will be fetched for DigiLocker includes the following parameters:
| Name | Description |
|---|---|
digilocker_verification_completed_at | This provides a timestamp, in Unix epoch format, indicating the exact time when the DigiLocker verification was completed. This allows you to know precisely when the verification event occurred. |
digilocker_verification_completed | This denotes whether the DigiLocker verification is completed. The value will be "True" if the verification is successfully completed and "False" if it is not. |
The response received will include the accurate information mentioned above. Note that, the response values can vary depending on the specific workflow modules.
Expected Errors
Based on the provided configuration, errors can occur during the DigiLocker verification process. Below are the categorized errors and their respective triggers.
1 Failure Triggers
These errors are triggered primarily due to user actions or interruptions during the flow:
| Error Key | Failure Status | Description |
|---|---|---|
digilocker_error | DigiLocker access code not found | The DigiLocker access code could not be located. |
digilocker_error | User cancels state selection in the flow | The user cancelled the state selection process during the flow. |
digilocker_error | User cancels document pull request | The user cancelled the request to pull a document. |
digilocker_error | No user input for pull confirmation | No input was received from the user to confirm the pull document action. |
digilocker_error | User denies pull confirmation | The user declined to confirm the pull document request. |
When these above errors occur, the flow is interrupted and does not proceed further. Additionally, the
errorattribute is triggered if the user discontinues the flow entirely, with a high-level interruption indicated as "Flow discontinued by the user."
2 Claim Key
Errors under the digilocker_failed_document key are specific to document-related issues and appear in the nested response format, such as {"error": "repository_service_configerror", "error_description": "Full Name did not match with PAN Data [#ISR400]"}. These errors do not interrupt the flow but are added as claims in the result.
| Error Key | Document Type | Description |
|---|---|---|
digilocker_failed_document | DRVLC | Occurs when the user cancels the state selection process for a Driving License (DL). |
digilocker_failed_document | DRVLC & PANCR | Occurs when the user cancels the request to pull a document (i.e, Driving License or PAN). |
digilocker_failed_document | DRVLC & PANCR | Occurs when an error is encountered while attempting to pull the document (Driving License or PAN) from DigiLocker. |
Note that, none of the attributes
digilocker_error,digilocker_failed_document, orerrorare included in validator claims by default. They are dynamically added only when an error occurs during the flow. If the flow completes successfully, these attributes will not be present in the response. If you wish to fetch the errors for any specific flow, use the format${digilocker_error.error_description}and${digilocker_error.error}.
How it Works
1 Launch Postman or your preferred API tool and execute the flow by configuring the suitable Method, URL, and Body settings. If you're seeking guidance on how to perform these actions, see here.
2 Upon initiating the API call, a verification request will be sent to your configured Verification Way settings.
3 Based on the request, execute the flow in an incognito browser and follow the prompts to complete the verification process.
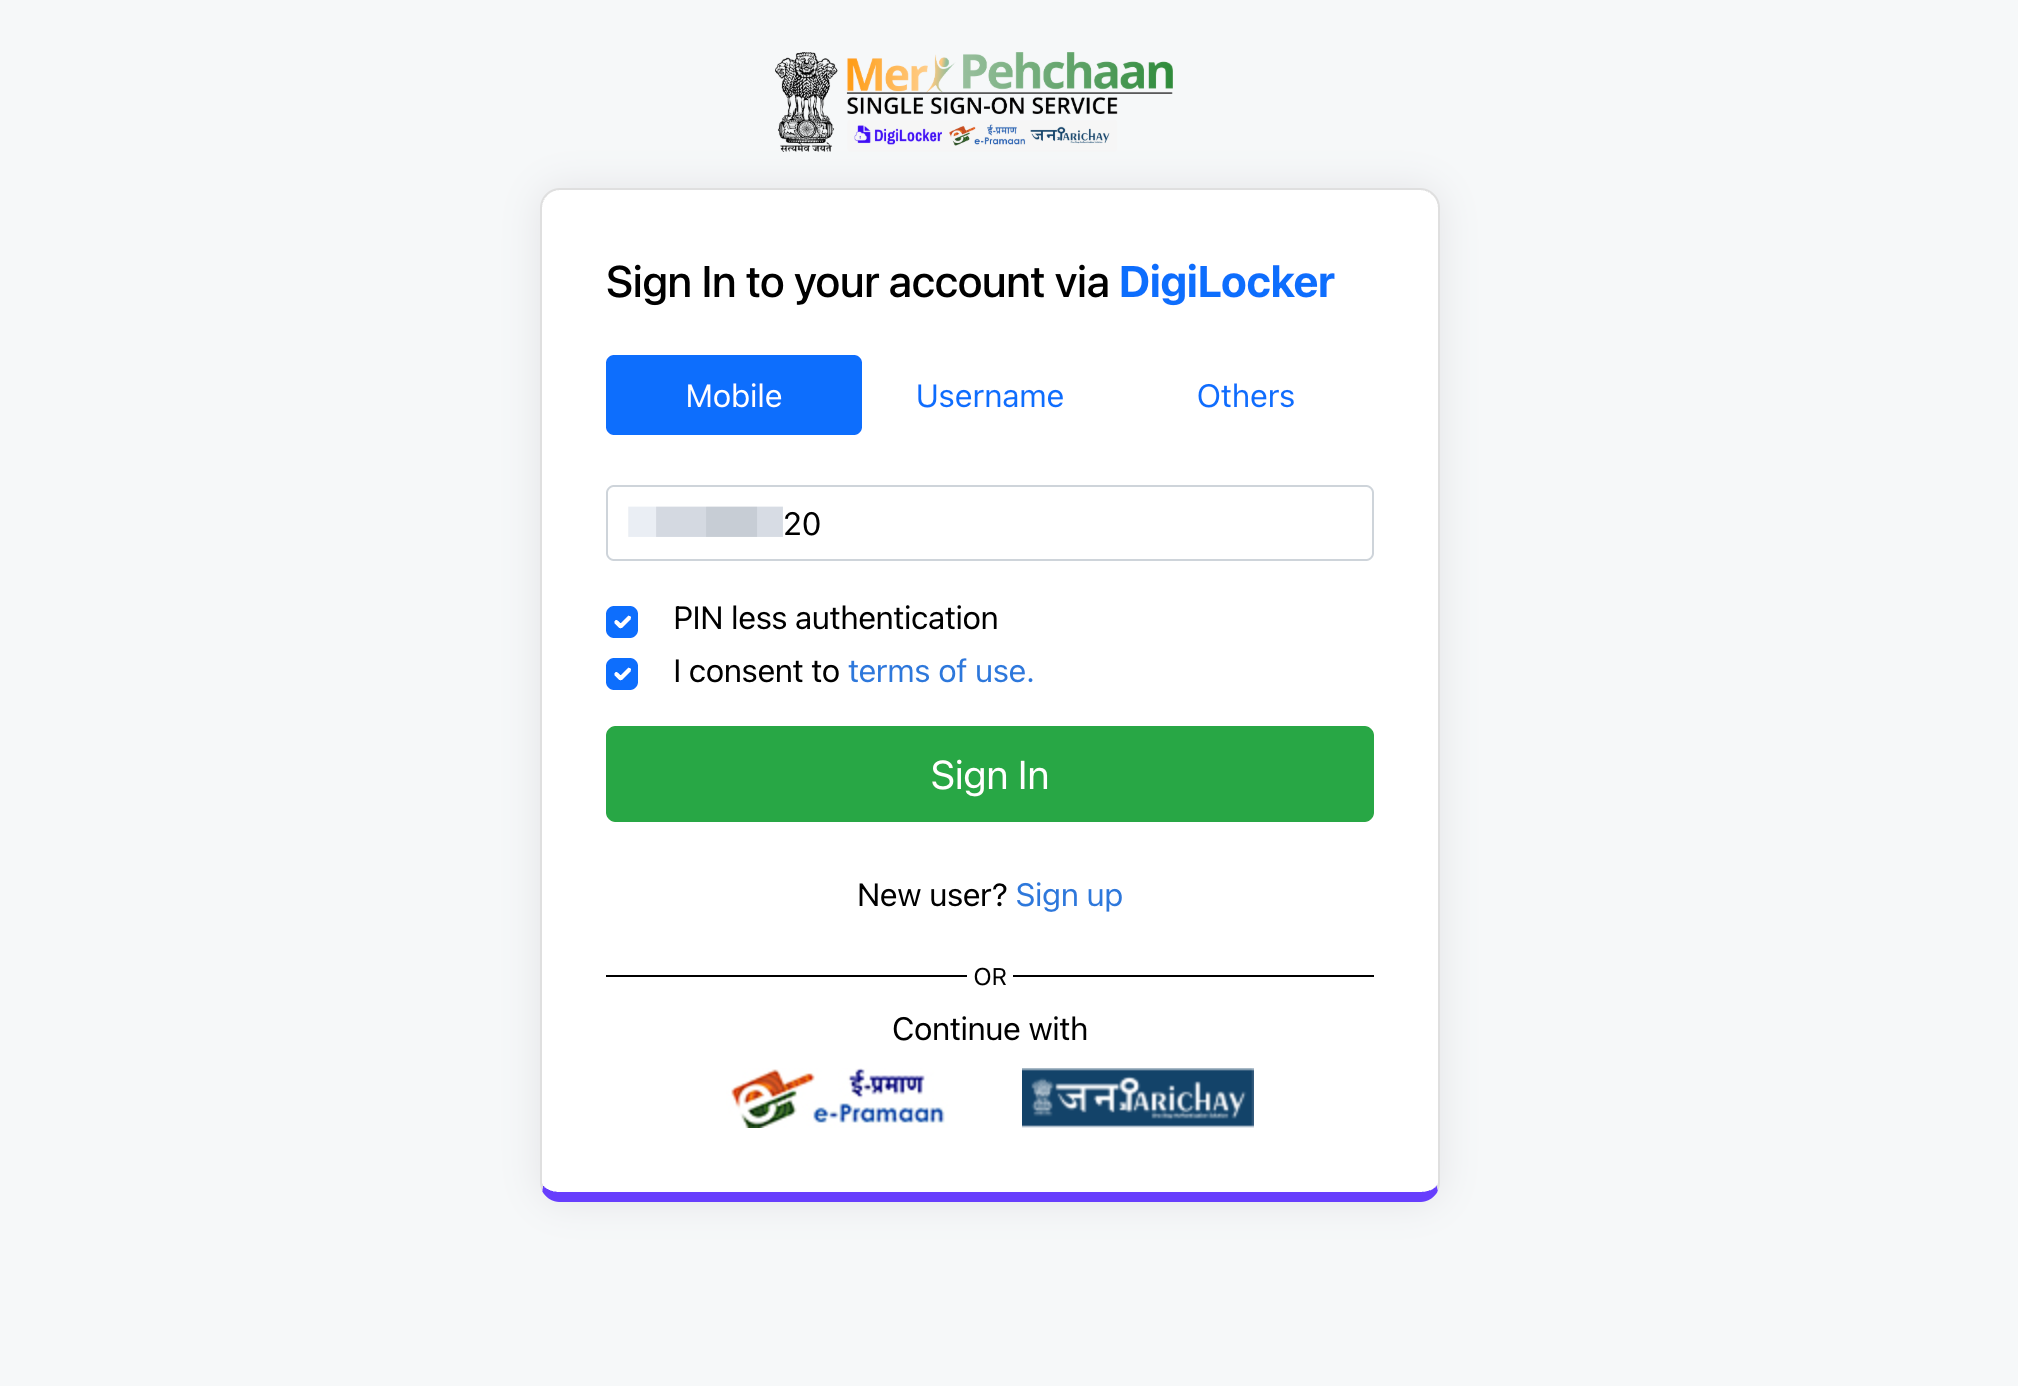
4 Sign in to your DigiLocker account using your preferred method to proceed with the process.
5 The documents you selected, along with other basic details, will be displayed. The purpose of the flow will also be shown here.
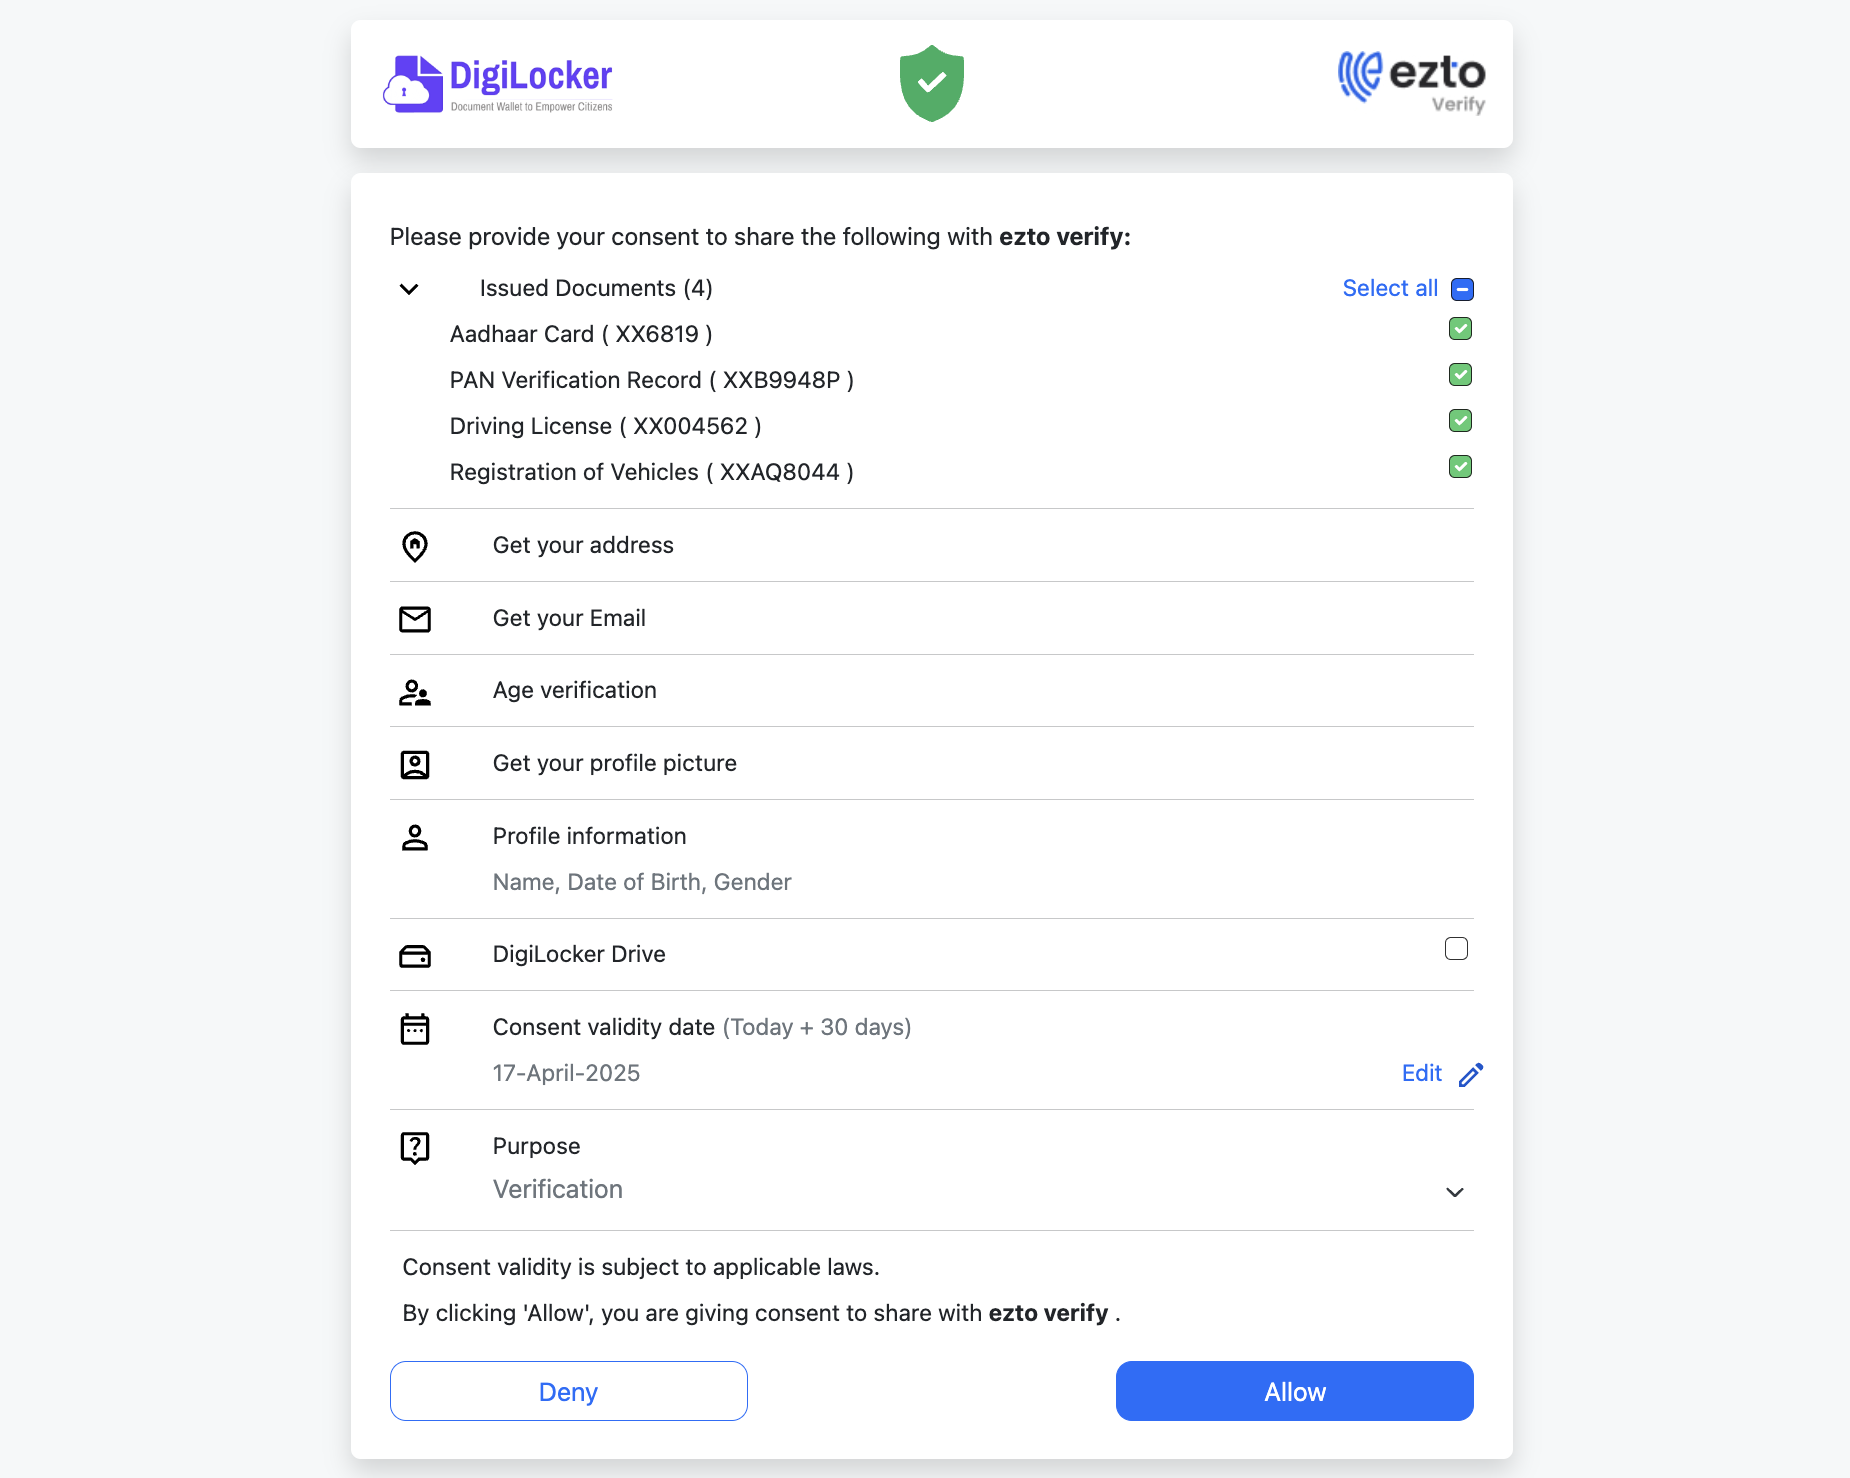
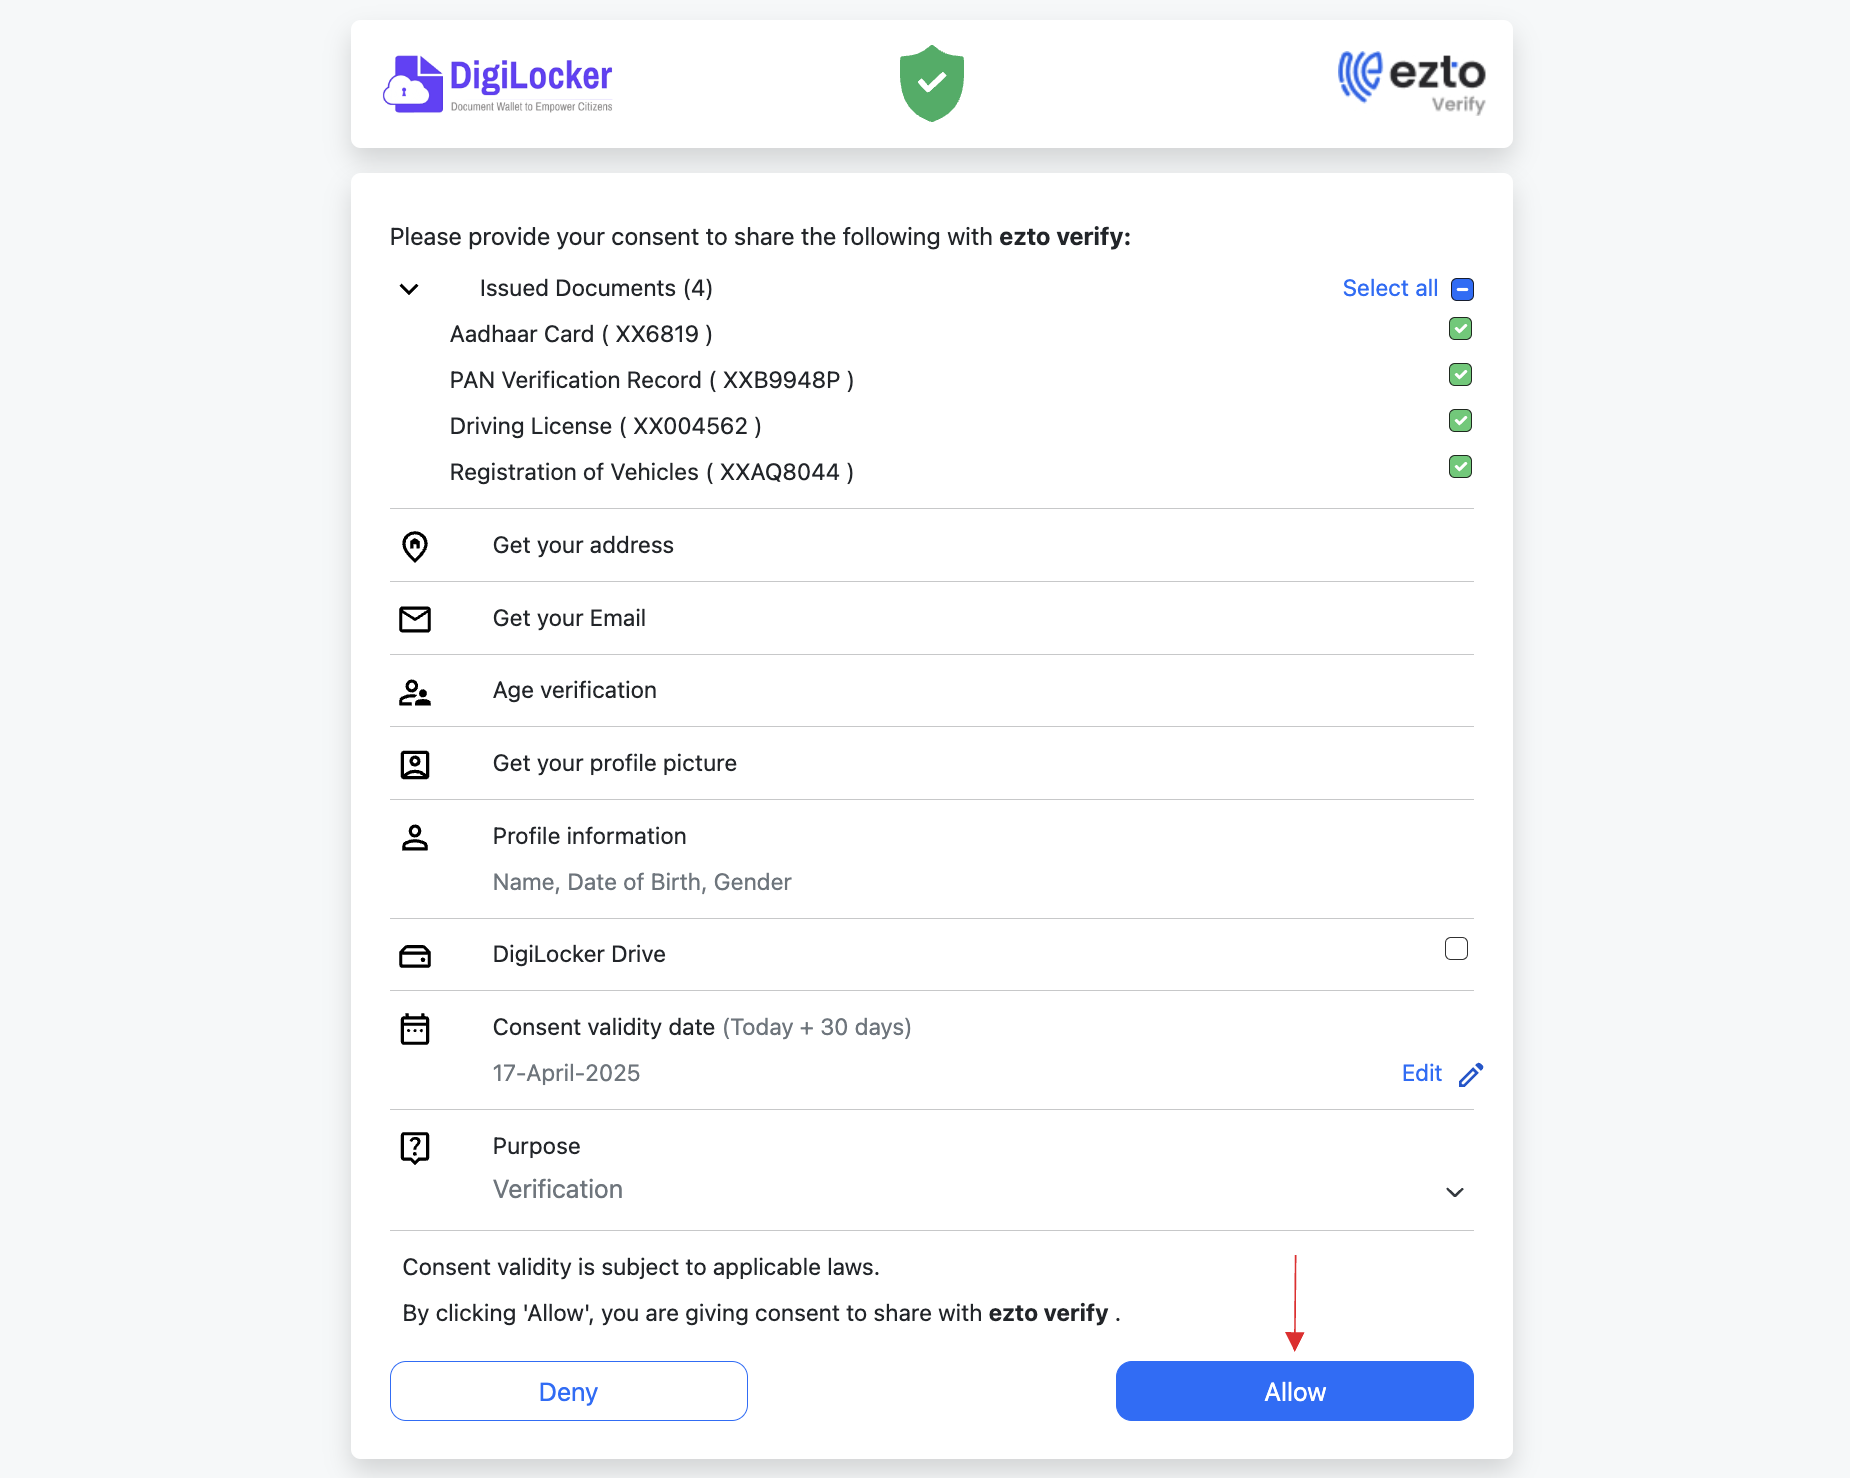
6 Provide your consent to proceed by clicking the Allow button.
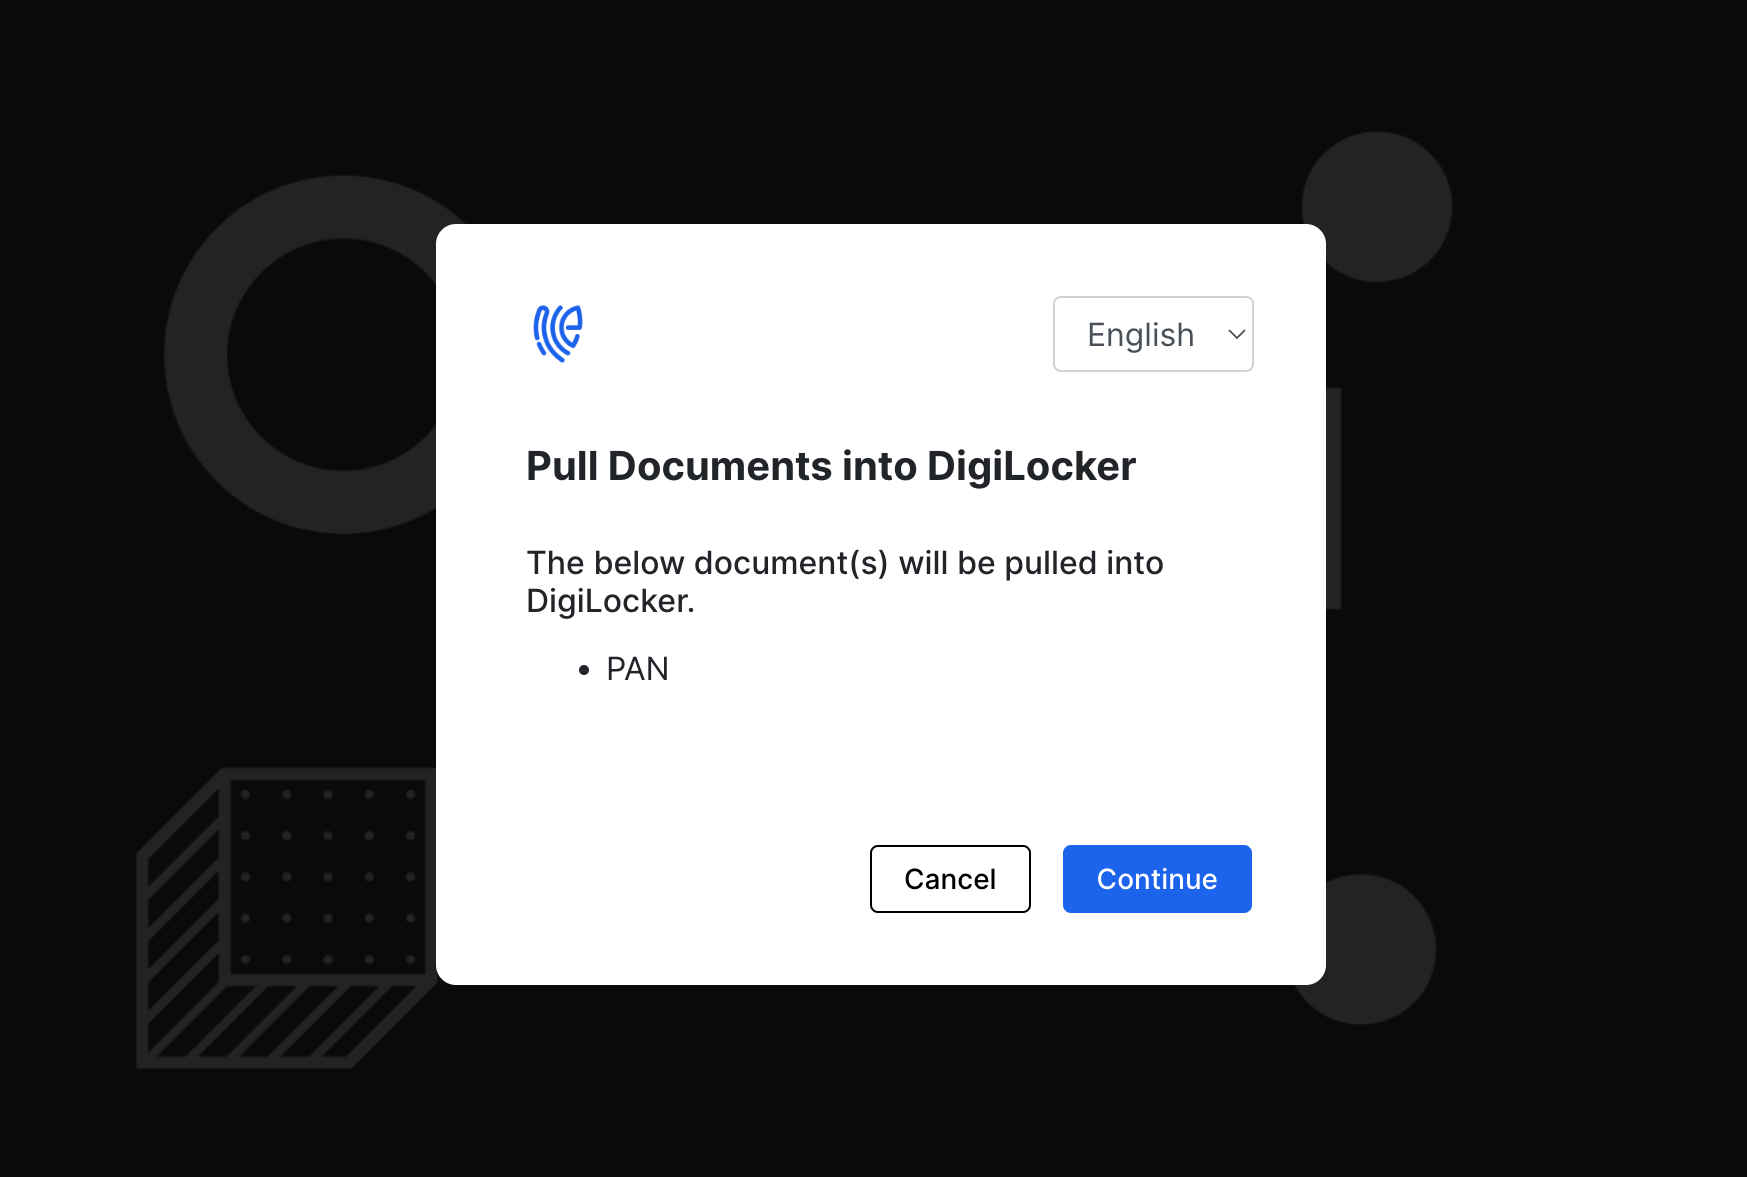
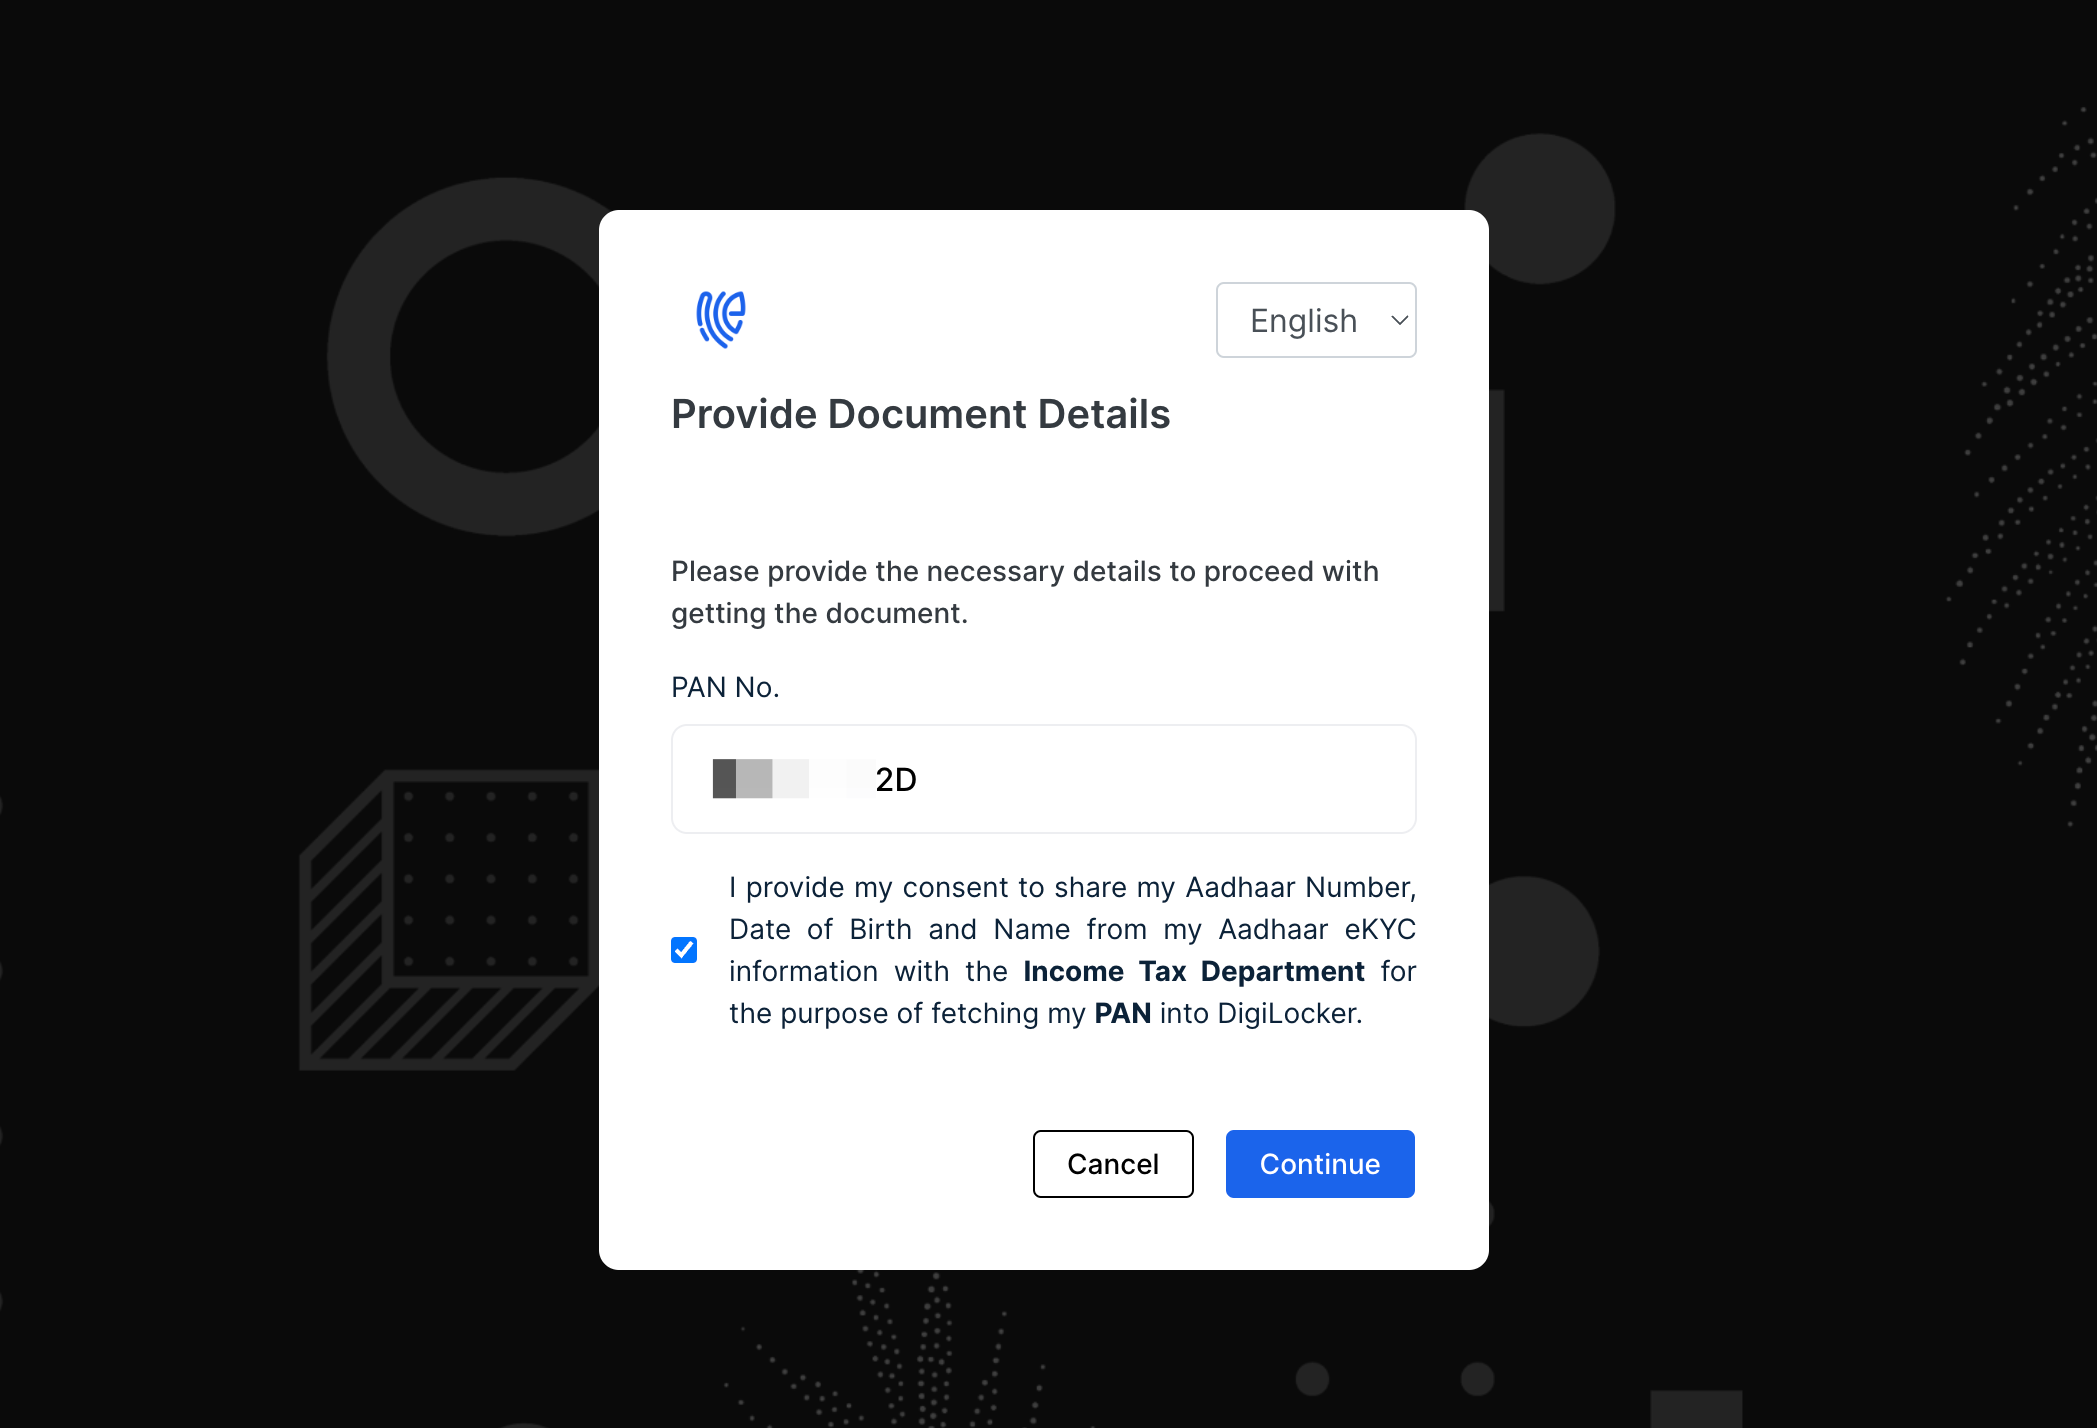
7 If the requested document is not found in your DigiLocker, you will be prompted to add the document by providing specific details. Once the details are entered, the document will be automatically added to your DigiLocker, and the relevant claims will be displayed. For example, if the PAN document is not available, you will need to provide the required information.
8 You will be asked to pull the document into your DigiLocker. Click Continue to proceed with this step.
9 Enter the PAN number, give your consent, and click the Continue button to complete the process.
10 The verification process will be completed.
If "force onboarding" is enabled in the API request, all users, regardless of status, will be directed to the onboarding flow first, followed by the verification flow if configured.
11 The response can differ depending on the chosen Verification Way and Notification Way configurations. To know more, see here.
12 Here is a sample response for DigiLocker:
{
   "workflow": "verification",
   "request_id": "xxxxxxxx-xxxx-xxxx-xxxx-xxxxxxxx",
   "user_id": "mark@gmail.com",
   "digilocker_verification_completed_at": "1734519961301",
   "driving_license": "{xxxxxxxxxxxxxxxxxxxxx}",
   "aadhaar": "{xxxxxxxxxxxxxxxxxxxxx}",
   "pan": "{xxxxxxxxxxxxxxxxxxxxx}",
   "registration_of_vehicles": "{xxxxxxxxxxxxxxxxxxxxx}",
   "digilocker_verification_completed": "true/false"
}