Web
Verification via the Web involves the process of verifying a user's identity using web-based methods and protocols. This typically involves users providing their credentials, such as usernames and passwords, through a web interface to gain access.
Every application execution requires an Onboarding and Verification workflow. The onboarding workflow (can be any) will be used for a new user. You can configure it as "None" for a user who has already been onboarded. Please note that selecting the "None" option for the onboarding workflow will automatically redirect the user to the verification workflow, irrespective of the users availability.
Access Application
1 Navigate to Workspace, and click on Applications.
2 Choose the application you wish to execute the flow with configuration as Web.
3 Click on the Configuration tab, and select Web in the Verification Way.

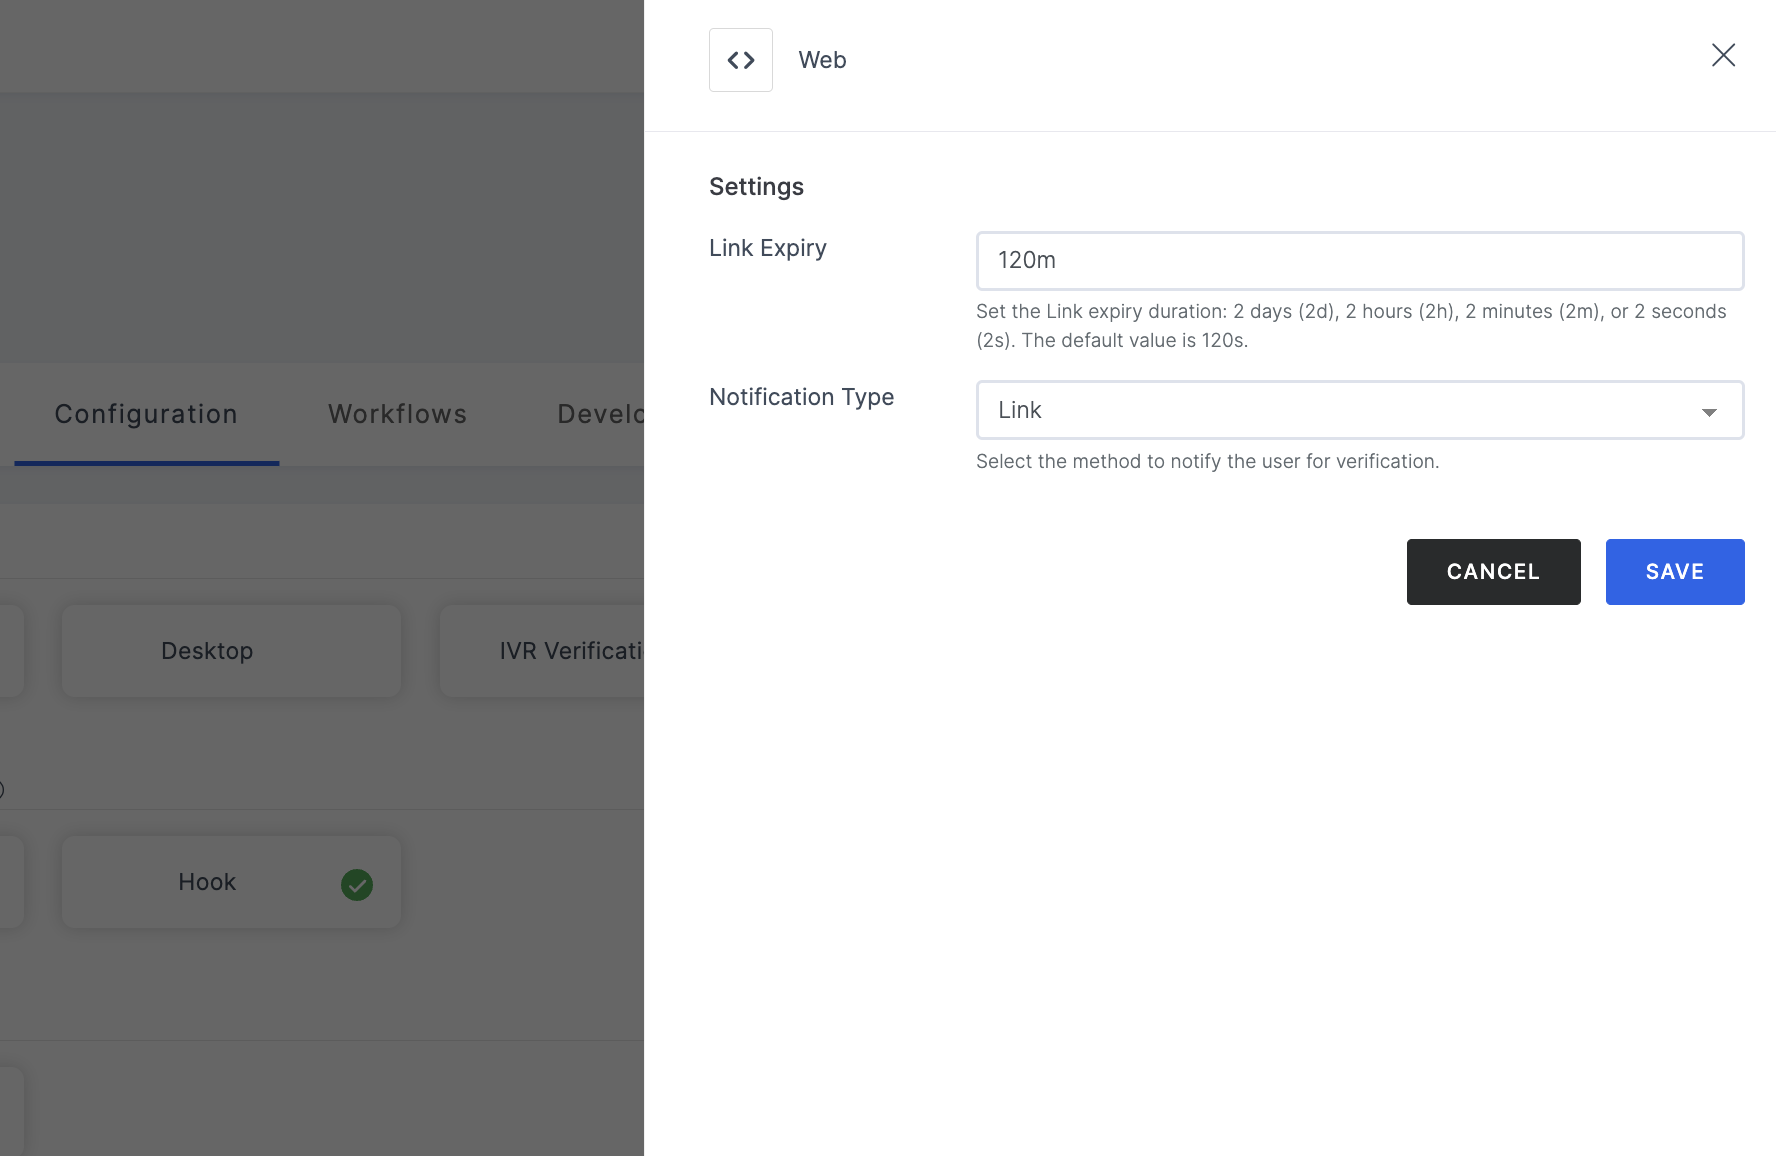
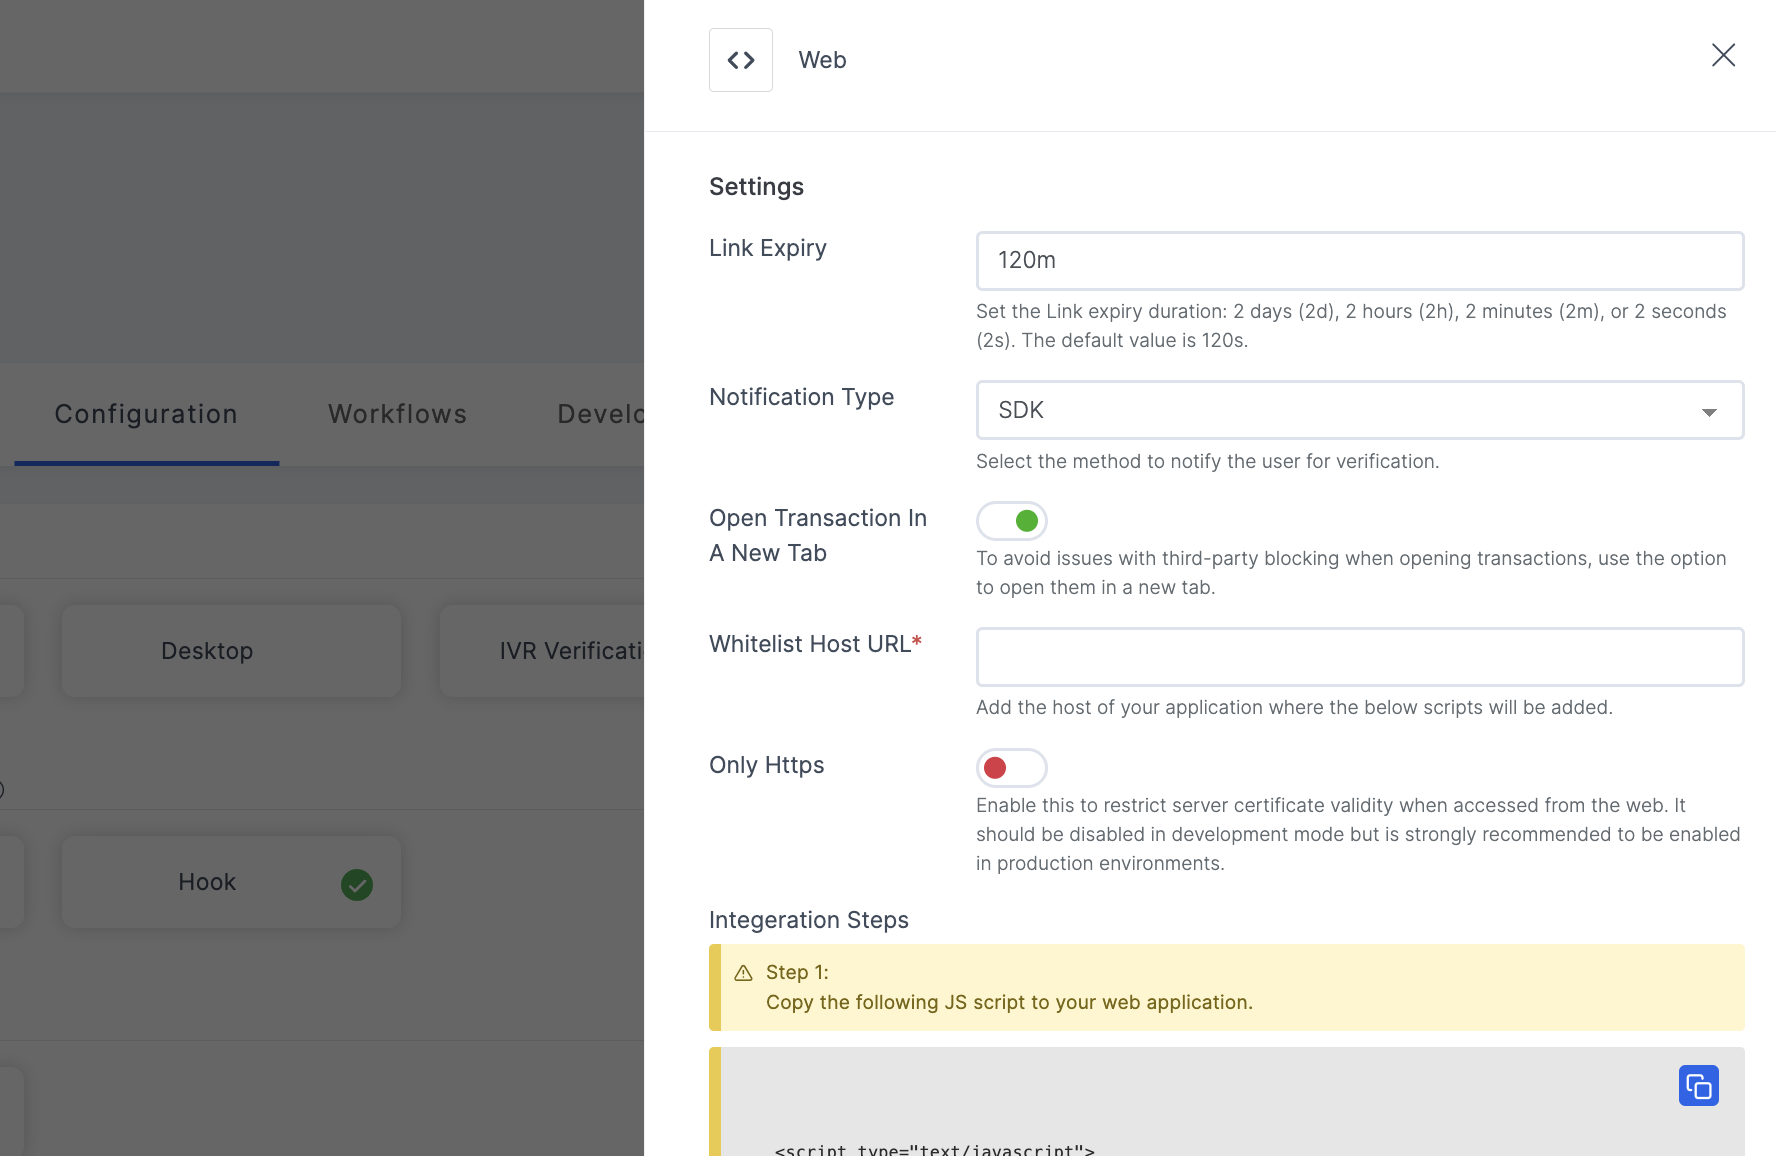
4 You will be displayed with default settings, i.e, Link Expiry and Notification Type, you can select your preferred Notification Type from the drop-down and based on the chosen, the configurations will vary.
There is currently five methods of Notification Type available for "Web" Verification Way.
- SMS
- Link
- SDK
If this method is selected as the Notification Type, an email containing the transaction link will be sent to the provided email address.
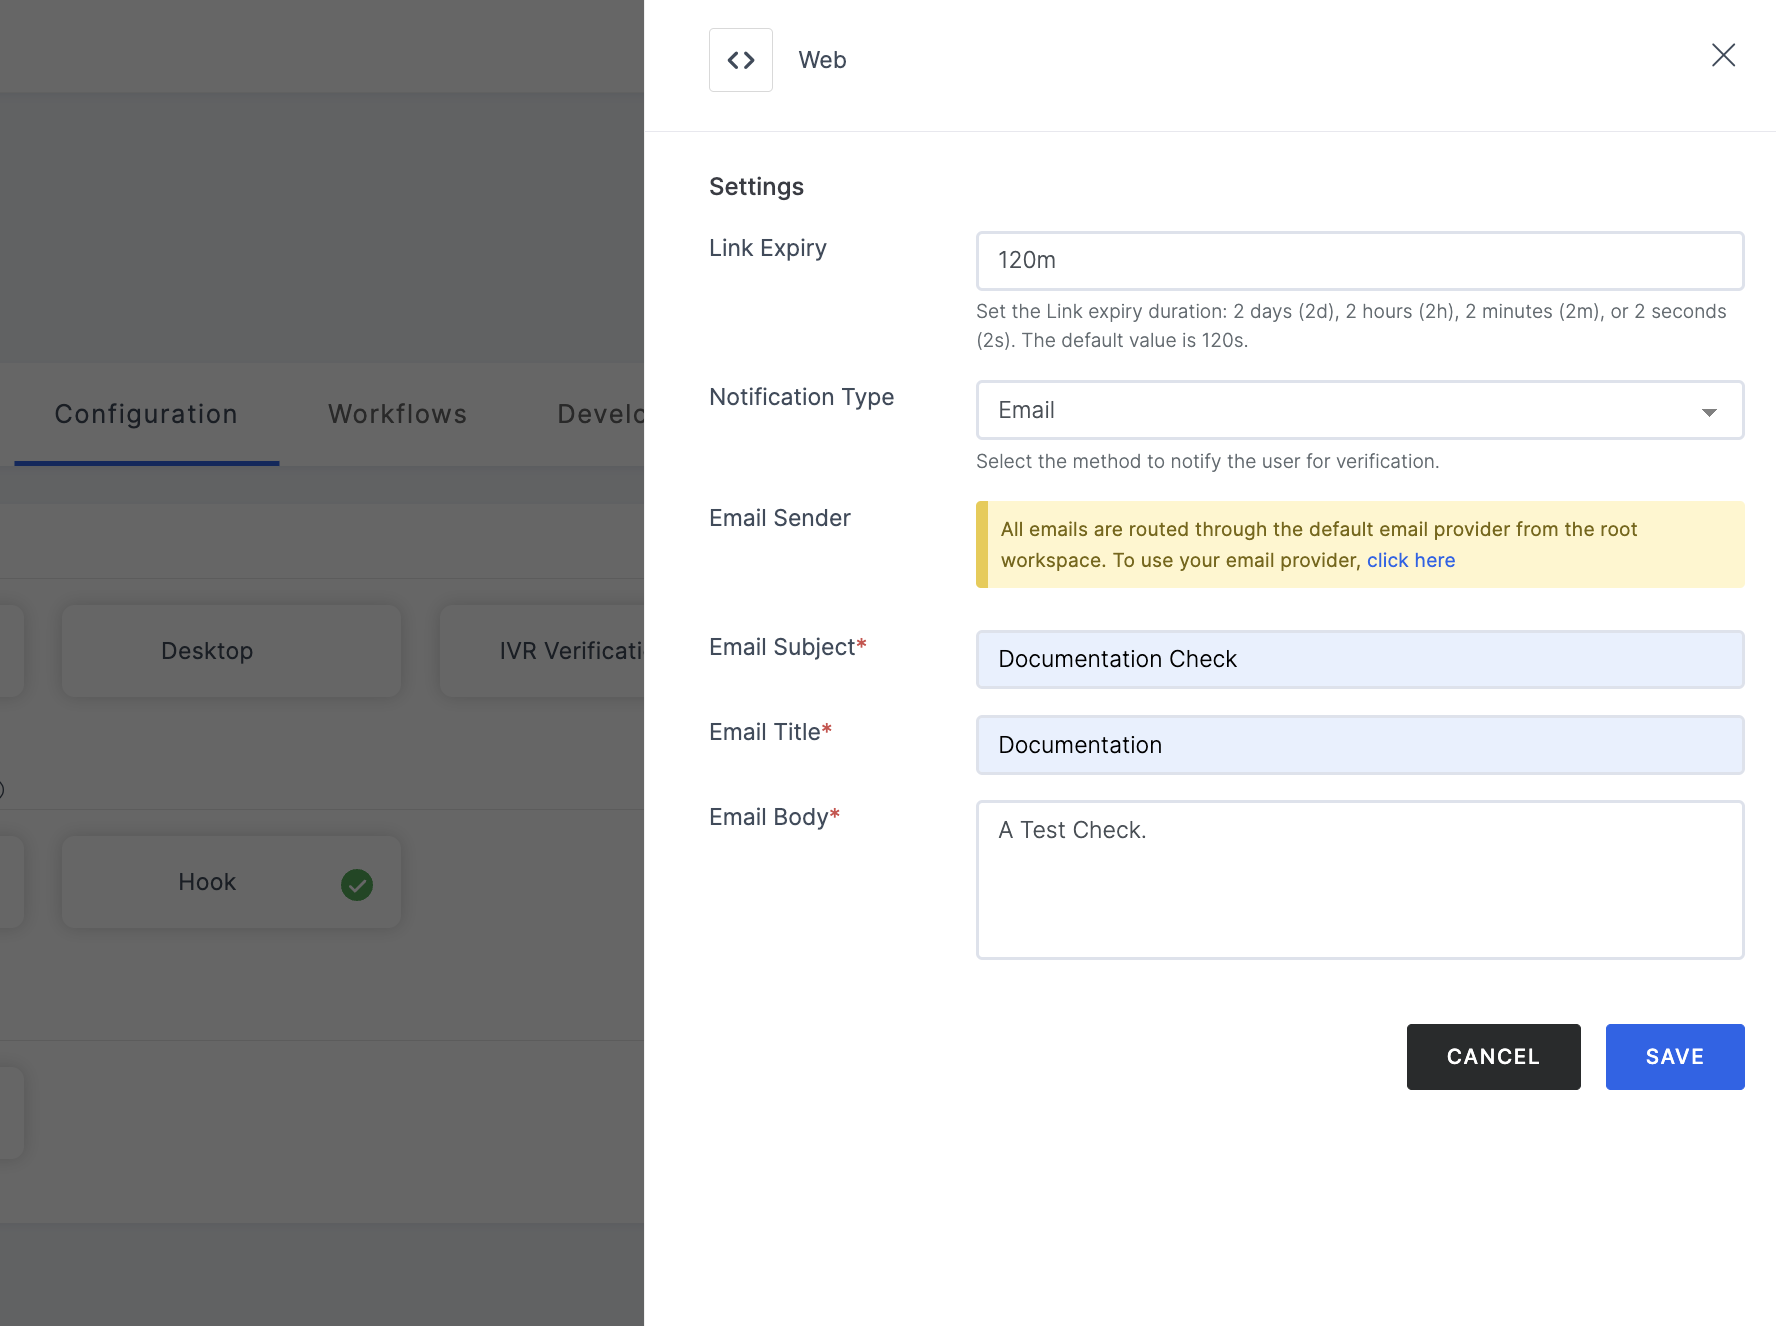
Email settings
(*) Indicates an action to be mandatory.
| Name | Description |
|---|---|
| Email Sender | The default email provider will be pre-configured. If you wish to use a custom provider, please refer here. |
| Email Subject* | Provide the subject of the email. |
| Email Title* | Title of the email. |
| Email Body* | Body of the email. |
If this method is selected as the Notification Type, a transaction link will be sent through text message (SMS) to the provided phone number.
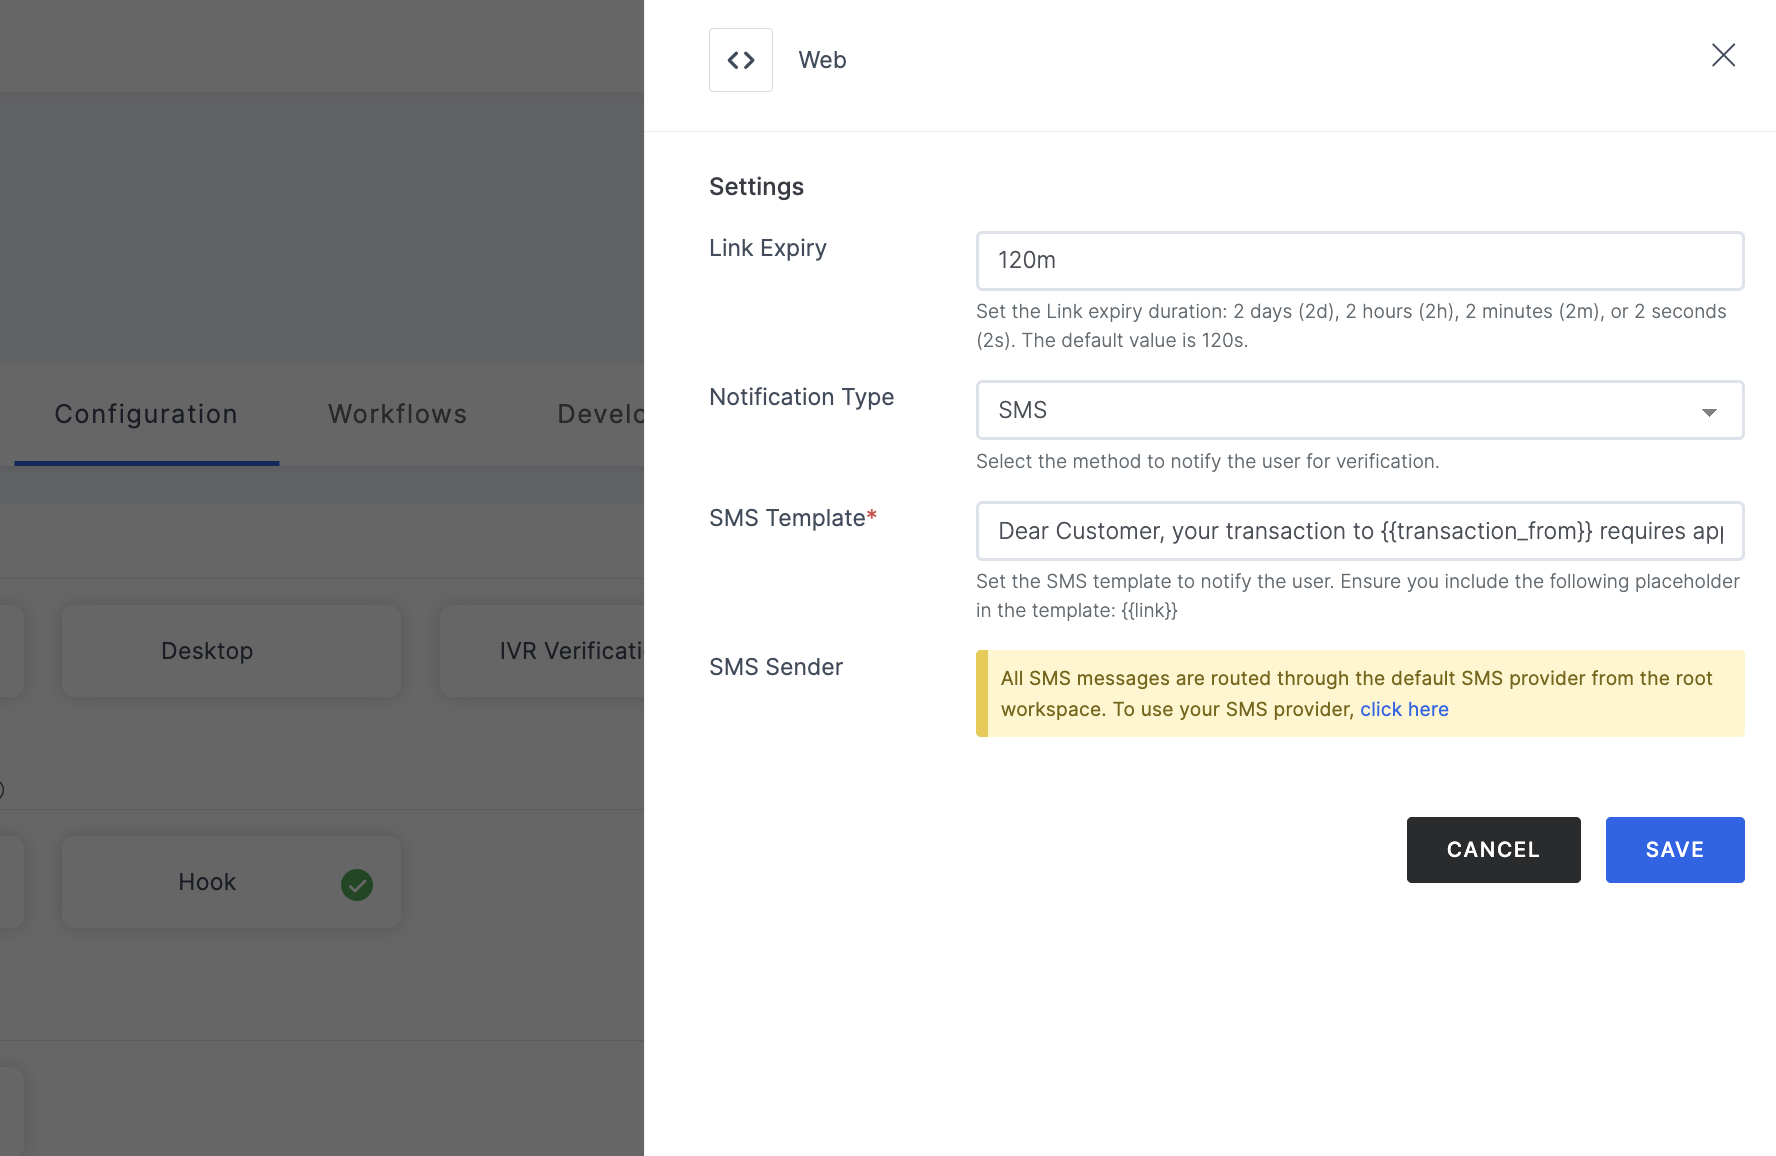
SMS settings
(*) Indicates an action to be mandatory.
| Name | Description |
|---|---|
| Sms template* | Set SMS template which will be formatted to notify user. Ensure add following placeholder in template here. |
| SMS Sender | The default SMS provider will be pre-configured. If you wish to use a custom provider, please refer here. |
If this method is selected as the Notification Type, the transaction link will be sent via the provided WhatsApp number.
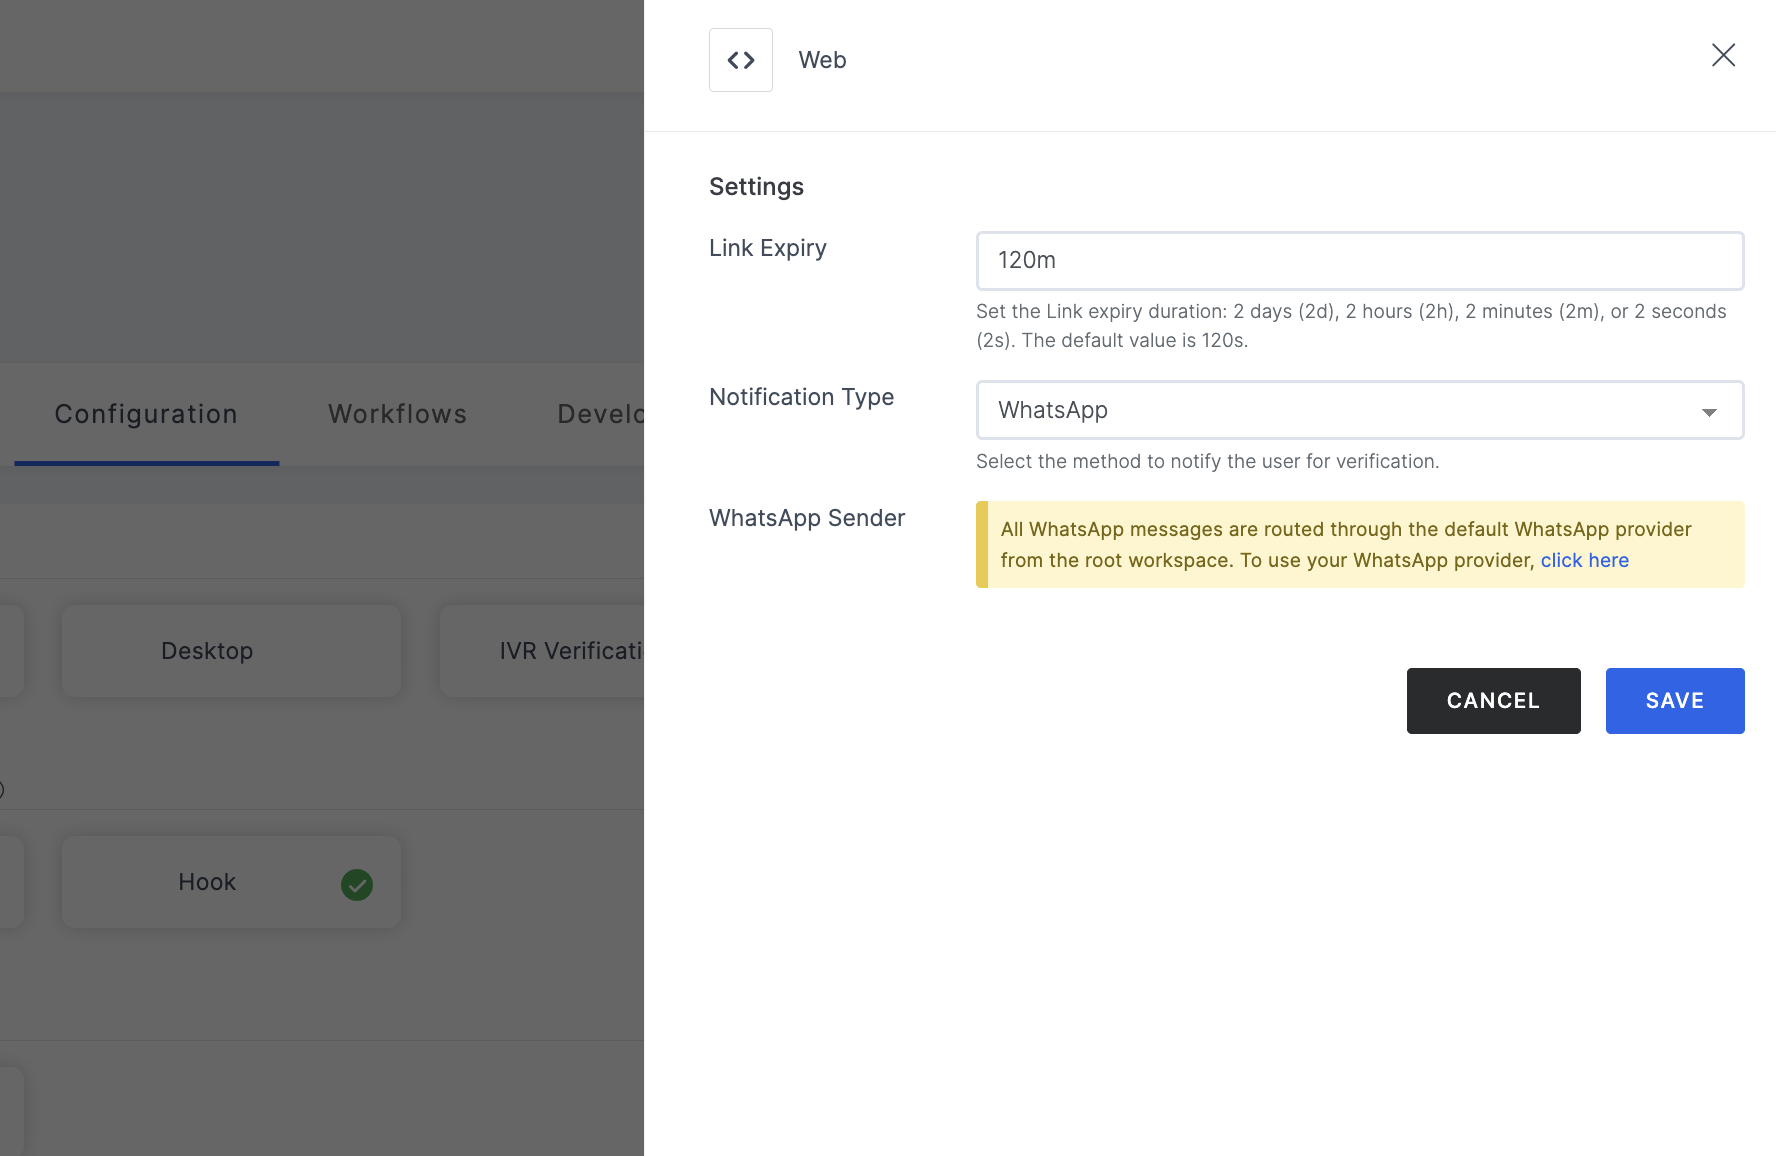
Whatsapp settings
| Name | Description |
|---|---|
| WhatsApp Sender | The default whatsapp provider will be pre-configured. If you wish to use a custom provider, please refer here. |
If this method is selected as the Notification Type, the transaction link will be provided in the API.
This is used when SDK is set as Hook in the Result Notification Way.
SDK settings
(*) Indicates an action to be mandatory.
| Name | Description |
|---|---|
| Open Transaction In A New Tab | Use the option to open transactions in a new tab to avoid issues with third-party blocking. For Passkeys, when a transaction is opened in a new tab using the web SDK, it relies on the Related Origin Request (ROR). This feature is supported only in the latest versions of browsers and is not compatible with Firefox. |
| Whitelist Host URL* | Add the host of your application where the below scripts will be added. |
| Only HTTPS | Enable the restriction of server certificate validity when accessed from the web. Disable for development mode; strongly recommended to enable in production environments. |
5 After configuring the required Verification Way, ensure to SAVE the configurations.
6 Then, configure the Result Notification Way. This is necessary to proceed further in order to obtain the desired result or response. To know in detail, see here.
How it Works
- Make sure your required workflow is set before starting with the execution process in order to get the expected result.
- To initiate the execution process, go to the How to use? tab within the Application. You'll see the steps laid out for you to follow using the cURL commands, or can simply test the flow using the test mode.
1 Launch Postman or your preferred API tool and execute the flow by configuring the suitable Method, URL, and Body settings. If you're seeking guidance on how to perform these actions, see here.
2 Upon initiating the API call, a verification request will be sent to your configured Verification Way settings.
3 Based on the request, execute the flow in an incognito browser and follow the prompts to complete the verification process.
4 After completing the verification process, view the exact response type for the configured Result Notification Type, refer here.
Note that, the results will be different based on the configured Result Notification Type.
5 To view a sample response for Web Verification Way, refer to our API Builder.