How to Integrate - Web
Integrating web applications with the ezto verify's Web SDK, a service used for identity verification and fraud prevention, involves several key steps to ensure a seamless and secure user experience.
Prerequisites
- Ensure you have the necessary SDK scripts.
- Make sure all frameworks are updated to their latest versions.
- You must have a workflow and application already set up.
1 Setup Workflow
Make sure to have a workflow configured in your Workspace to be executed. This guide uses Biometric as an example workflow.
1 Navigate to Workspace > Workflows, and create a new workflow for Verify Email. If you need understanding in creating a workflow, refer to the step-by-step guide here.
2 Hover over the plus (+) symbol and select Workflow. From the list, click Verify Email to add it.

3 Click on the newly added workflow, then select the General tab to customize your preferences.
4 Then, click on the Configs tab to set the necessary configurations.
5 After you've configured everything needed, click on the SAVE button.
6 Proceed to attach the workflow to the relevant application for execution.
7 Go to Applications and choose the application that is configured for this integration. Please refer to the below application requirements for Web integration.
8 Proceed to attach the Verify Email. To know how, refer here.
2 Configure Application
Please ensure that your application is configured with Web as the Verification Way, using SDK for integration type, and Web SDK for the Result Notification Way.
- Verification Way
- Result Notification Way
1 Navigate to Workspace, and click on Applications.
2 Select the application you want to set up for this integration.
3 Click on application's Configurations tab and choose Web as the Verification Way.

4 Once the settings are displayed, make the necessary configurations, and then click on the SAVE button. To know more about Web, refer here.
1 Navigate to Workspace, and click on Applications.
2 Select the application you want to set up for this integration.
3 Click on application's Configurations tab and choose Hook as the Result Notification Way, the settings will open.
4 For Hook Notification Way, choose Web SDK from the dropdown.
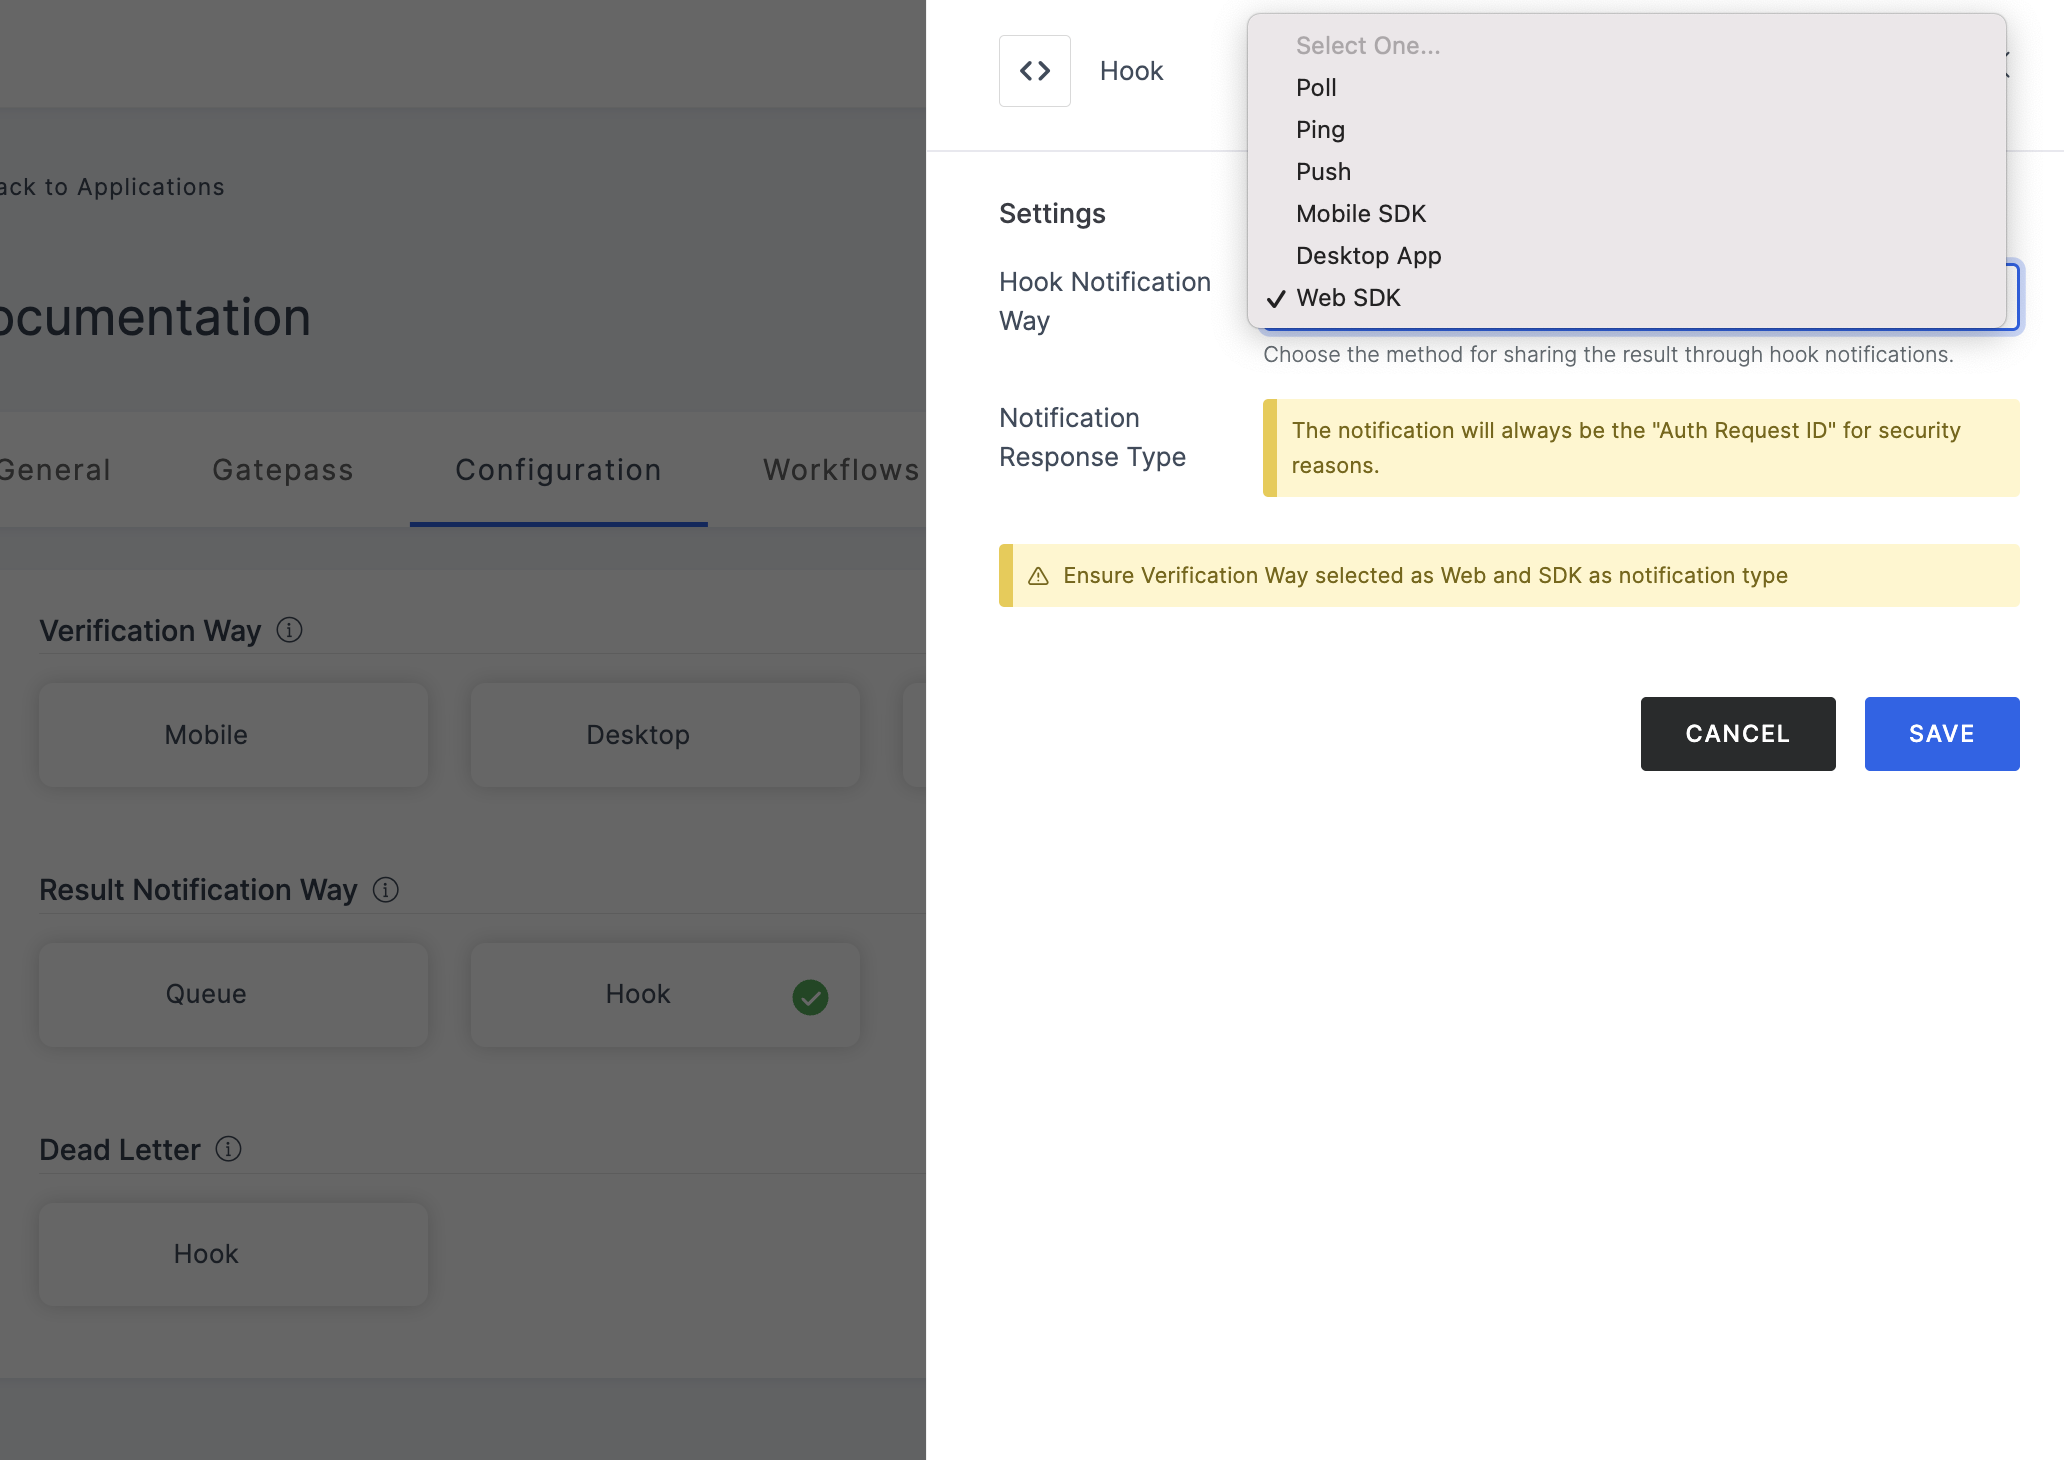
5 Configure the necessary and click on the SAVE button. To know in detail about Hook, refer here.
Once the application is set up with the appropriate configurations, proceed with the following steps.
3 Add SDK Scripts
- Add
eztoverifyandsocket.ioJavaScript bundles using CDN:
    <script src="https://cdn.socket.io/4.7.2/socket.io.min.js" type="text/javascript"></script>
    <script src="https://cdn.jsdelivr.net/gh/ezto-io/dev-web-push@latest/eztoverify.min.js" type="text/javascript"> </script>
- Add ezto verify css using tag.(or add your custom CSS.)
<link rel="stylesheet" href="https://cdn.jsdelivr.net/gh/ezto-io/dev-web-push@latest/eztoverify.min.css" />
- Initialize the ezto verify SDK in your web application:
const ez = new eztoverify();
- To start the verification in your web application, call the below function:
    ez.request({
        request: {}
    }, {
        api: "{API}"
    }, function(res) {
        // You will get the "auth_req_id" in the response callback.
    });
- To view the response, input the copied
auth_req_idinto the Get Result API.