Create Application
Design and customize your application according to your preferences, including the customization of its interface.
With ezto Verify, you can establish a verification procedure specific to meet your needs, ensuring secure interactions with users, information, and transactions. Utilize the capabilities of ezto verify to seamlessly integrate and execute verification processes, enhancing both security and user experience.
1 Navigate to Workspace, and click on Applications.
2 Click on the + CREATE APPLICATION button.
3 You will be taken to the first step, (i.e, Details) for creating an application.
1 Details
Provide a descriptive name and select the theme that suits best or click on default. Note that, if no themes are created, you can set the default theme. To know how to create a Theme, see here.
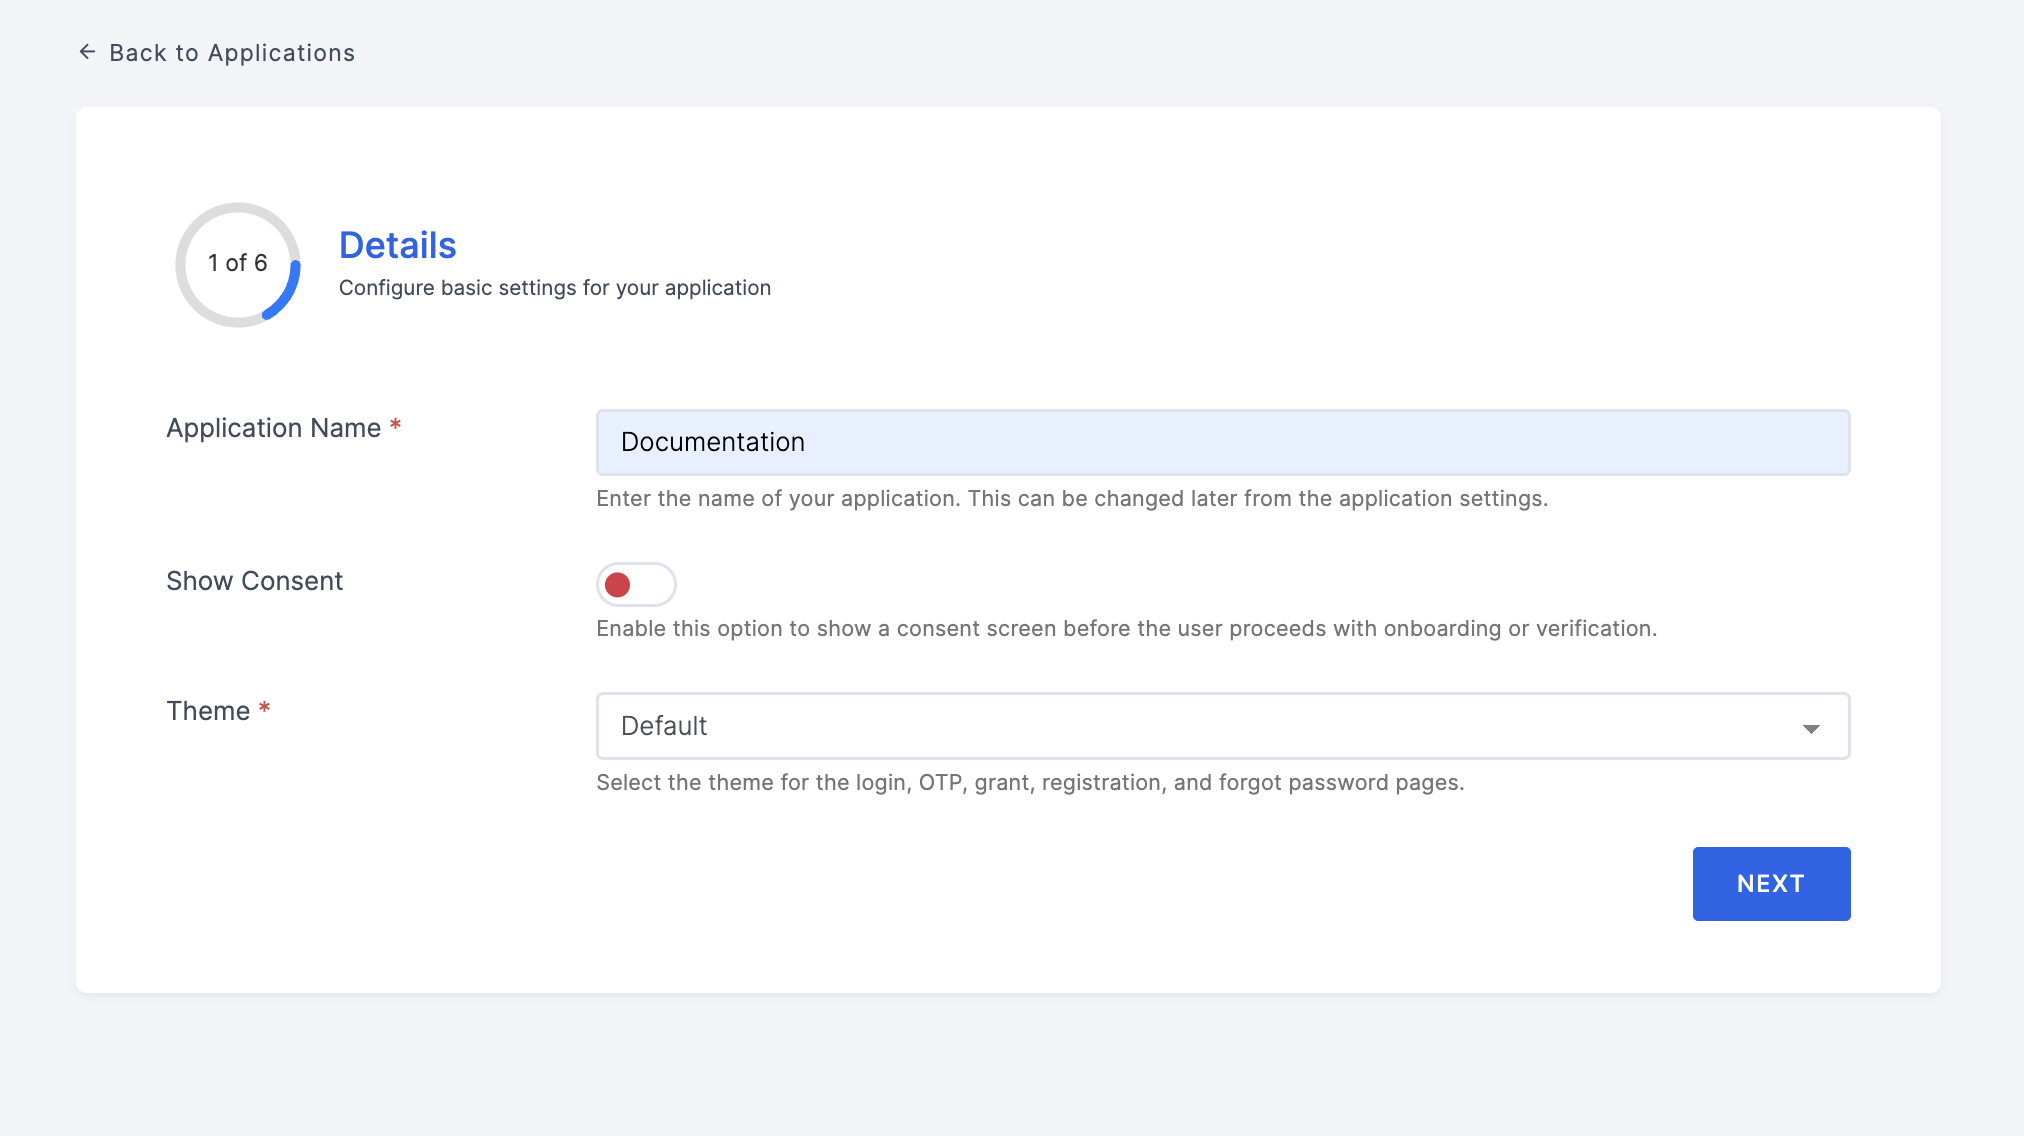
Manage Details
| Name | Description |
|---|---|
| Application Name | A name for the application. |
| Show Consent | Allow the presentation of permissions to users prior to proceeding with onboarding or verification. |
| Theme | Select a theme for the authentication page. |
Upon providing the above, click on the NEXT button to proceed to the further steps.
2 Gatepass
This section allows to set application-level rules that must be met for a transaction to be initiated. Failure to comply with these rules will result in denied user access to initiate the verification flow. To know how these rules work, refer here.

Either configure or skip the step, and click on the NEXT button to proceed to the further steps. You can always configure the Gatepass rule, even after creating the application.
3 Configurations
As the third step, you will be taken to the Configuration tab. Here, it contains Verification Way and Result Notification Way, which must be provided, as it is a mandatory step.
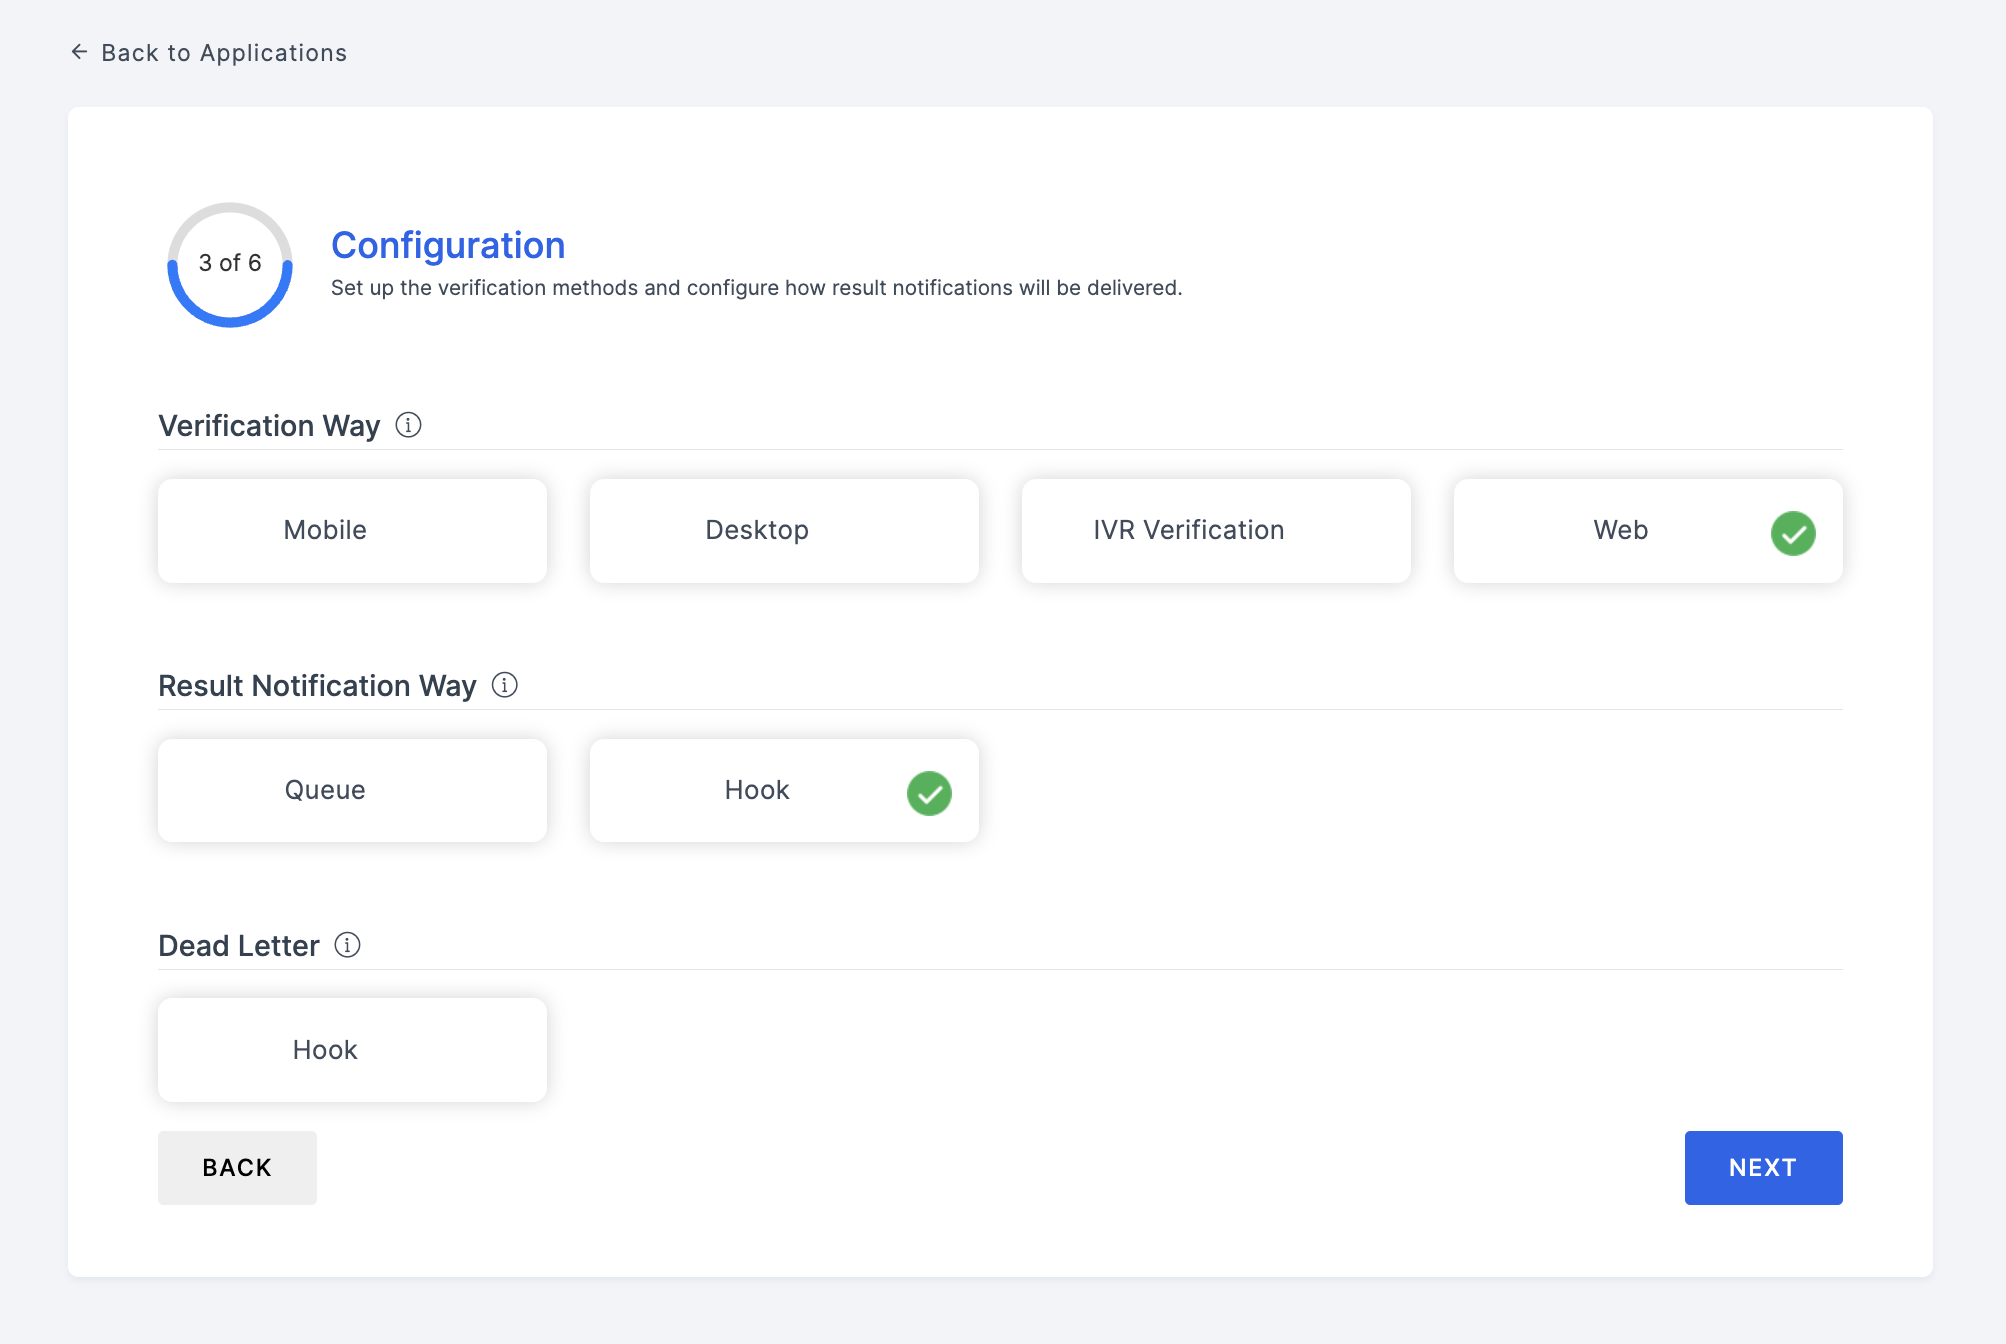
- Verification Way
- Result Notification Way
- Dead Letter
This determines how the verification should be executed. It currently consists of five types:
| Verification Way | Description |
|---|---|
| API | This verification process involves utilizing API endpoints to confirm a user's identity and grant them access to your application |
| Mobile | This verification process involves utilizing mobile devices to confirm a user's identity and grant them access to the application. |
| Desktop | Verification done on the ezto verify desktop application with the configured workflows. |
| IVR Verification | Verification method used to confirm a user's identity by interacting with them through a phone call. It typically involves automated systems that prompt users to respond or enter information using their phone's keypad. |
| Web | Verification using the web, involves verifying the identity of users who access online platforms, websites, or applications. |
This determines how the result notification should be sent. There are two types:
| Result Notification Way | Description |
|---|---|
| Queue | Configure the Queue notification to specify how the result should be shared, currently Kafka is supported. |
| Hook | Configures Hook notifications to specify how the result should be shared. This consists of five types: Poll, Ping, Push, Mobile SDK, and Web SDK. |
This option is used for handling incomplete flows. It ensures that, even if a flow is not completed, the result will be sent to the configured webhook, allowing further actions. Currently, one type is supported:
| Dead Letter | Description |
|---|---|
| Hook | Configure the Hook option so that when a verification flow expires or remains incomplete, the partial result is sent to the specified webhook. This allows the admin to retrieve it and decide how to proceed with the flow. |
Configure the above required Verification Way and Result Notification Way, click on the NEXT button to proceed to the further steps. Note that configuring the Dead Letter is not mandatory.
4 Onboarding Workflow
As the fourth step, you will be taken to the Onboarding Workflow. During this step, you will need to select which onboarding workflow you want to execute for a newly onboarding user.
Please note that selecting the "None" option for the onboarding workflow will automatically redirect the user to the verification workflow, irrespective of the users availability. To know how to create a workflow, refer here.
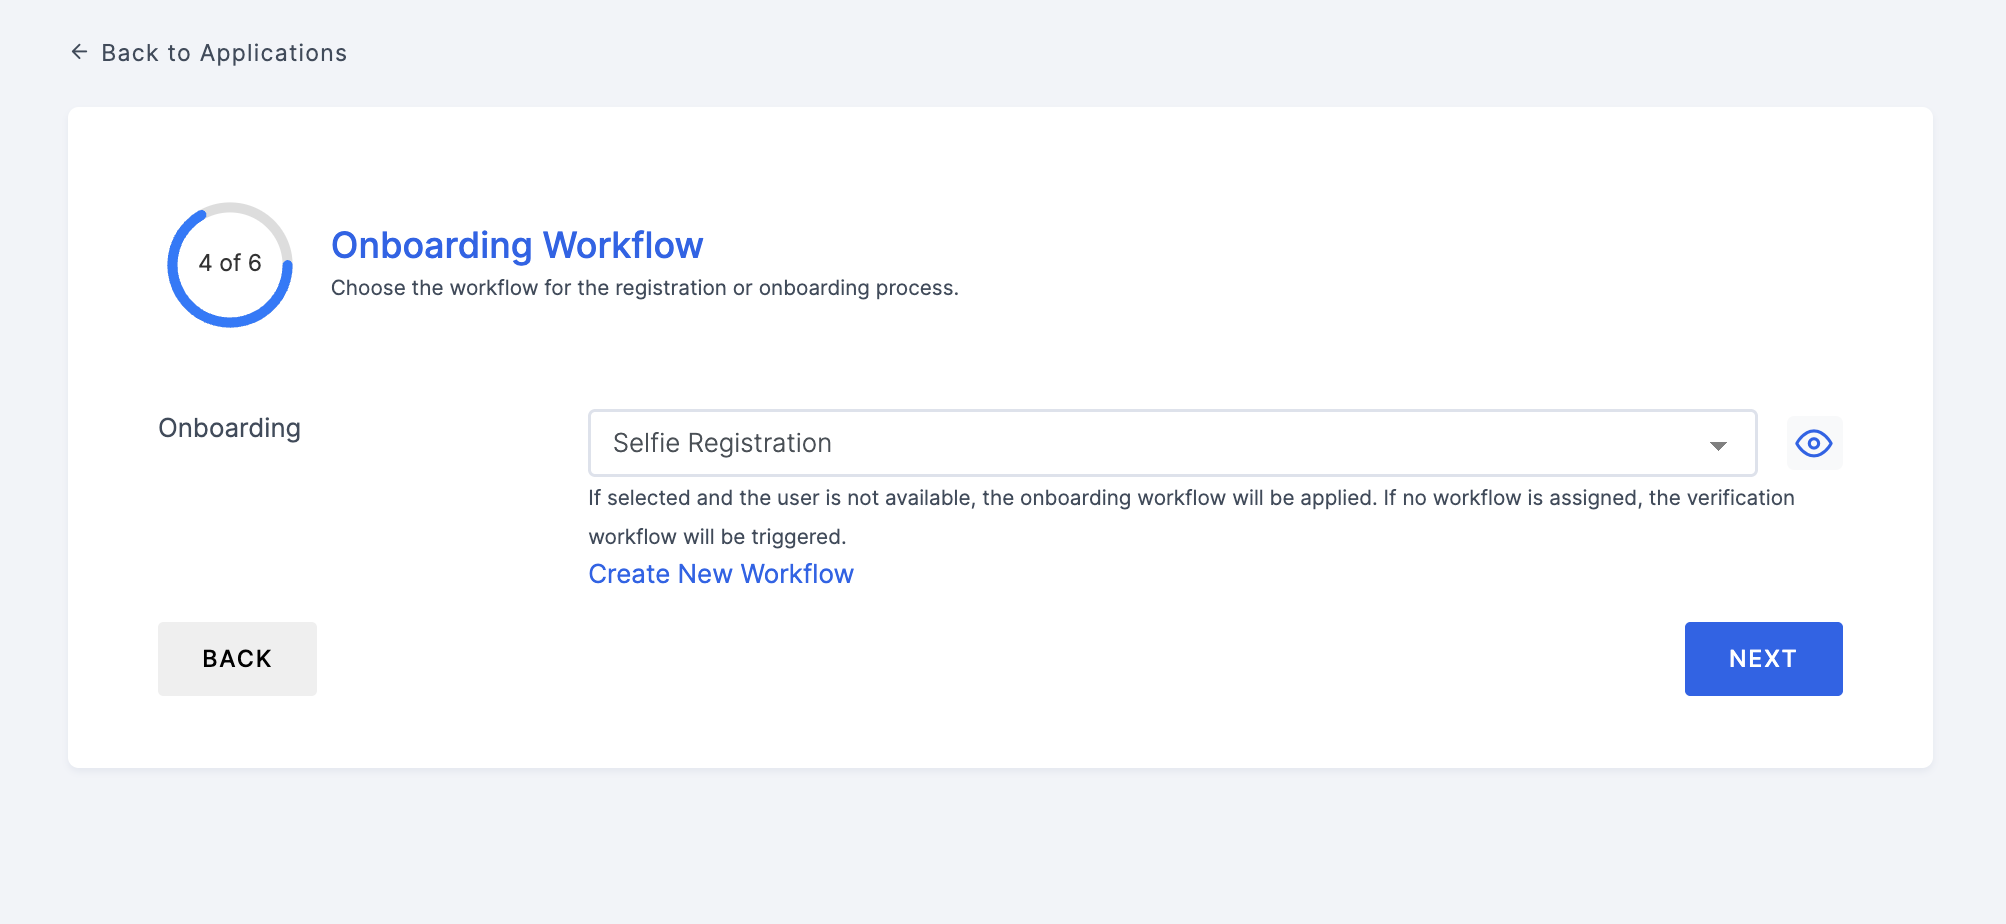
After selecting the required onboarding workflow or skip, click on the NEXT button to proceed to the further steps.
5 Verification Workflow
As the fifth step, you will be taken to Verification Workflow, which is required in order to start the verification process. Note that if a user has already been registered/onboarded, they will be taken directly to this verification process. To know how to create a workflow, refer here.
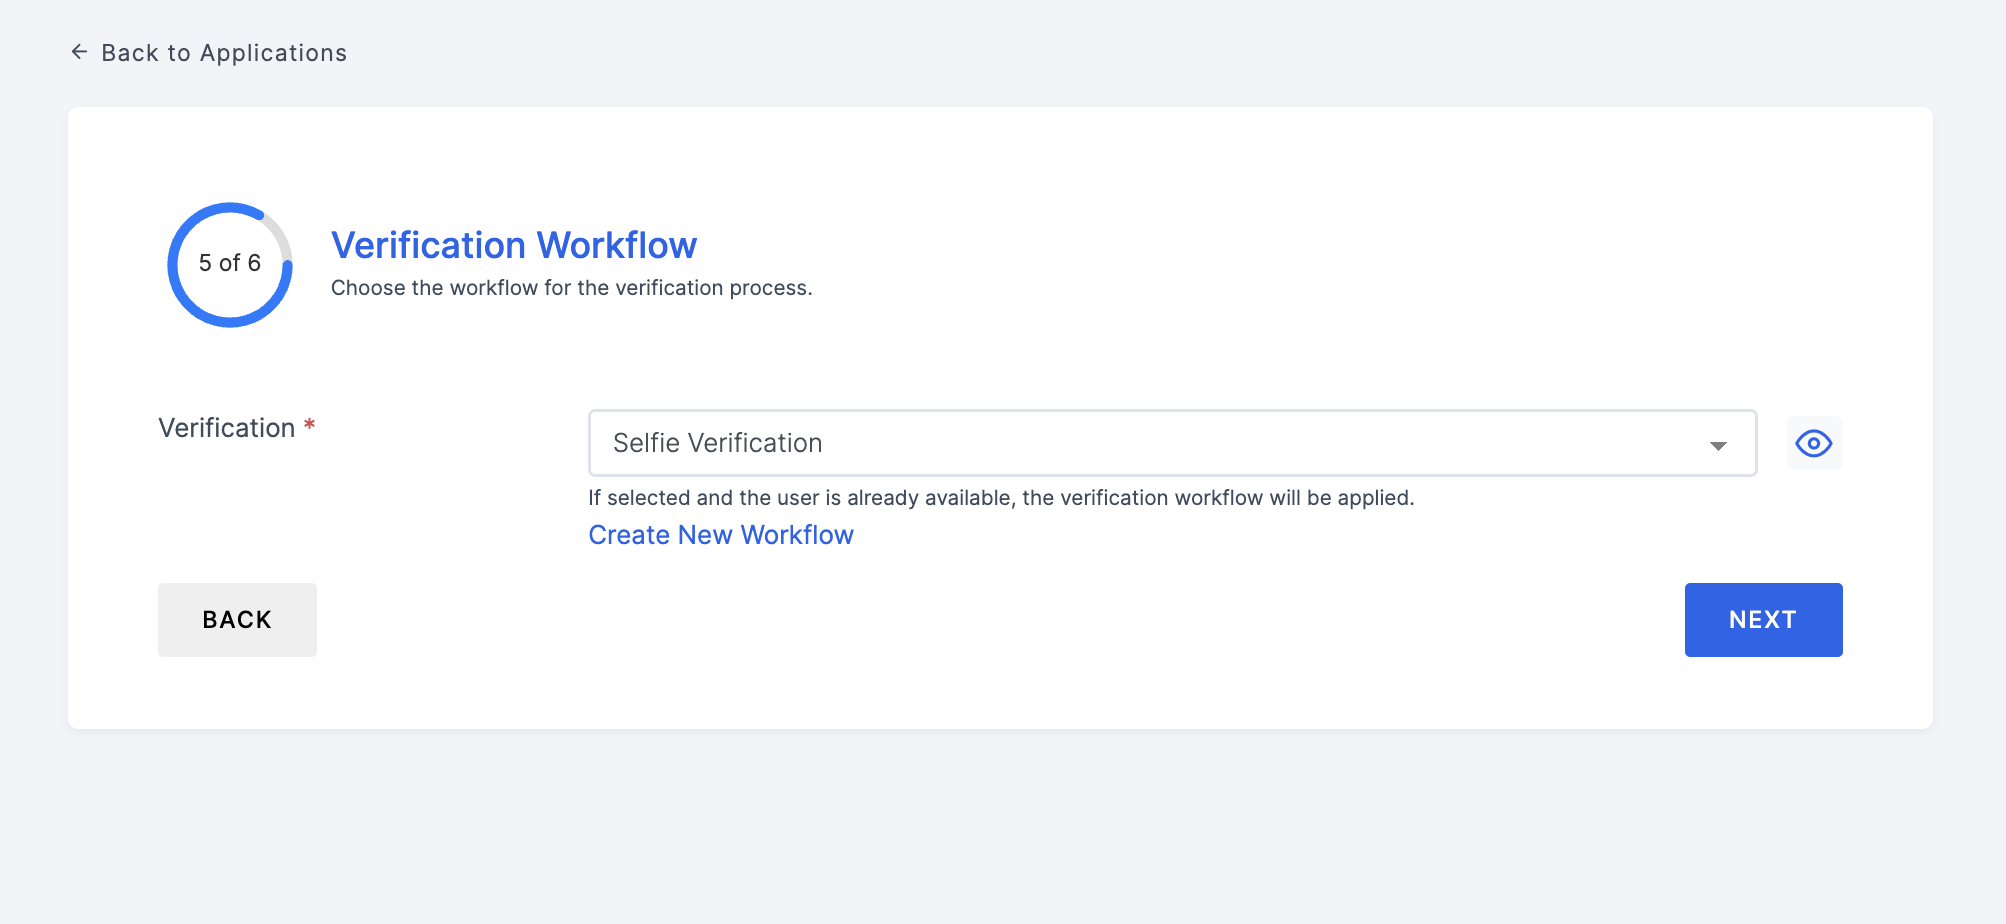
After selecting the required verification workflow, click on the NEXT button to proceed to the further steps.
Know About Custom End Message
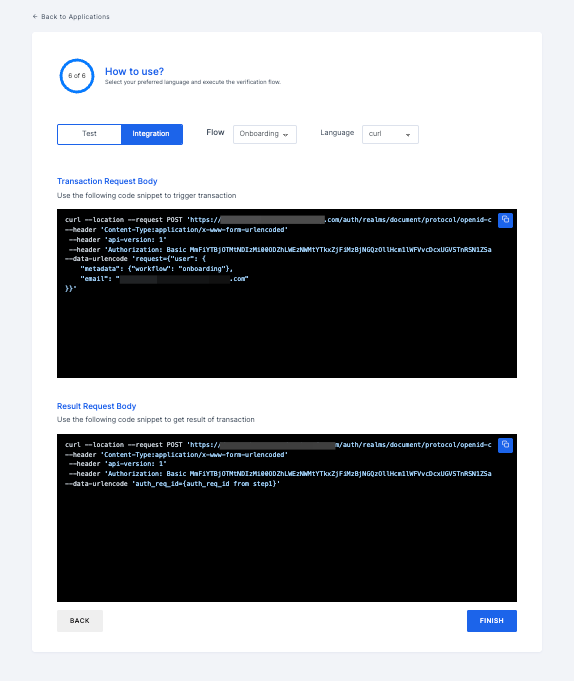
6 How to use?
As the final step, you will be taken to "How to use?", this page consists of **Test mode** and **cURL commands** to execute a flow and get its result.
- Test
- Integration
API
This option allows a smoother testing of your API`s within the Workspace, by simply choose the API (i.e, Aadhaar Verification) and click on the TEST button to initiate the test execution.


Workflow
This option allows a smoother testing of your onboarding and verification flow within the Workspace, by simply choose the flow (i.e, Onboarding or Verification) and click on the TEST button to initiate the test execution.


Once all the above mentioned are configured, click on the FINISH button.
Note that by default, if you are in Sandbox mode, the application will be created in Sandbox. When you transition to Live mode, you can move the Sandbox application to Live by disabling the Sandbox Mode toggle. To learn how to do this, refer here.