Our default Whatsapp provider is accessed through our official provider, Twilio. If you have a WhatsApp provider from a different service, ezto verify allows you to configure your own WhatsApp provider. This offers greater flexibility and control over your messaging.
To take advantage of this feature, ensure your subscription plan is updated to "Own" WhatsApp provider.
Use case
The primary purpose of configuring a custom WhatsApp provider is to deliver messages to recipients that are not supported by the default options. Additionally, you can:
- Perform high engagement rates
- Change recipients
- Modify message payloads
Prerequisites
- You need to update "Own" WhatsApp provider in your subscription.
- To configure WhatsApp with ezto verify, you must have an active Twilio account.
Access your Twilio
- Log in to your Twilio account.
- Setup a SenderNumber for the project you have created in Twilio.
- Once the SenderNumber is successfully configured, copy the SenderNumber, Account SID, and Auth Token.
Configure Custom Whatsapp Provider
1 Navigate to Workspace, click on Notification, and choose SMS.
2 Click on +ADD PROVIDER
3 You will be directed to the New SMS Provider page, where all available providers will be displayed. Click on the Whatsapp tab.
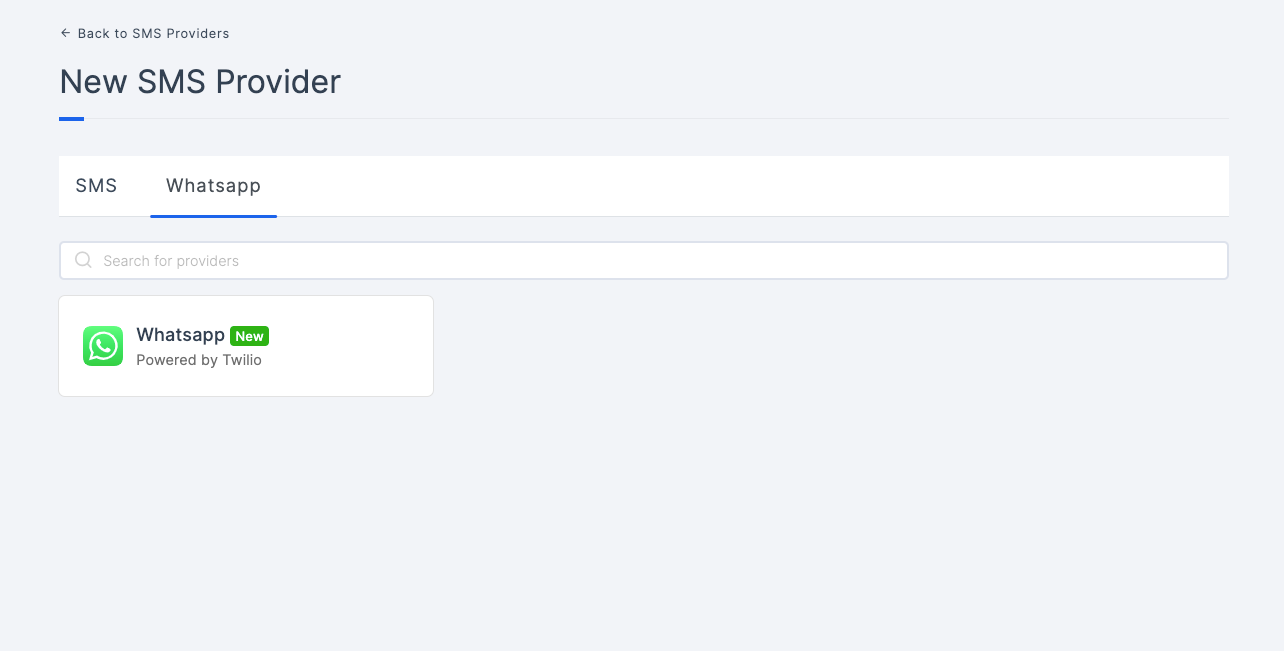
4 Click on Whatsapp.
5 You will be taken to the Whatsapp provider configs page. To obtain the necessary configs, log into Twilio. Refer to the prerequisites on how to do it.
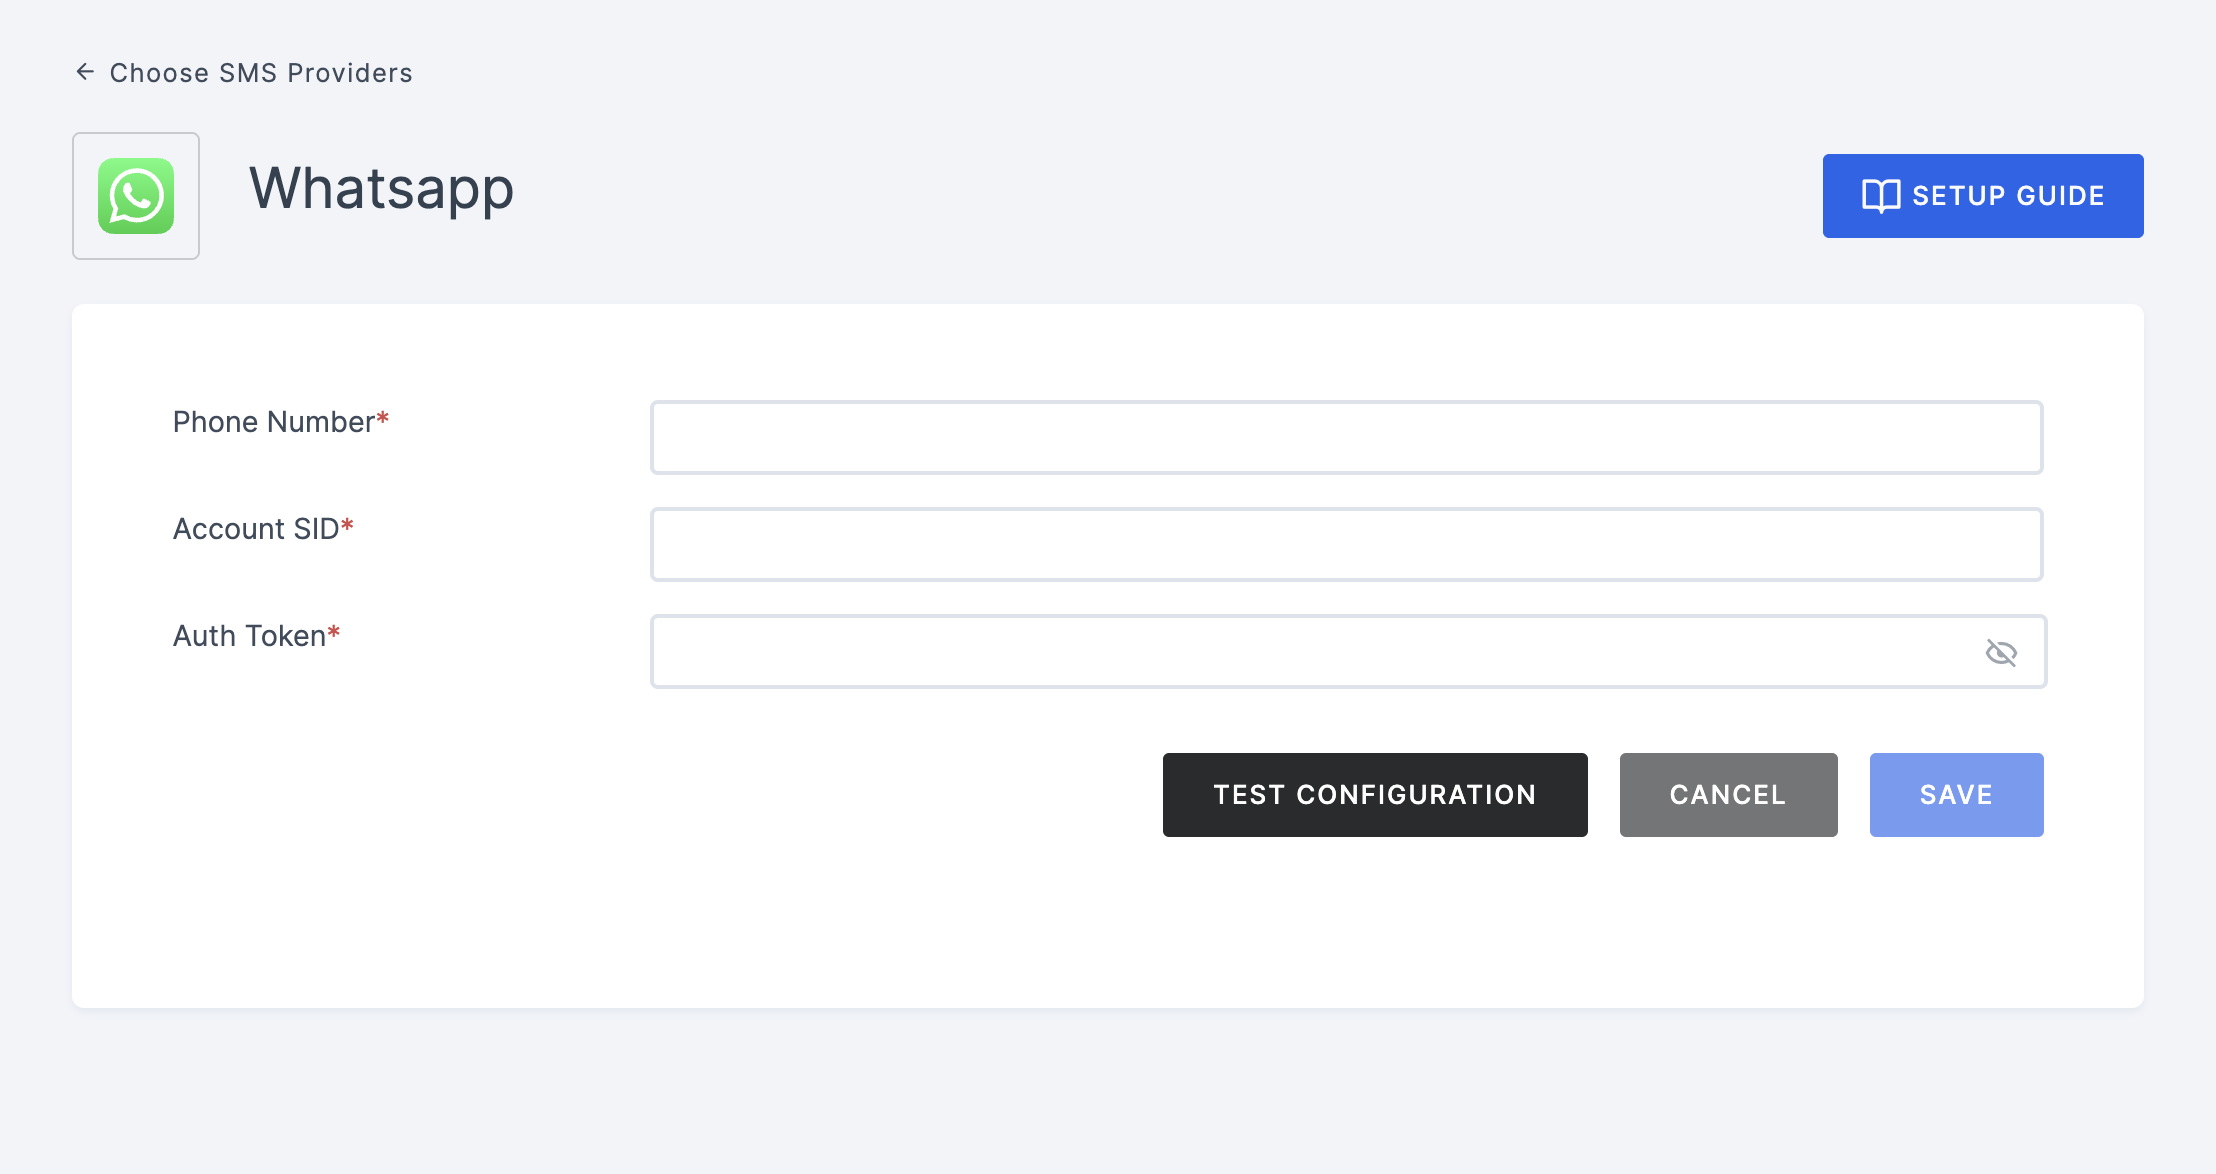
6 Navigate back to your Workspace and input the SenderNumber, Account SID, and Auth Token.
7 After providing the necessary configurations.
8 Click on TEST CONFIGURATION to ensure the configuration looks good.

9 Provide phone number and click on SUBMIT.
10 If everything is set up correctly, a test success SMS will be sent to the phone number you provided earlier.
11 Click on the SAVE button.
Remove Custom SMS Provider
If you wish to switch to another provider or remove a provider, you must first create a new provider before removing the existing one. Alternatively, you can change your subscription to revert to the ezto verify's "Default" provider.
To remove your custom provider completely:
1 Navigate to Workspace, click on Notification, and choose SMS.
2 You will be presented with a list of existing (created) providers. Click on the Whatsapp tab, choose the provider.
If you want to modify the provider instead of deleting it, click on the edit icon next to the provider's name.
3 Click on the name of the provider you want to delete. Scroll down to the bottom of the page to the Danger Zone section and click on the DELETE button.
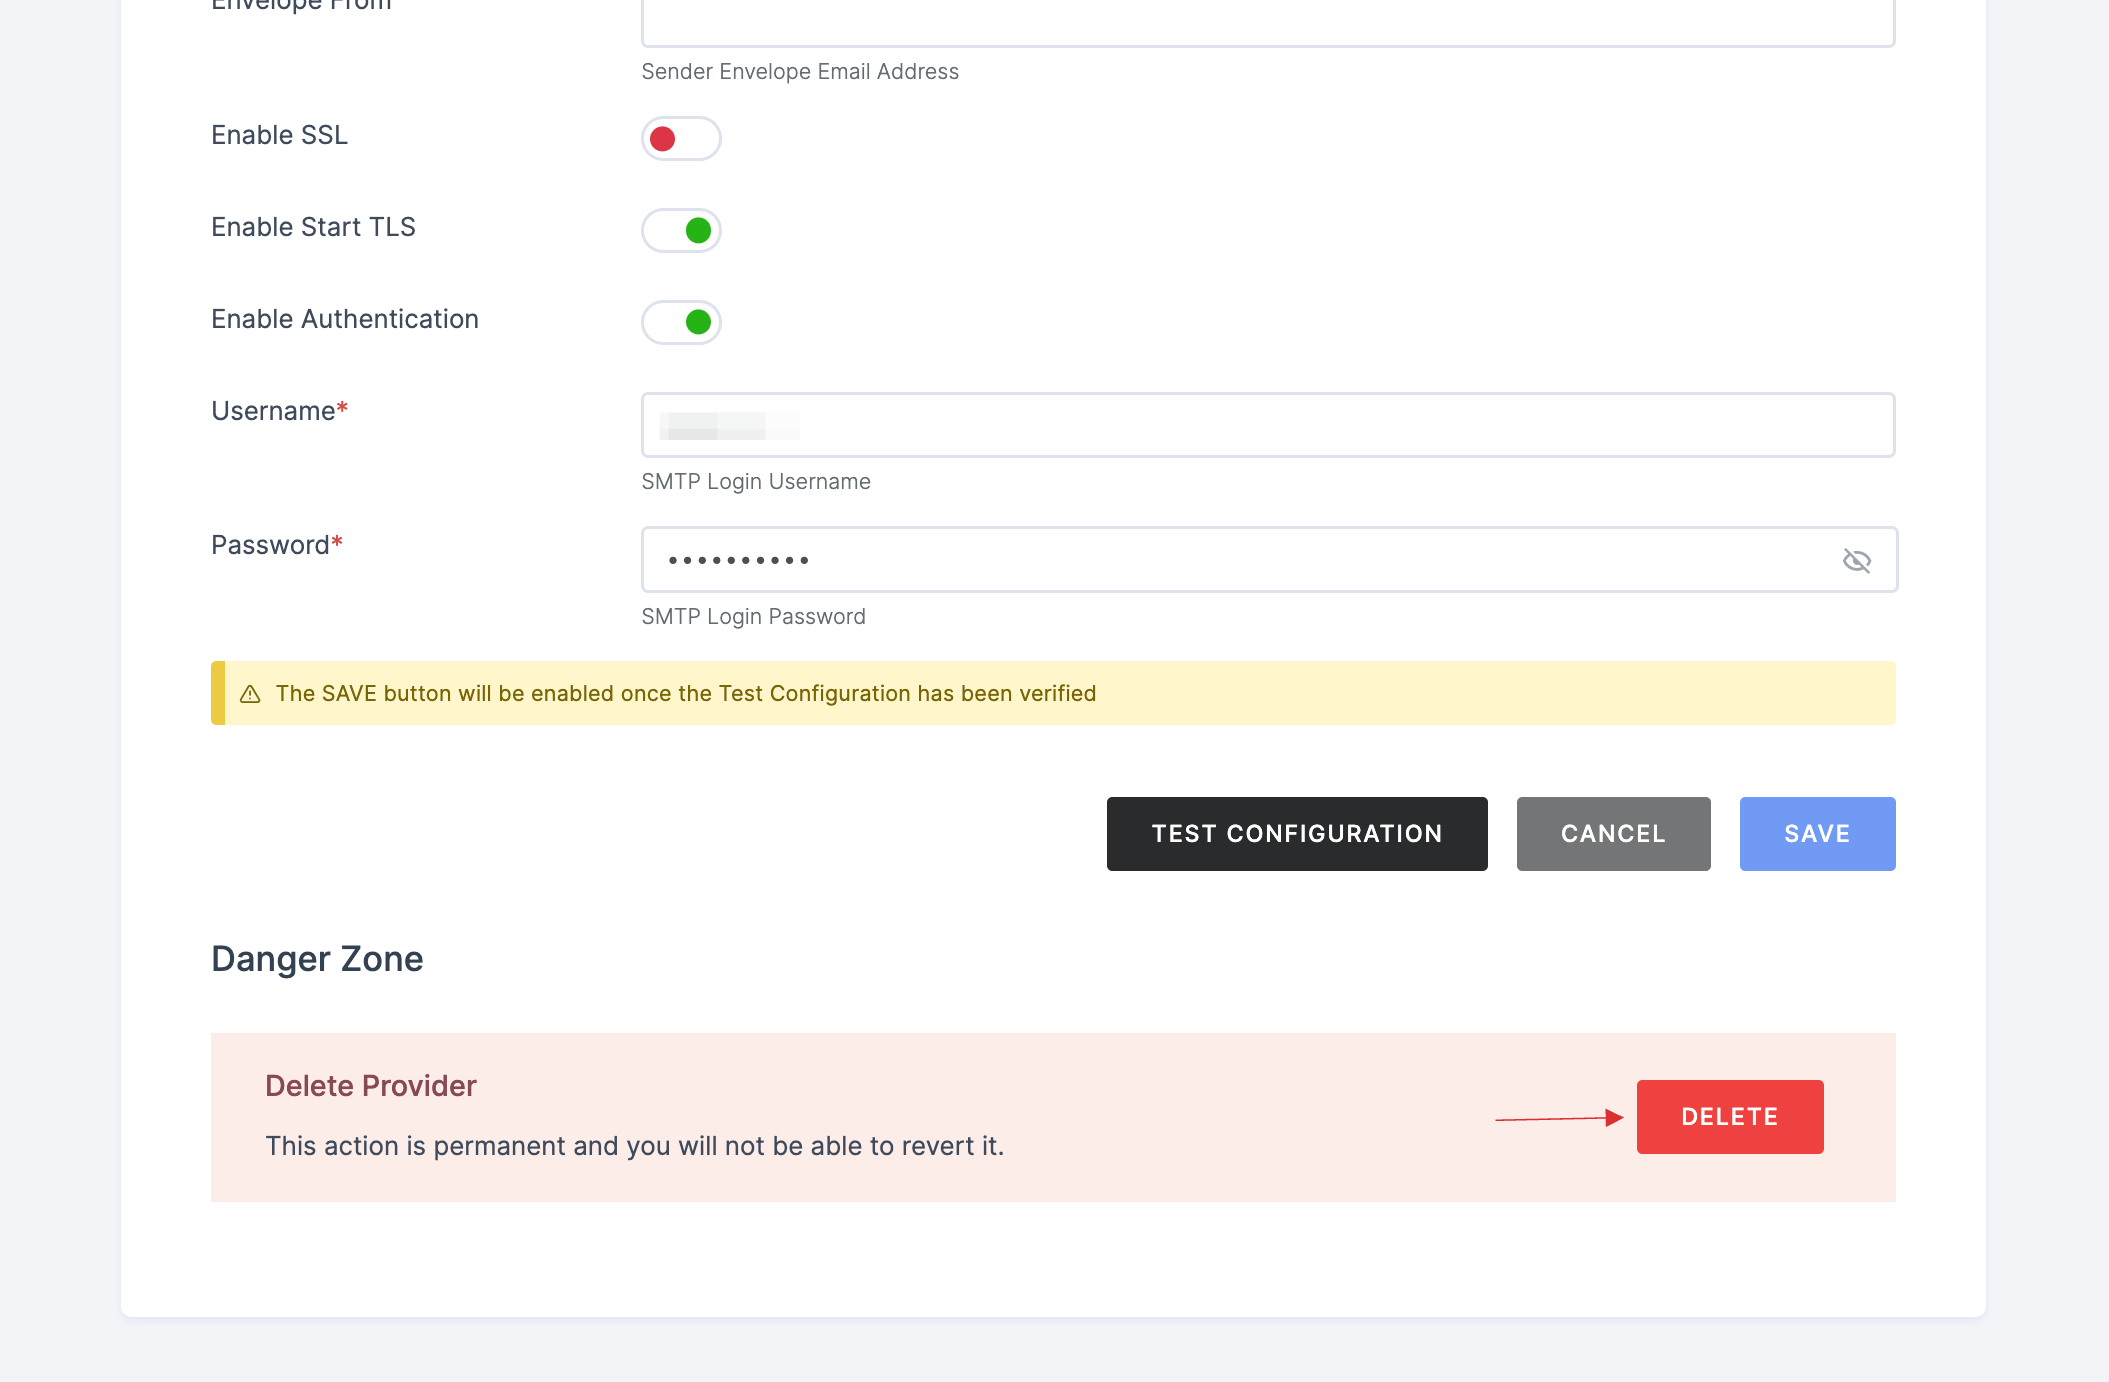
4 A pop-up will appear, cautioning you that this action will permanently delete the provider. Confirm your intention by clicking on DELETE.
By following these steps, you can manage your provider settings effectively and ensure that your WhatsApp communications are handled according to your needs.