Amazon SES
Amazon SES, known as Amazon Simple Email Service, stands as a popular cloud-based email delivery platform that furnishes businesses with a scalable and economical approach to sending transactional, promotional, and marketing emails.
Prerequisites
- You need to update own email provider in your subscription.
- You must have an active Amazon AWS account.
Access your Amazon AWS
- Log in to your Amazon AWS account.
- Begin by verifying your domain as the initial step. If you need guidance on how to accomplish this, see here. (If you have already done with your setup, skip to the last point.)
- Attach a policy with the
ses:SendRawEmailandses:SendEmailpermissions, as in this example below: - Initiate a request for production access, and subsequently obtain your AWS access keys. To know how to do that, see here.
{
    "Version": "2012-10-17",
    "Statement": [
        {
            "Effect": "Allow",
            "Action": [
                "ses:SendRawEmail",
                "ses:SendEmail"
            ],
            "Resource": "*"
        }
    ]
}
Configure Amazon SES
1 Navigate to Workspace, click on Notification, and choose Email.
2 Click on +ADD PROVIDER
3 You will be directed to the New Email Provider page, where all available providers will be displayed.
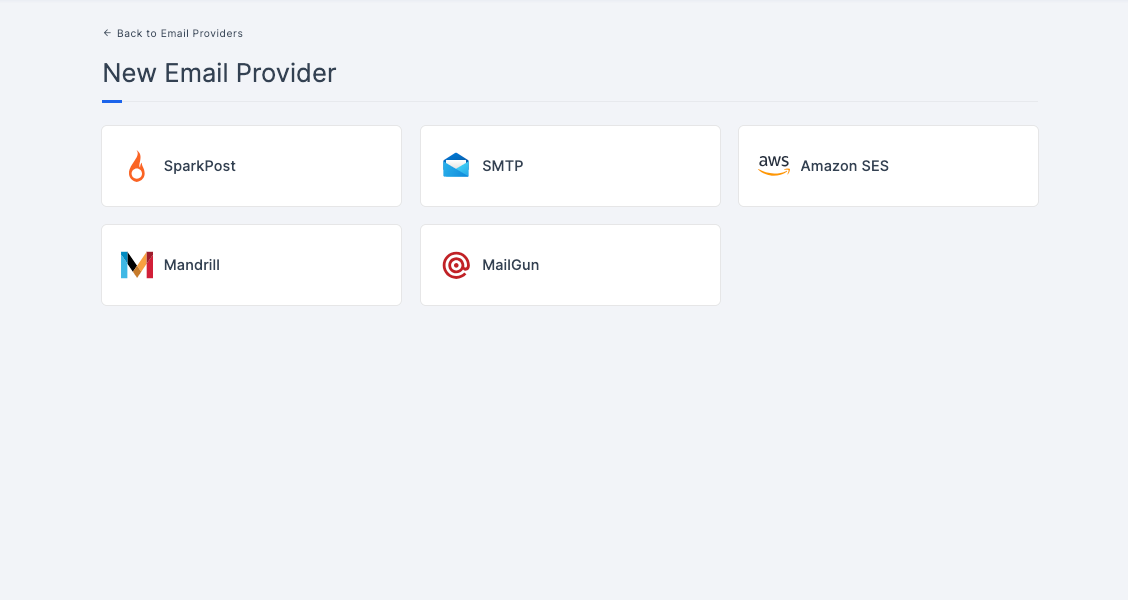
4 Choose the Amazon SES.
5 You will be taken to the Amazon SES provider configs page. To obtain the necessary configs, log into Amazon AWS. Refer to the prerequisites on how to do it.
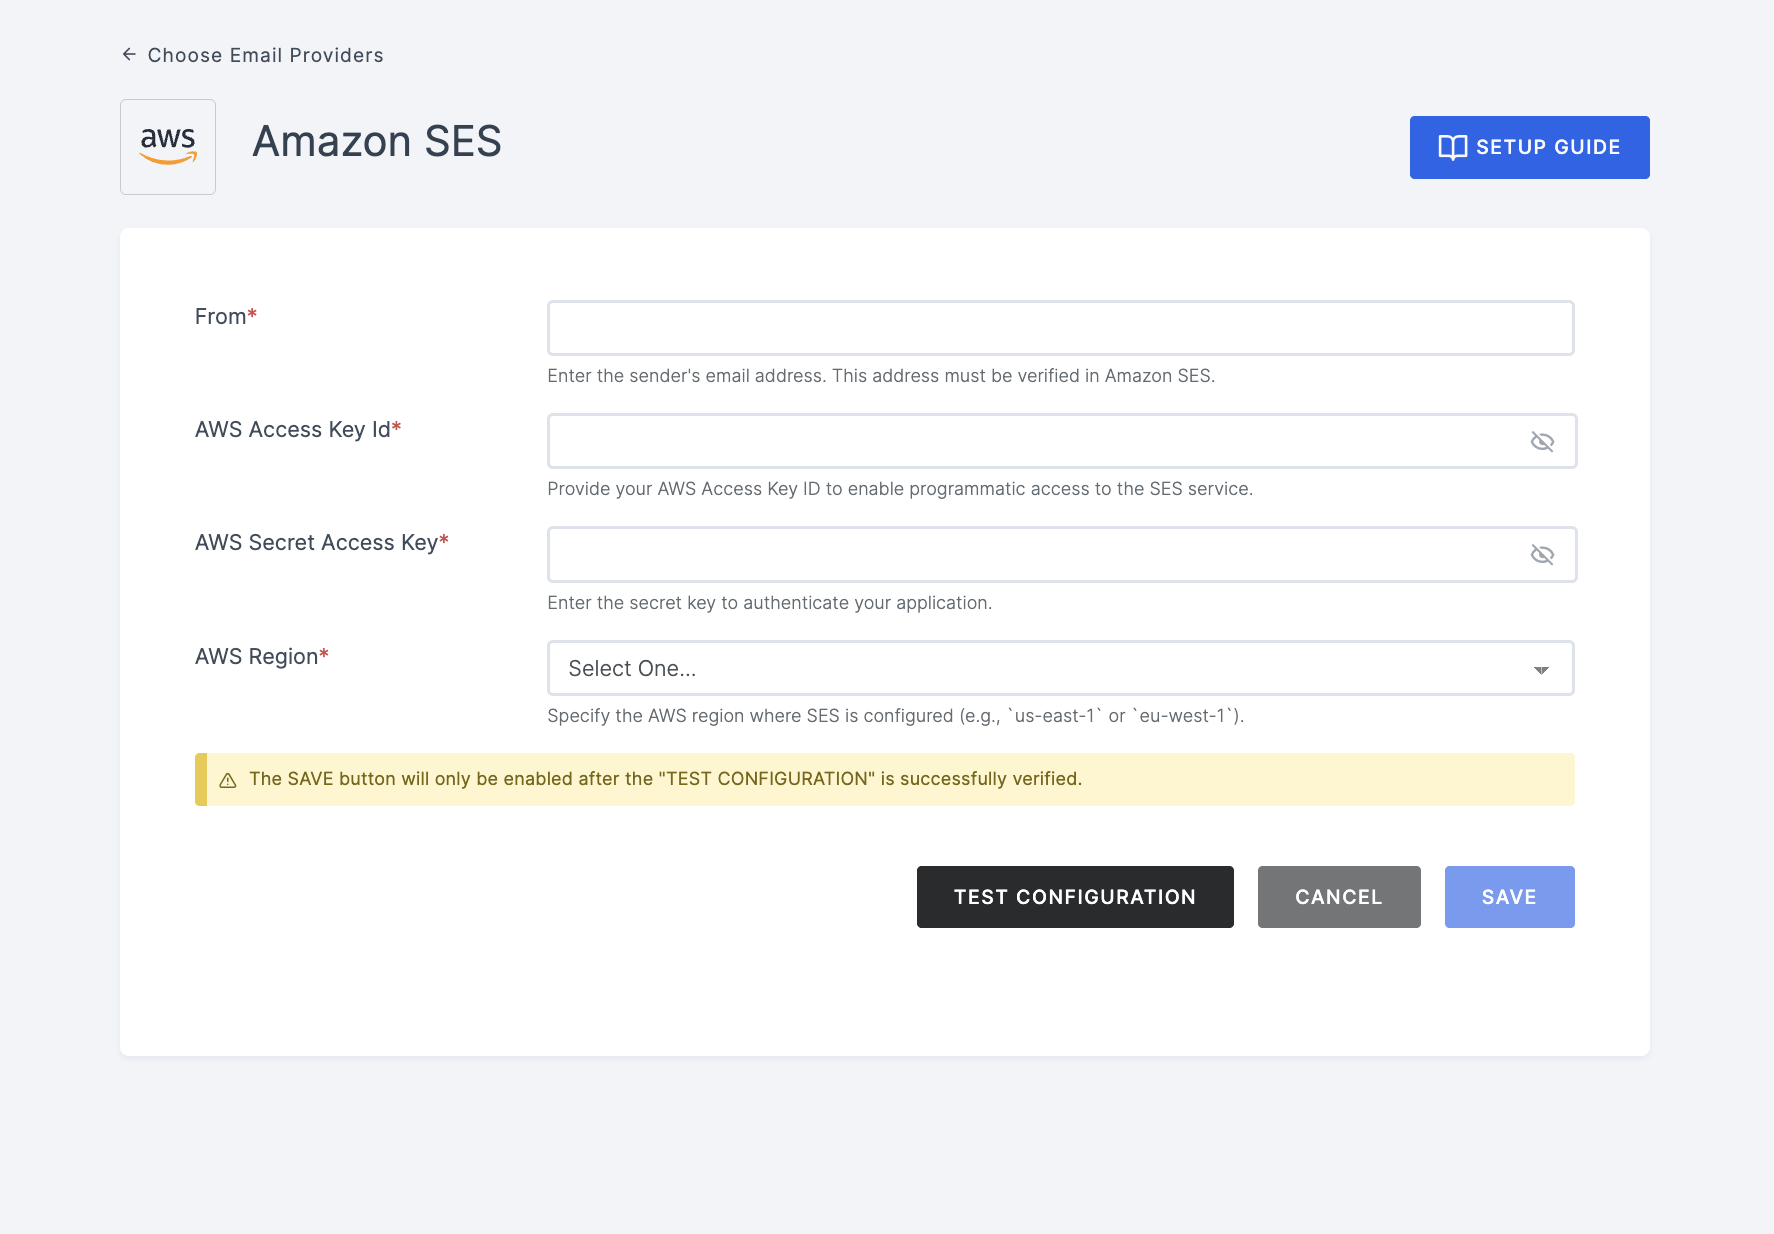
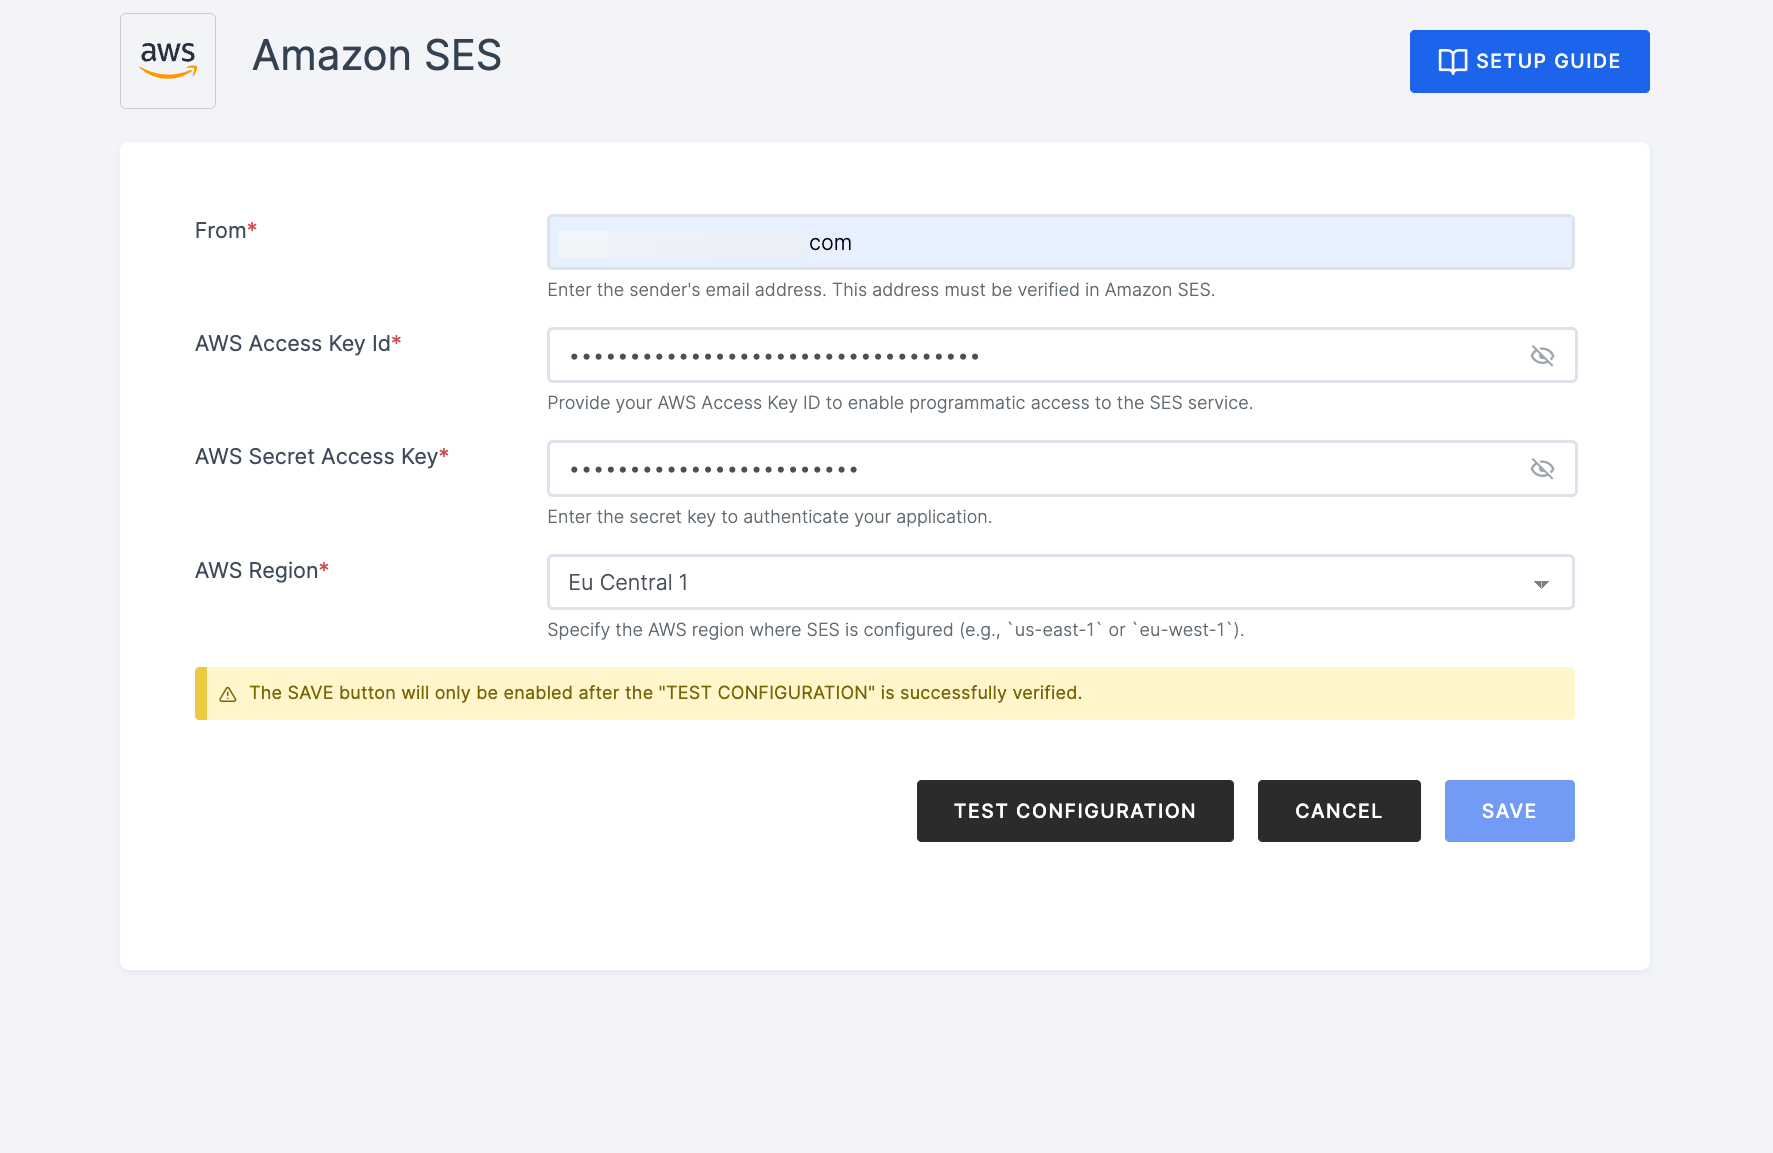
6 Navigate back to your Workspace and input the From address, AWS Access Key Id, and Secret Access Key. Additionally, select your preferred Region.
The values for Access Key Id and Secret Access Key can be sourced from an external vault. They won't be stored in our database.
7 After providing the necessary configurations.
8 Click on TEST CONFIGURATION to ensure the configuration looks good.
9 Provide email address and click on SUBMIT.
10 If everything is set up correctly, a test success email will be sent to the email address you provided earlier. Click on the SAVE button.