Encrypt Request
Encrypting a request ensures the security and confidentiality of the data being transmitted. This process involves converting the request body into an unreadable format using encryption algorithms, such as AES (Advanced Encryption Standard).
Only authorized parties with the correct decryption key can convert the data back to its original form, ensuring that sensitive information remains protected from unauthorized access during transmission.
To help visualize this process, the following flow diagram provides an overview of how encryption works.

Access Application
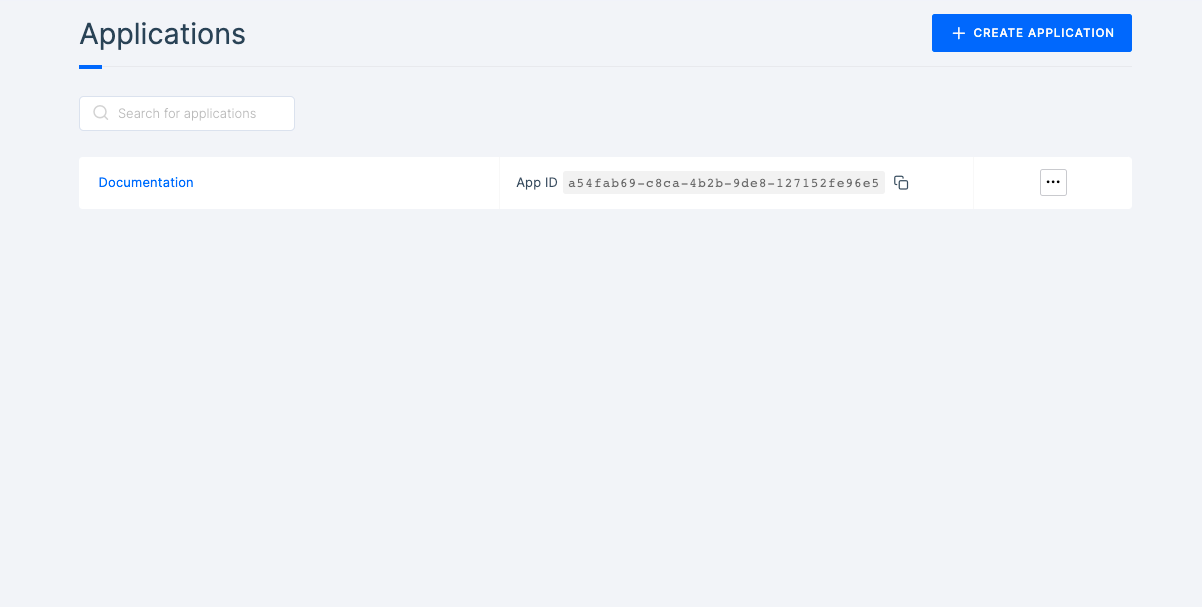
1 Navigate to Workspace, and click on Application.
2 This will take you to the list of all applications available in your dashboard.
3 Click on the application you wish to view enable encryption. This will open the application General page.
4 Within the application's General page, click on the Developers tab.
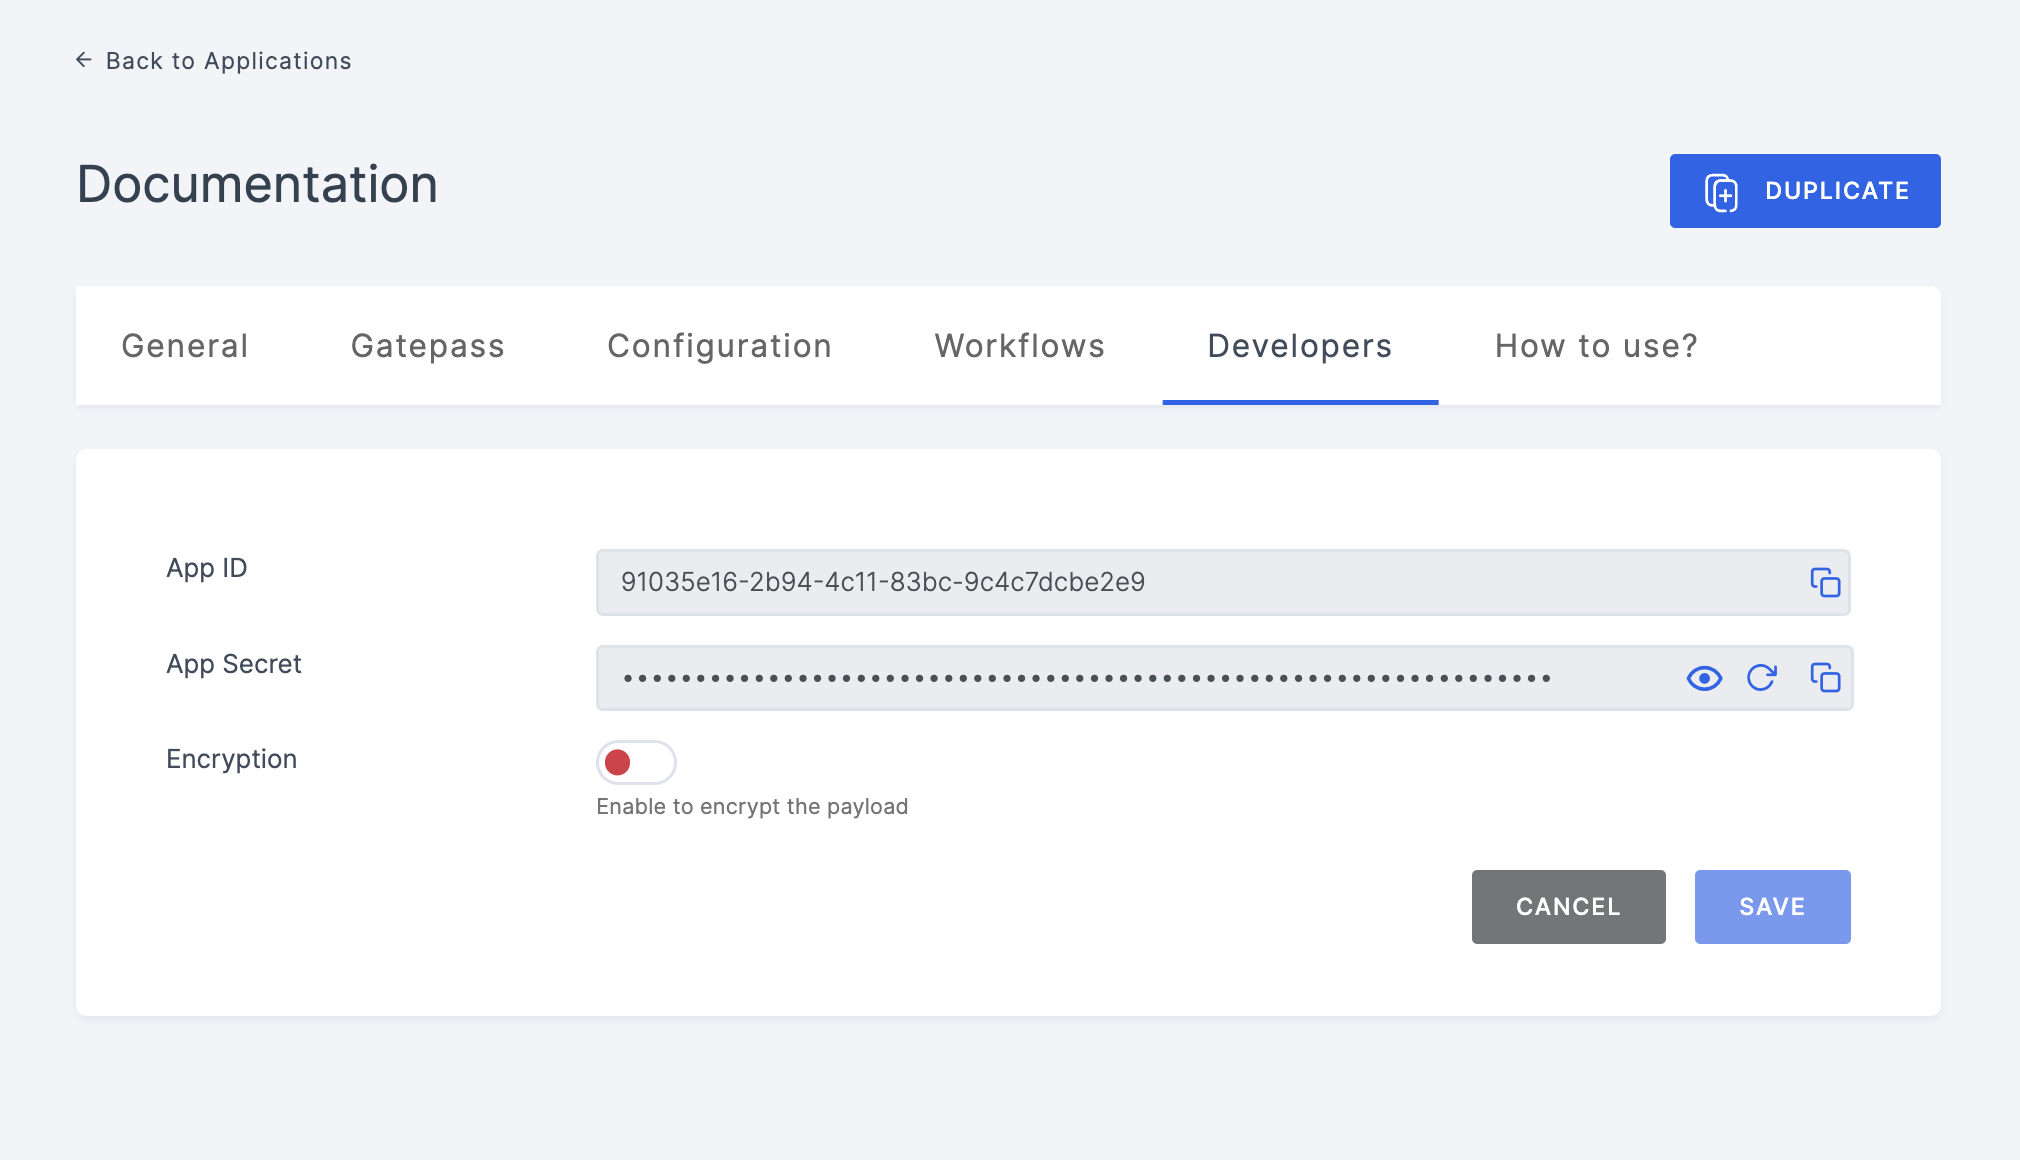
Enable Encryption
1 Toggle the enable for Encryption and select the AES key which will be available in the dropdown. To know how to create a Key, see here.
Make sure your required workflow is set before starting with the execution process in order to get the expected result.

2 After choosing the AES key, the Secret Key will be displayed. Copy this key to your clipboard.
3 Based on the requirements, build your API request body.
4 Now, using the AES Secret key, you can encrypt the request payload with any of the available libraries. Ensure that the same key size is used as the selected AES key. (use padding if required)
Here are some AES libraries
5 Once the encryption is done, copy the encrypted data.
Here is an example of how the encrypted data will appear:
"T3vY1#rF9VGhpcyBpcyBhbiBleGFtcGxlIG9mIGEgdmVyeSBsZW5ndGh5IGVuY3J5cHRlZCBzdHJpbmcgdXNpbmcgYmFzZTY0IGVuY29kaW5nLiBCYXNlNjQgaXMgdXNlZnVsIGZvciBlbmNvZGluZyBiaW5hcnkgZGF0YSBpbiBhbiBlZmZpY2llbnQgd2F5LCBhbmQgaXQgdGFrZXMgYWR2YW50YWdlIGG5j$9vZb@WqL5oJ8cR2bZ4dP9fE7qK1yM8sU3tV6nW9jX2mQ5rA4nF1vC6hL3kP7oD2D0a7@N3&sY4!uG5j$9vZb@WqL5D0a7@N3&sY4!uG5j$9vZb@WqL5oJ8cR2bZ4dP9fE7qK1oJ8cR2bZ4dP9fE7qK1"
6 Return to your API tool, paste the generated value in request value field and initiate the Trigger Request API.
7 The response can differ depending on the chosen Verification Way and Notification Way configurations.
To view result,
1 After completing the verification process, view the exact response with Get Result, and initiate the API call with the copied auth_req_id from the API request made prior to this.
2 Below is the sample response:
{
  "request_id": "c504a110-c984-4fad-84d7-40dd2c9b082c",
  "email_verified": "true",
  "user_id": "mark@gmail.com",
   "workflow": "verification",
  "email_verified_at": "1708757480",
  "email": "mark@gmail.com"
}