Admin Logs
The Admin Logs functions as a comprehensive record of all actions performed within the Workspace.
This page allows admins to view, search, and analyze logs to ensure transparency, accountability, and security within the Workspace.
Some of the things you can analyze with these Admin Logs are:
All updates, creations, deletions on applications, rules, workflows, and relevant events can be viewed here.
View actions performed by the Workspace admins.
Search for specific admin logs by entering relevant details.
To access the admin logs, ensure that the admin logs are enabled.
Enable Admin Logs
1 Navigate to Workspace, and click on Audit.
2 Go to the Admin Logs page, click on the SETTINGS button located at the top right corner, toggle the Enable button, and then click on SAVE button.
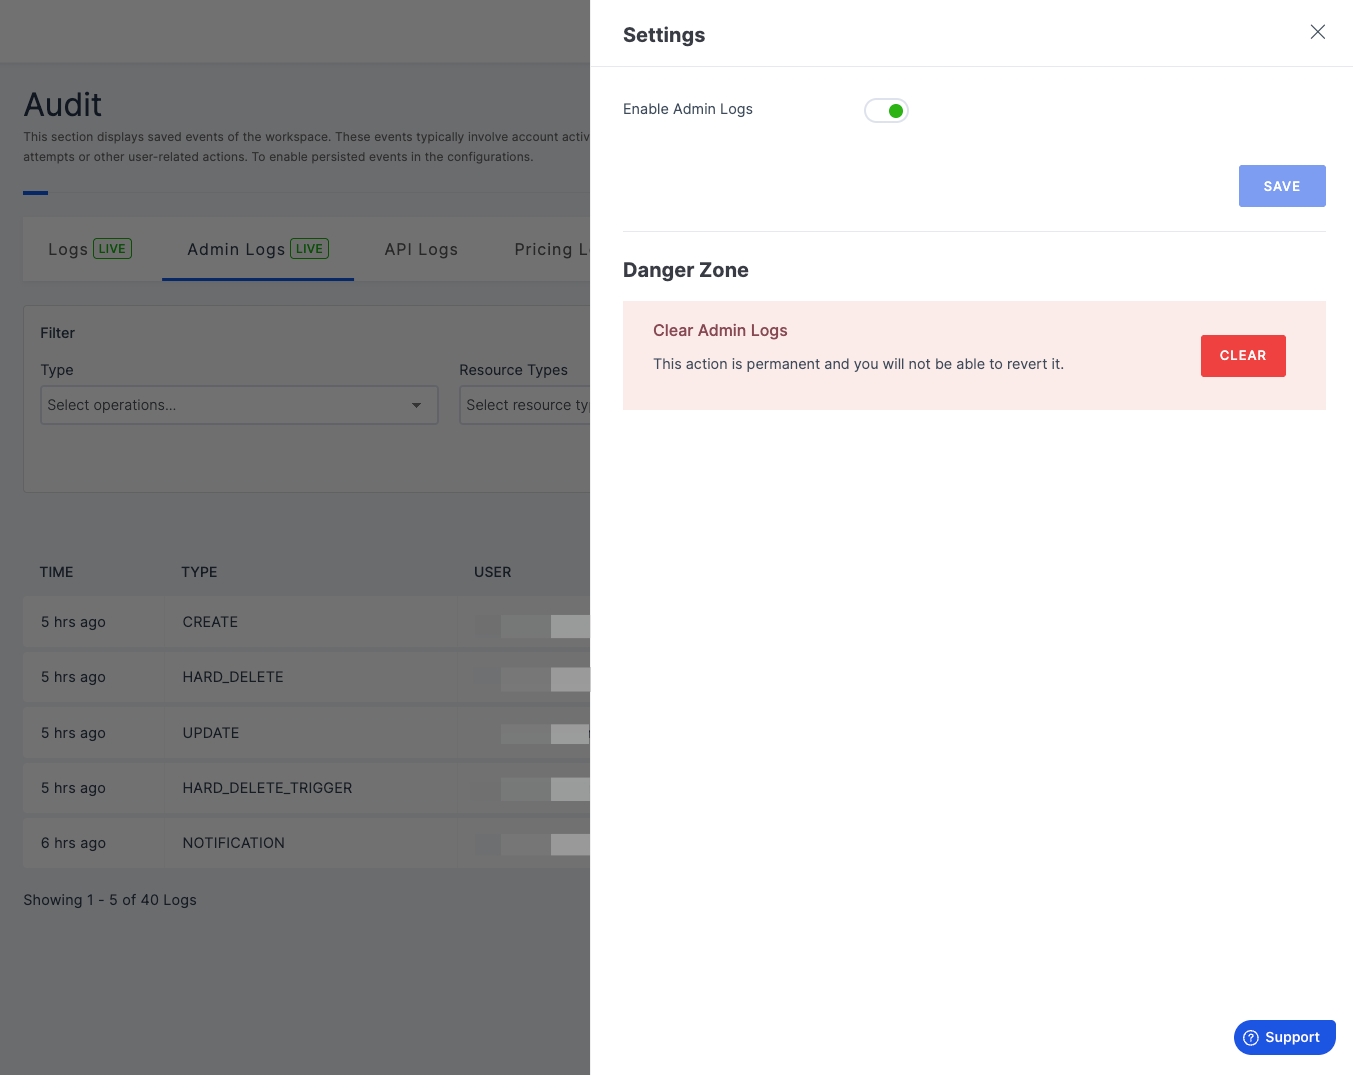
3 Once the admin logs are enabled, all events are recorded in the database, making them accessible for review.
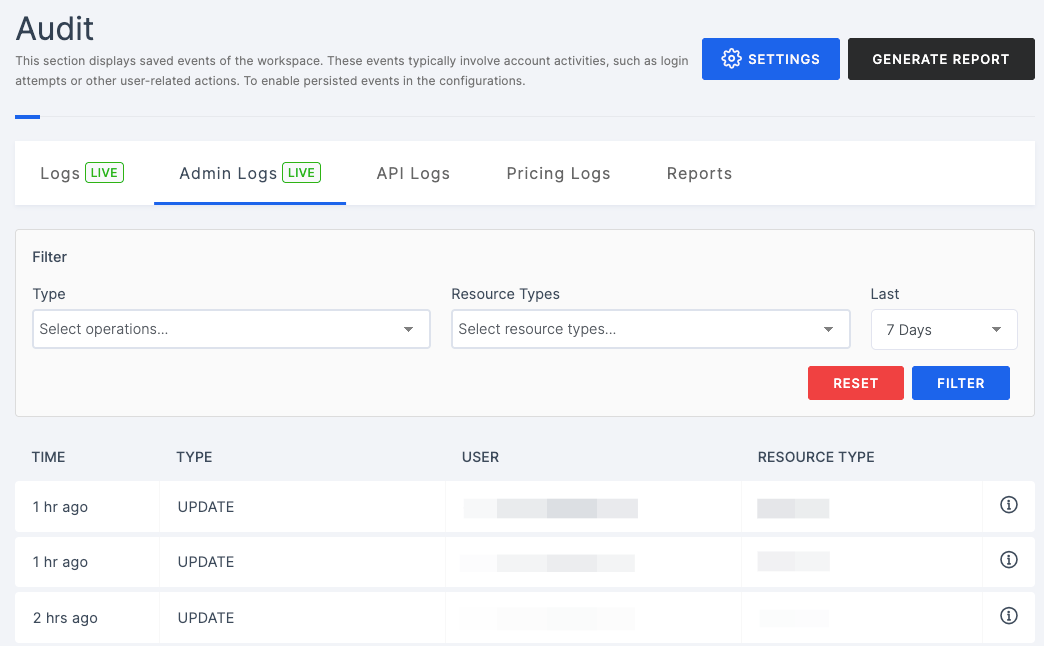
View Admin Logs
1 Once the admin logs are enabled, you can view all active logs, displaying comprehensive details;
| Attributes | Descriptions |
|---|---|
| Time | This indicates the timestamp or moment when each action occurred, providing a chronological order of events. |
| Type | This field categorizes the type or nature of each action, allowing to discern whether it was an update, deletion, or any relevant events. |
| User | It identifies the specific admin responsible for initiating the action, ensuring accountability and tracking. |
| Resource Type | Specifies the type of resource or component within the Workspace that was affected by the action. It helps to understand which part of the Workspace underwent changes or received attention from admins. |
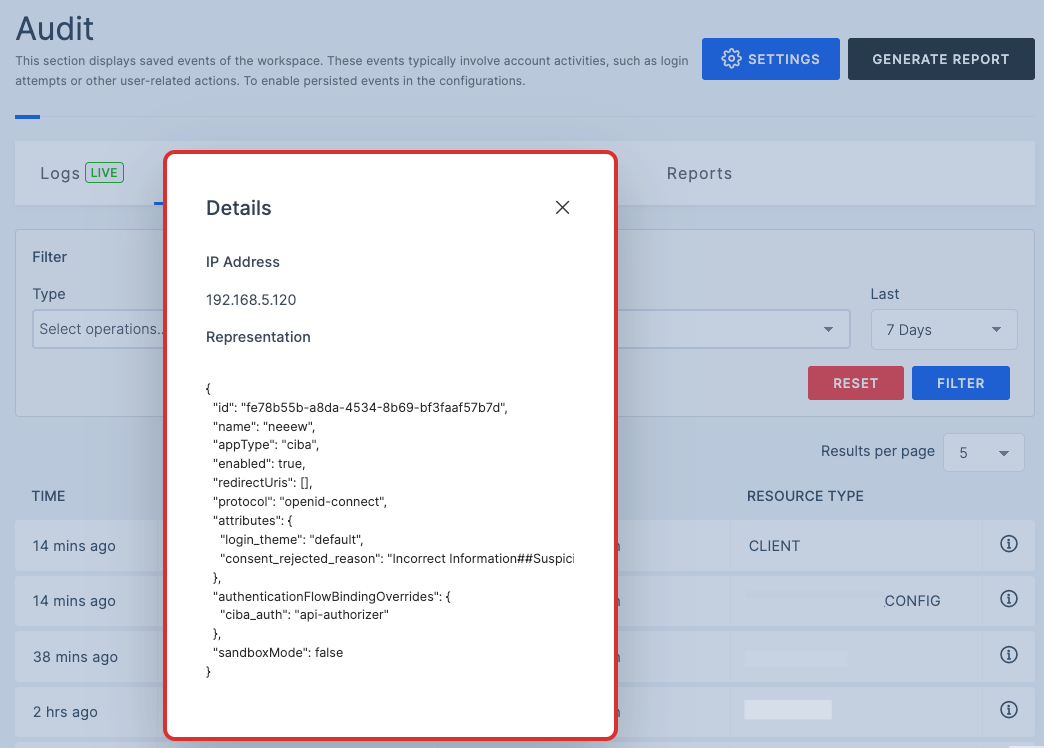
2 For more details on each log, click on the information icon.
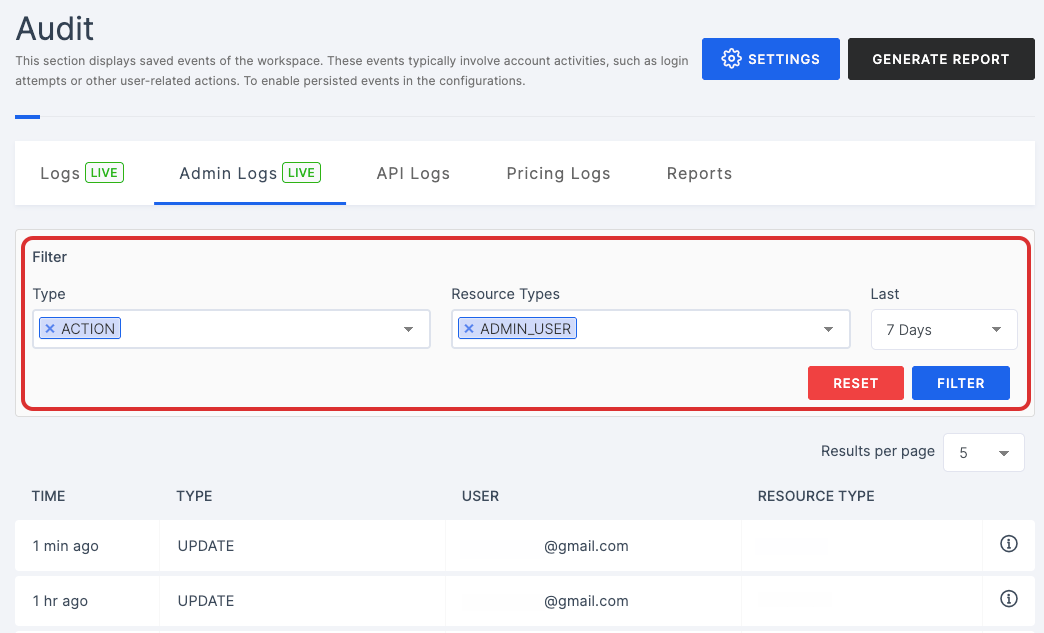
Get Admin Logs
1 To retrieve a specific log, enter the relevant details into the provided fields and specify the number of days you want to view. For example, if you enter 7 days, the logs from the last 7 days will be displayed.
| Attributes | Descriptions |
|---|---|
| Type | |
| Resource Type | |
| Last | Select the number of days you want to fetch the logs for, such as the last 7 days, last 30 days, or last 90 days |
2 Provide the details and click on the FILTER button.
3 To reset the fields and filters, simply click on the RESET button.