Workspace Admins
Workspace Admin are basically the account creator and all of its co-admins. During the initial Workspace setup, you would have had the option to add a co-admin. Even if you didn't add co-admins then, the dashboard still provides the option.
1 Go to Dashboard > Settings.
2 Click on Workspace Admins.
The Workspace Admins tab will list the account creator (with a tag OWNER), and other admins. Additionally, it allows you to add new admins.
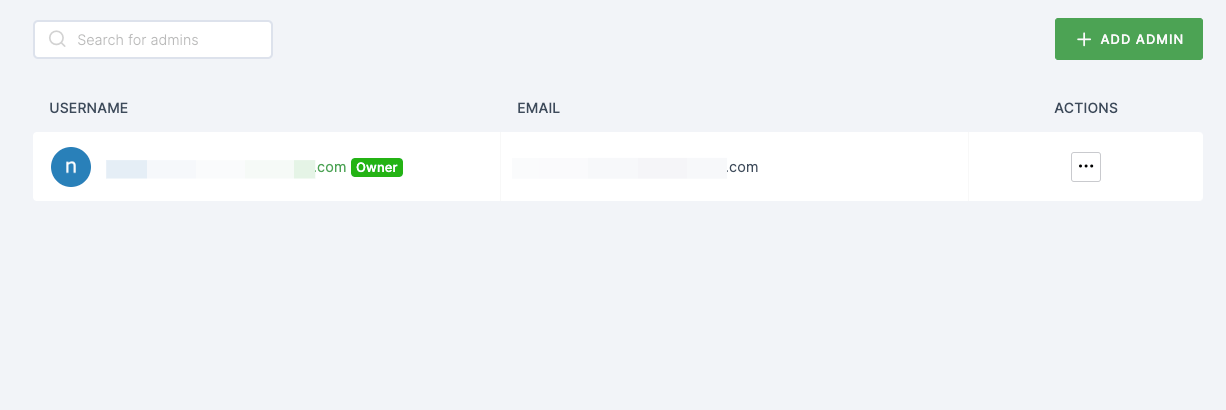
3 A user's configuration can be viewed and edited by clicking their username. (Please note; editing can only be done by admins)
The Co-admins can only be added through the ADD ADMIN option.
Adding a Co-admin.
1 Click ADD ADMIN button, provide the email address of the user you wish to add as an admin.
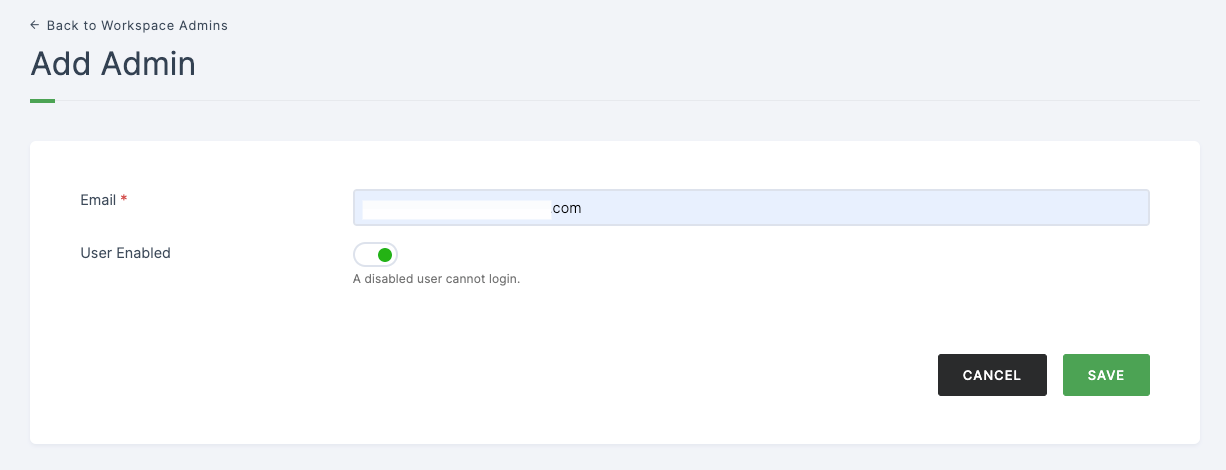
By default, the User Enabled feature is enabled, allowing users to log in to the workspace. If it is disabled, users will be restricted from logging in.
2 Click on SAVE. > An invite email will be sent to the provided email address, containing a link and OTP (One-Time Password).
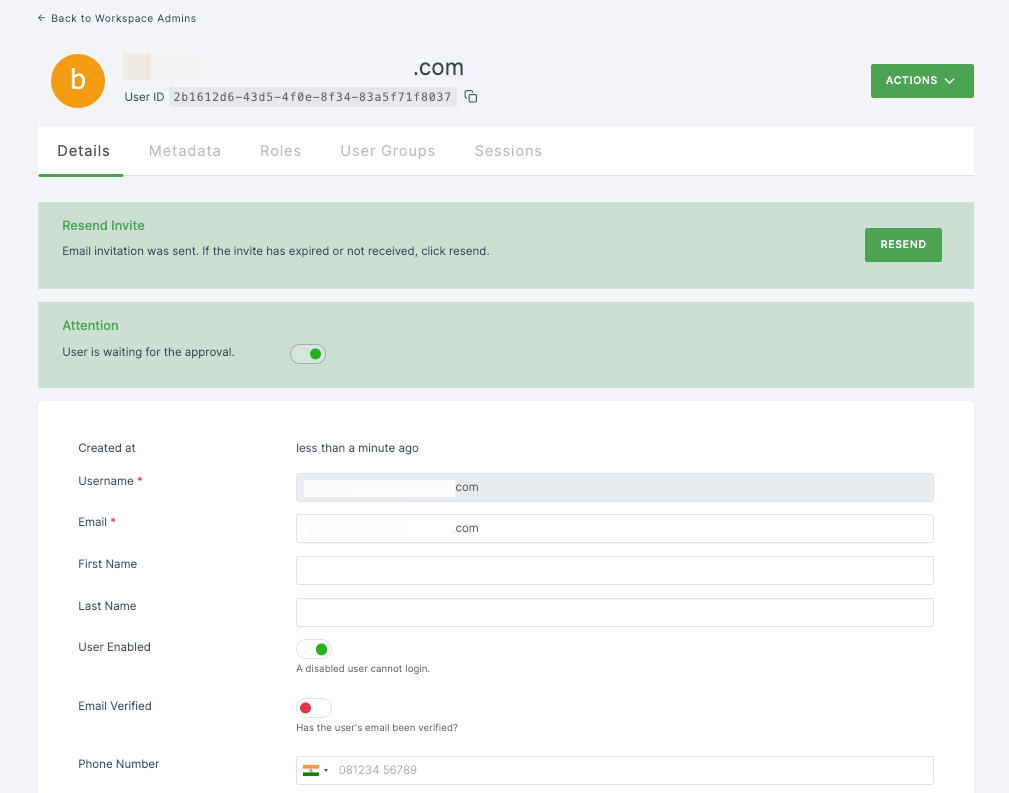
3 Follow the link and provide the email address and OTP, then set the password for the workspace.
However, the co-admin user will not have permission to access resources in the dashboard until approved by the workspace owner or admin.
Grant access
1 Go to Workspace Admins.
2 Click on the co-admin you want to provide access.
3 Enable the toggle as shown below and scroll down, click on SAVE.
There are certain actions that only the Workspace owner can perform, such as promoting a co-admin to an account creator but co-admins do not have the authority to perform this action. However, co-admins can promote or demote Workspace users within their granted permissions.