Keycloak OpenID Connect
The Keycloak OpenID Connect protocol is an open authentication protocol featuring single sign-on (SSO) capabilities. Users can authenticate themselves through OpenID Providers (OPs), like email providers or social networks.
Make sure to create a Keycloak OpenID Connect Developer account before you begin.
1 Go to Dashboard > Authentication > Social.
2 Click on + CREATE CONNECTION.
3 You will be redirected to the social connection providers page, where you can view all the available providers.
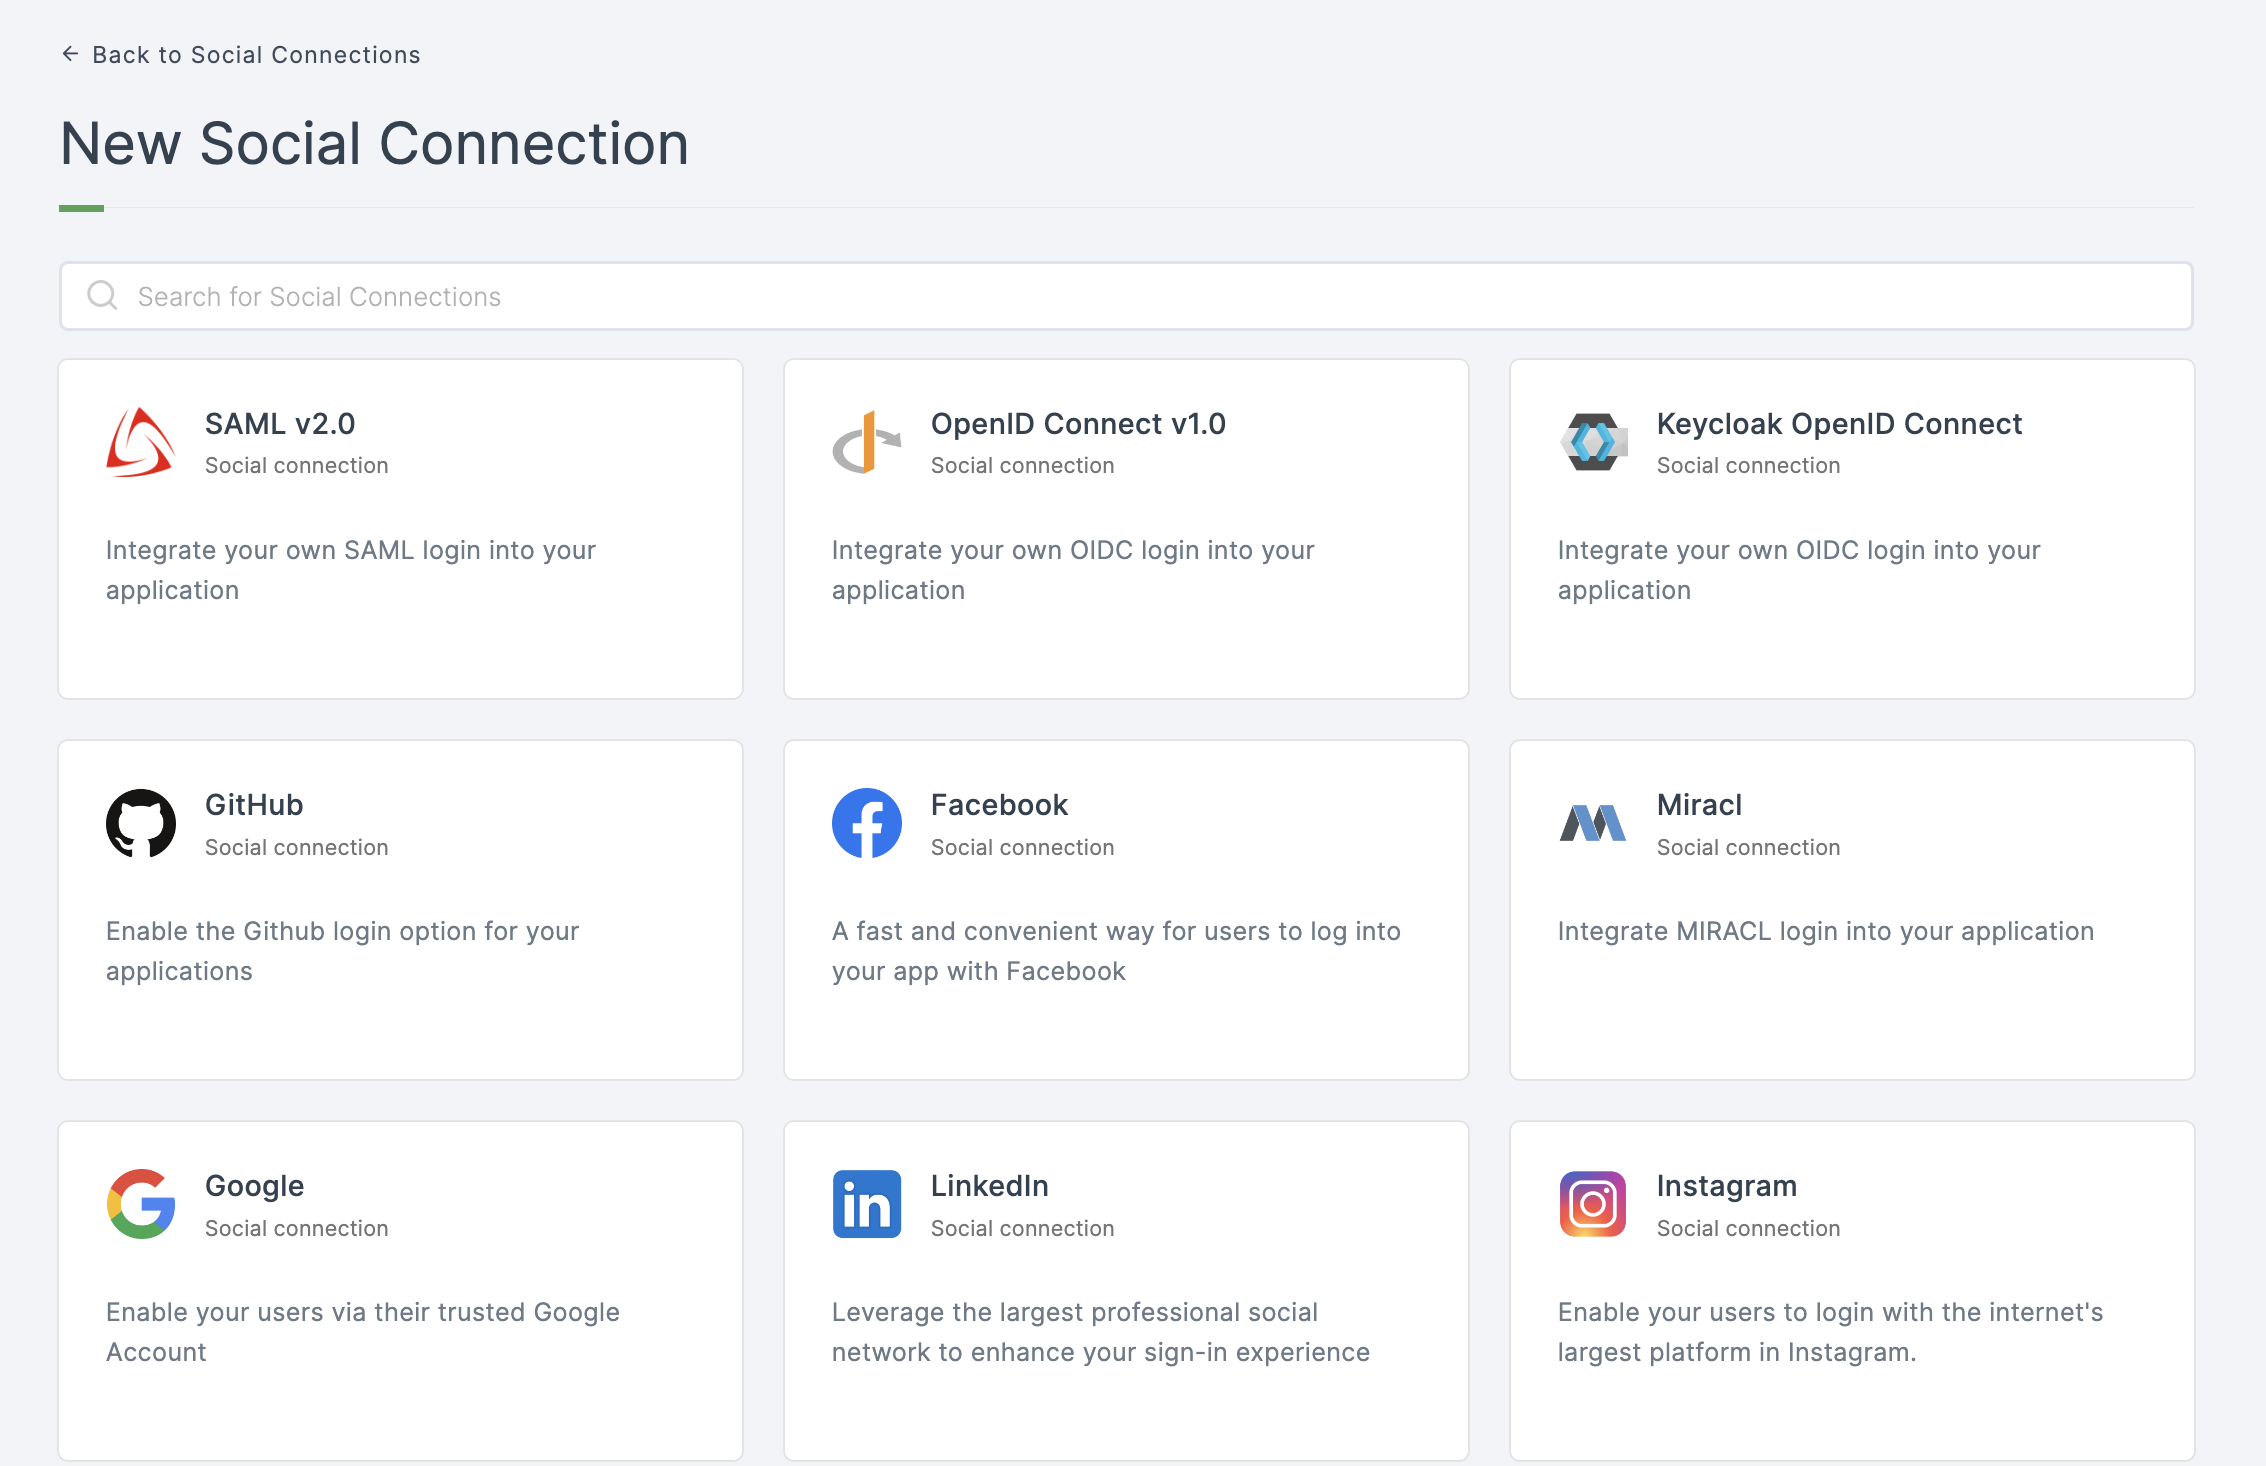
4 Click on Keycloak OpenID Connect
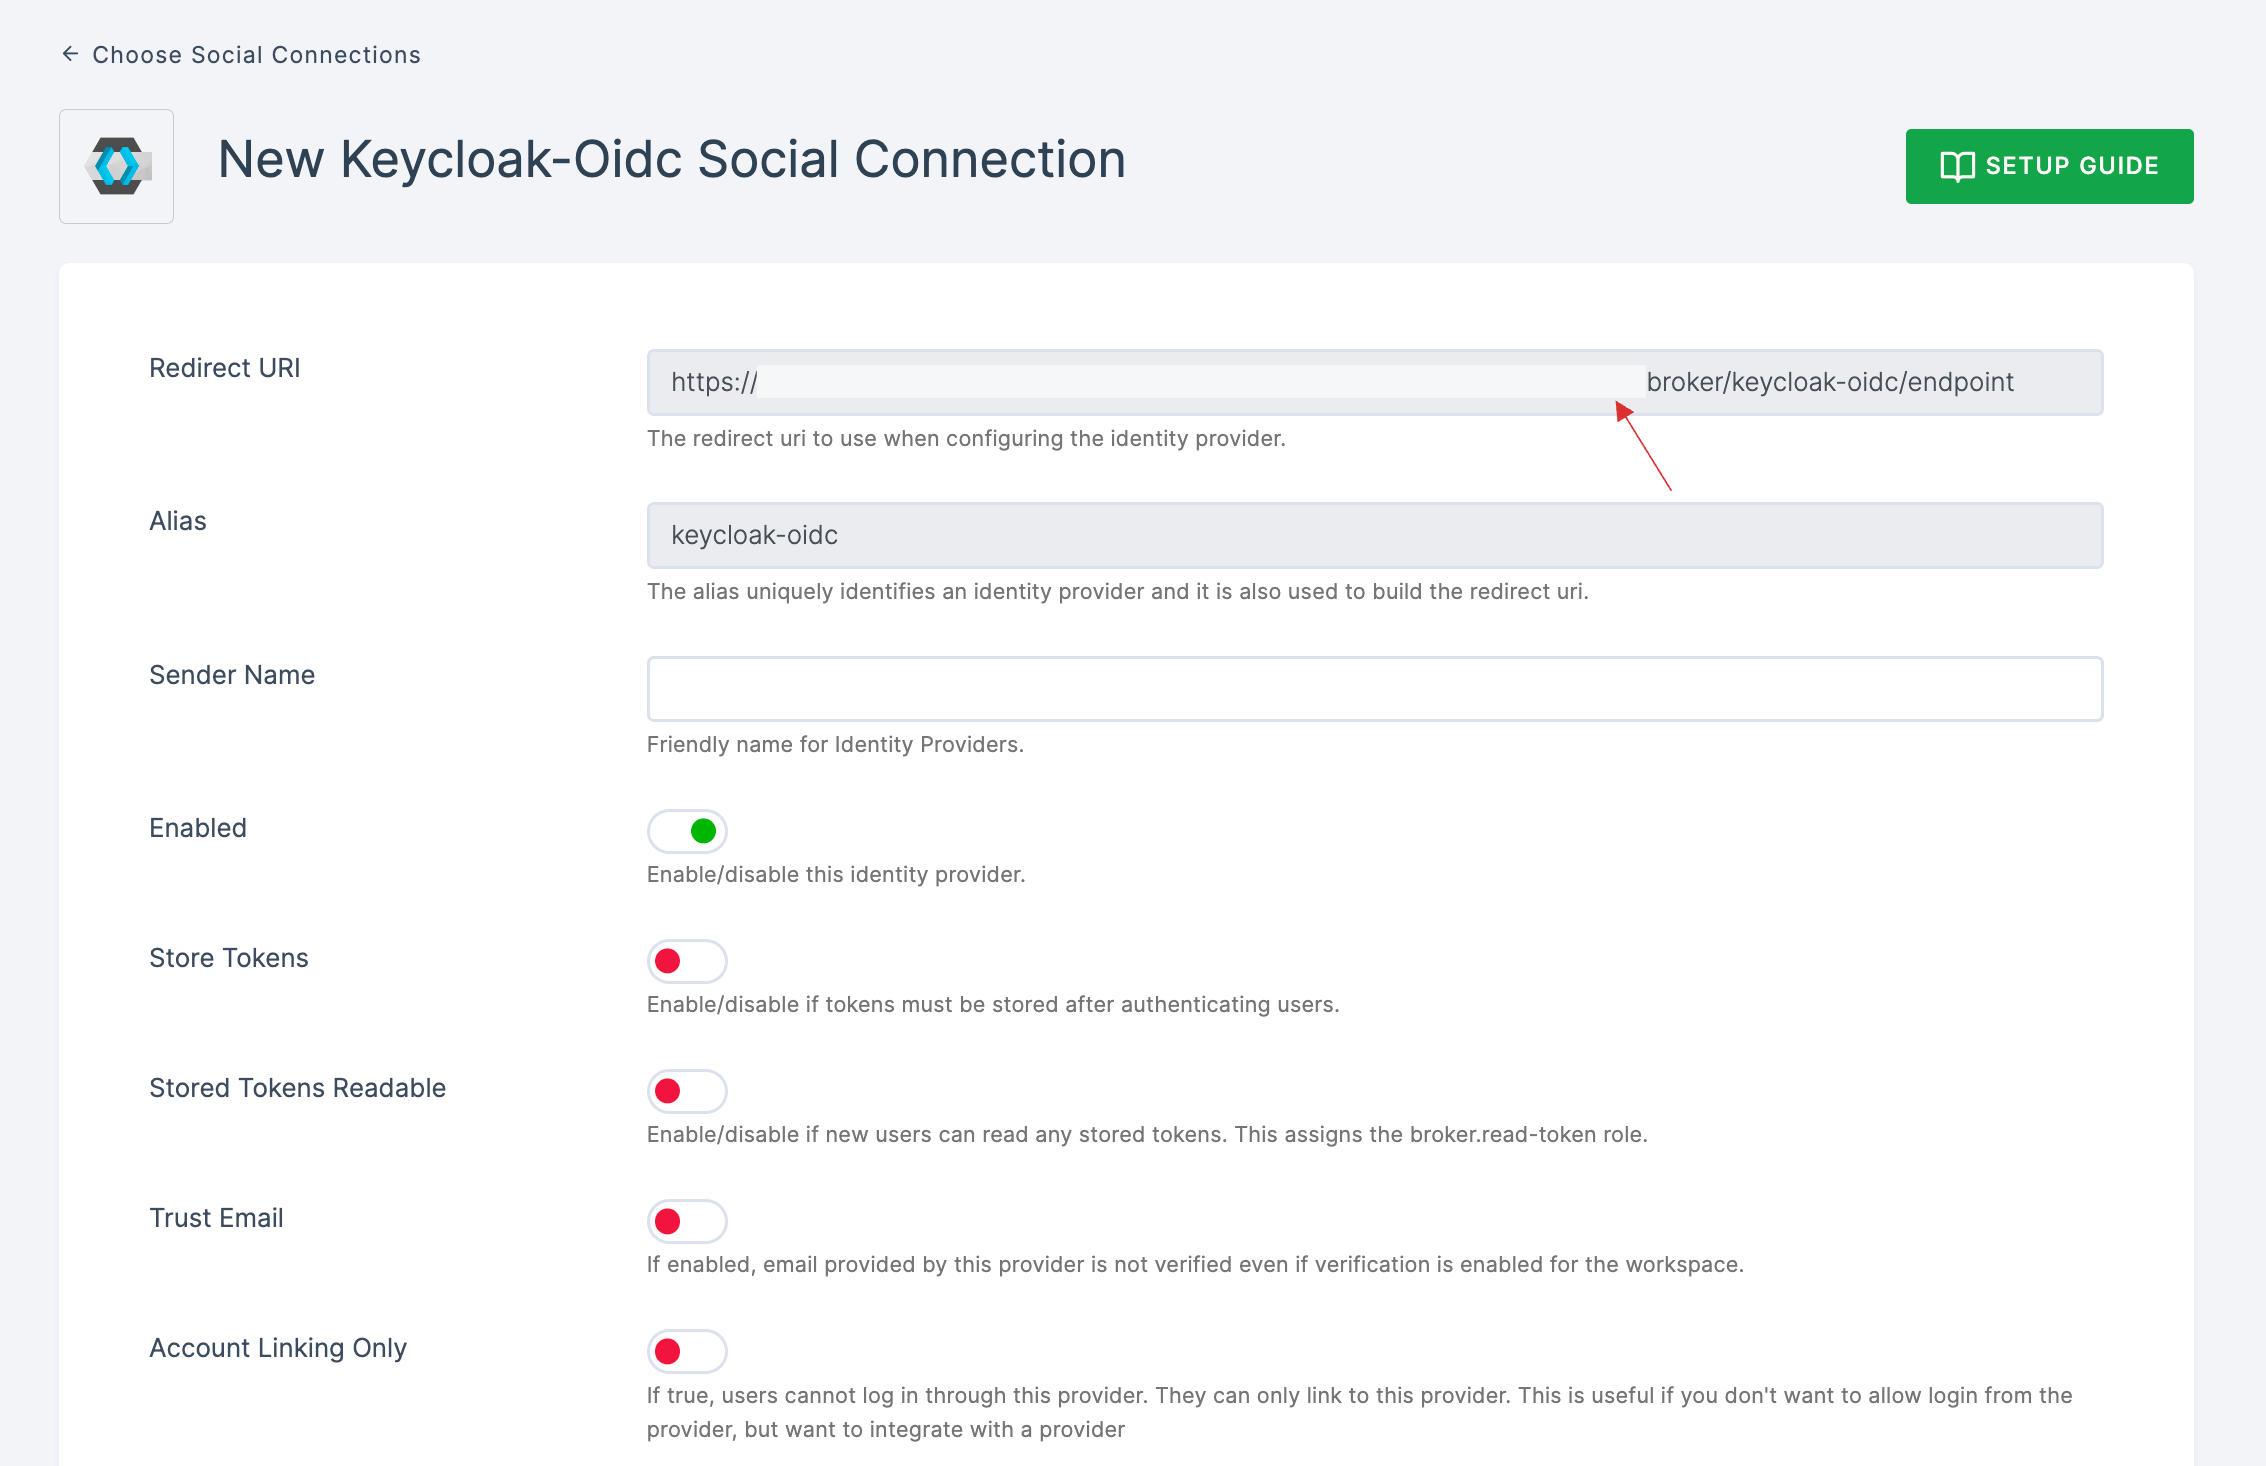
5 You will be directed to the configuration page for the chosen social connection method.
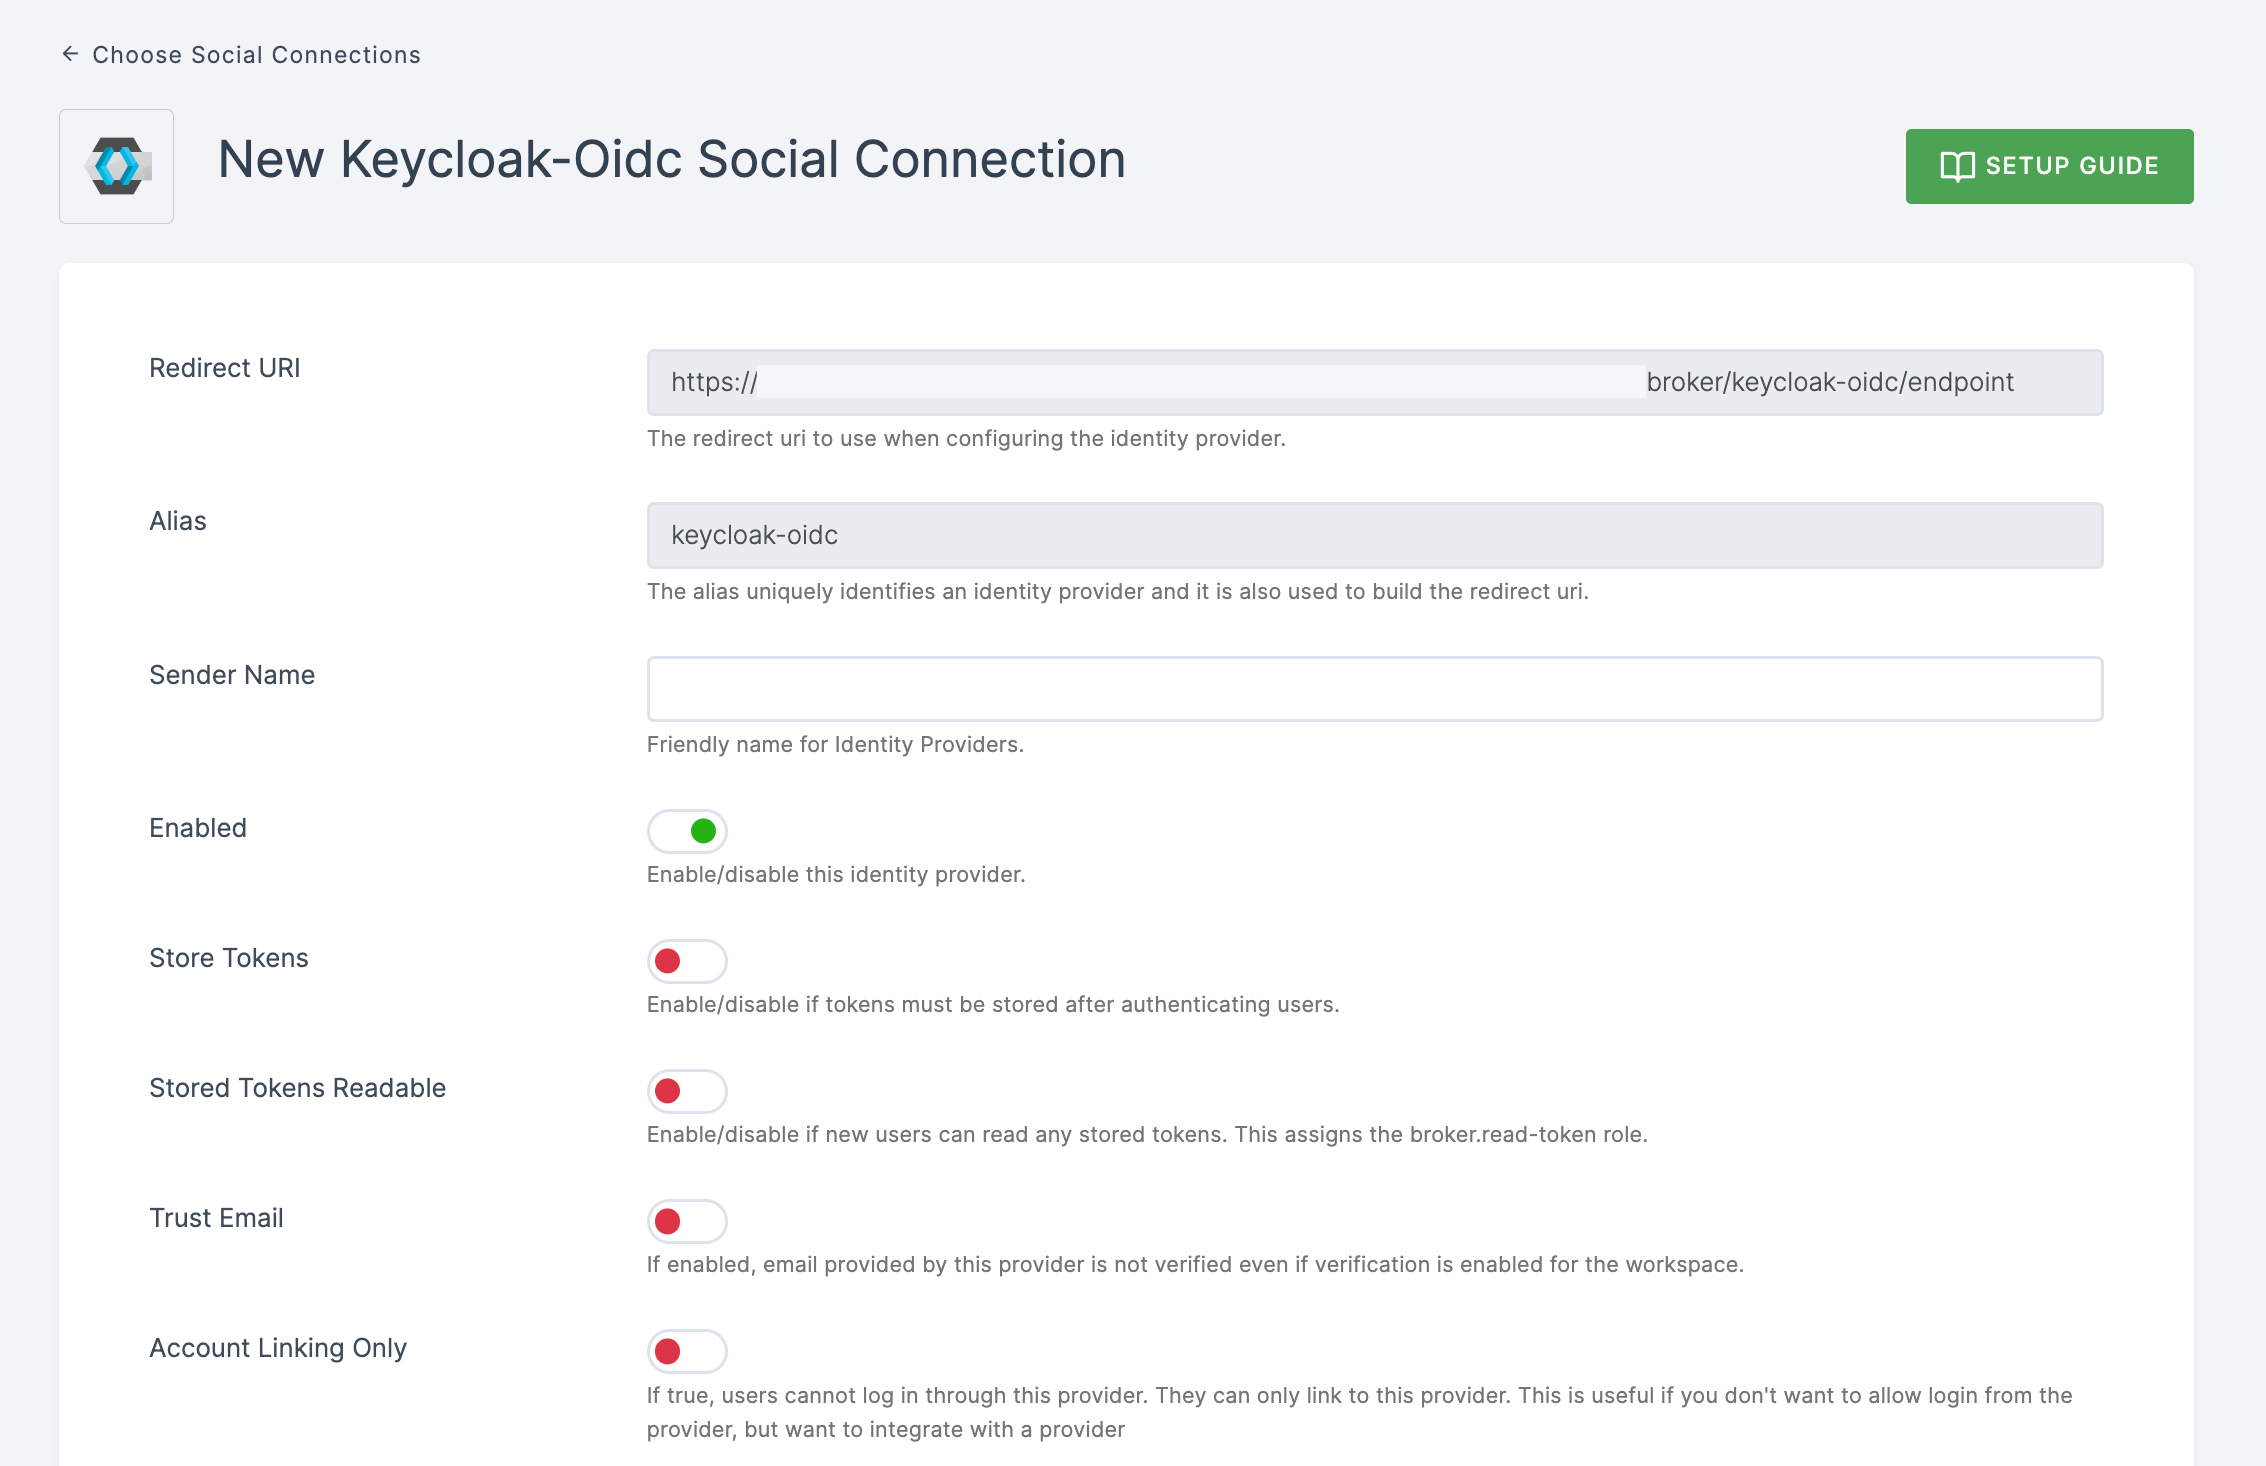
6 Scroll down, and click on OpenID Connect Config section.
7 To enable Keycloak OpenID Connect login, you must first create a client in Keycloak OpenID Connect Provider.
- Copy the redirect URL for the Keycloak OpenID Connect provider from the dashboard as the first step.
Go to Keycloak > Clients, and click the create button.
Paste the copied redirect URL into Root URI of a Keycloak Connect. > Click on Save.
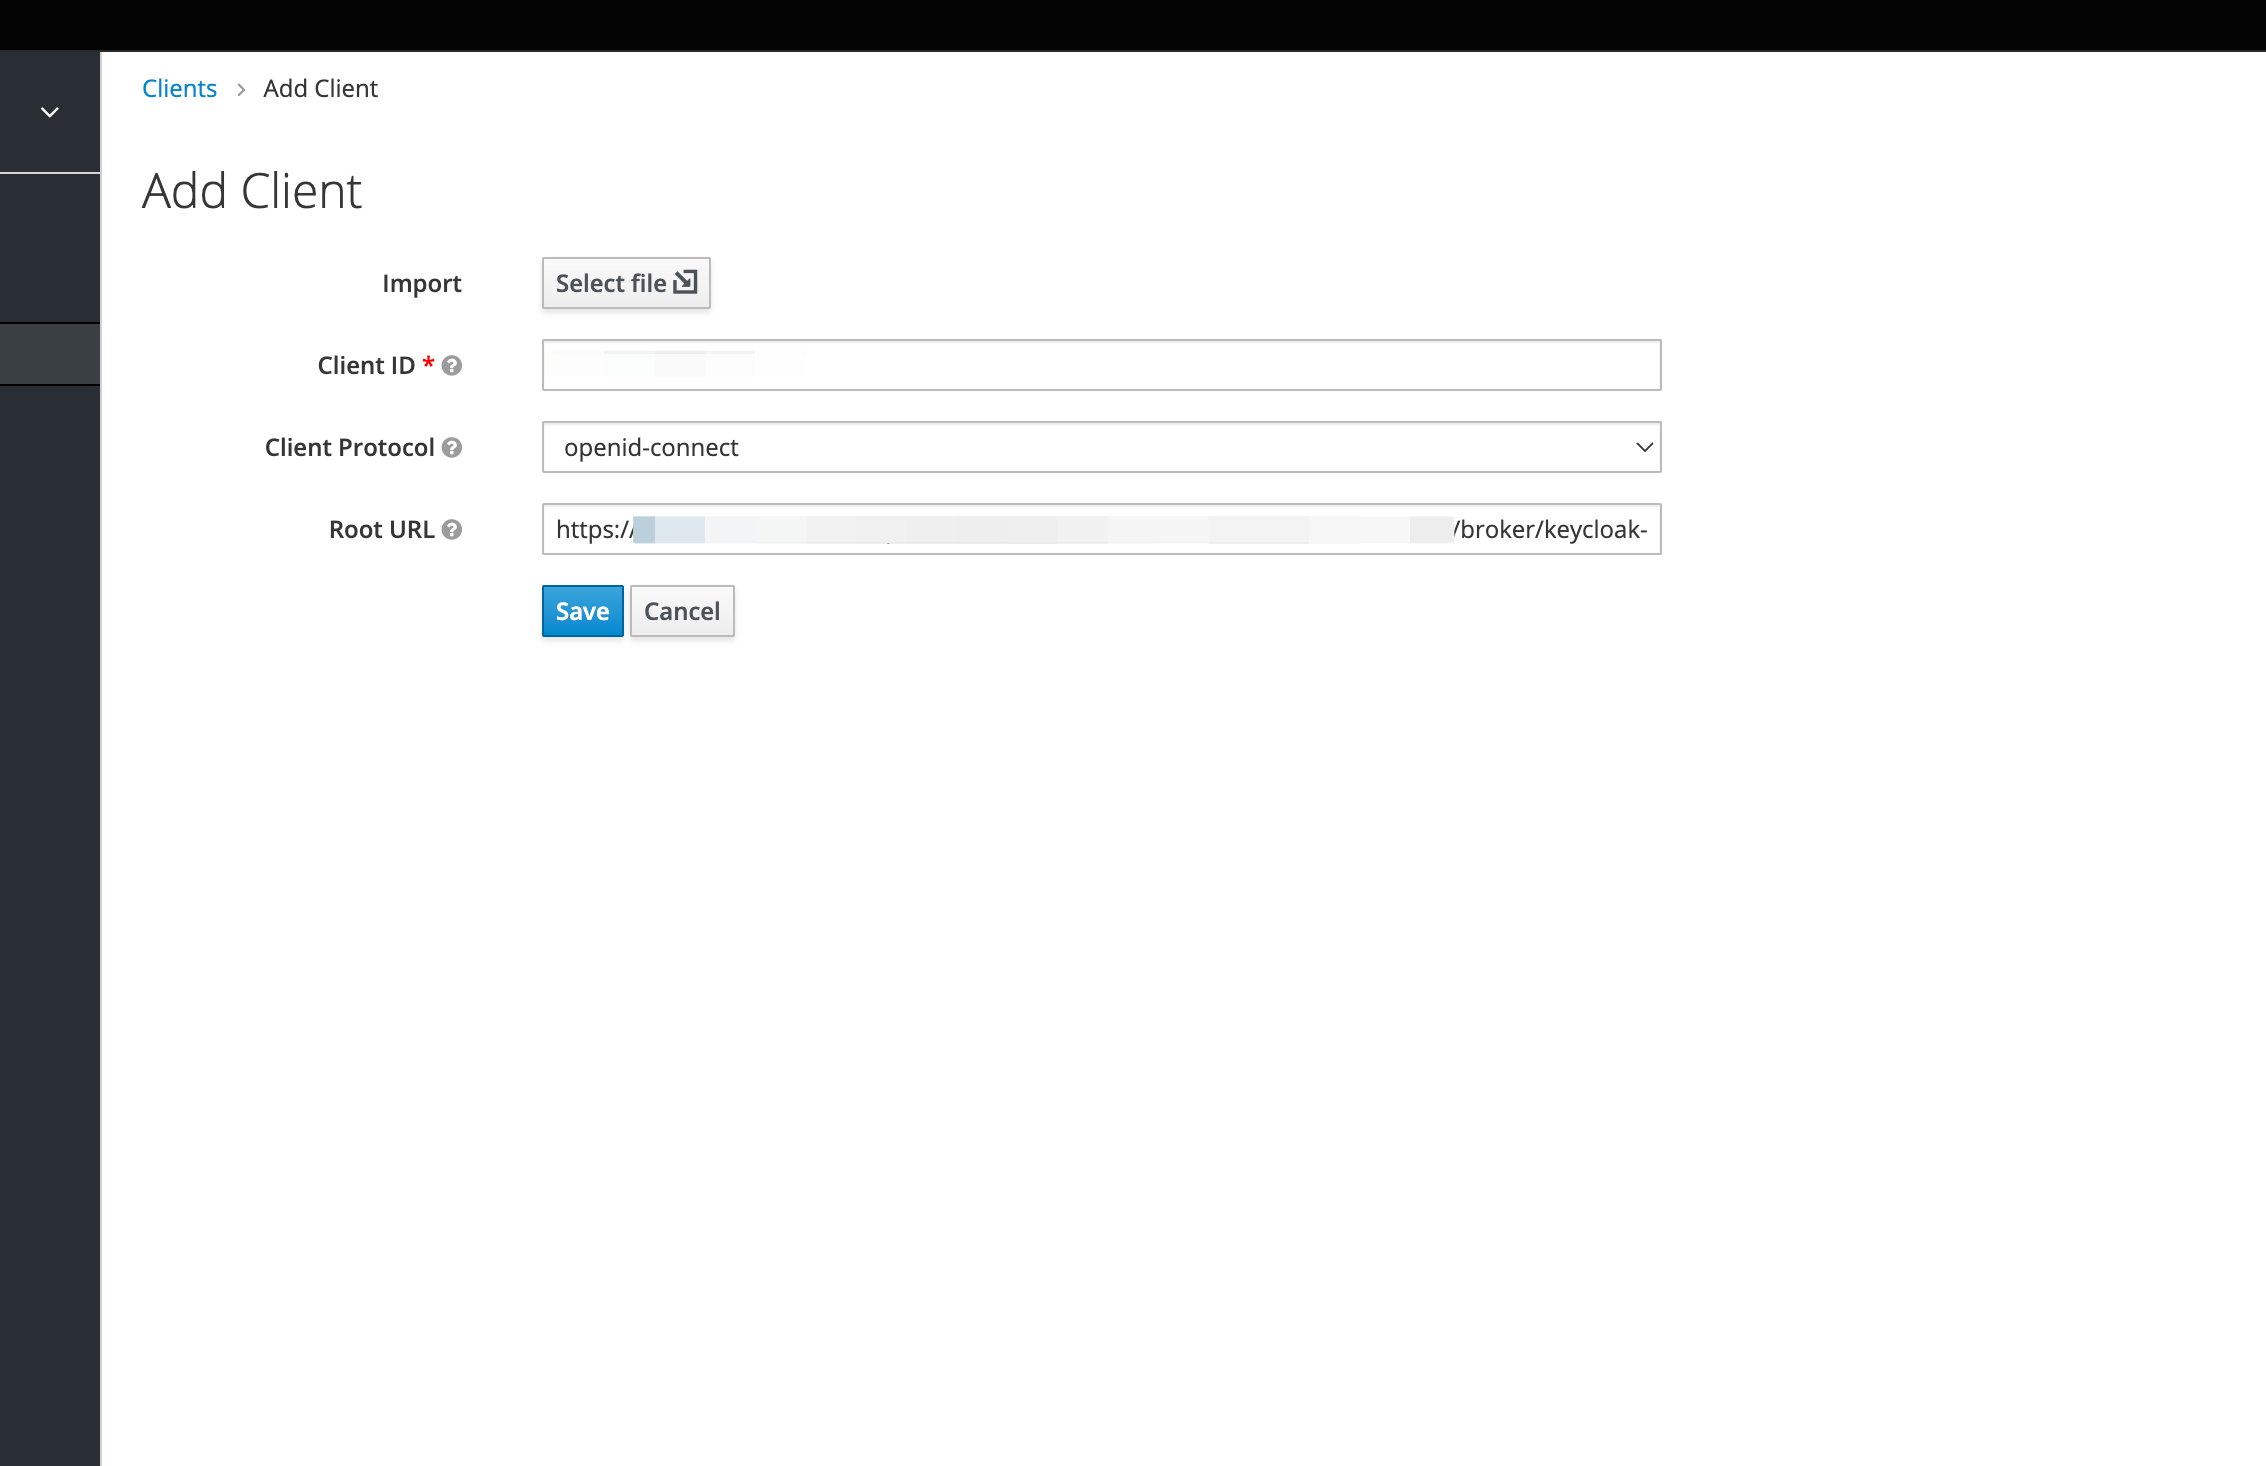
Client ID will be generated, copy it to your clipboard.
Click on the created client, navigate to Access Type and set it as confidential.
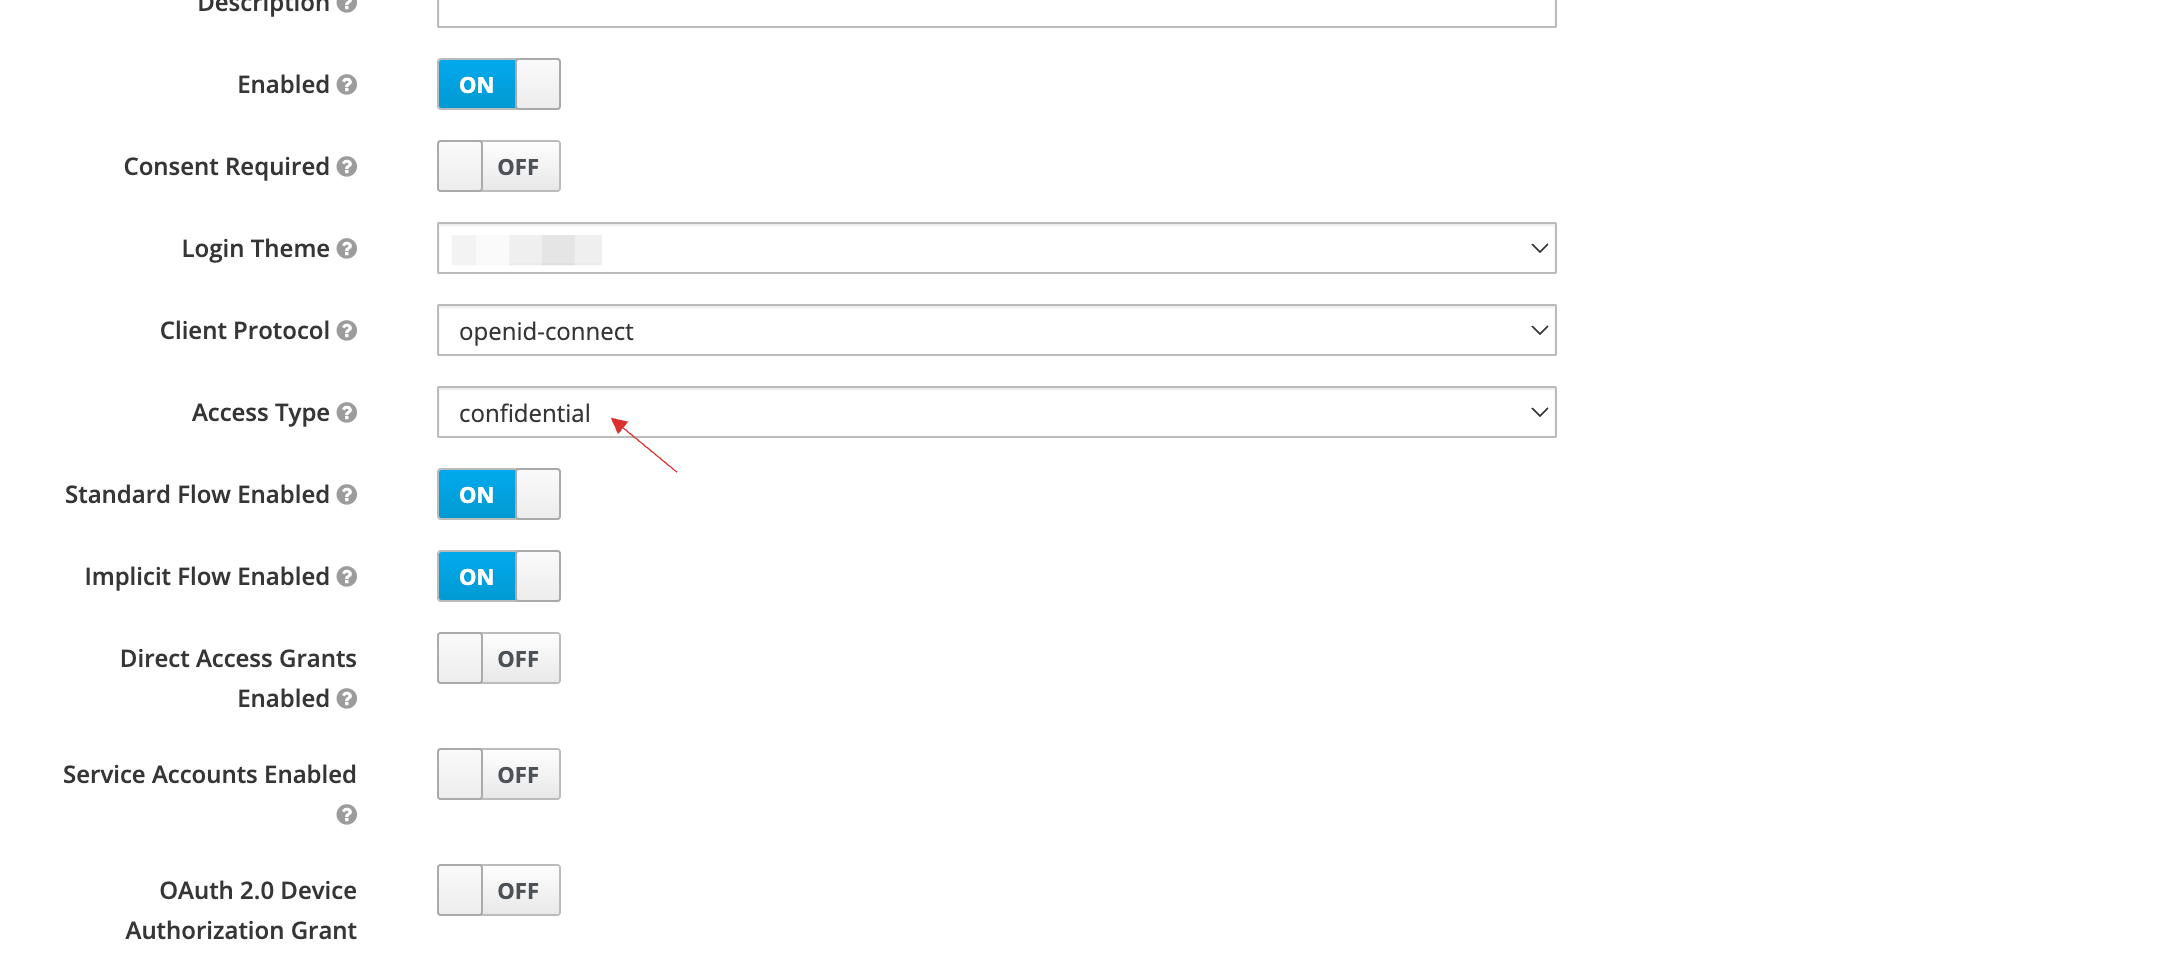
Click on Save.
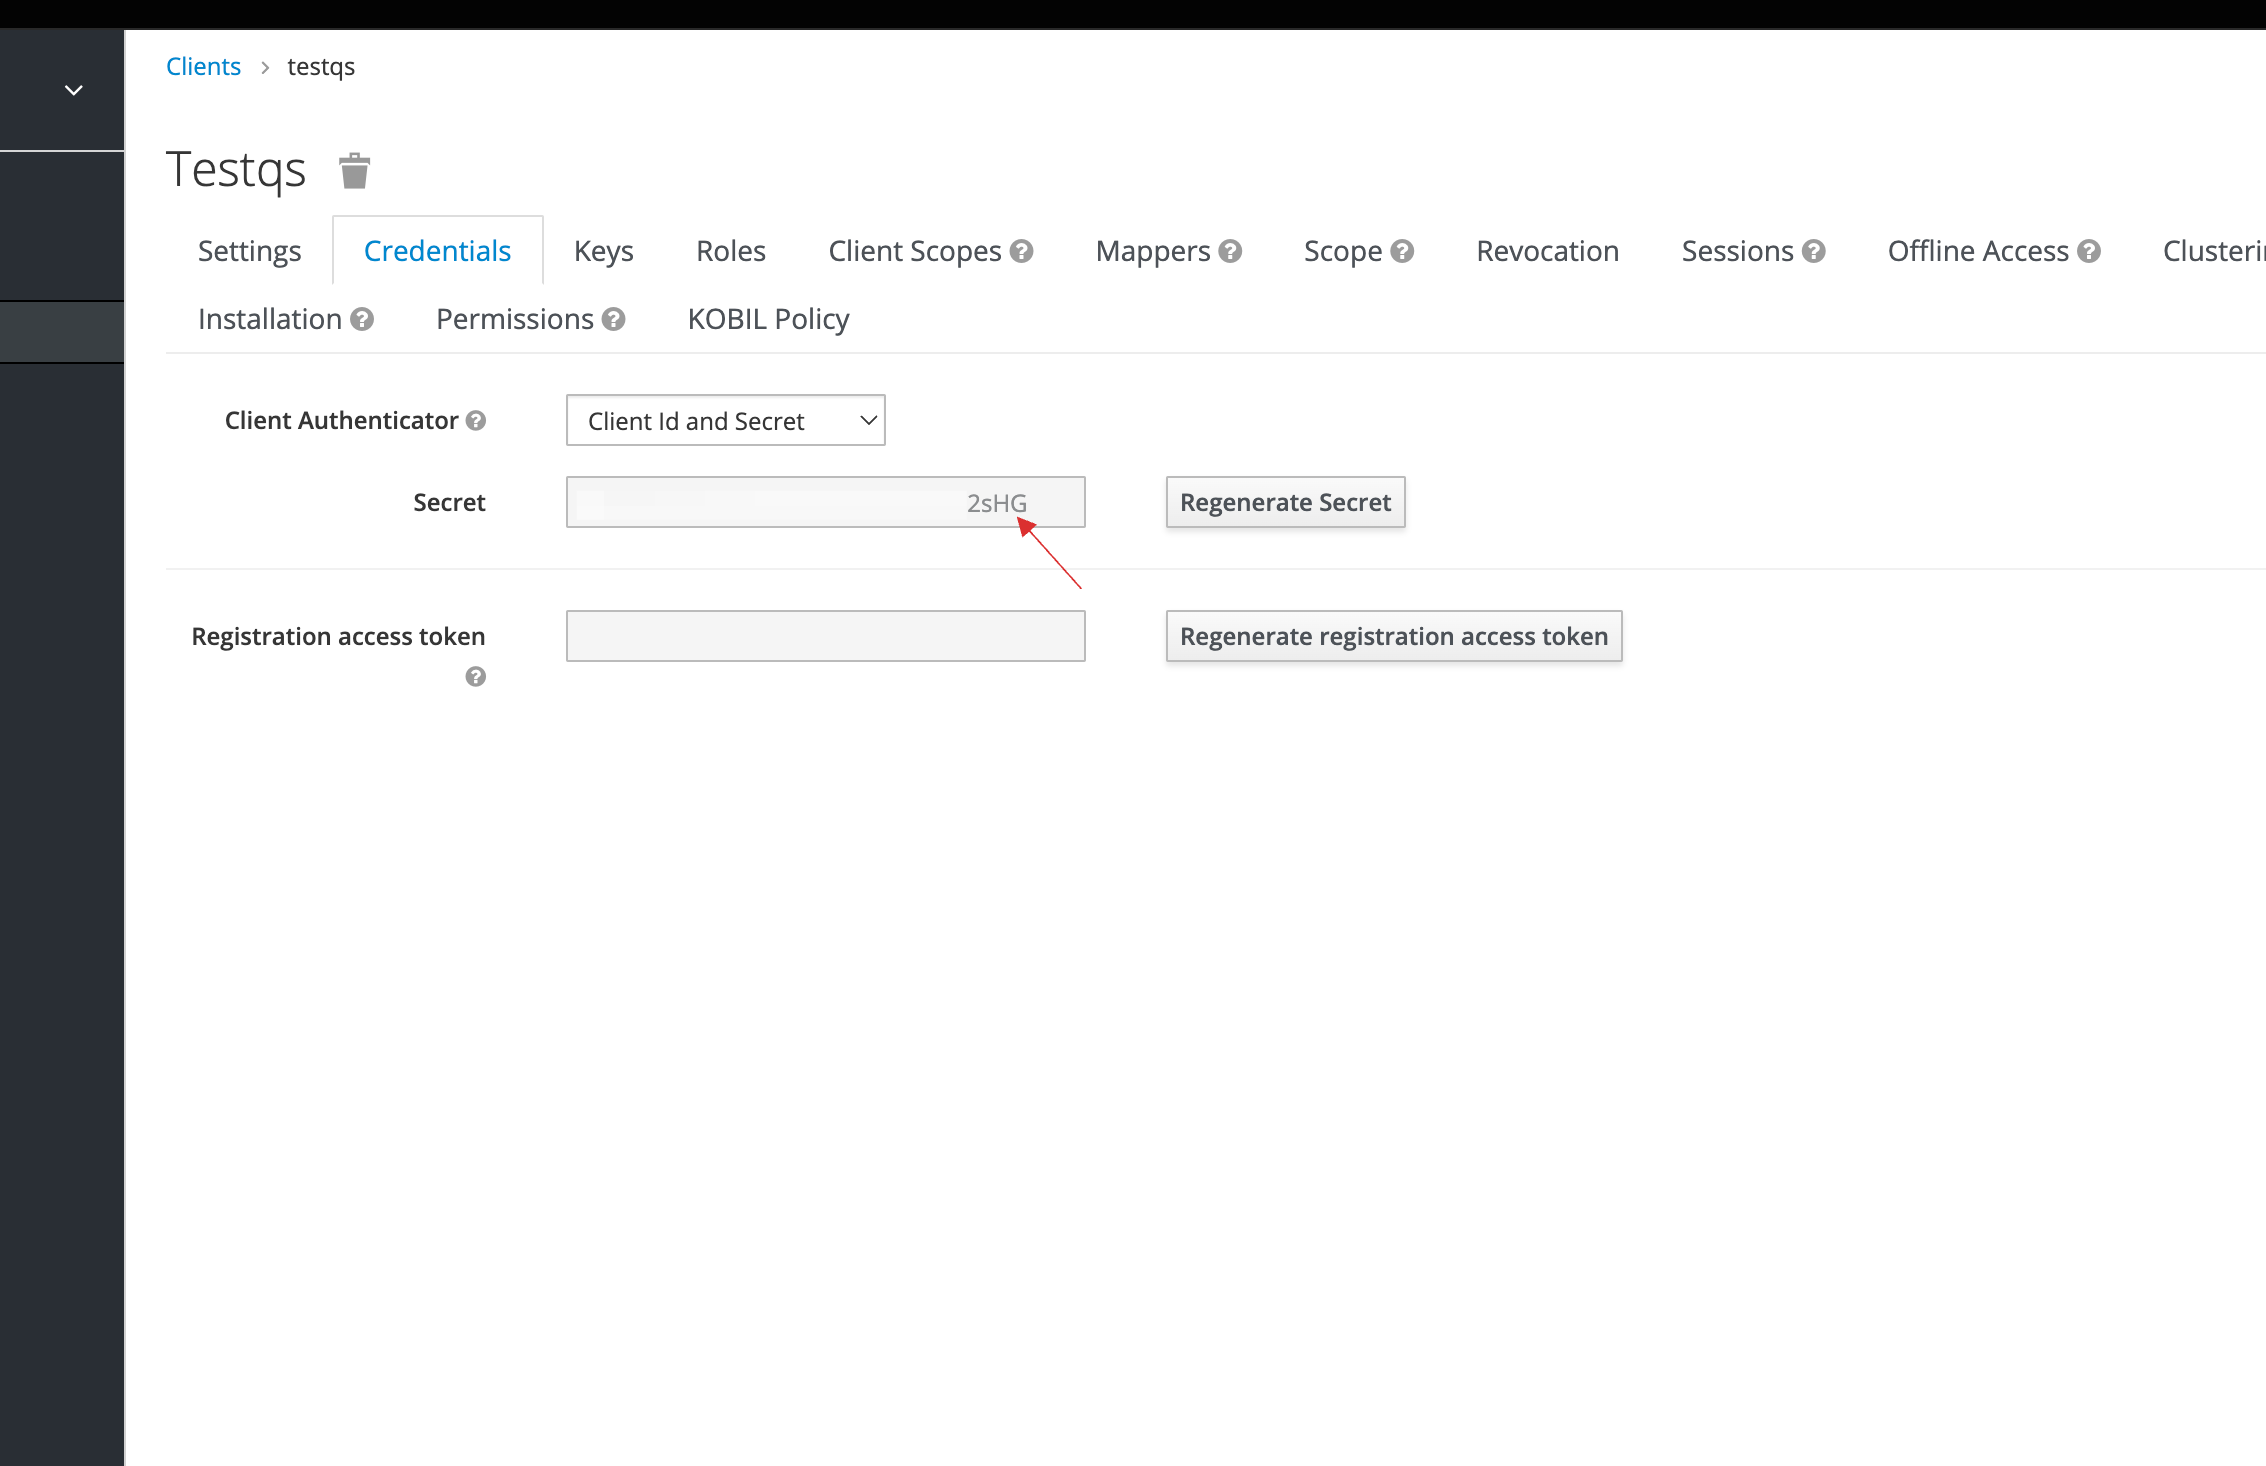
Click on the Credentials tab, copy the Client Secret to your clipboard.
Return to your dashboard, paste the Client ID in App ID and Client Secret in App Secret.
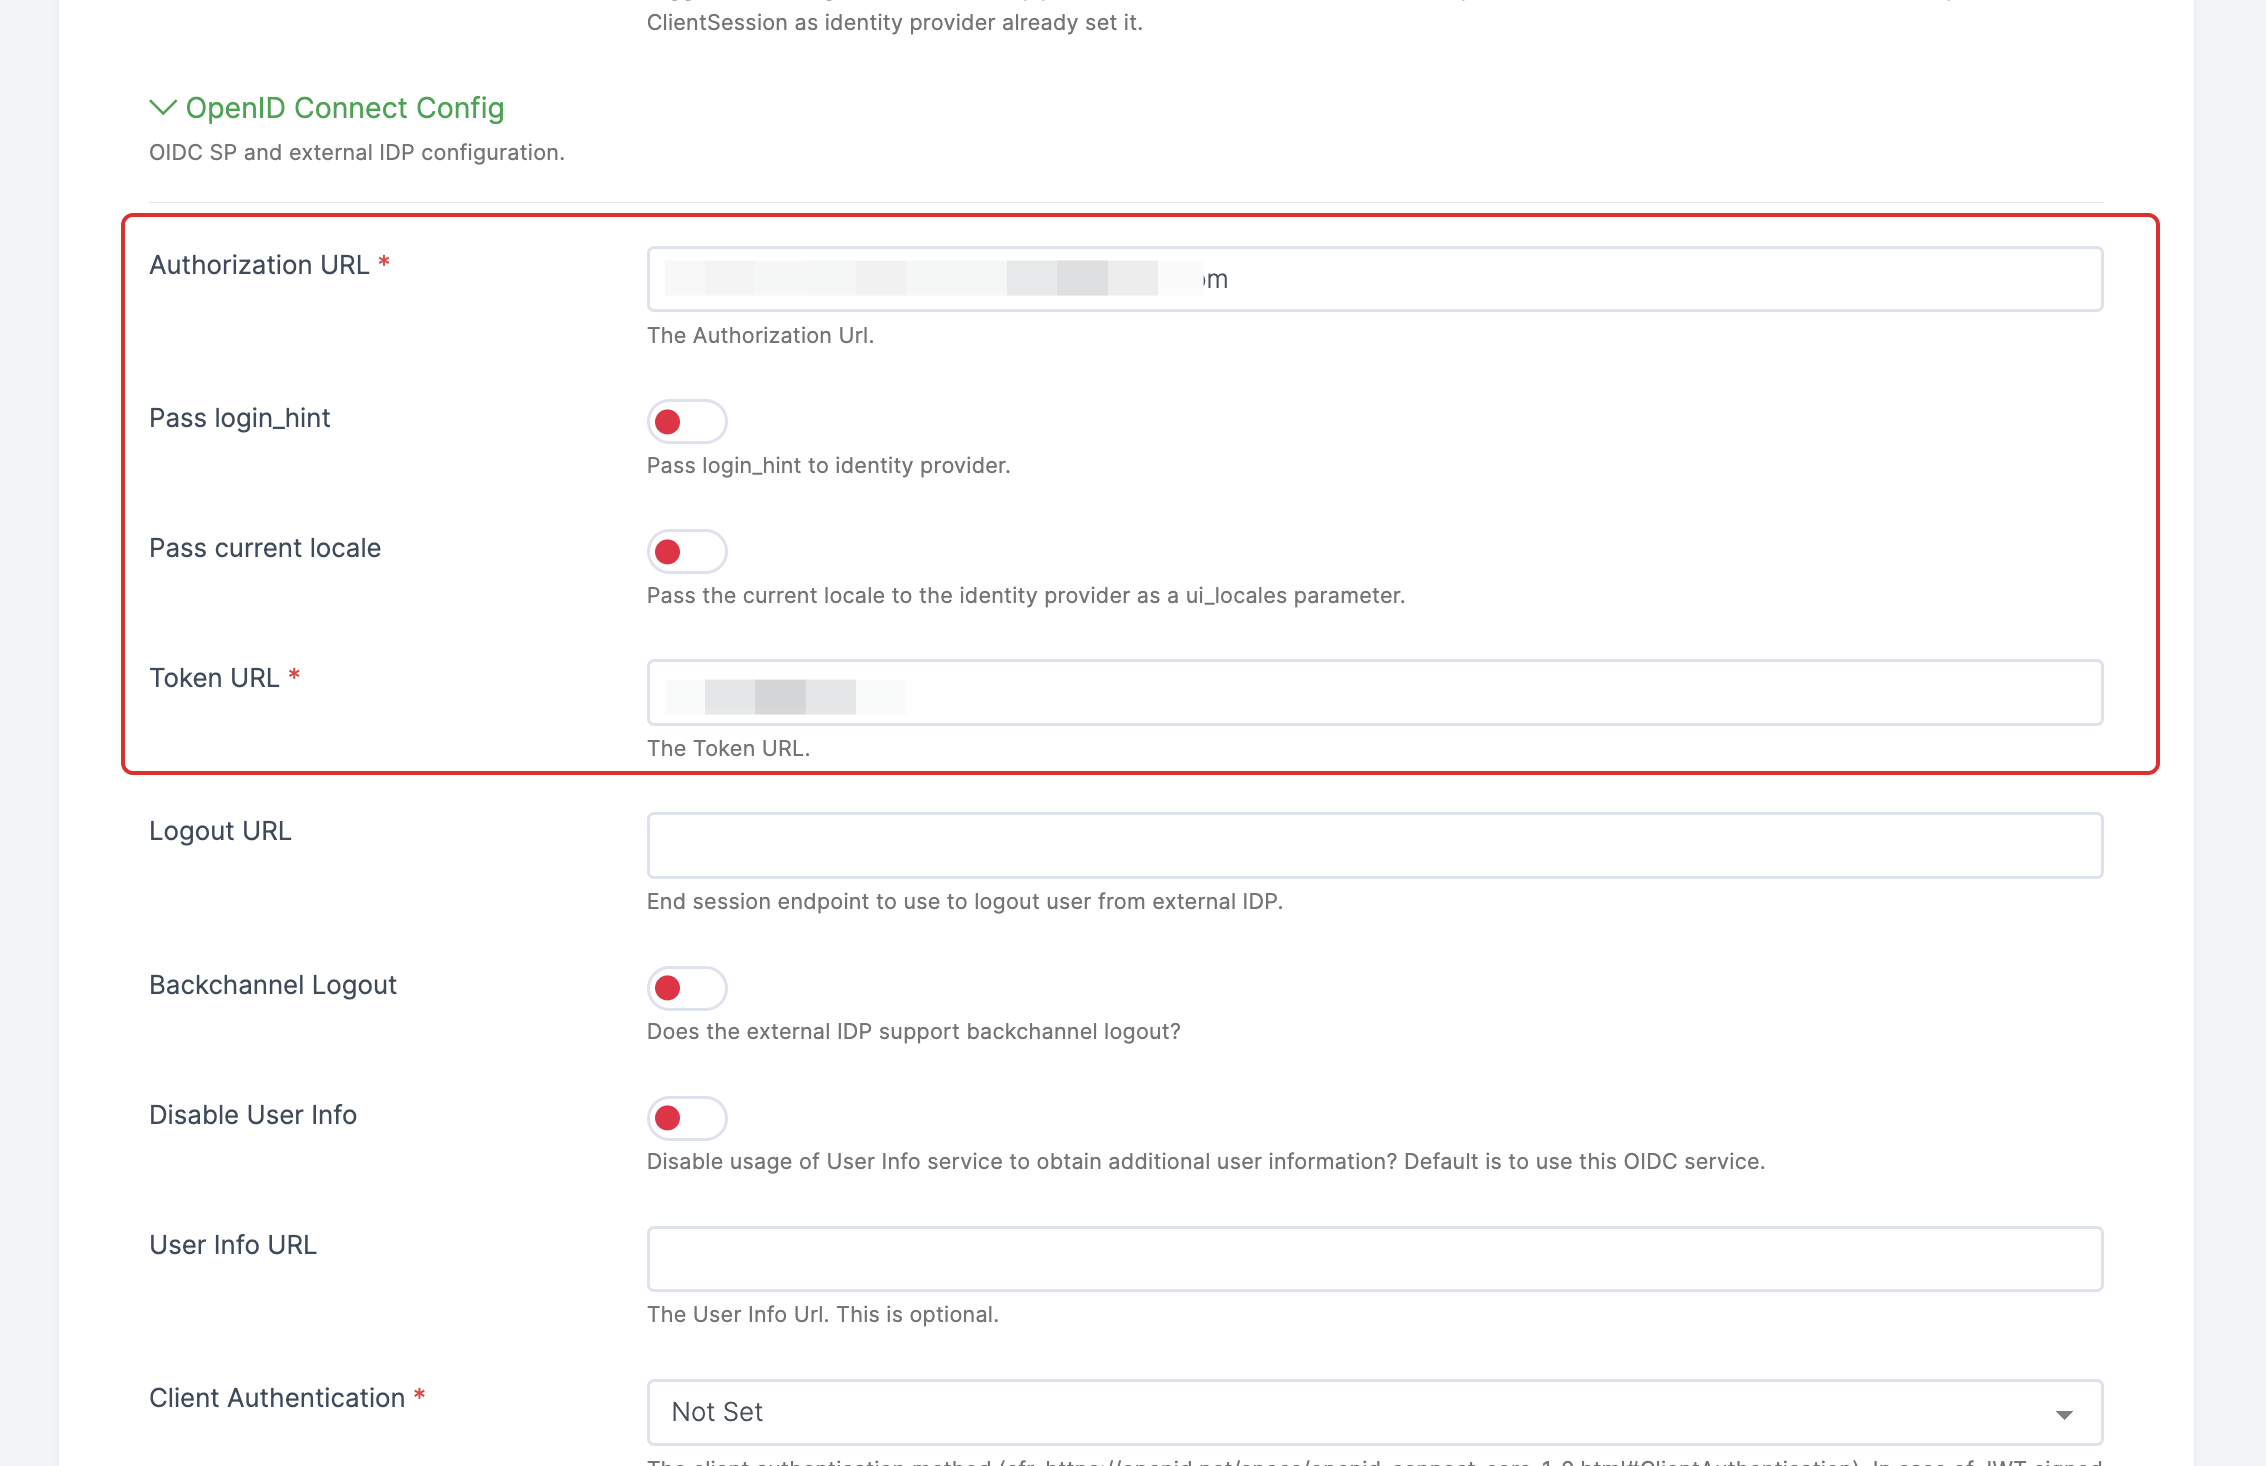
- Now to get the Authorization URL and Token URL, navigate to Keycloak > Realm Settings > Set Endpoints type as
OpenID Endpoint Configuration

- Copy the generated the Authorization URL and Token URL.
8 Return to your dashboard, paste the Authorization URL and Token URL.
9 Configure the other required specification, click on SAVE.