The ezto auth's Google social provider will enable your users via their trusted Google Account.
Make sure to create a Google Developer account before you begin.
1 Go to Dashboard > Authentication > Social.
2 Click on + CREATE CONNECTION.
3 You will be redirected to the social connection providers page, where you can view all the available providers.
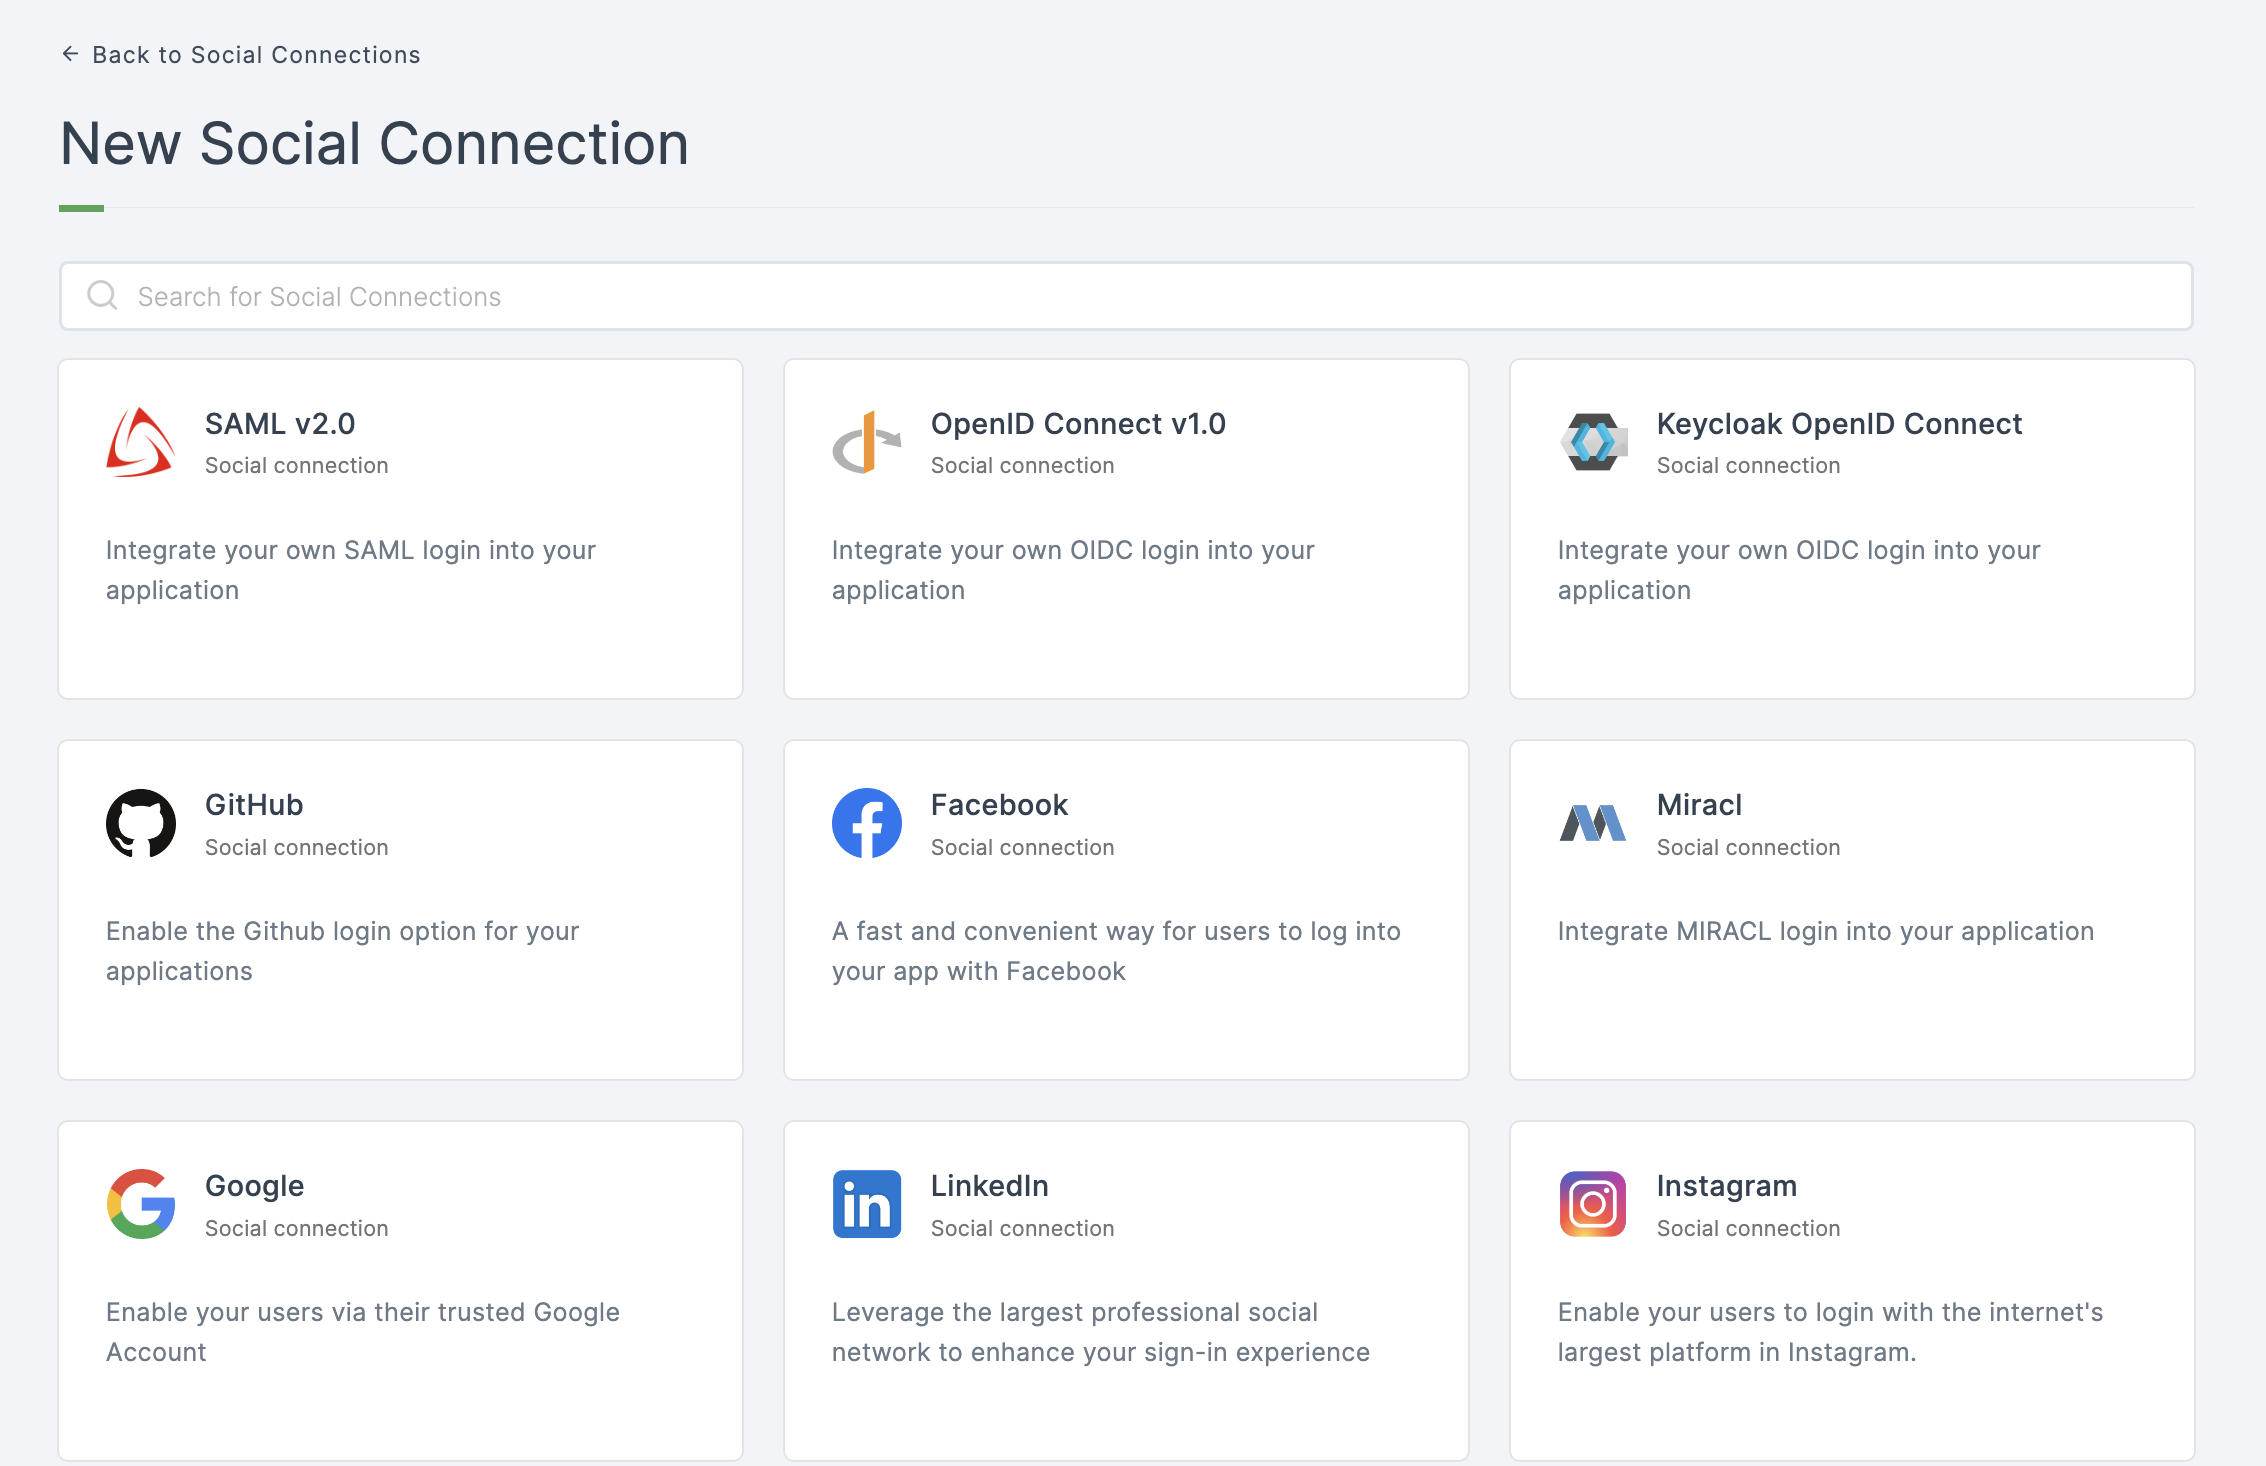
4 Click on Google.
5 You will be directed to the configuration page for the chosen social connection method.
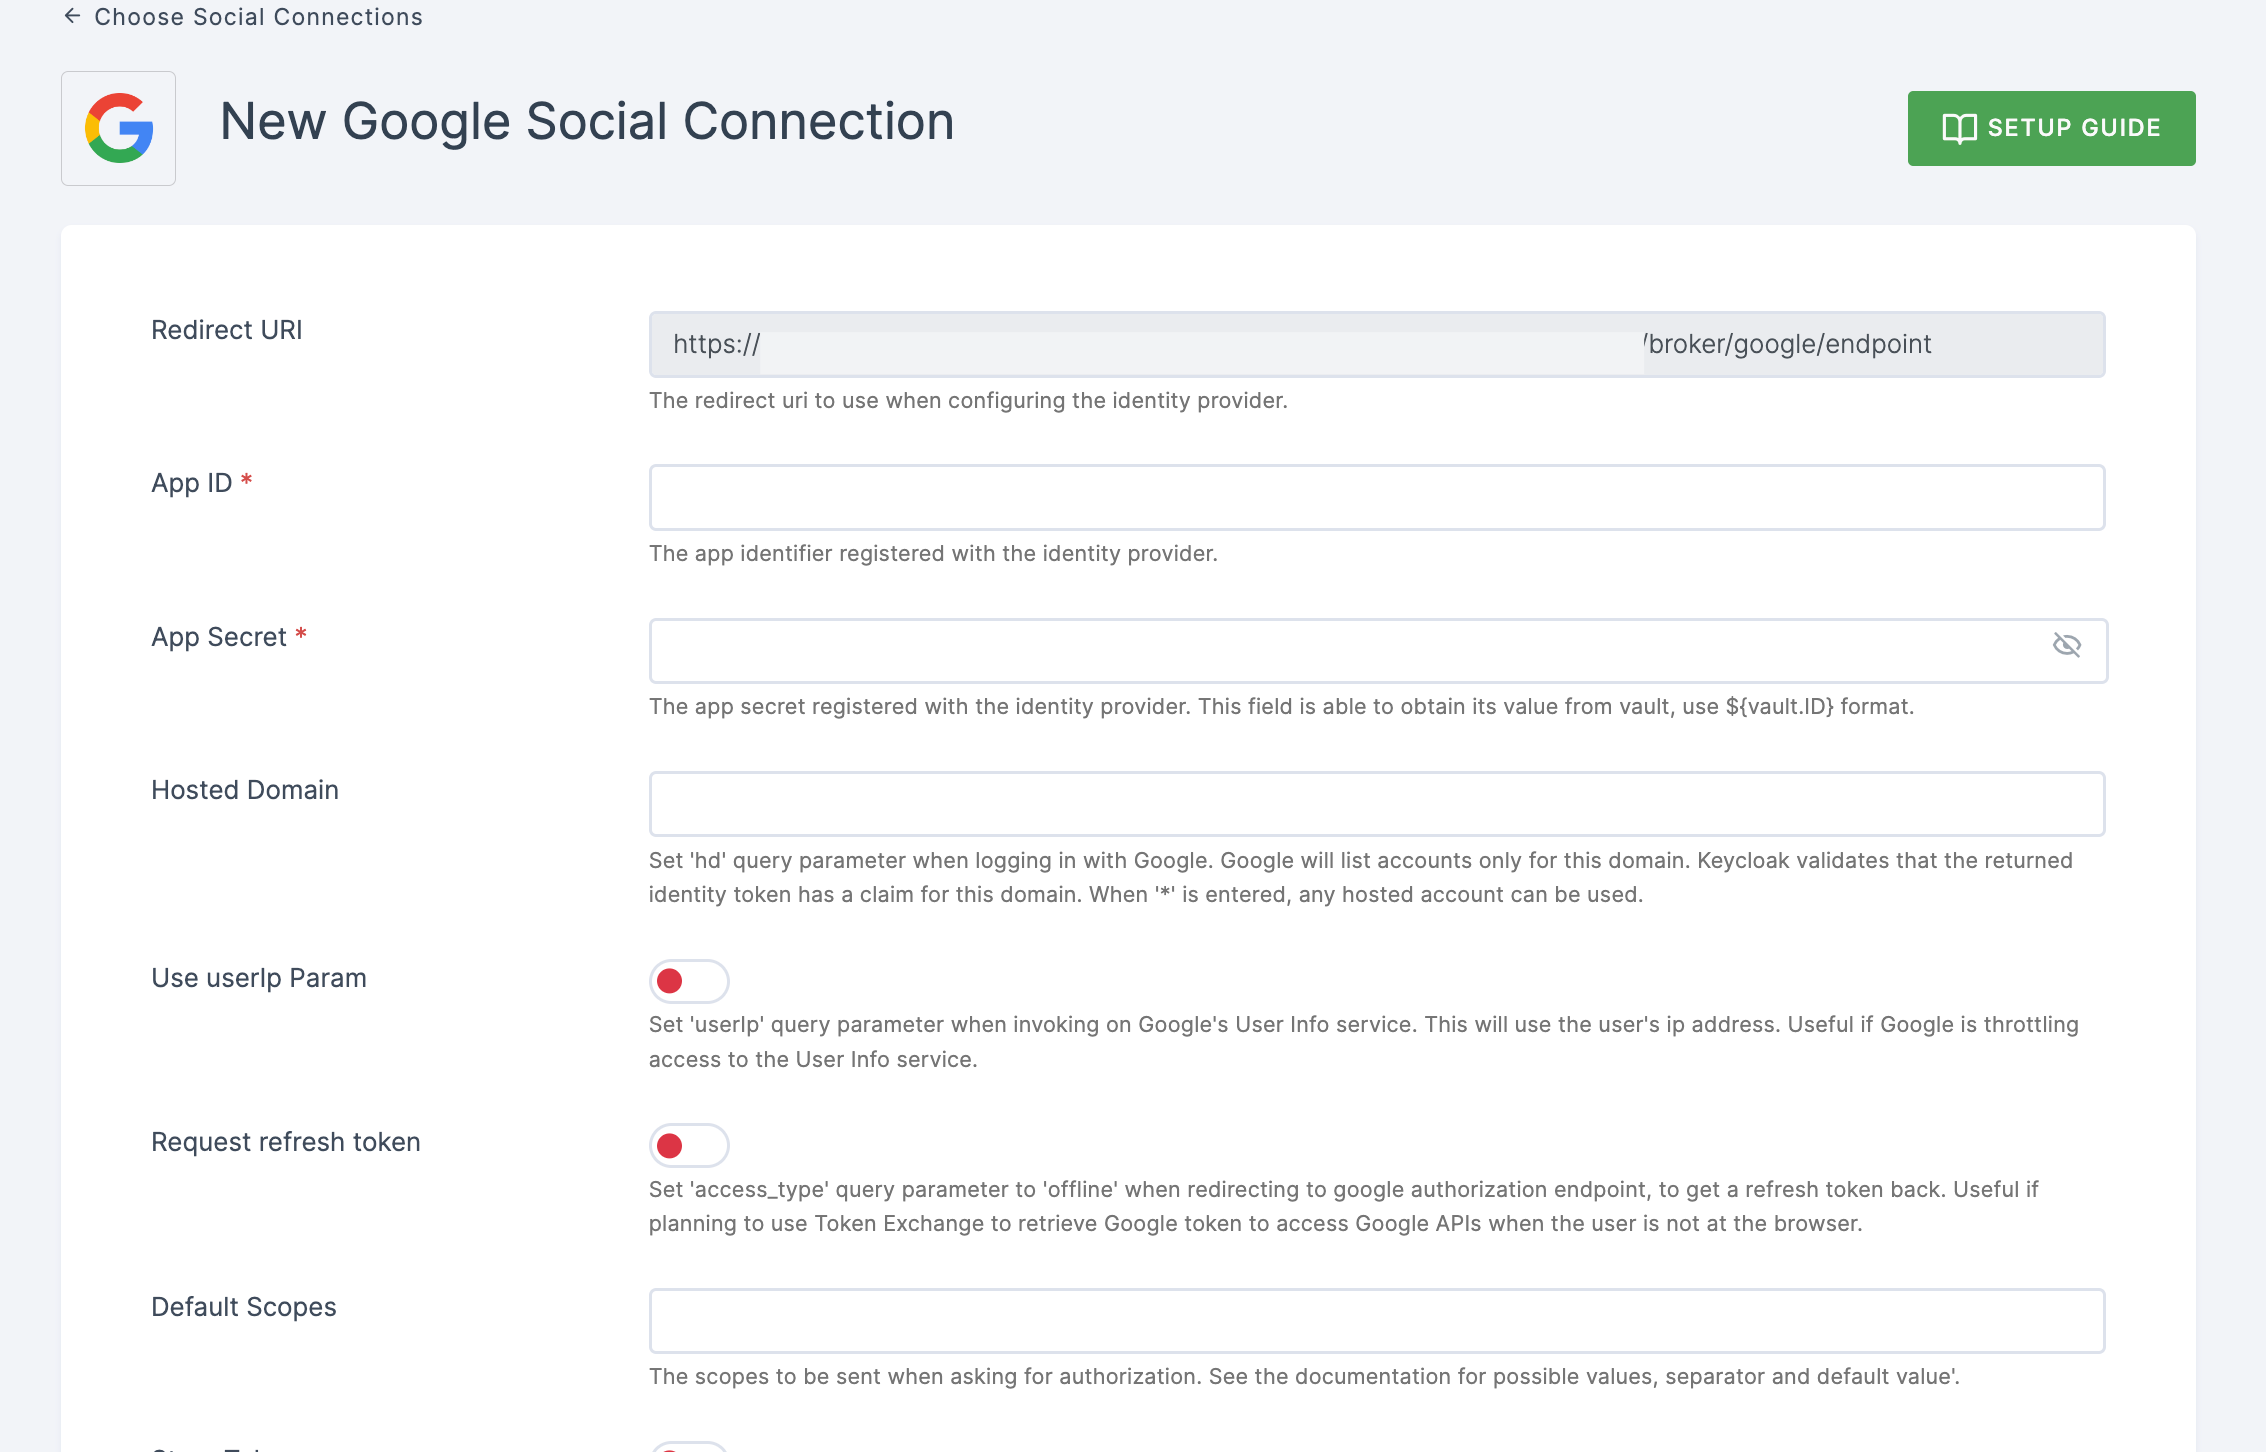
6 To enable Google login, you must first establish a project and client in the Google Developer Console.
- Copy the redirect URL for the Google provider from the dashboard as the first step.
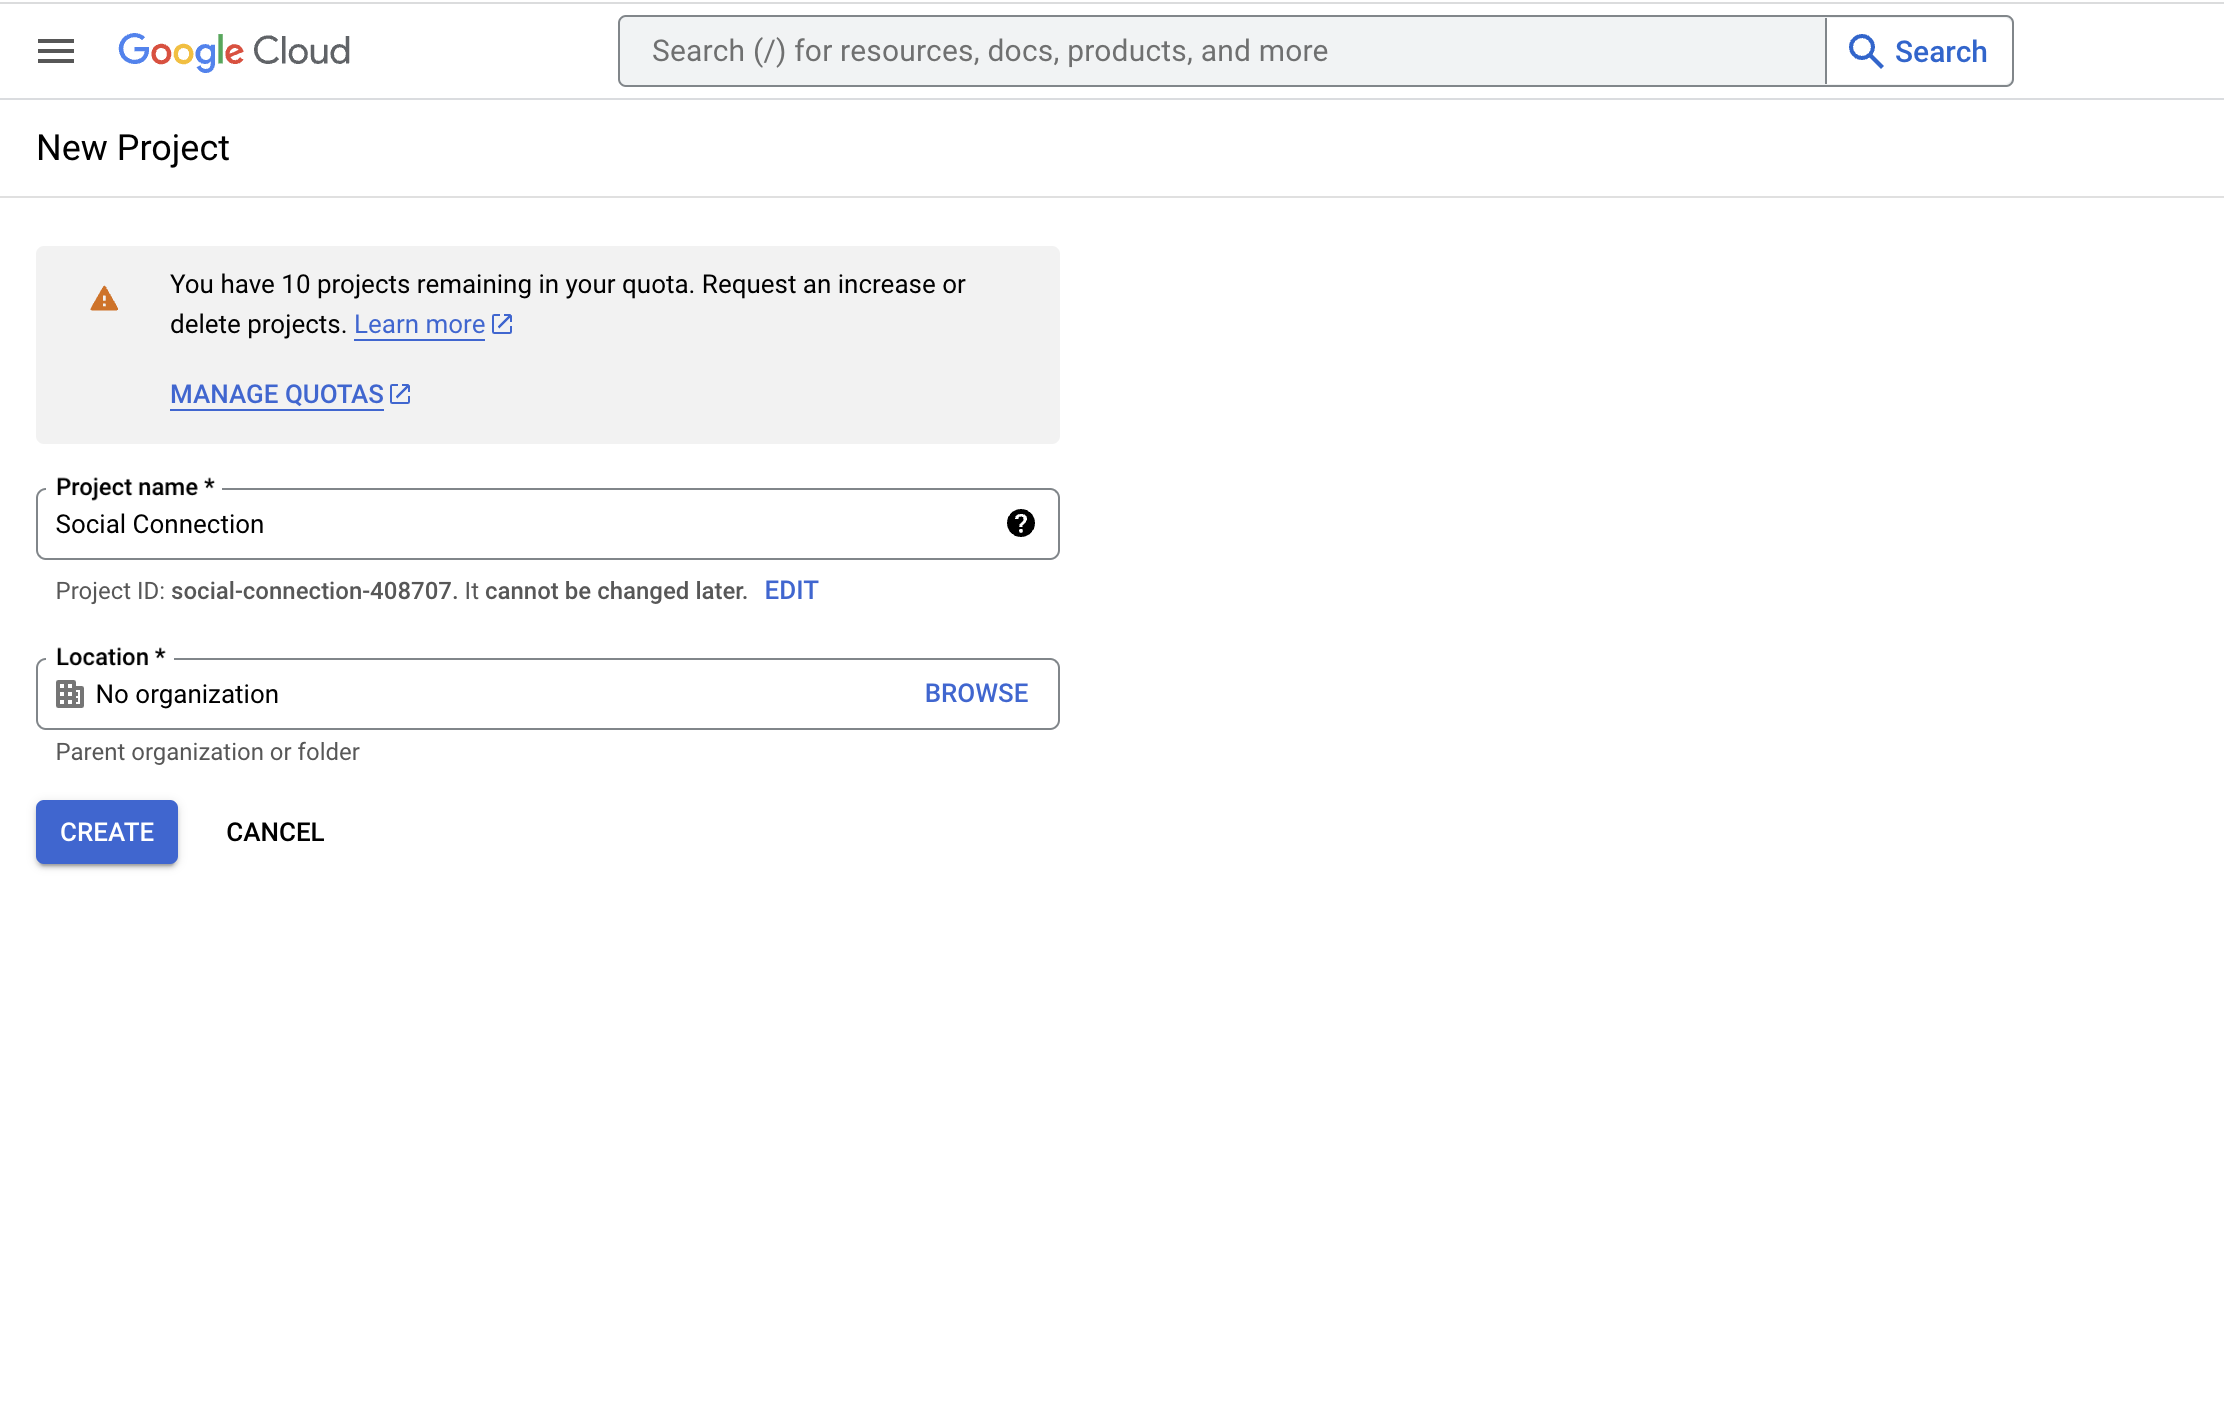
- Go to Google Developer Console and click on CREATE PROJECT.
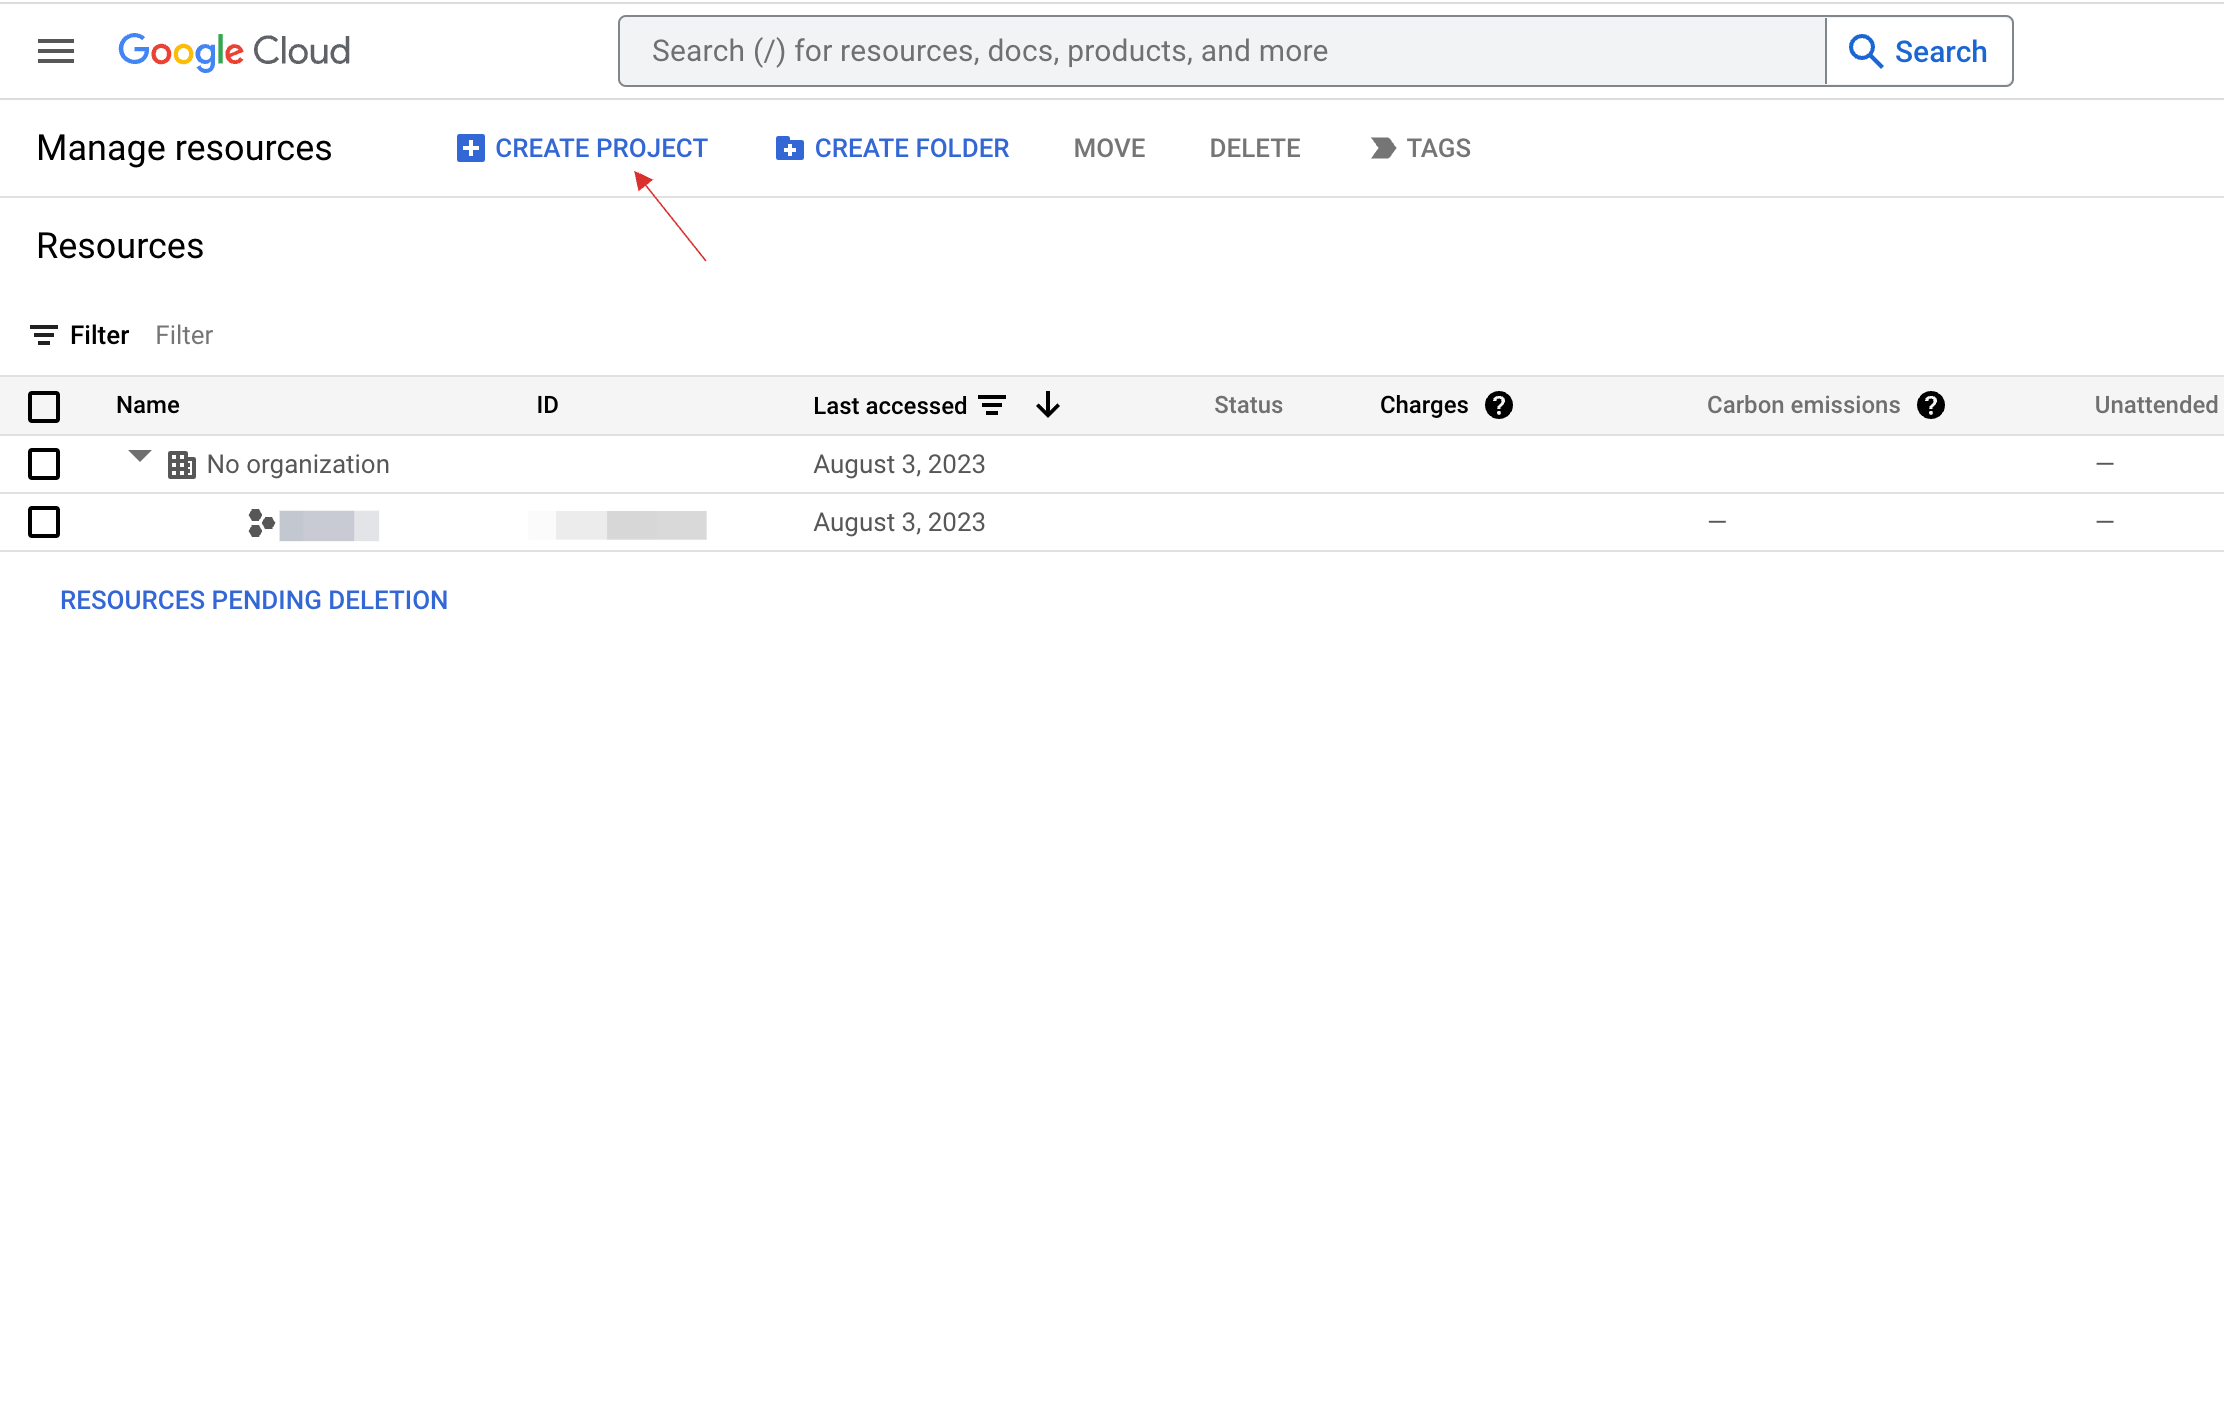
- Provide Project name, click on CREATE.
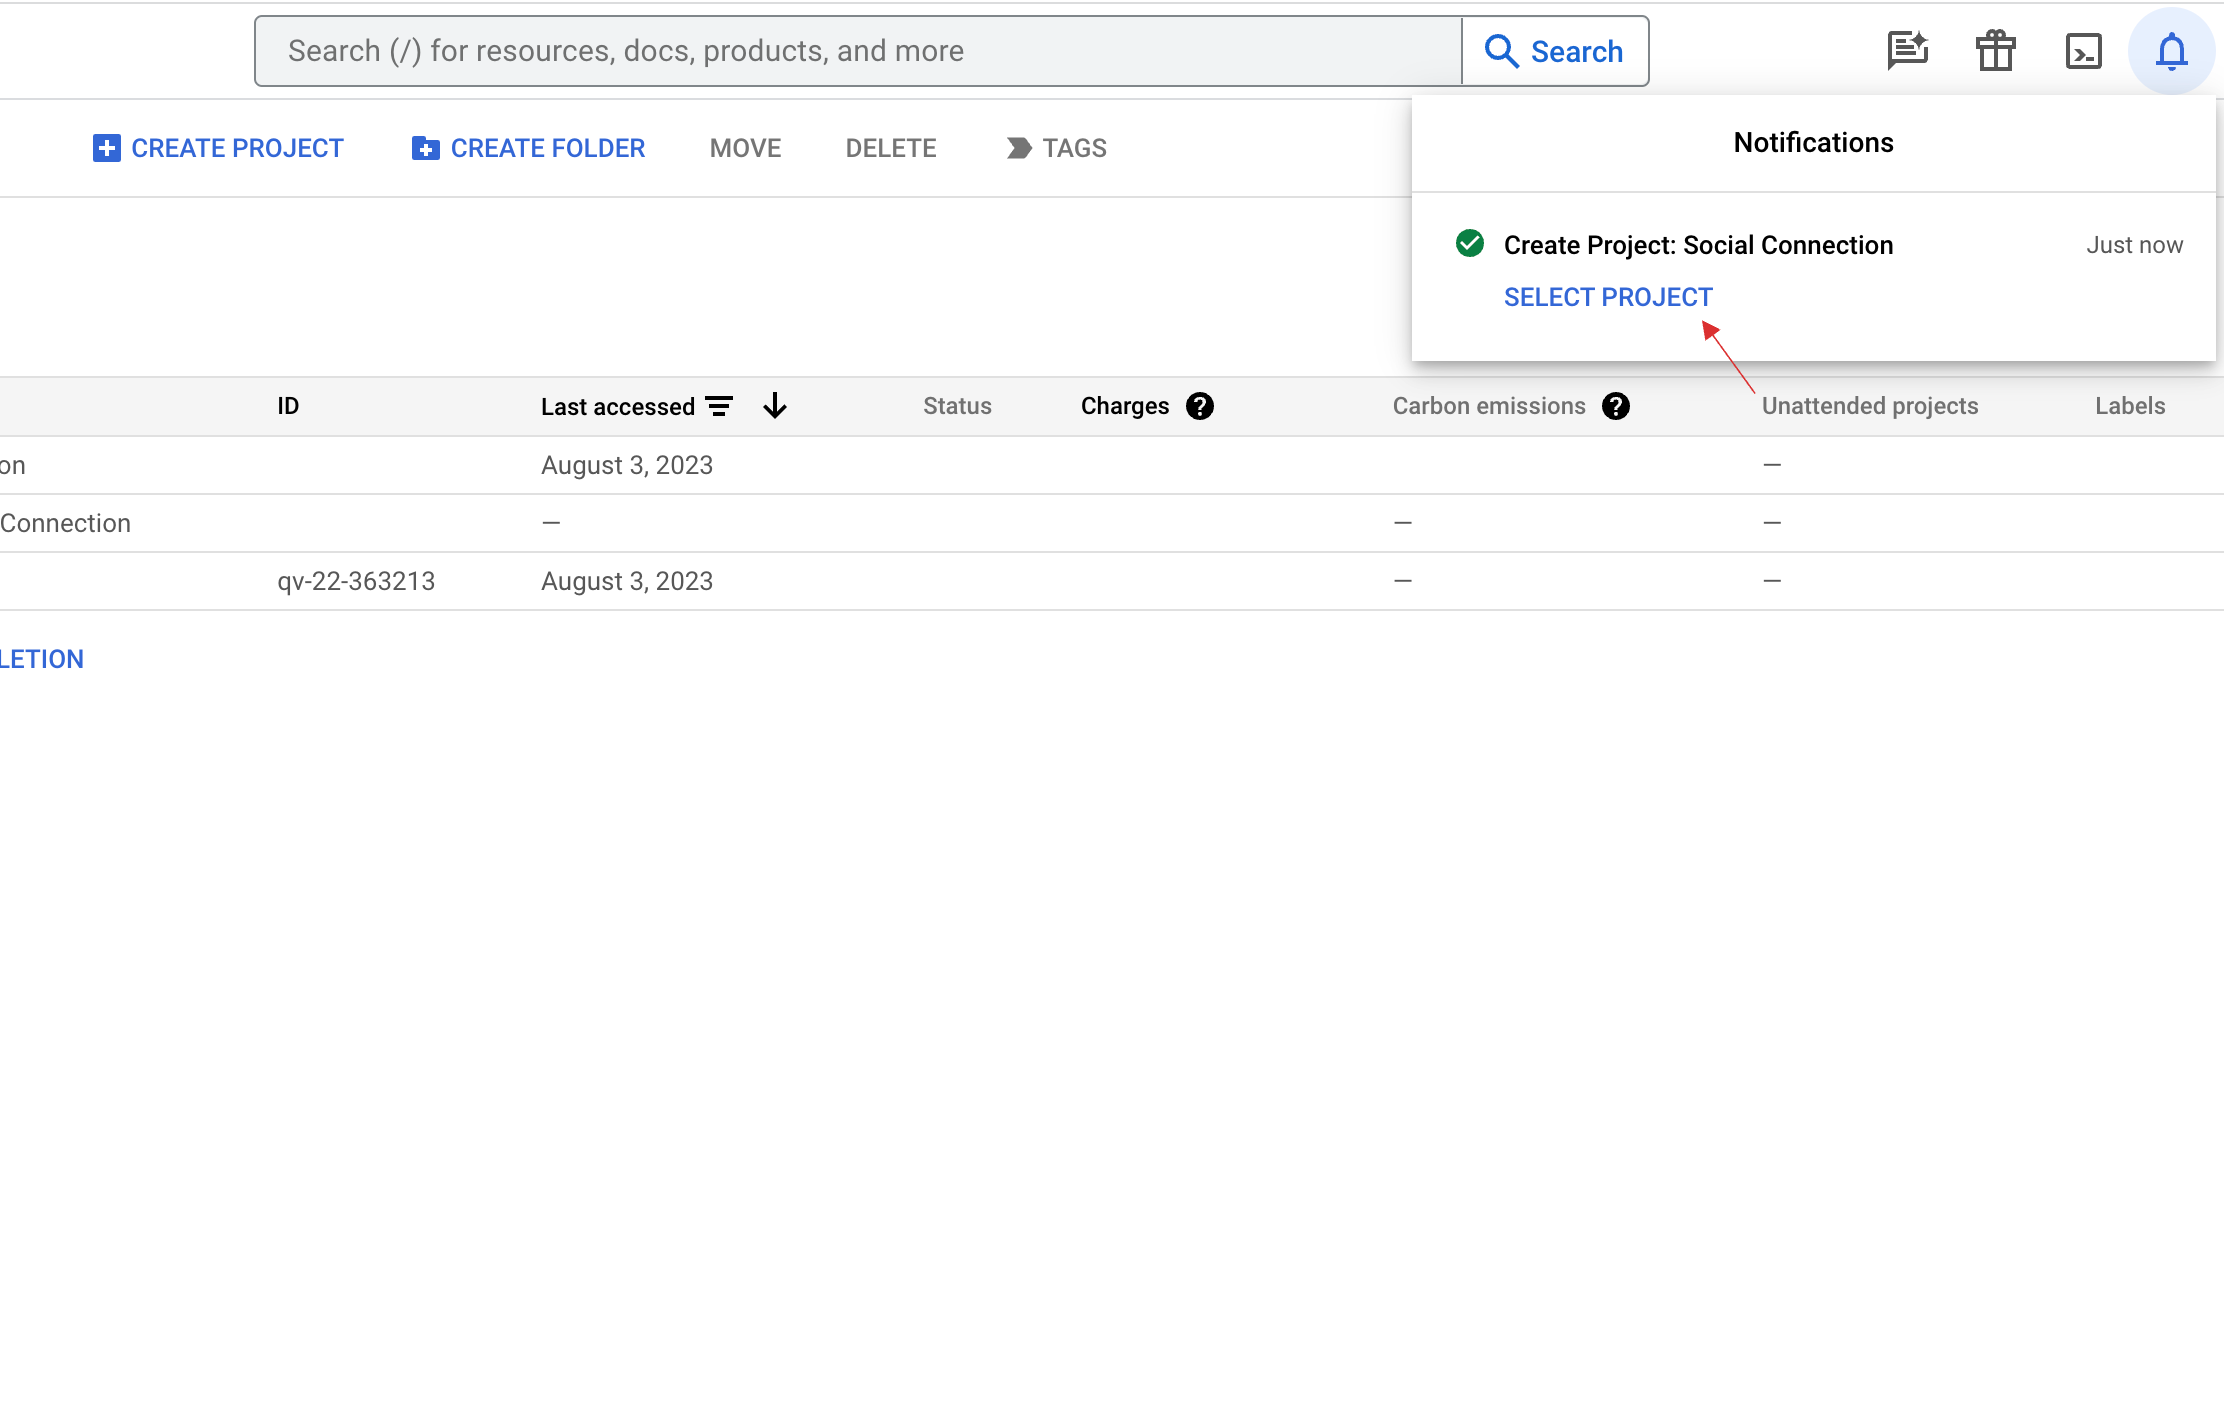
- Click on SELECT PROJECT.
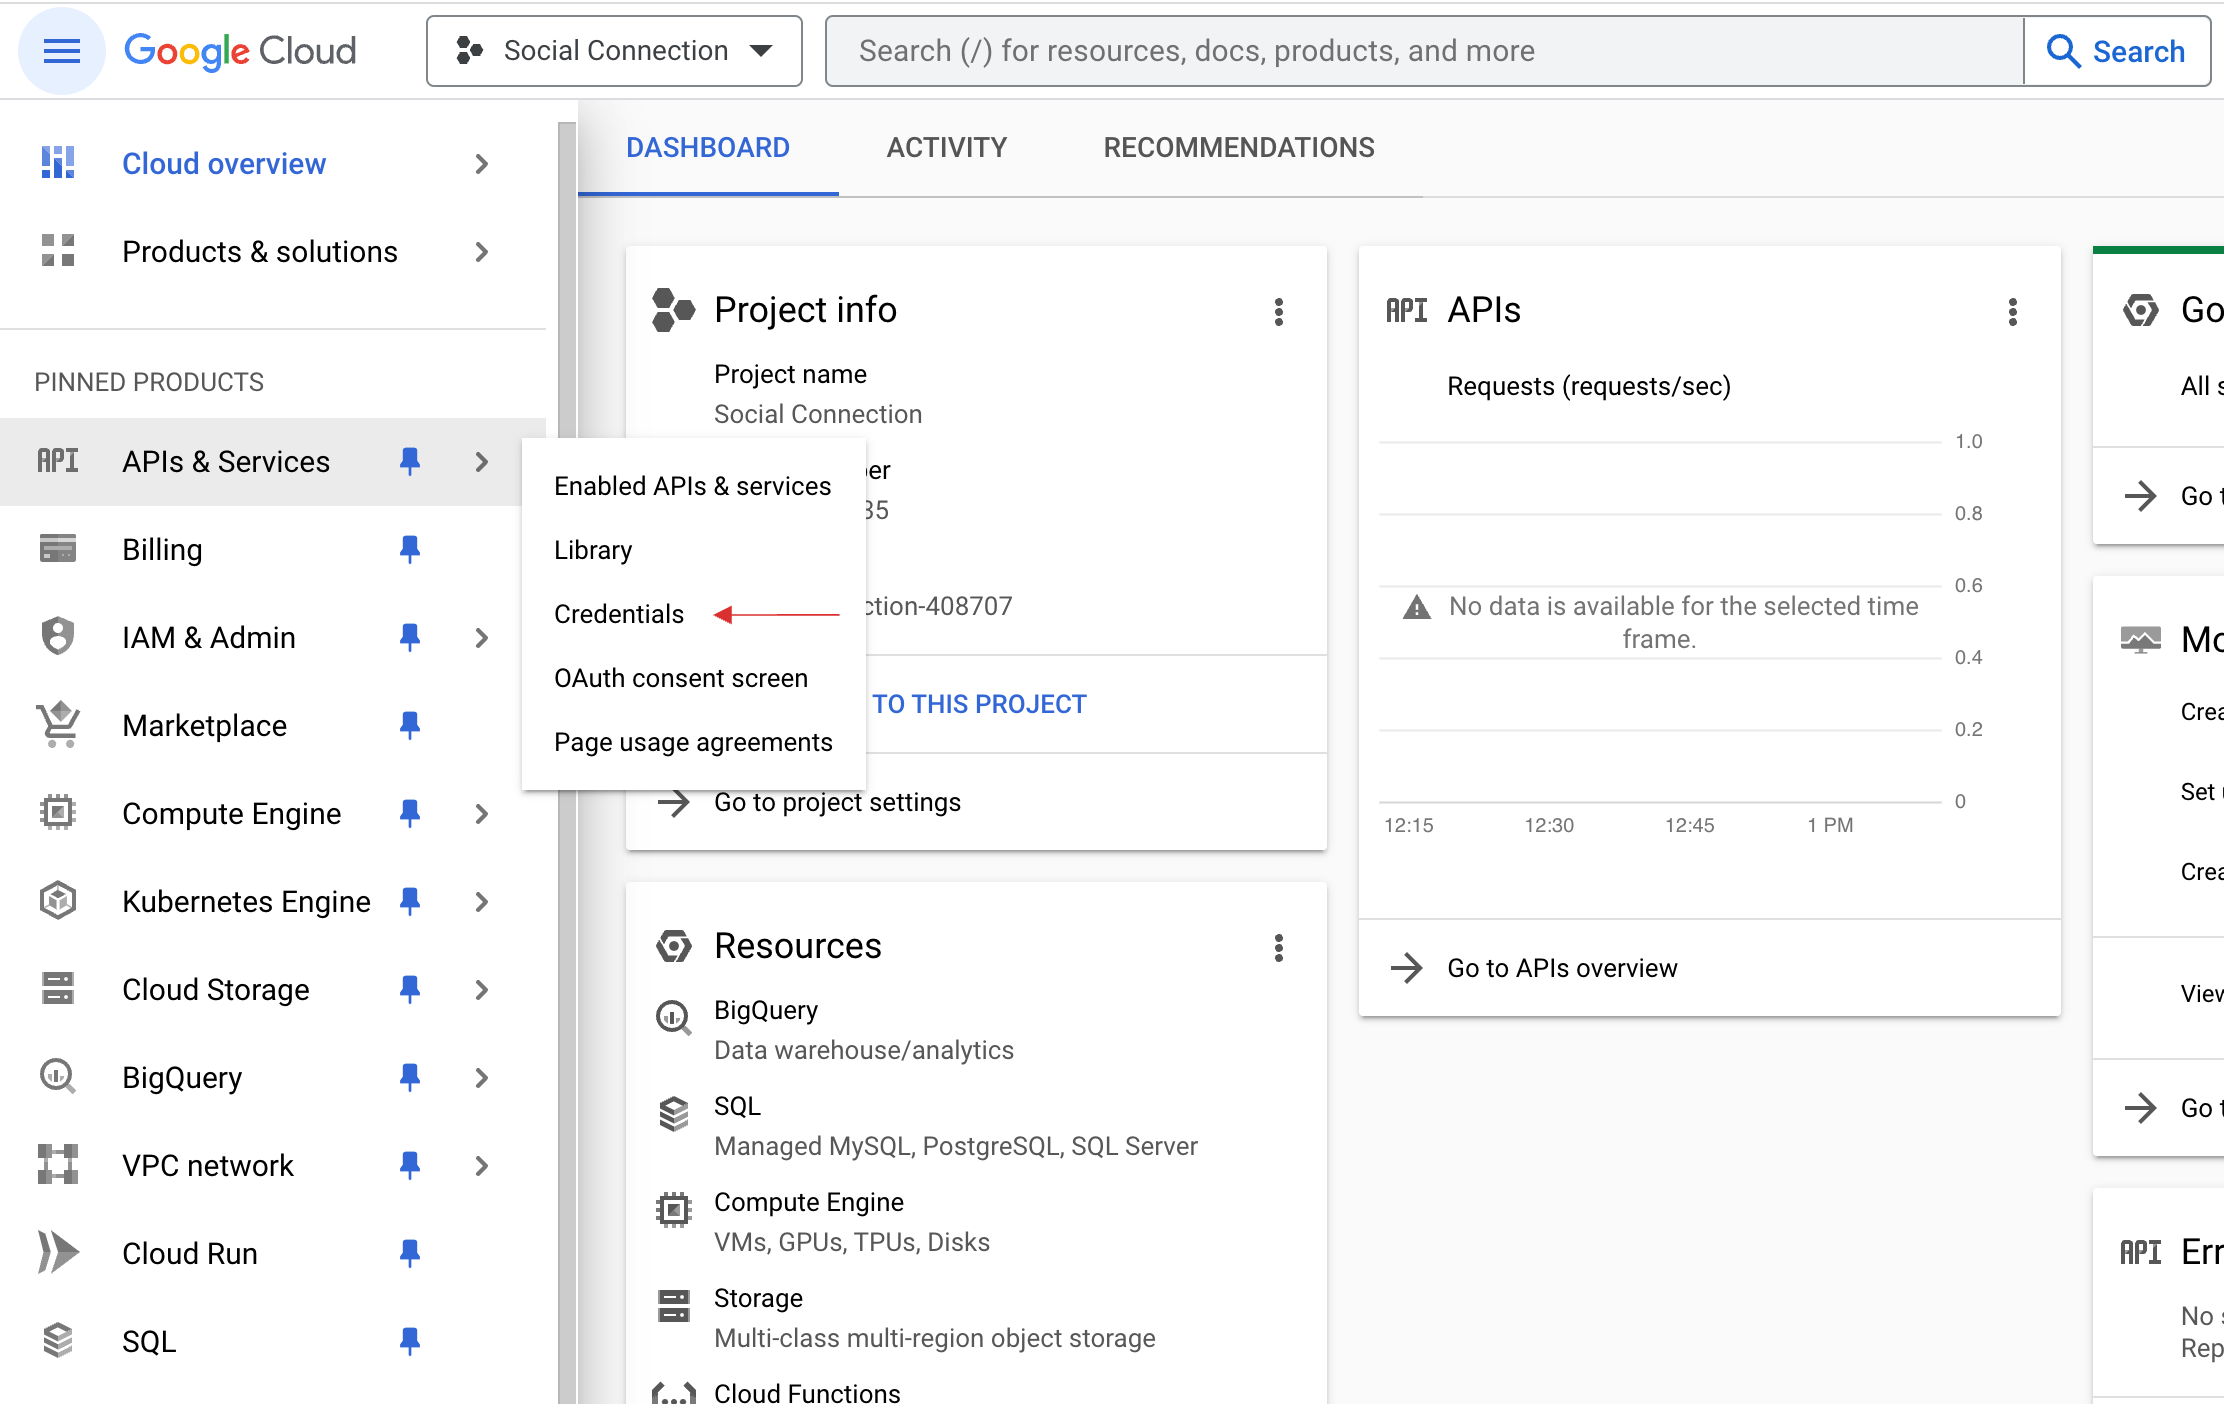
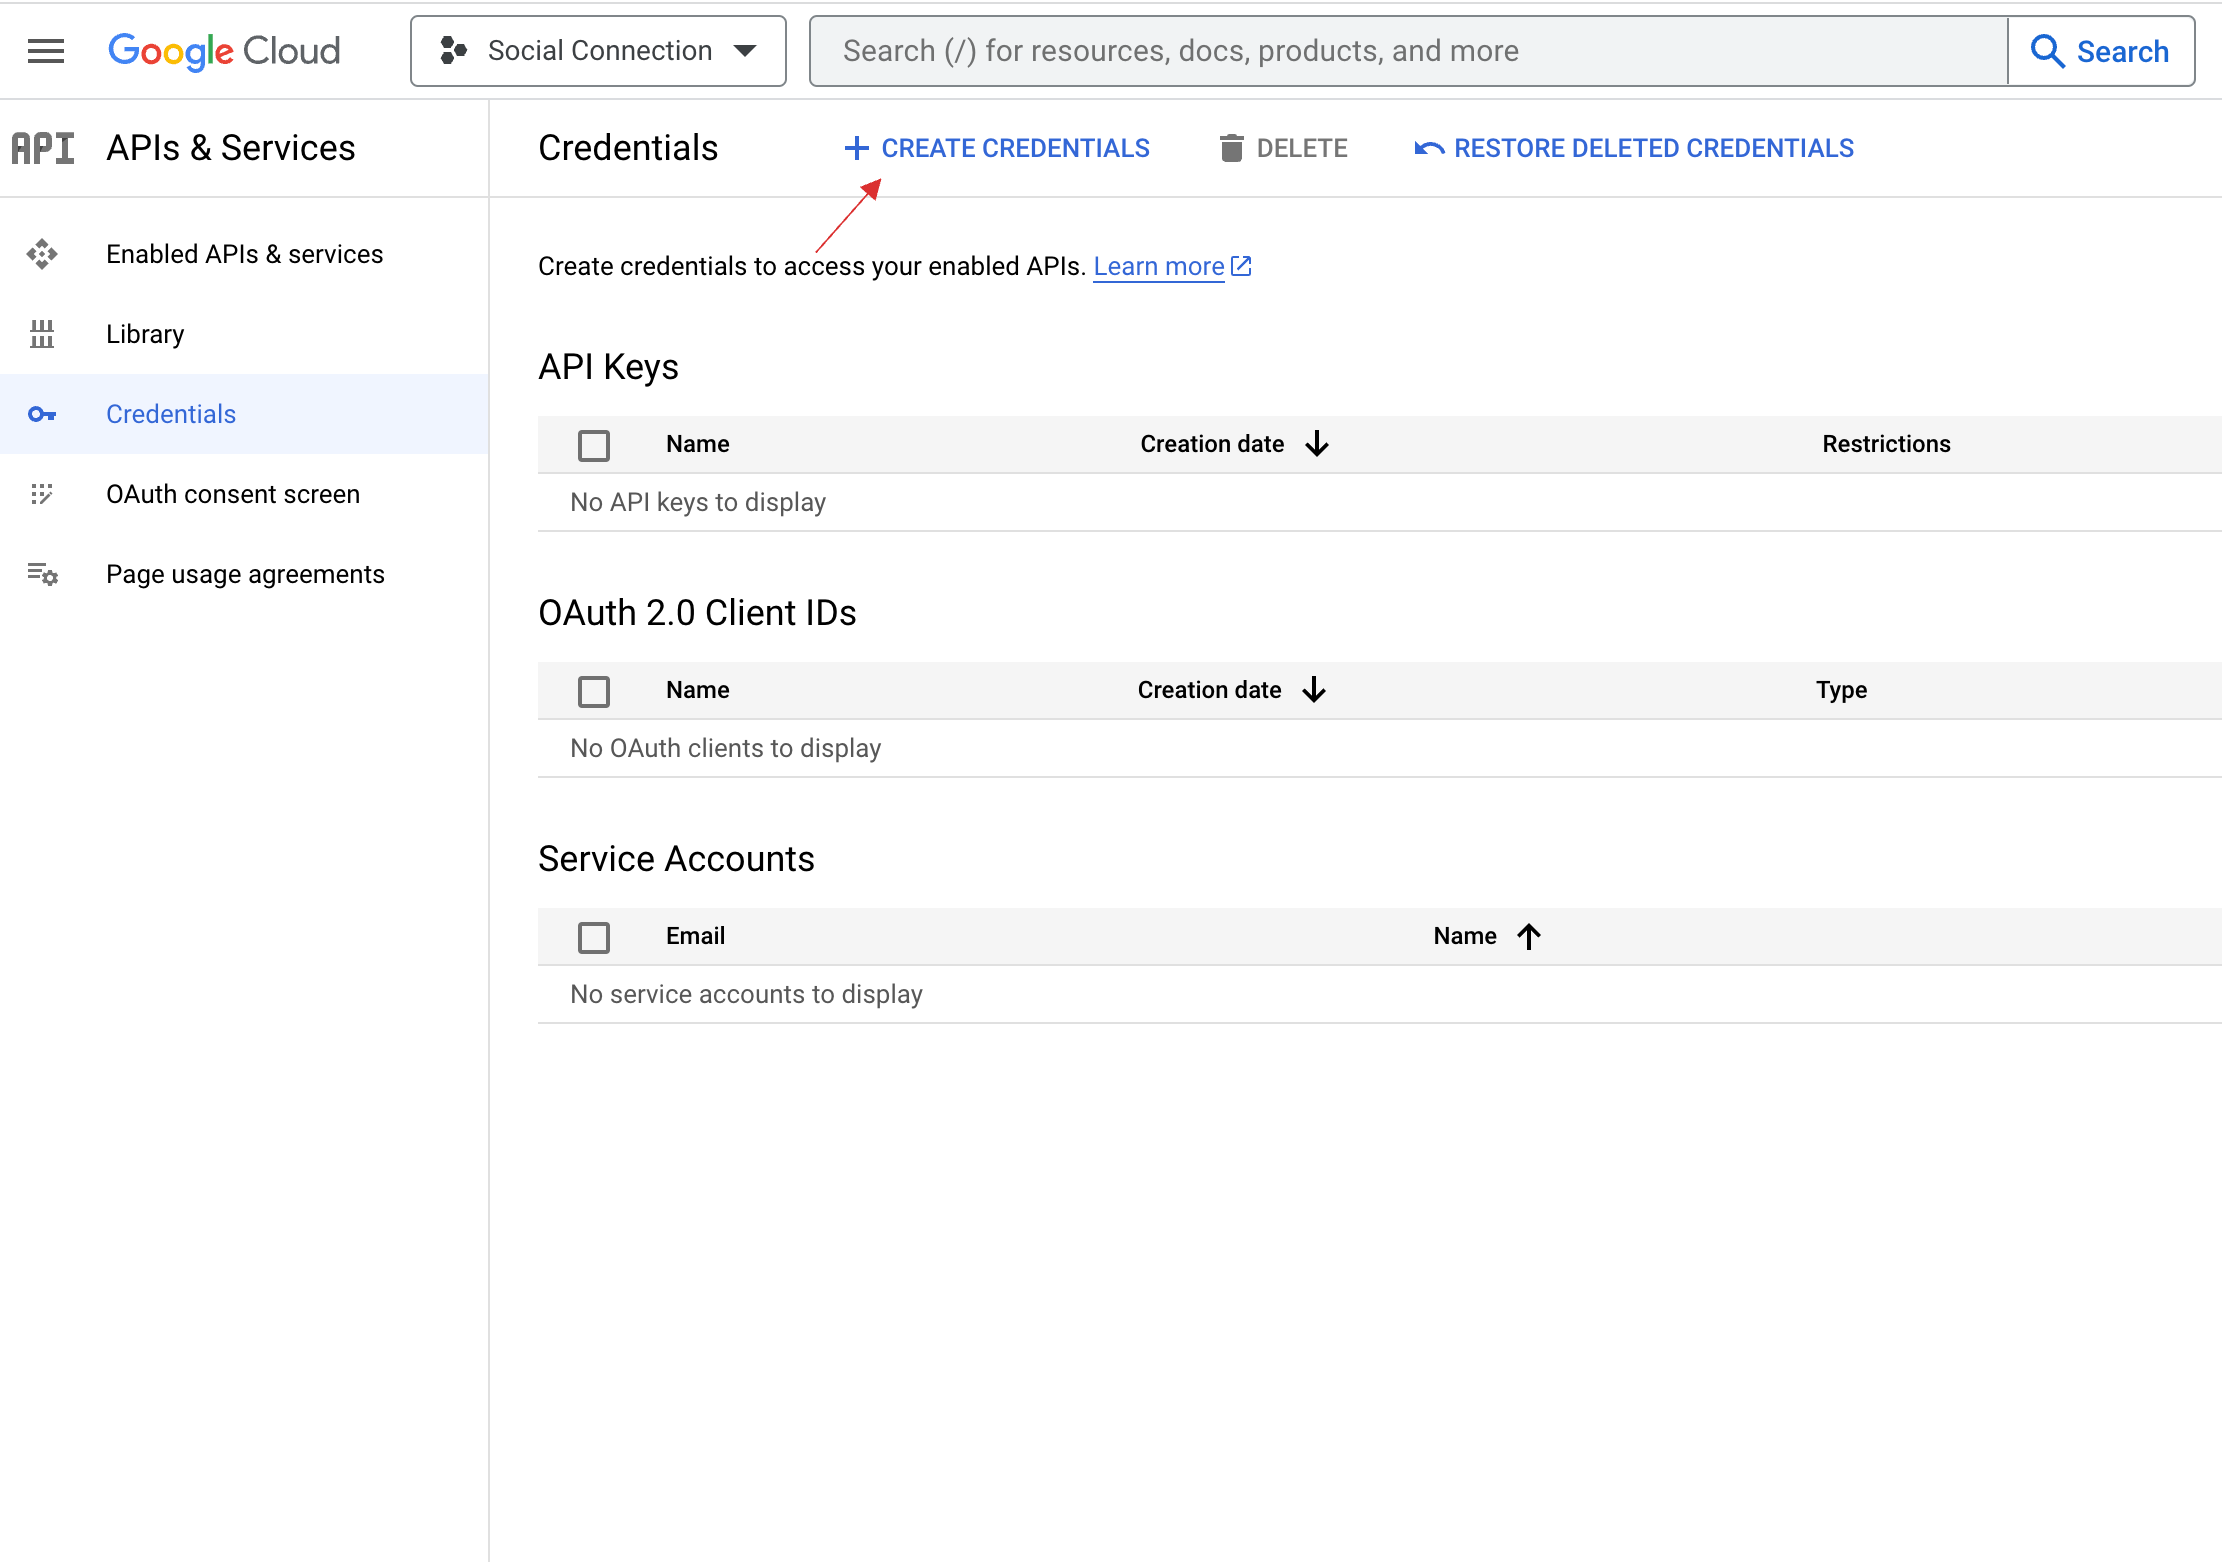
- You will be moved to your project's dashboard. From left hand menu, click on APIs & Services > Credentials.
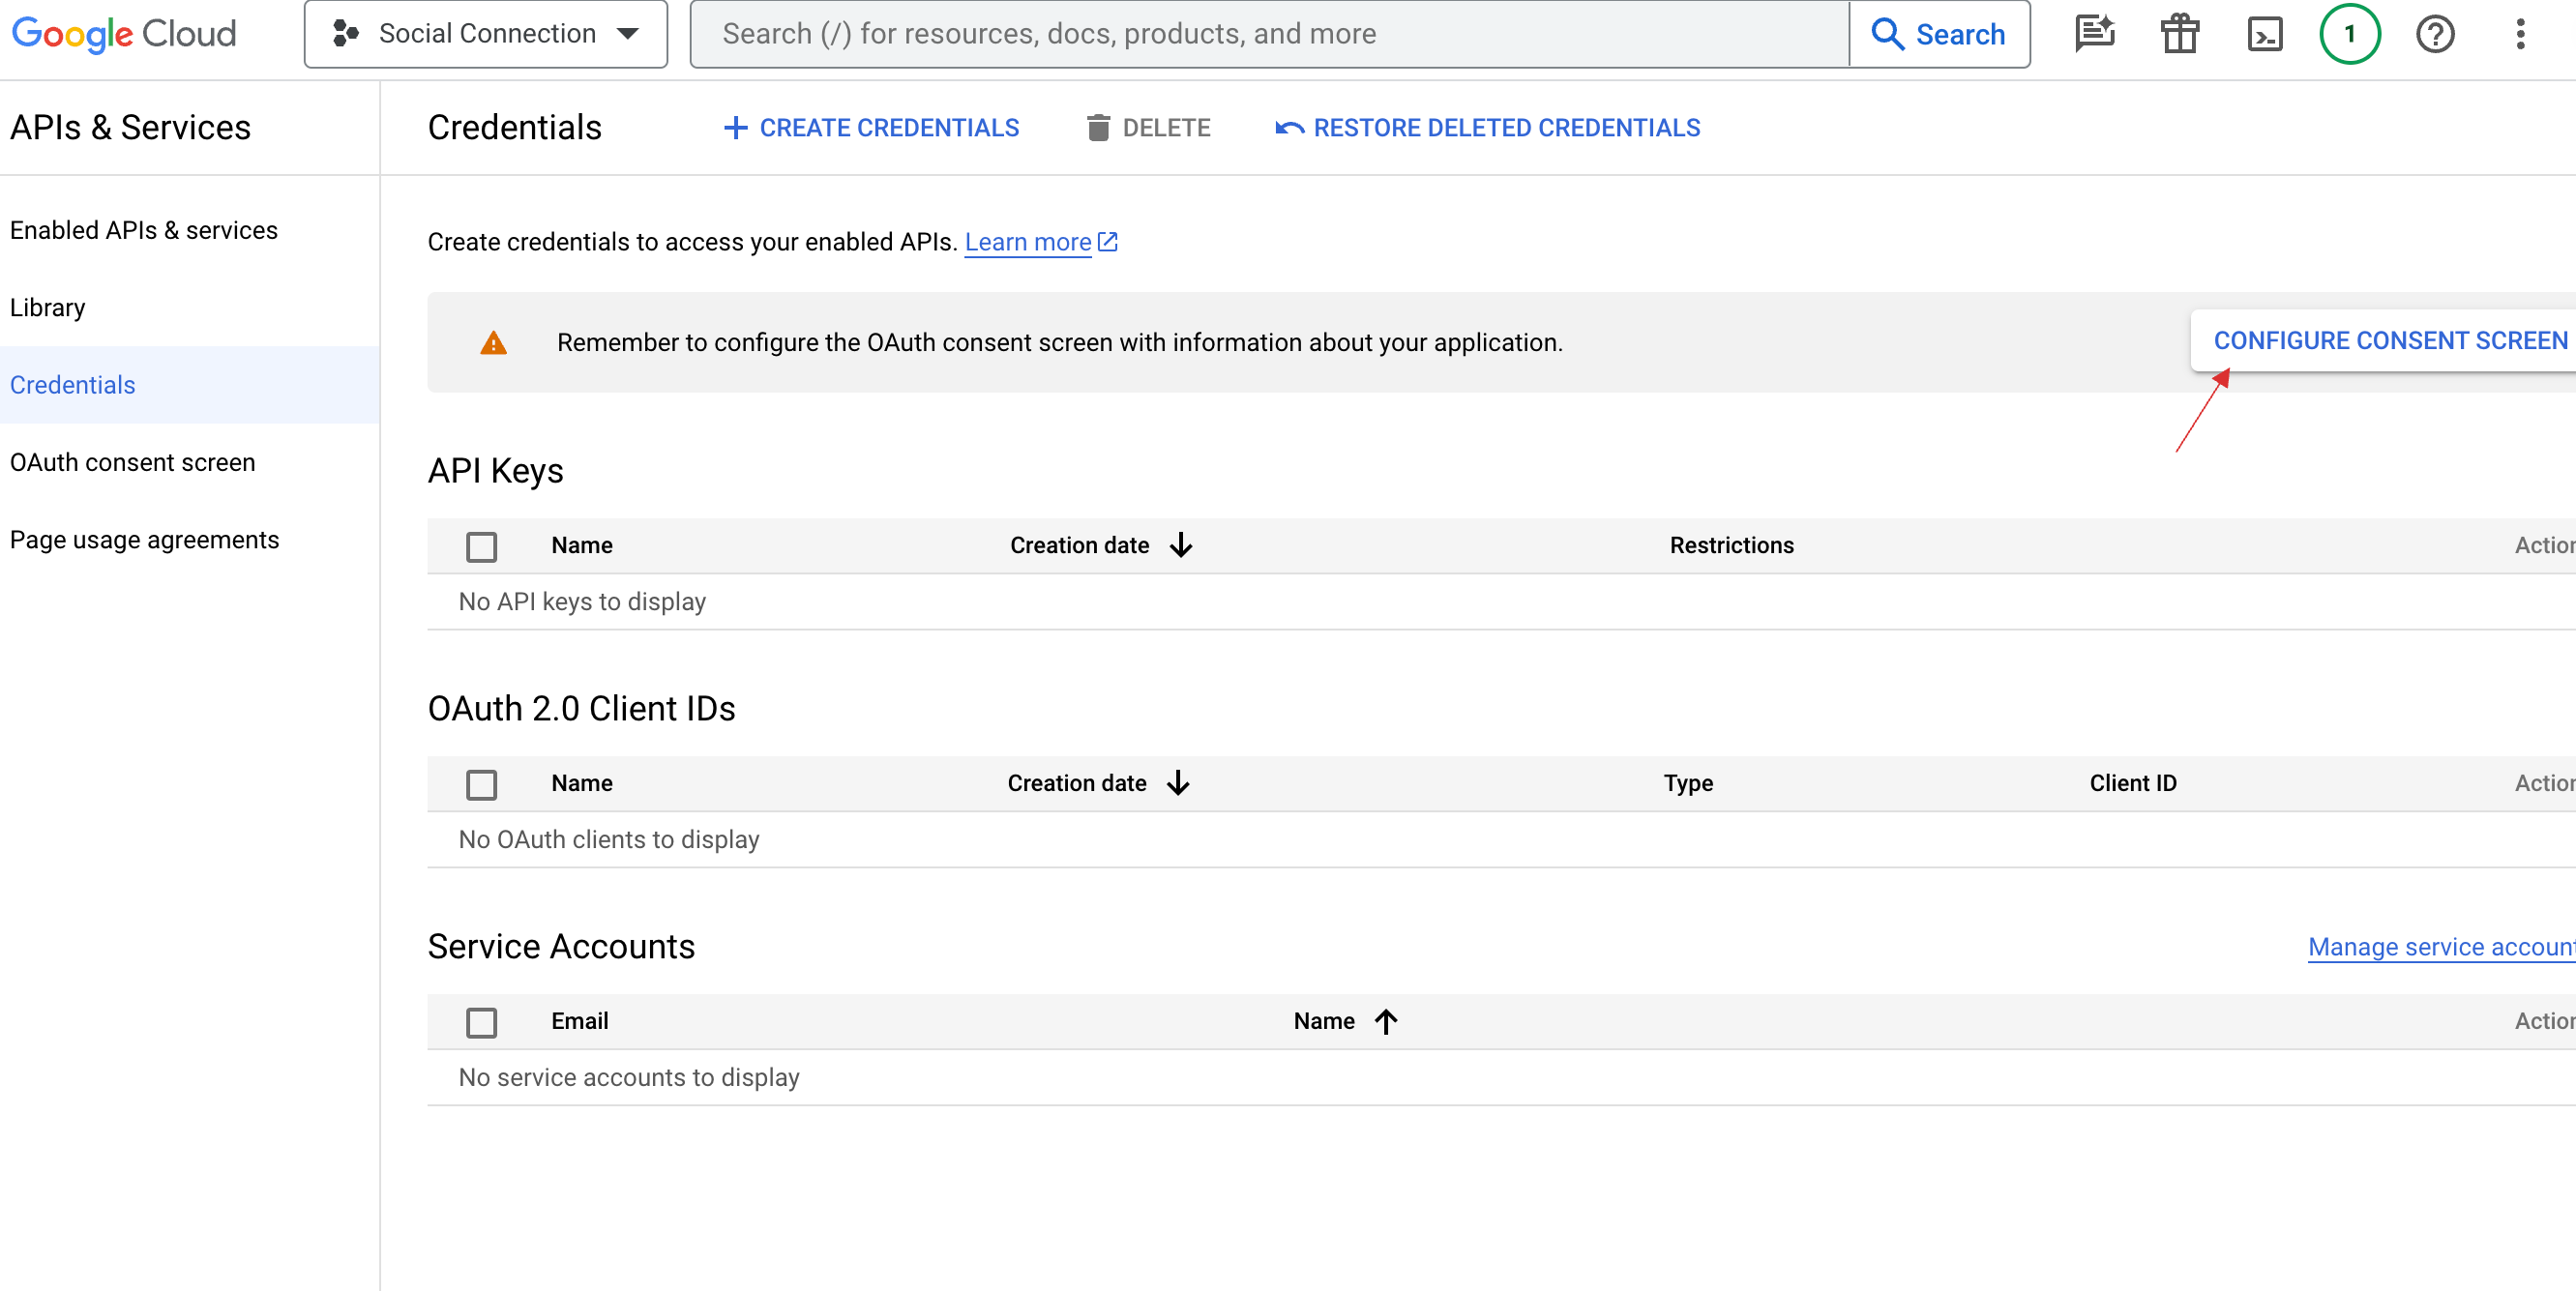
- Click on CONFIGURE CONSENT SCREEN.
- Check on External and click on CREATE.
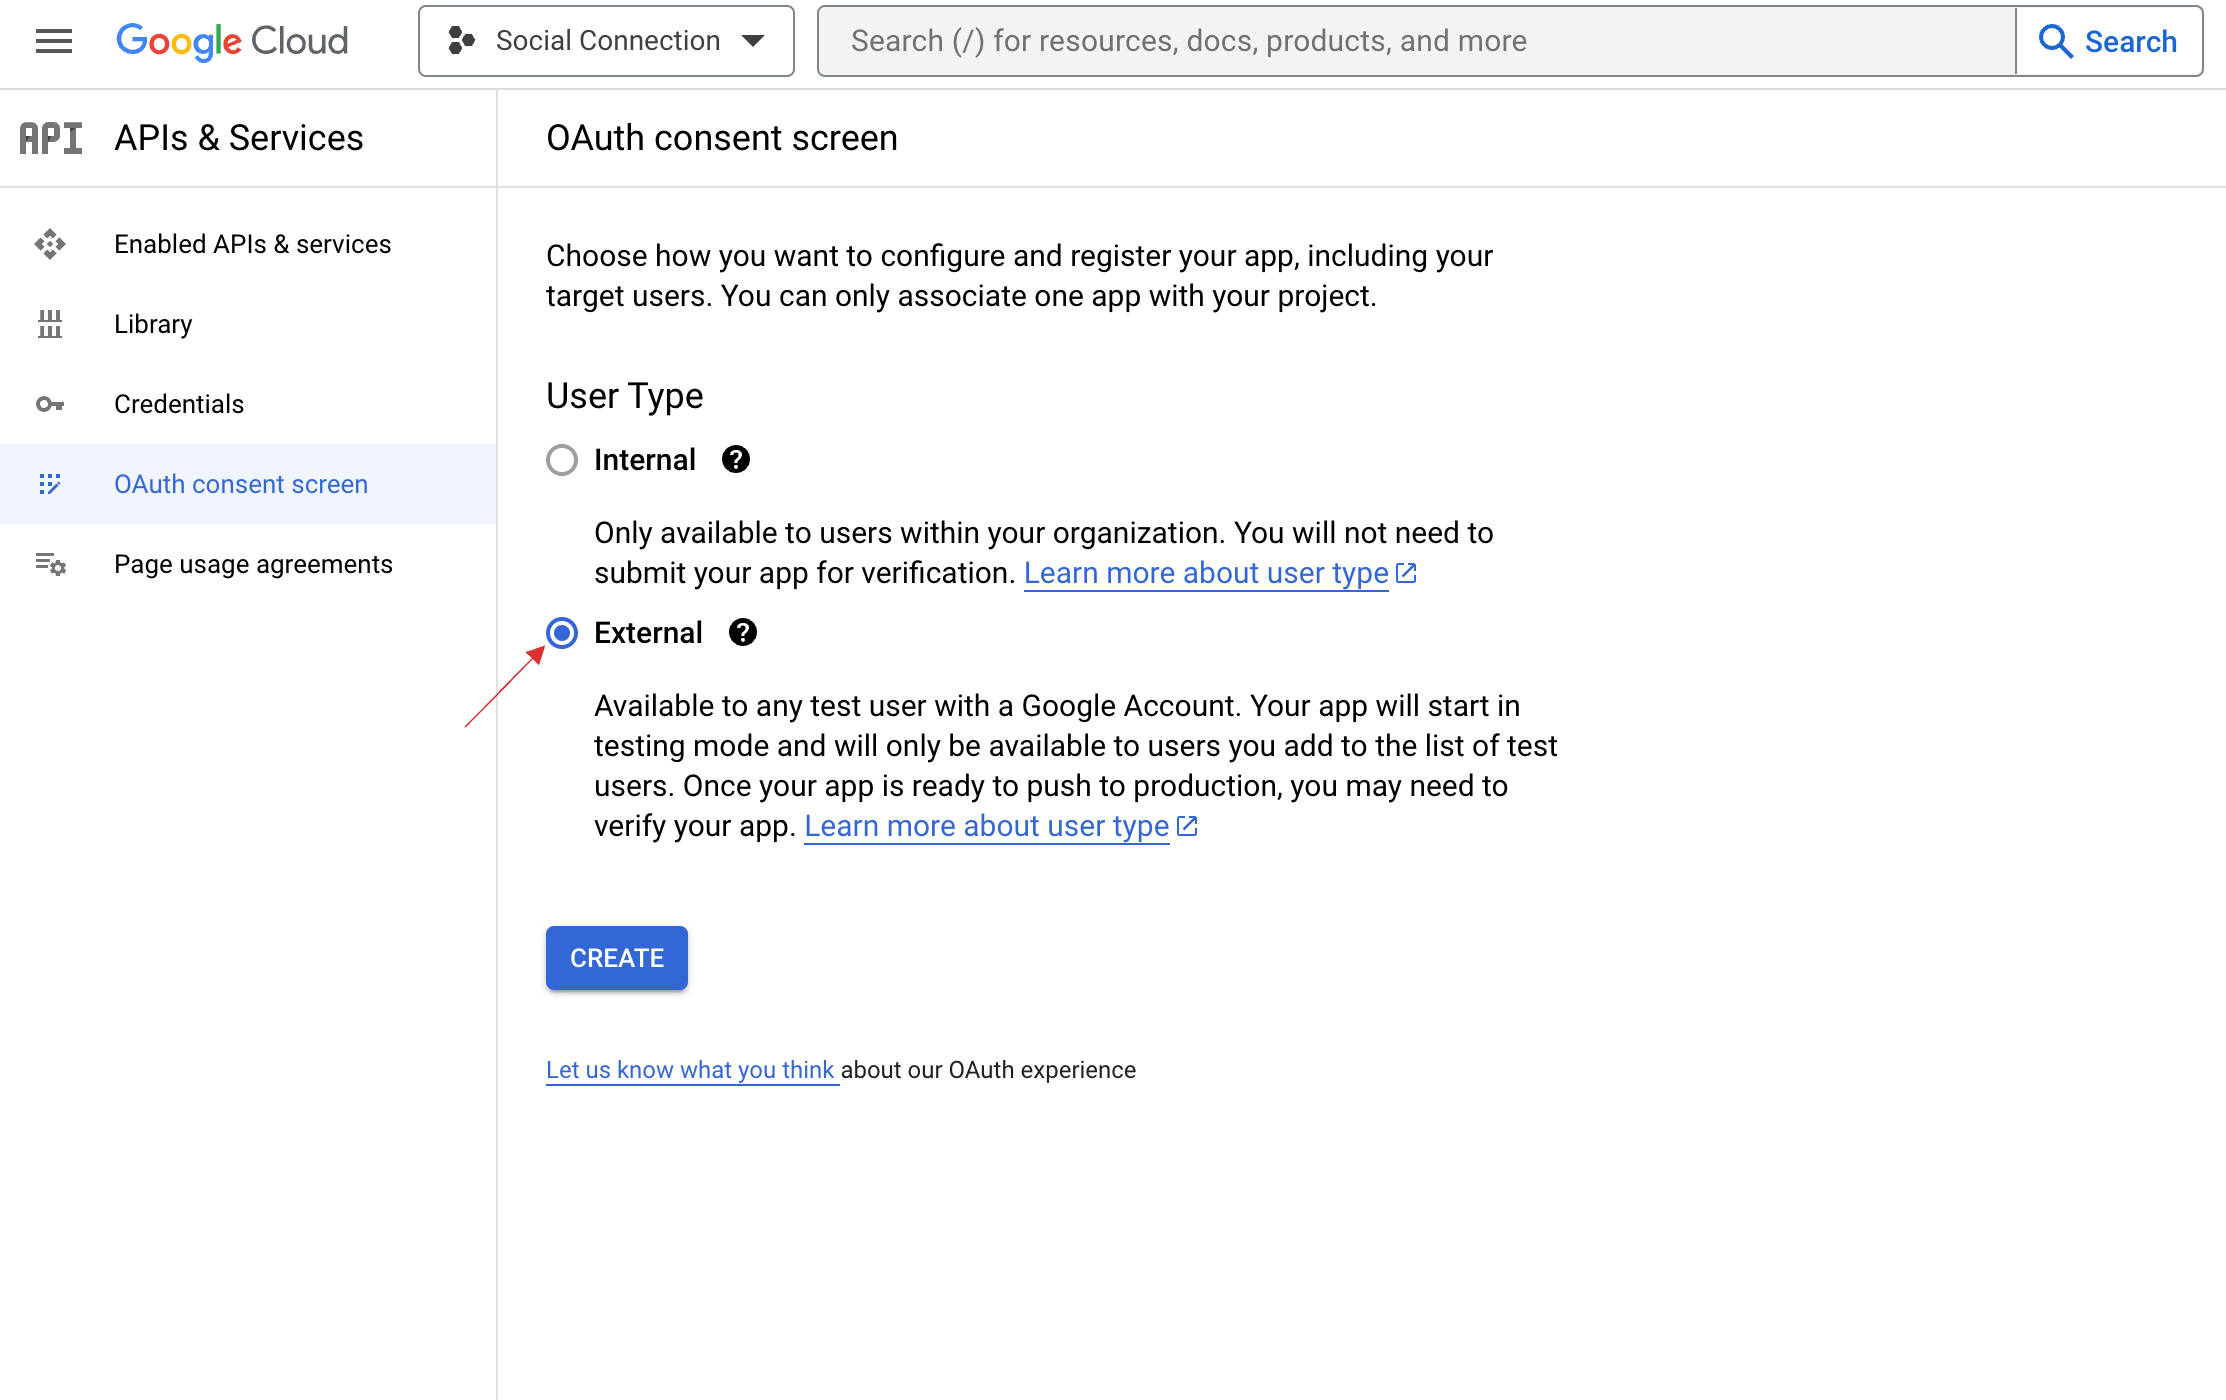
- You will be asked for app registration and the application name is sufficient for the most basic setup.
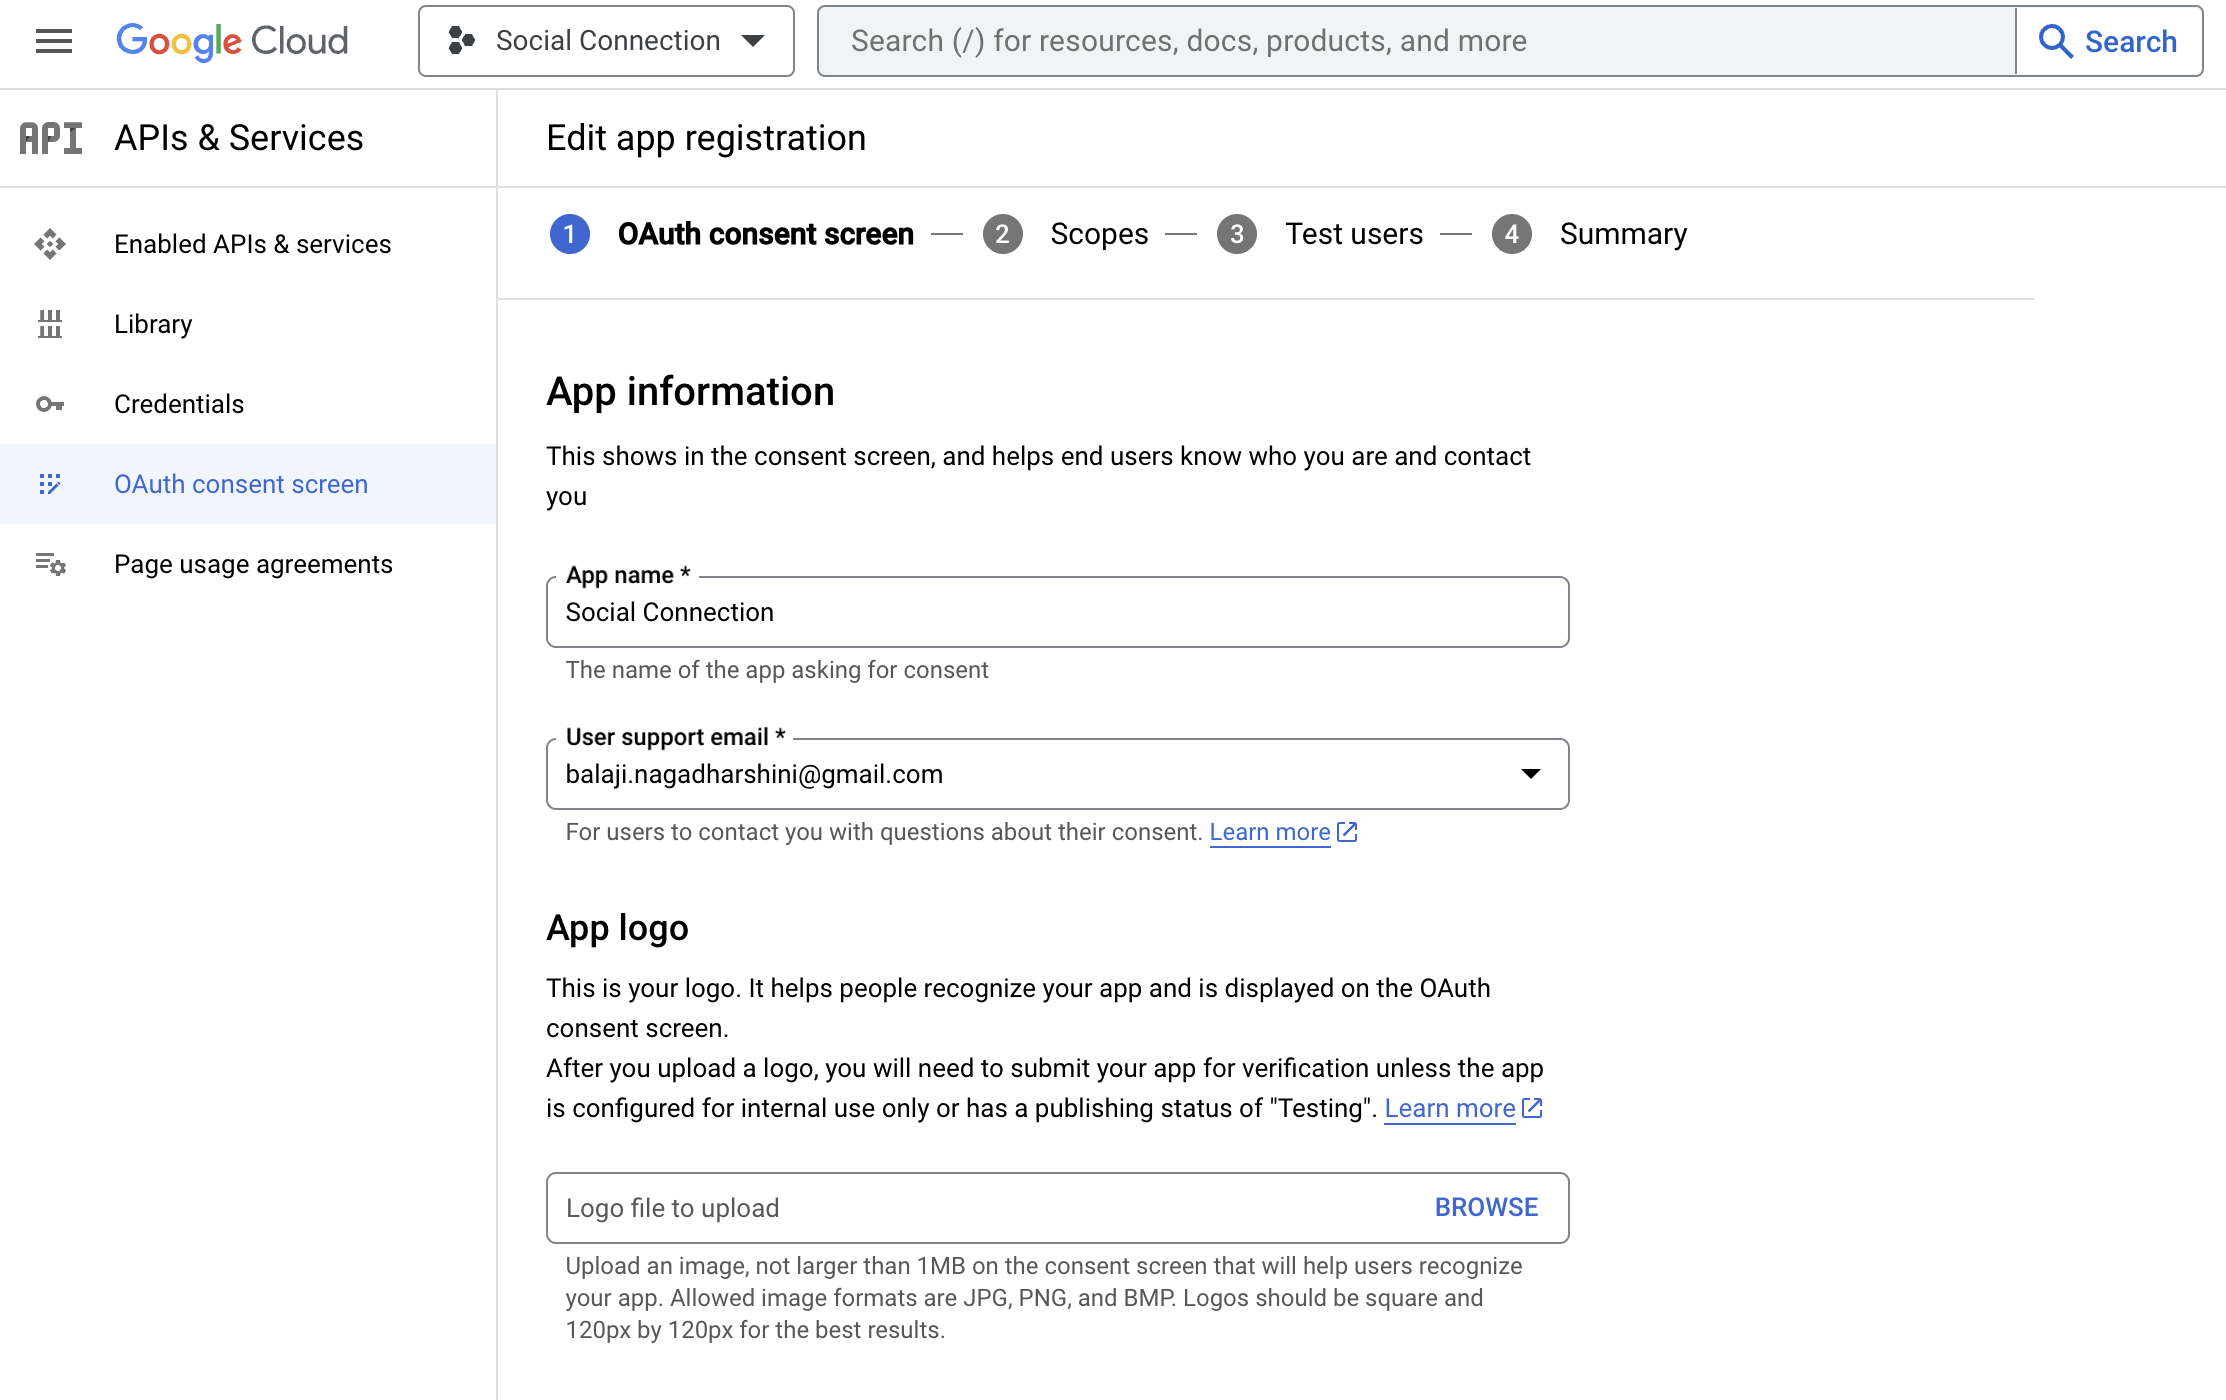
Provide the needed details, scroll down and click on SAVE AND CONTINUE.
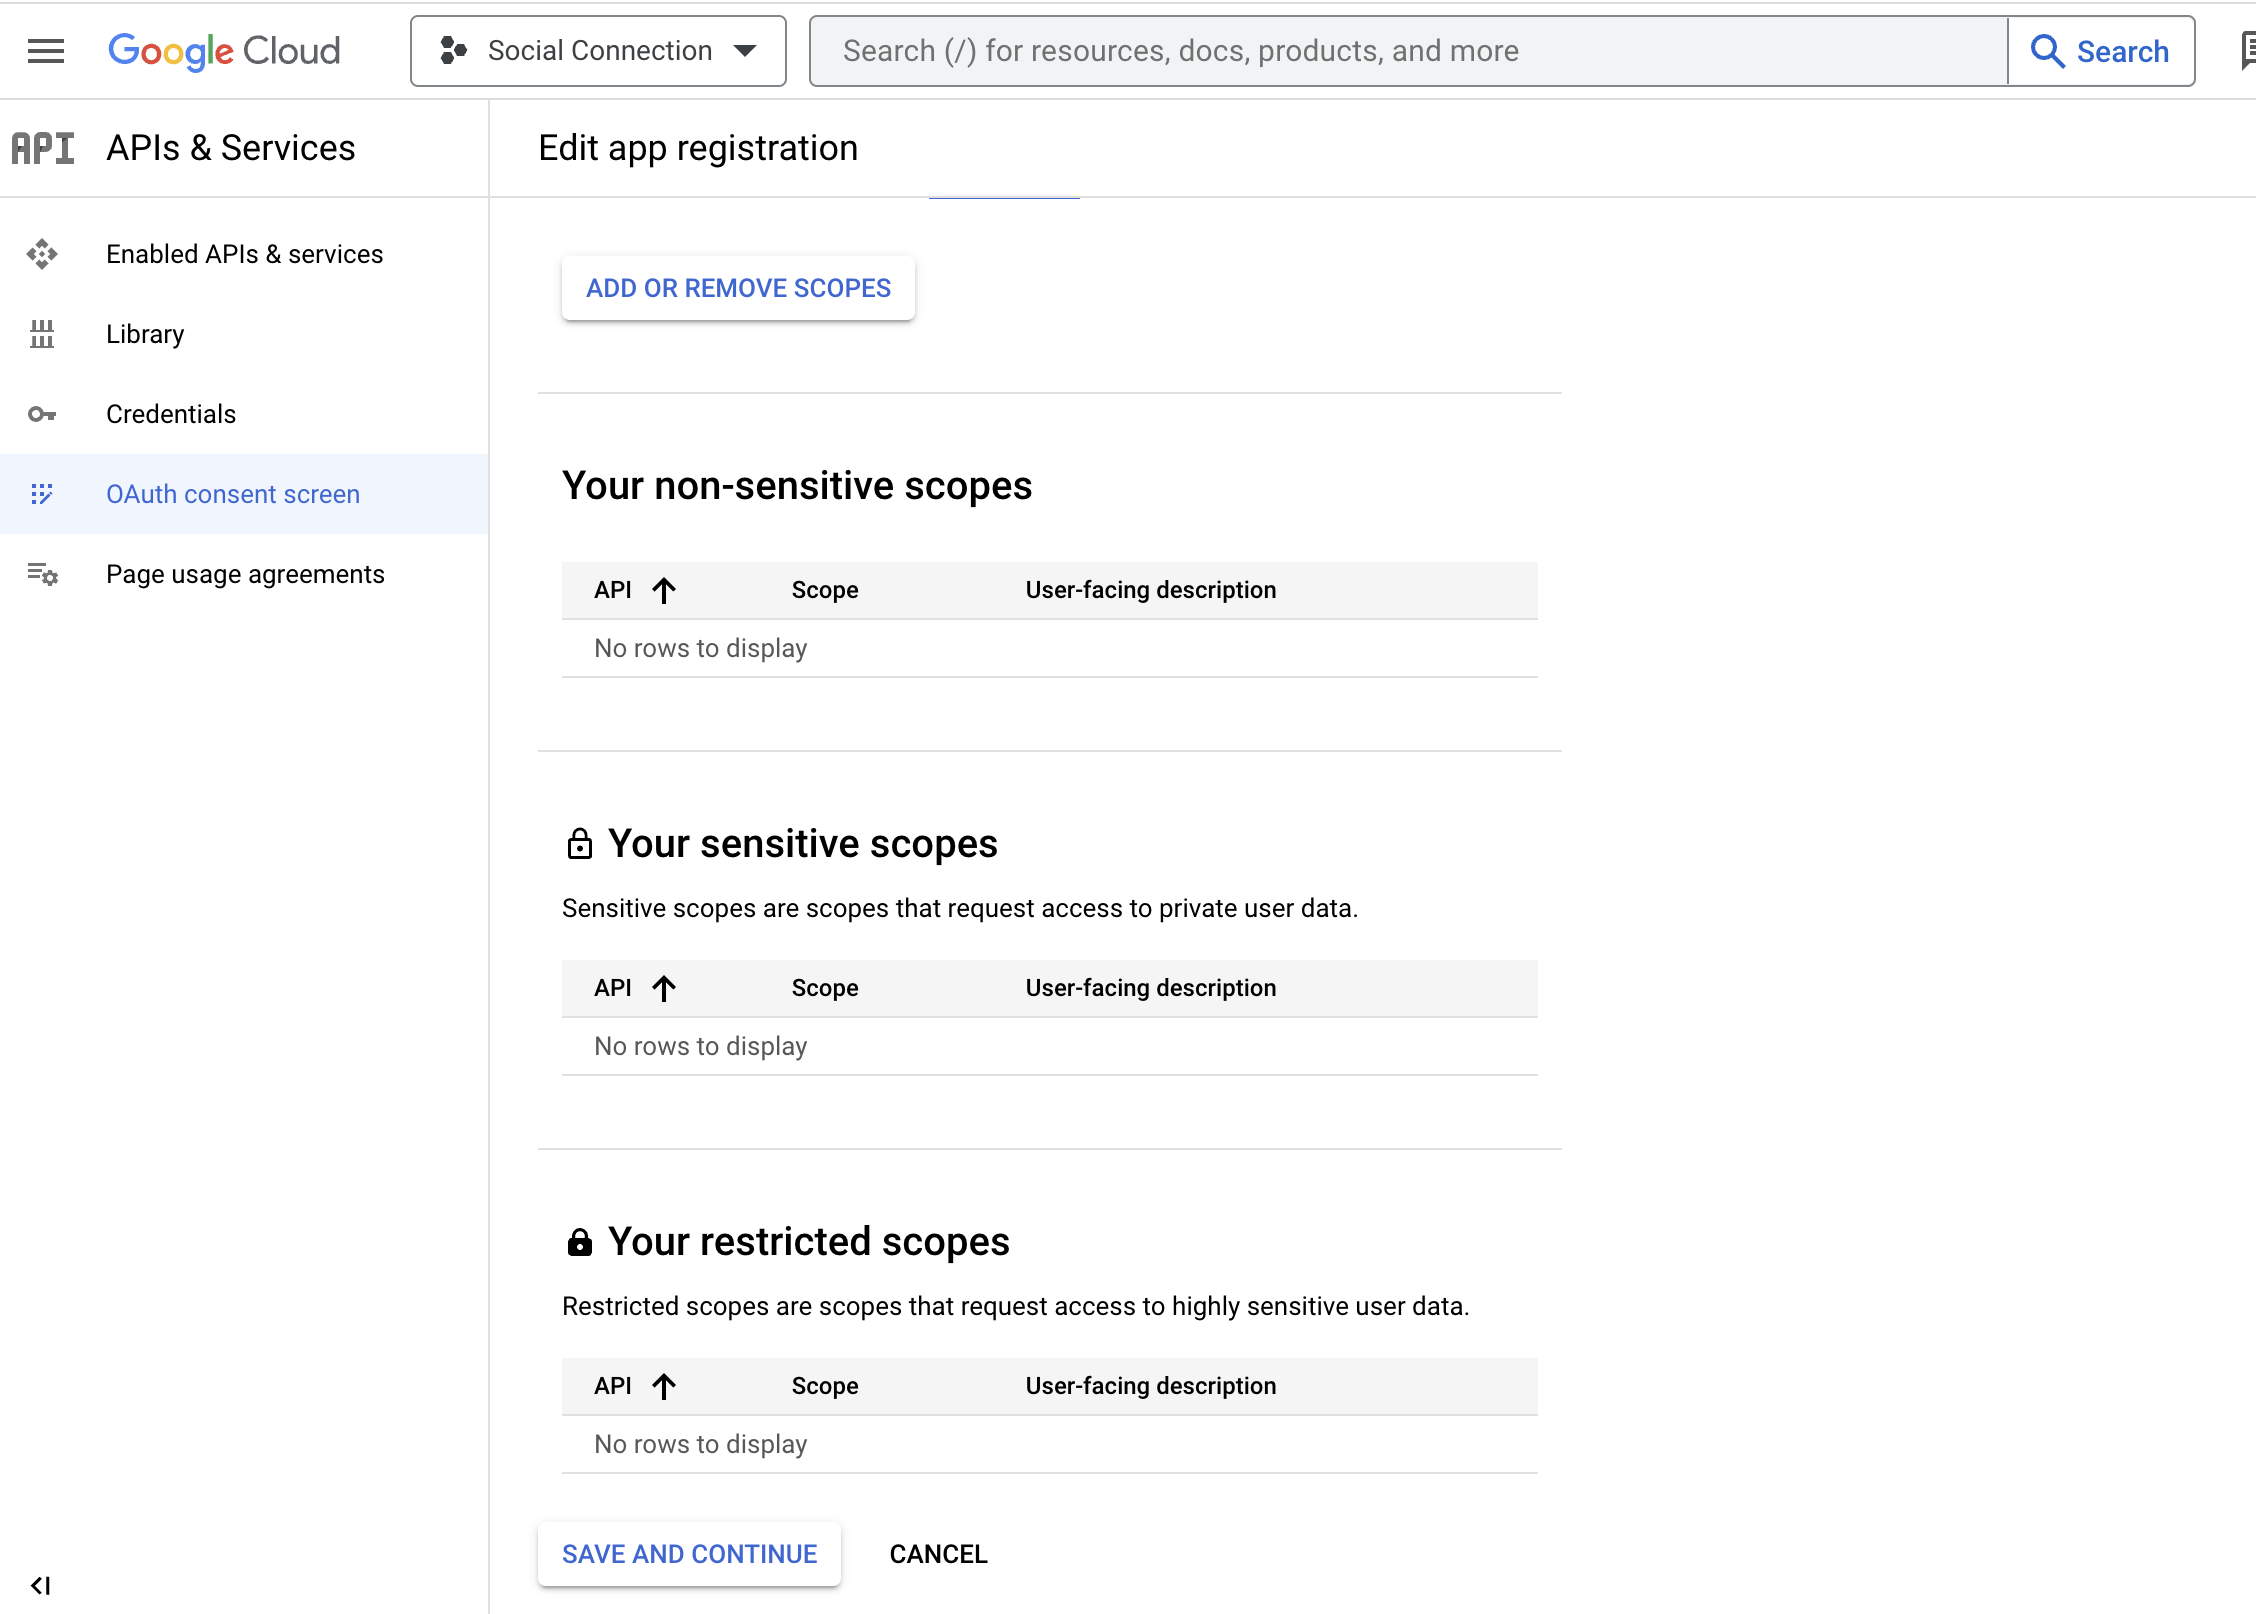
You will be moved to the scopes, configure Scopes if required, and click on SAVE AND CONTINUE.
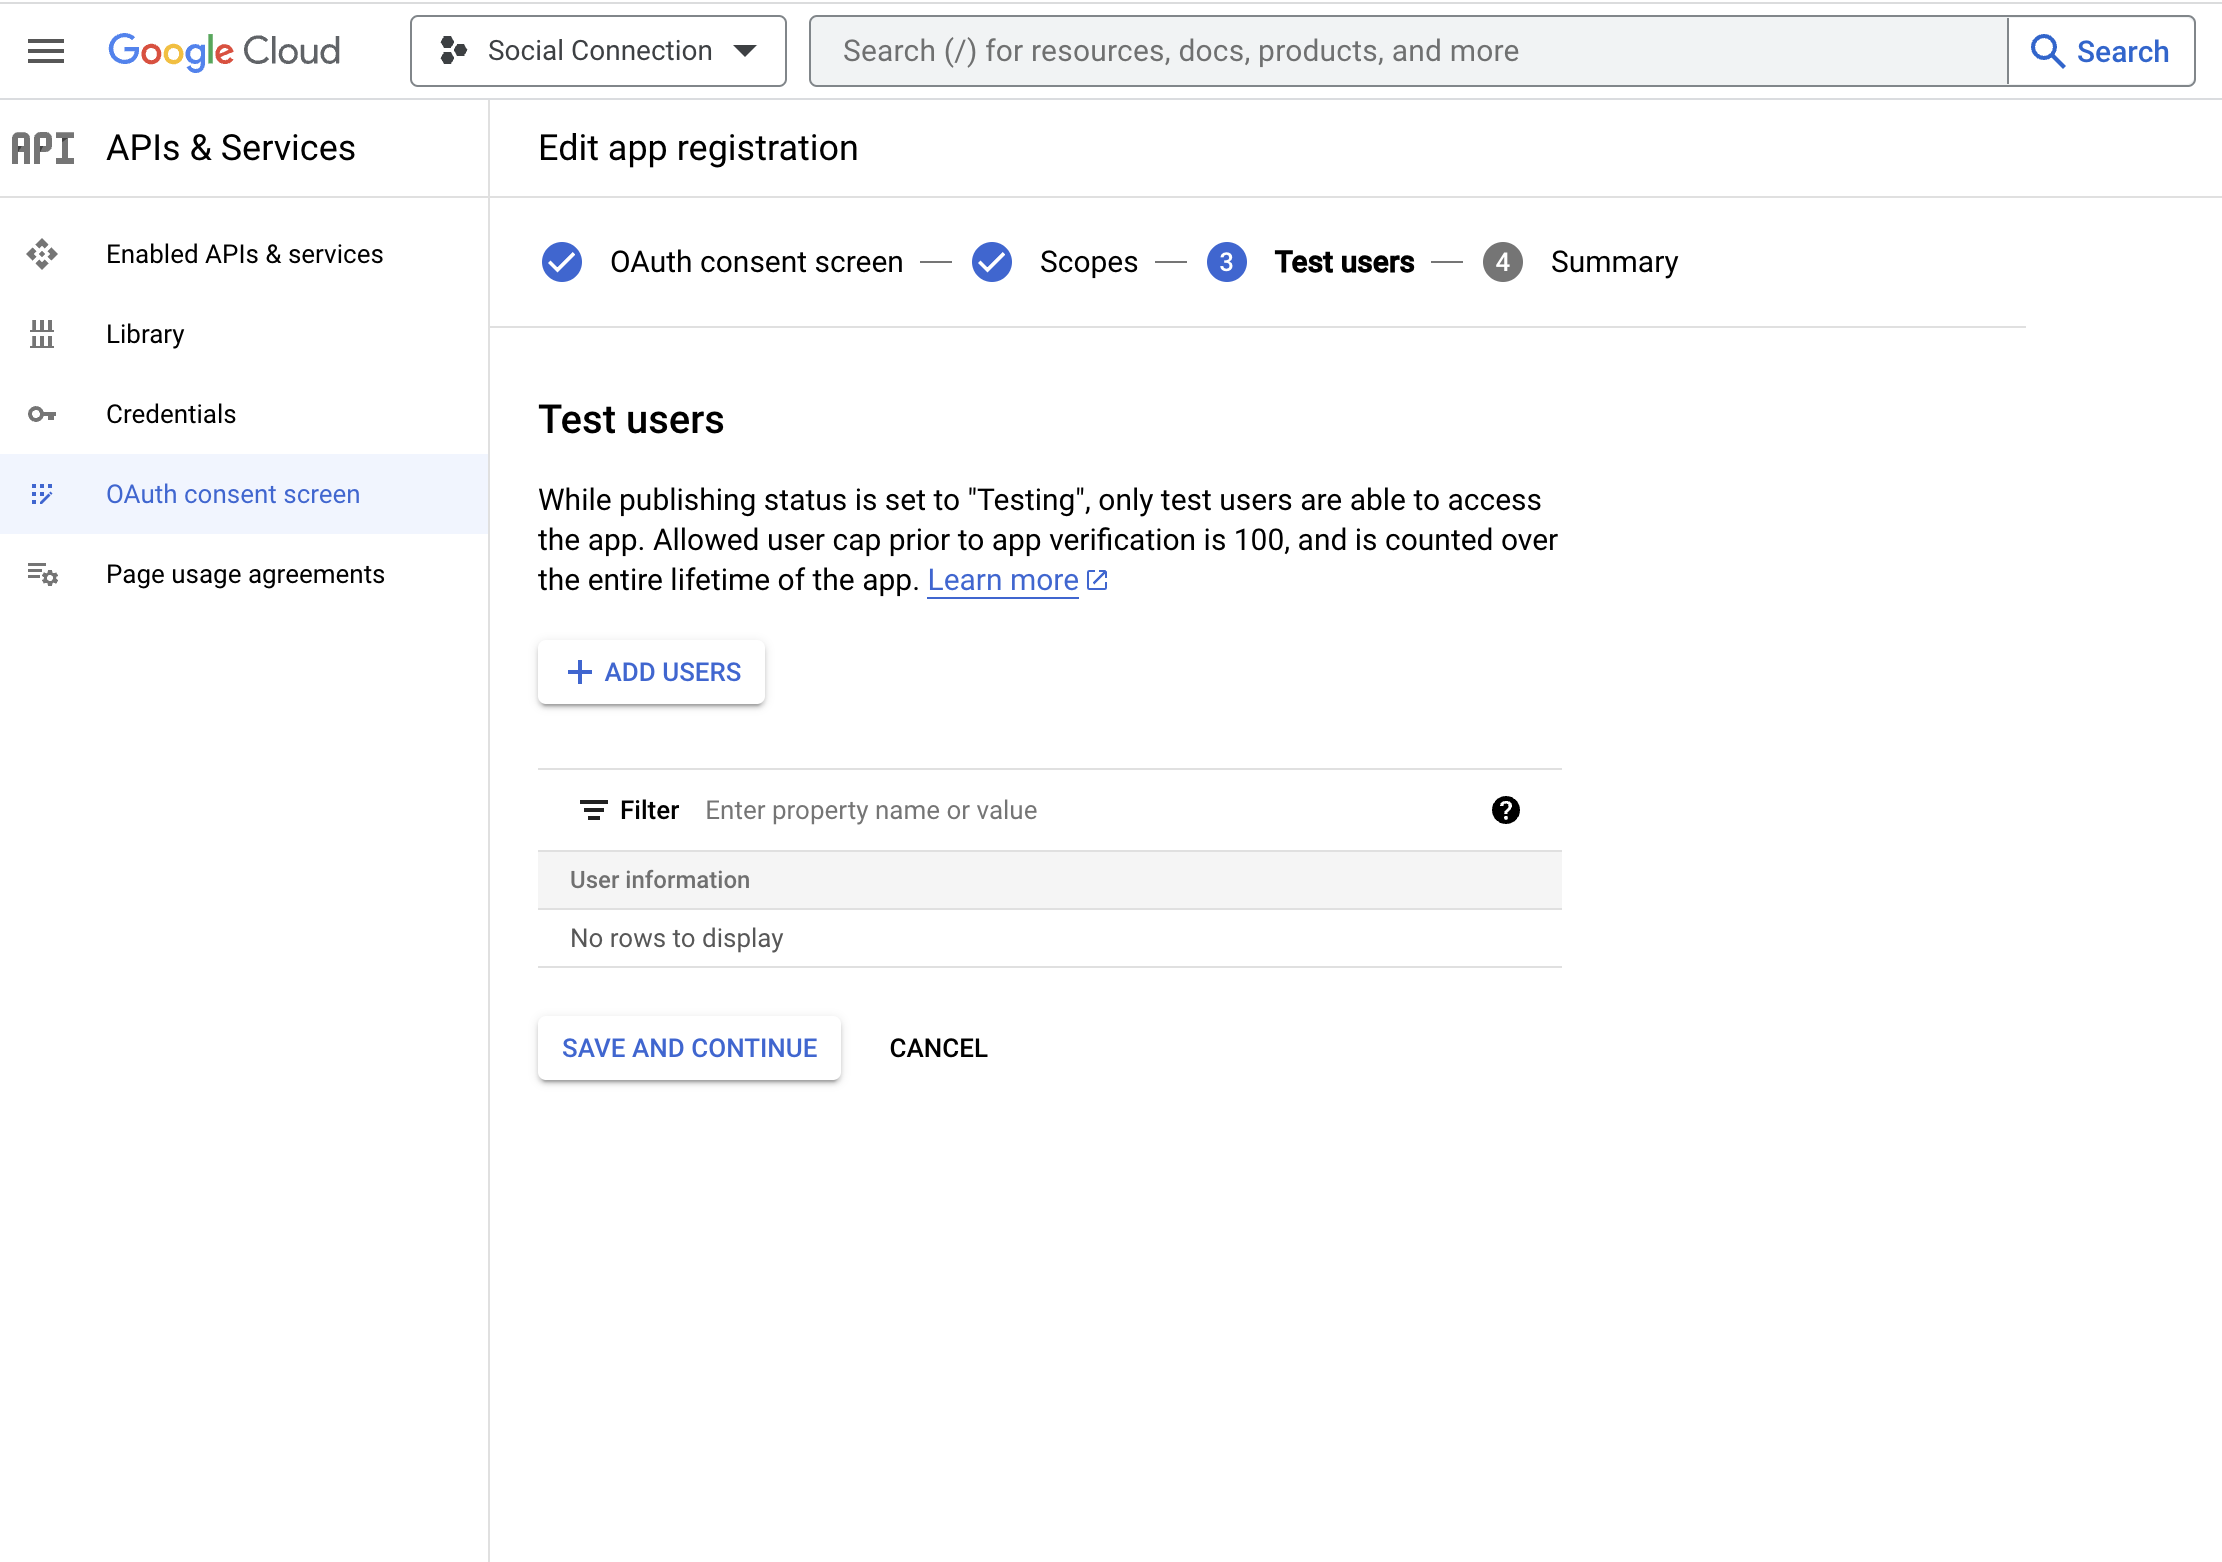
- You will be moved to the Test users, configure Test users if required, and click on SAVE AND CONTINUE.
- Navigate to Credentials > Click on + CREATE CREDENTIALS
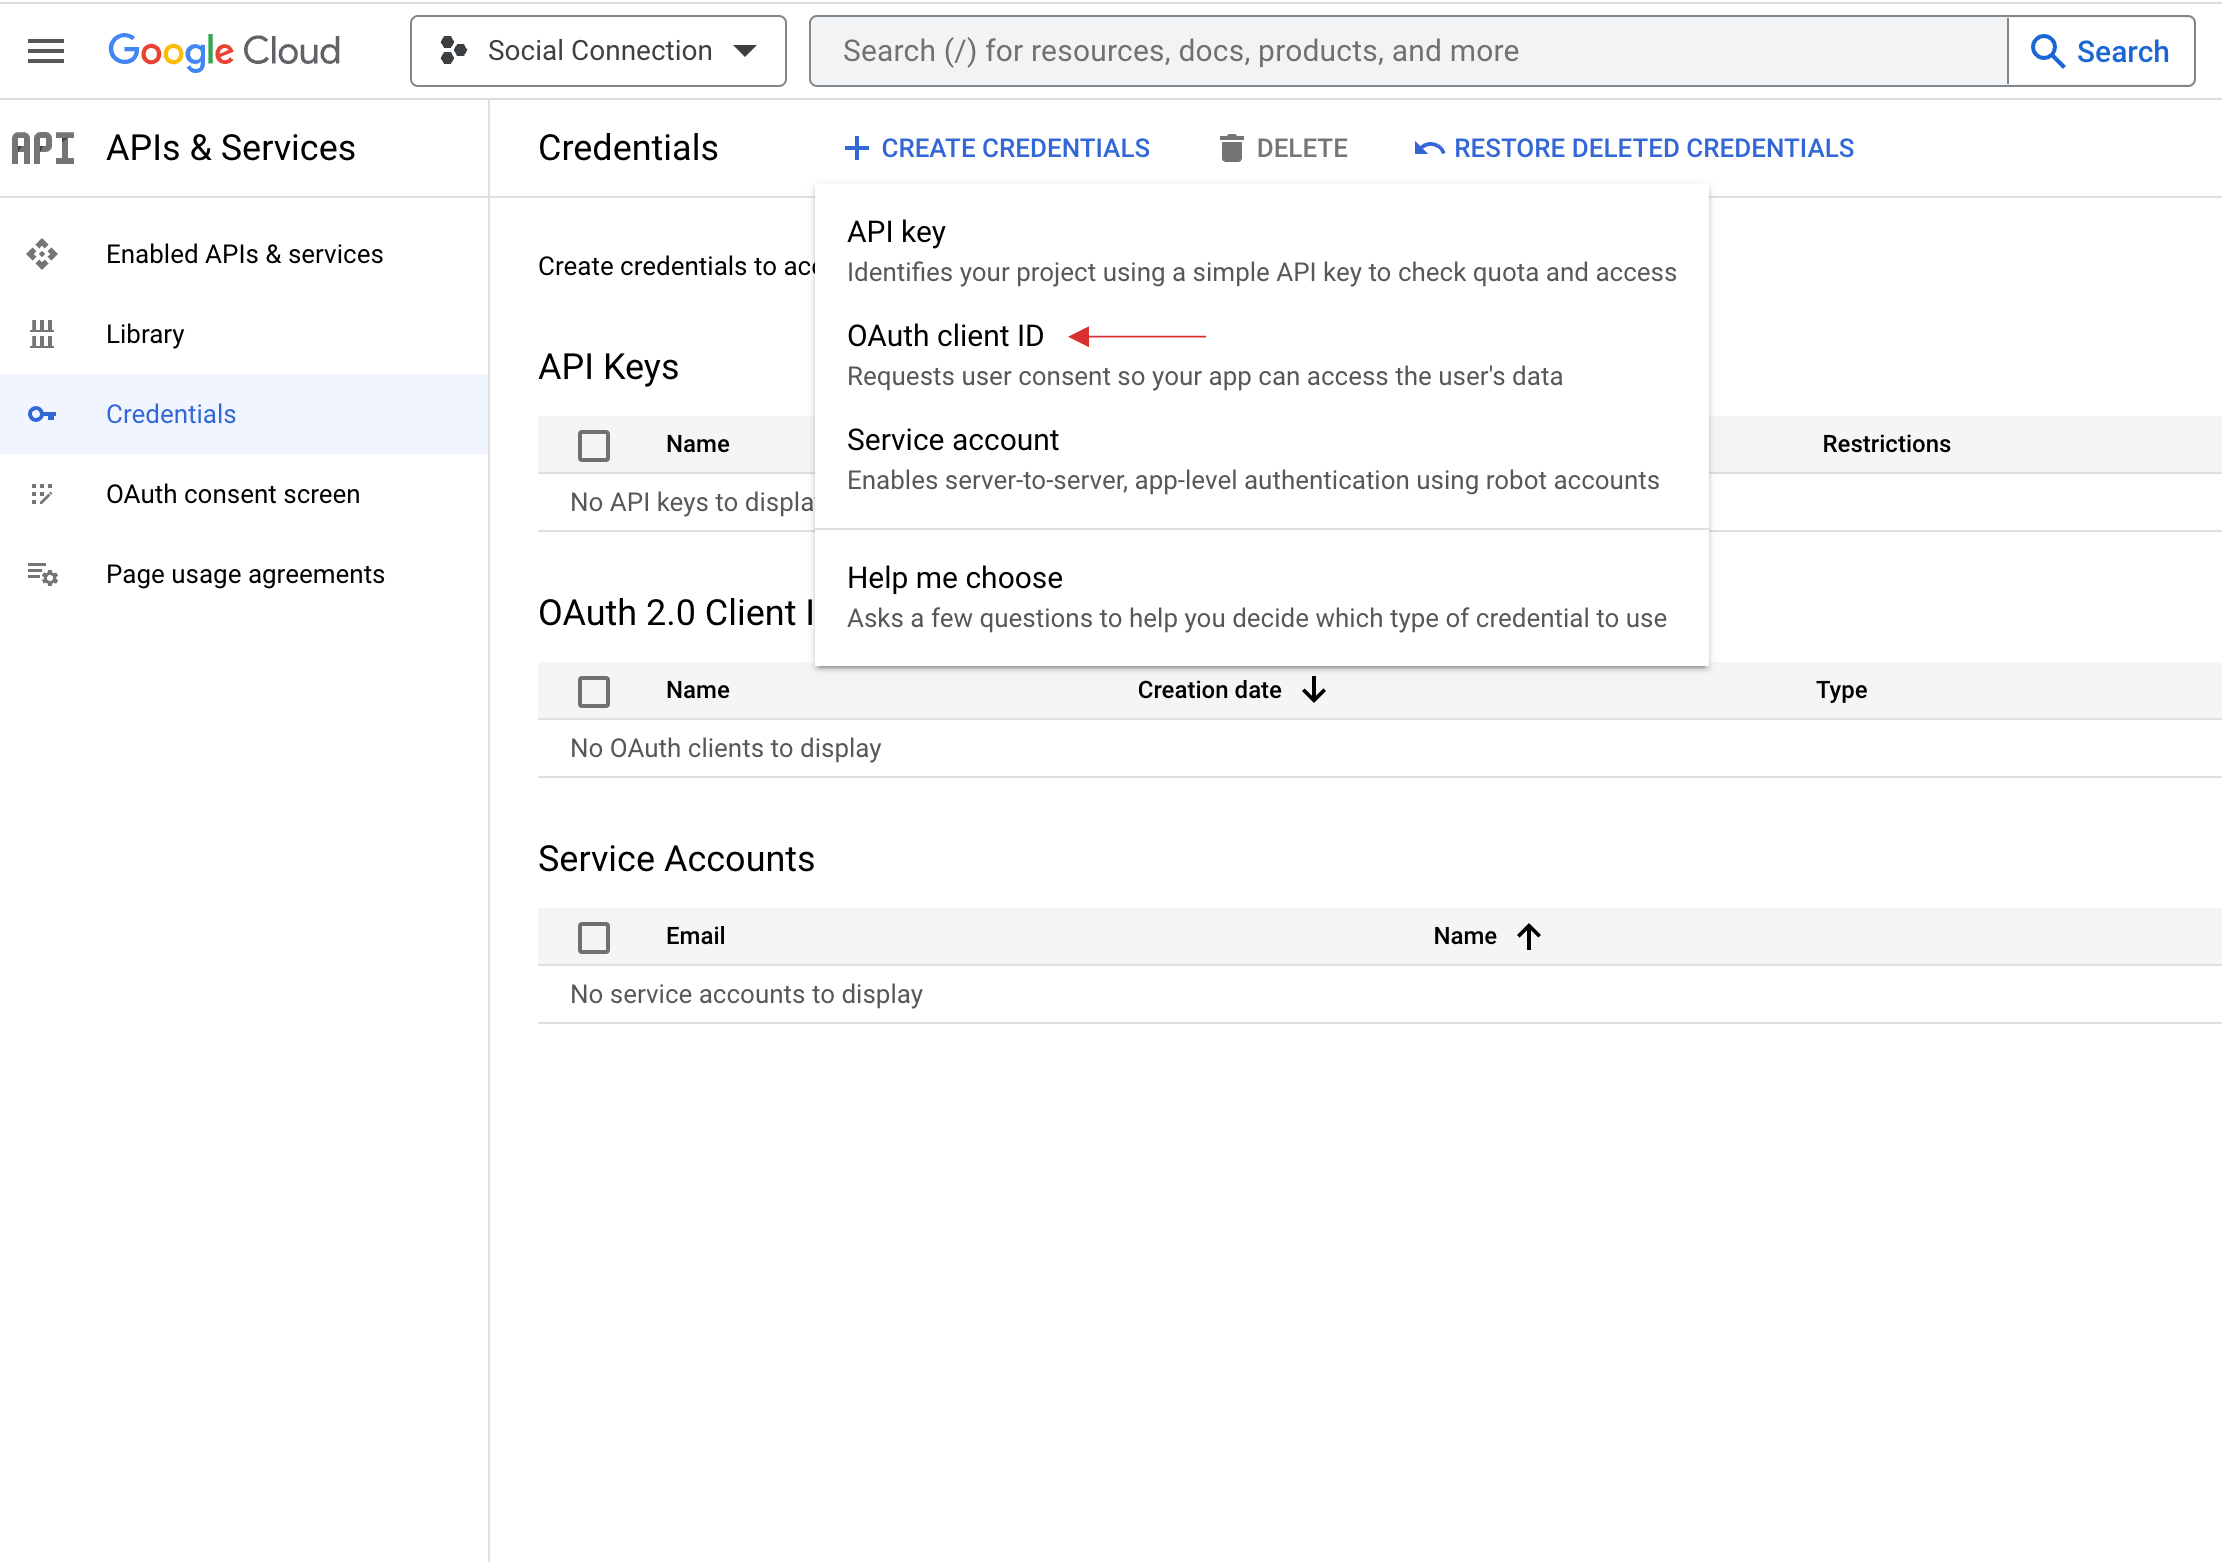
- Choose OAuth client ID.
- Select application type as Web and paste the Redirect URL copied from your dashboard in the Authorized redirect URIs field.
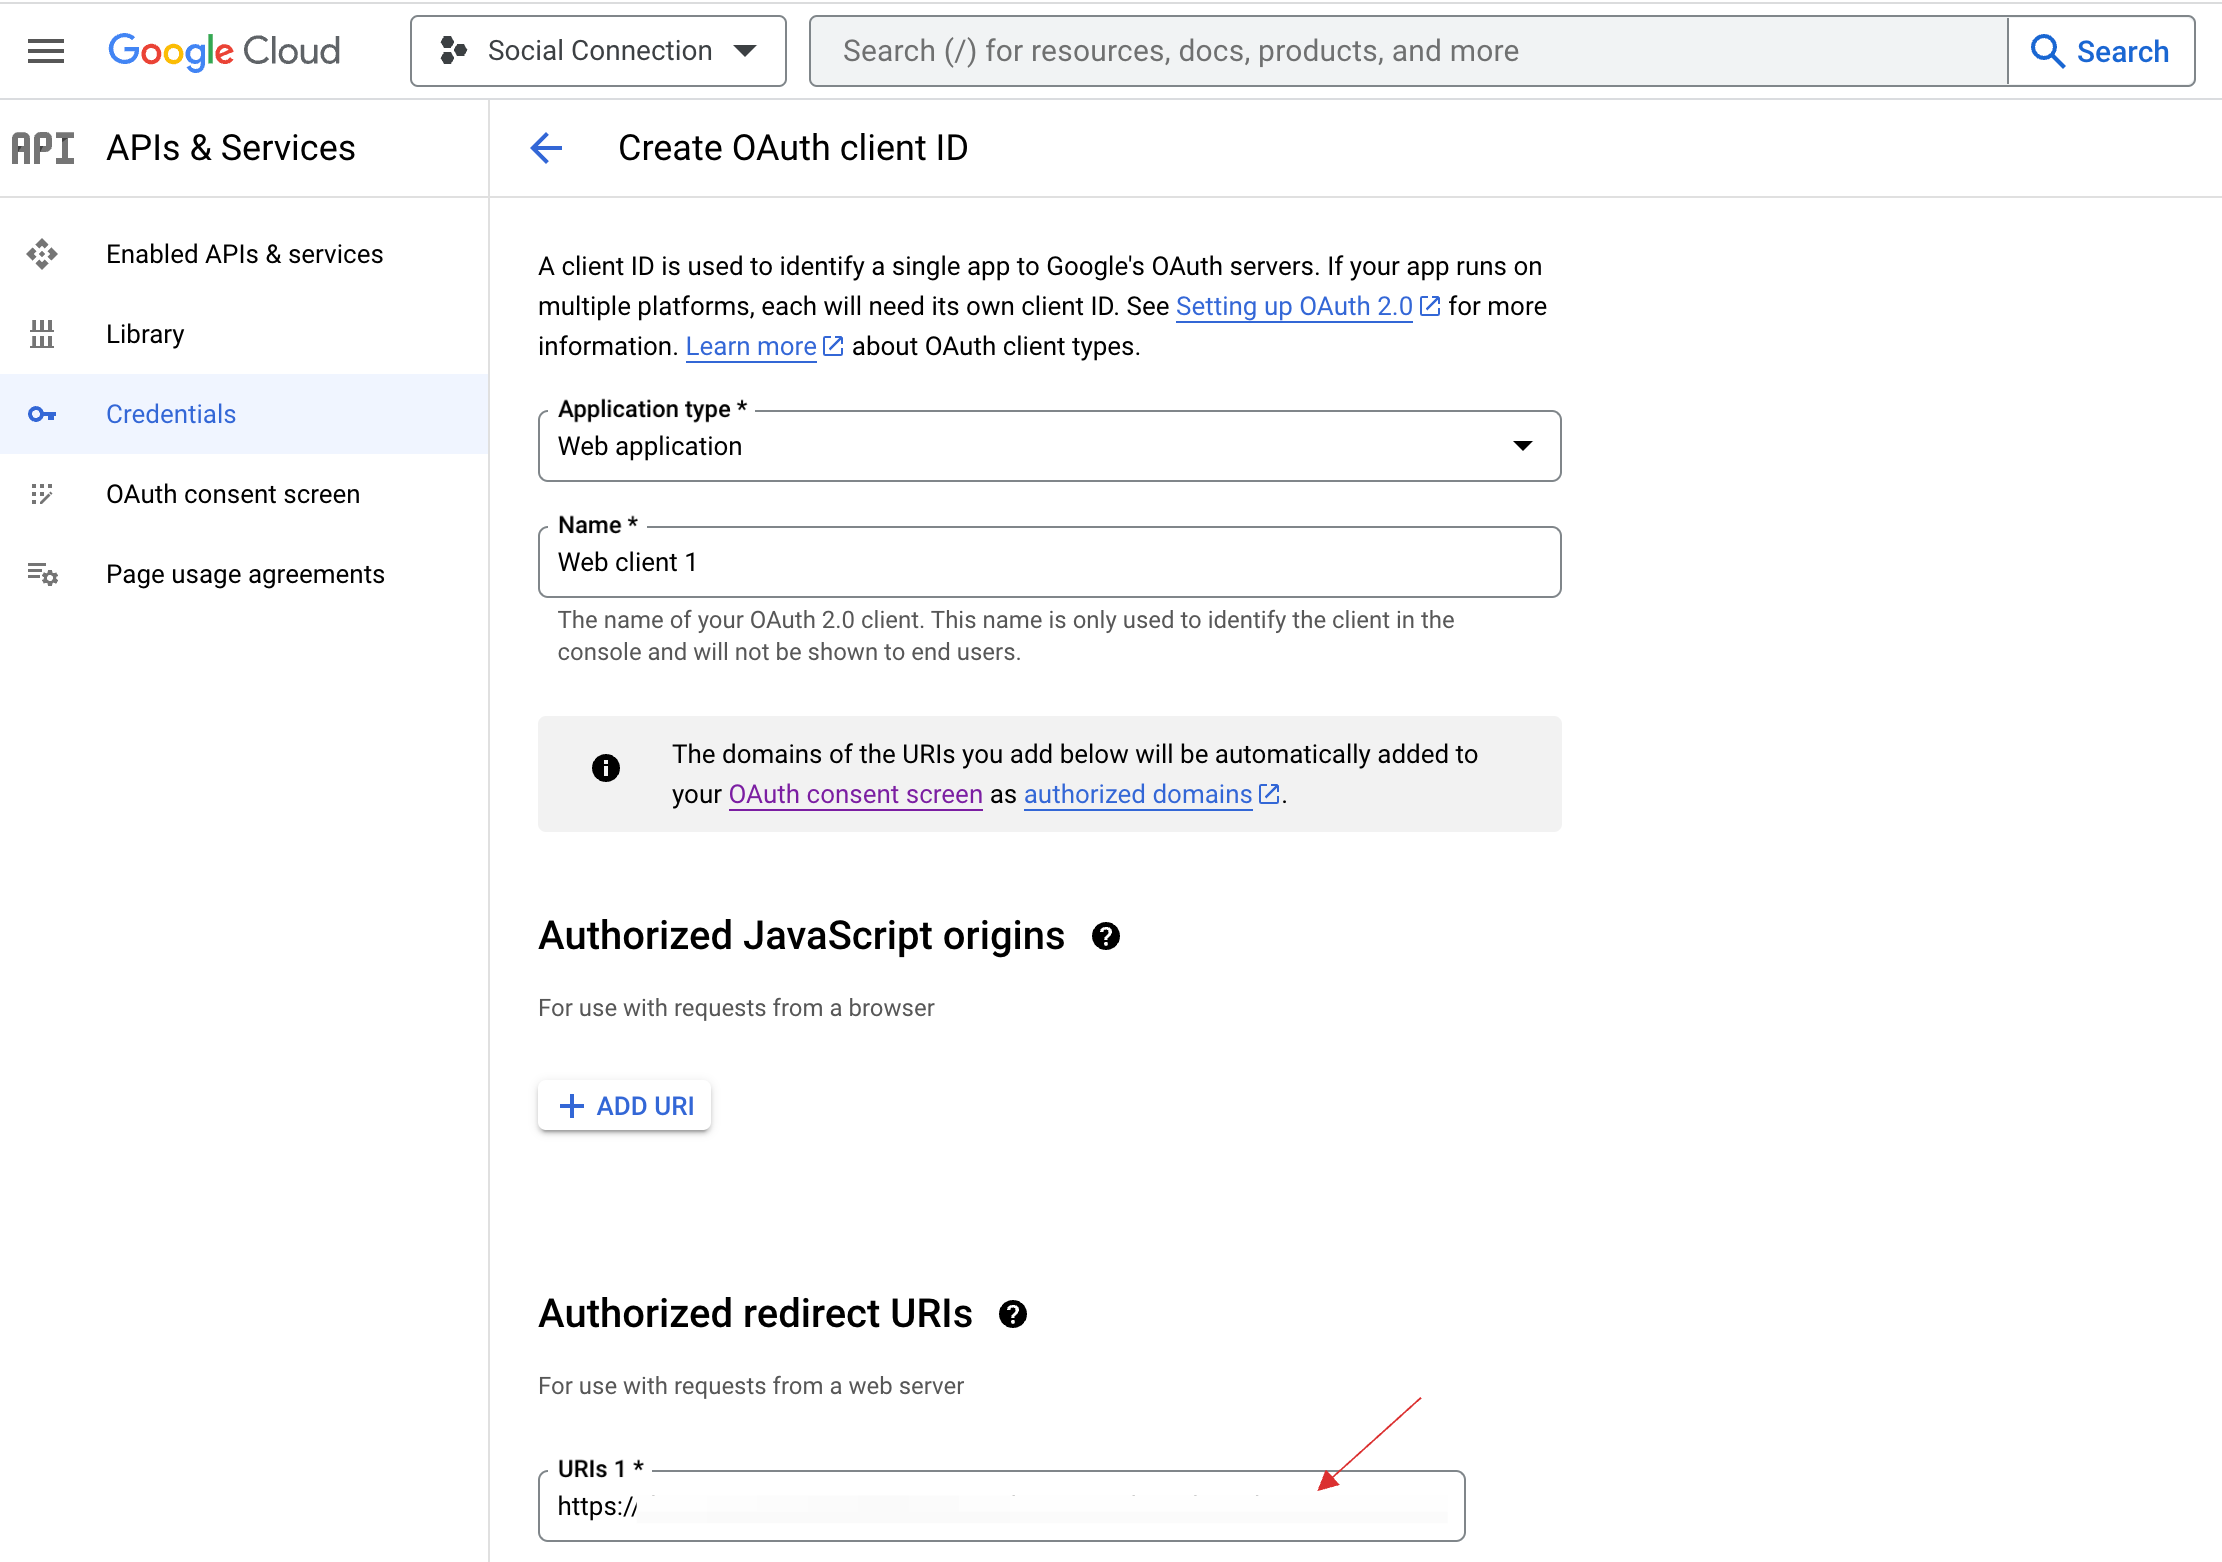
Click on CREATE.
Copy the generated Client ID and Client Secret.

7 Return to your dashboard, paste the Client ID in App ID and Client Secret in App Secret.

8 Configure the other required specification, click on SAVE.