Audit
The Audit page serves as a comprehensive record(logs) of all actions executed within the dashboard, offering detailed information.
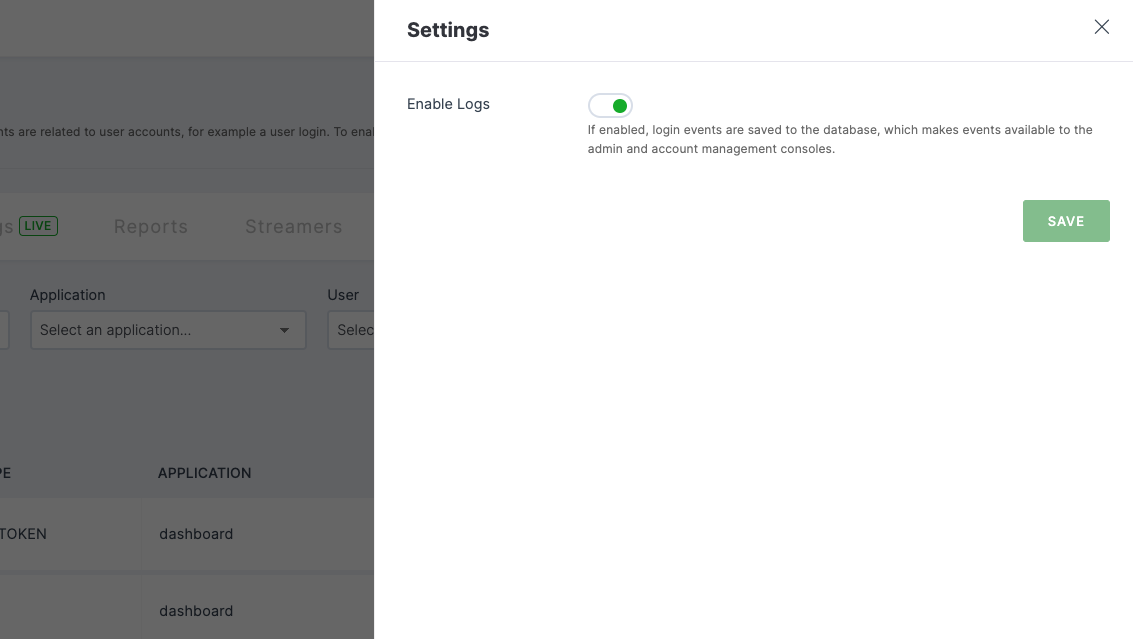
Enable Logs
1 Go to Dashboard > Audit.
2 The Logs page will be displayed.
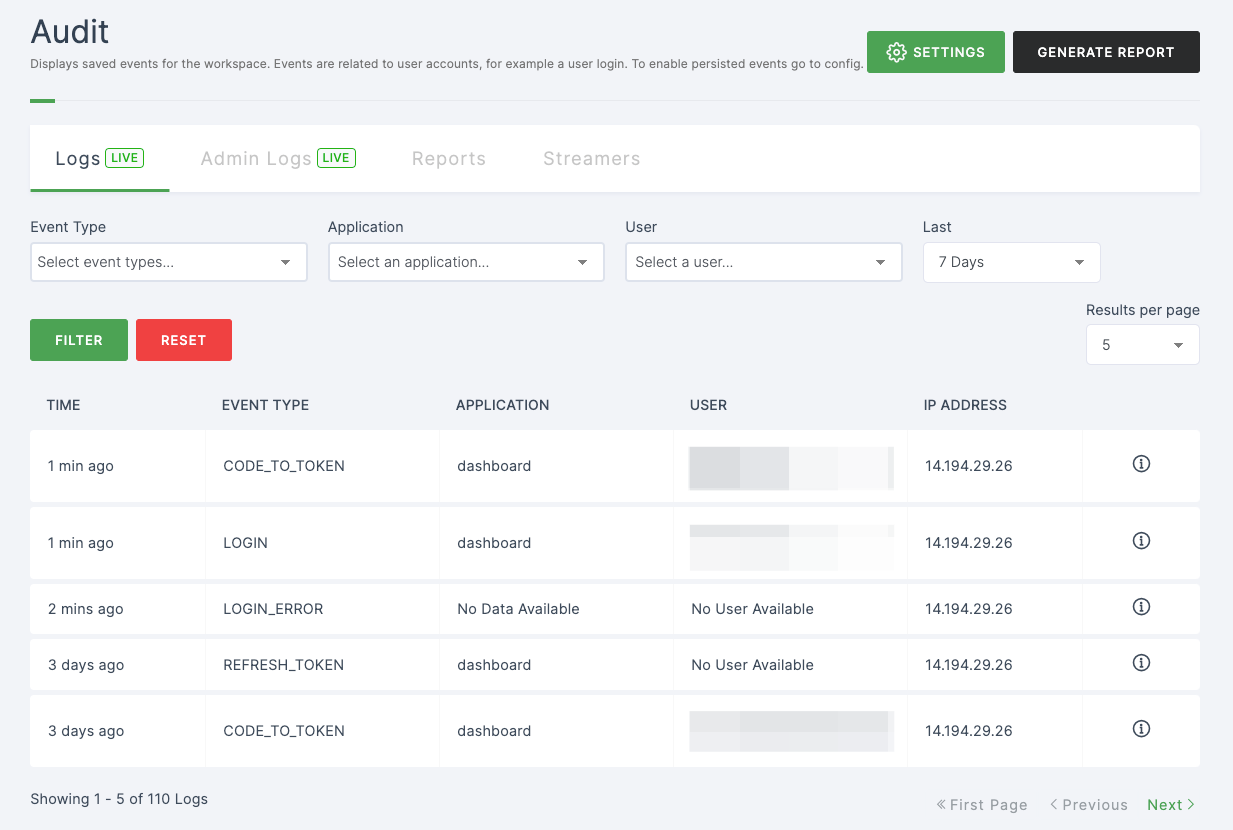
3 This page will showcase all actions performed within the dashboard, furnishing comprehensive details including TIME, EVENT TYPE, APPLICATION, USER, and IP ADDRESS.
Configuration
| Attributes | Description |
|---|---|
| Time | This indicates the timestamp or moment when each action occurred, providing a chronological order of events. |
| Event Type | This field specifies the nature or category of each action, helping users understand what type of activity took place, whether it was a login, data update, configuration change, or another event. |
| Application | This section identifies the specific application or system component involved in the recorded action, enabling users to pinpoint which part of the dashboard was affected. |
| User | It displays the username or user identifier associated with the individual who initiated the action, allowing for user accountability and tracking. |
| IP Address | This shows the Internet Protocol (IP) address from which the action originated, aiding in security and auditing by revealing the source of the action. |
To access the Logs, it is important that the logs are enabled.
4 Please select SETTINGS located at the top right corner. Toggle the Enable button and then click on SAVE.
5 Once enabled, login events are recorded in the database, allowing these events to be accessible through the admin and account management consoles.
6 You can also easily search for a specific log by entering the relevant details into the provided fields.

7 Simply provide details and click on FILTER.
8 To reset the fields and filters and click on RESET.
Enable Admin Logs
1 Go to Dashboard > Audit > Admin Logs.
2 Click on SETTINGS in the top right corner.
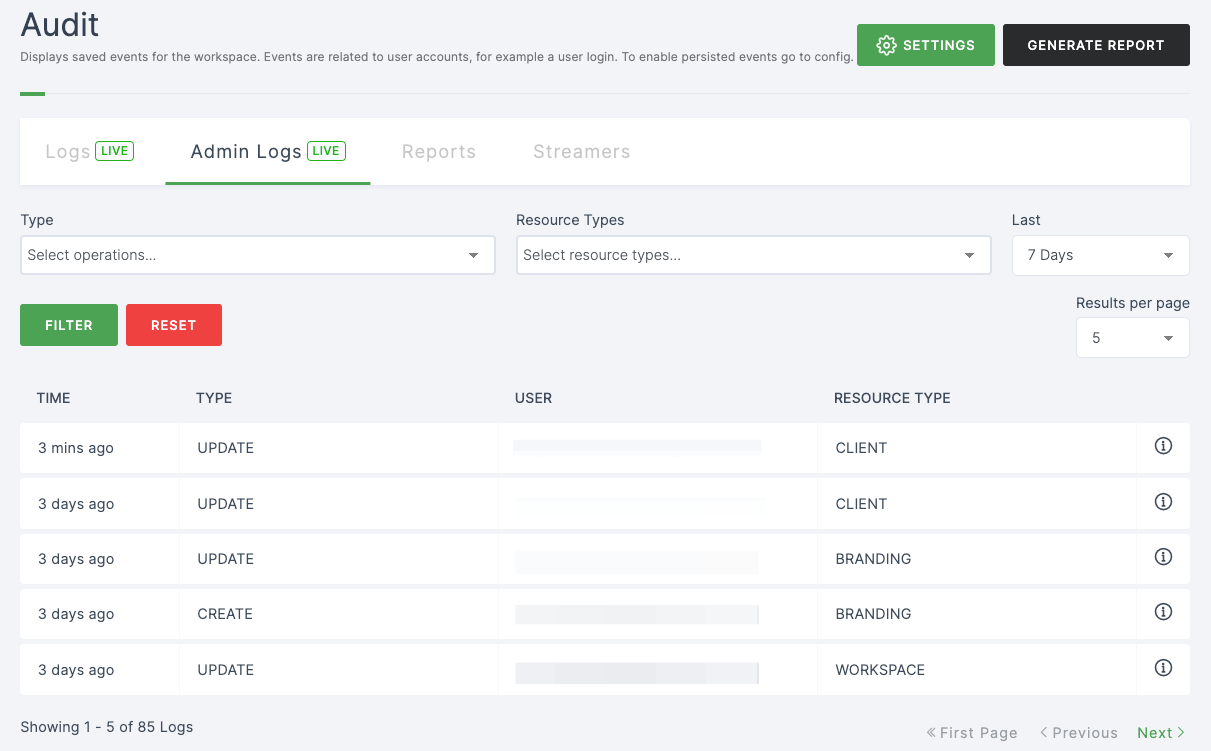
3 Any actions that happens within the dashboard that is related to admins will be displayed in this page, by providing you with the details of TIME, TYPE, USER, and RESOURCE TYPE.
Configuration
| Attributes | Description |
|---|---|
| Time | This timestamp indicates precisely when each action took place, enabling a chronological understanding of administrator-related activities. |
| Type | This field categorizes the type or nature of each action, allowing users to discern whether it was a login, modification, access request, or another relevant event. |
| User | It identifies the specific administrator responsible for initiating the action, ensuring accountability and tracking of administrative activities. |
| Event Type | This element specifies the type of resource or component within the dashboard that was affected by the action. It helps users discern which part of the dashboard underwent changes or received attention from administrators. |
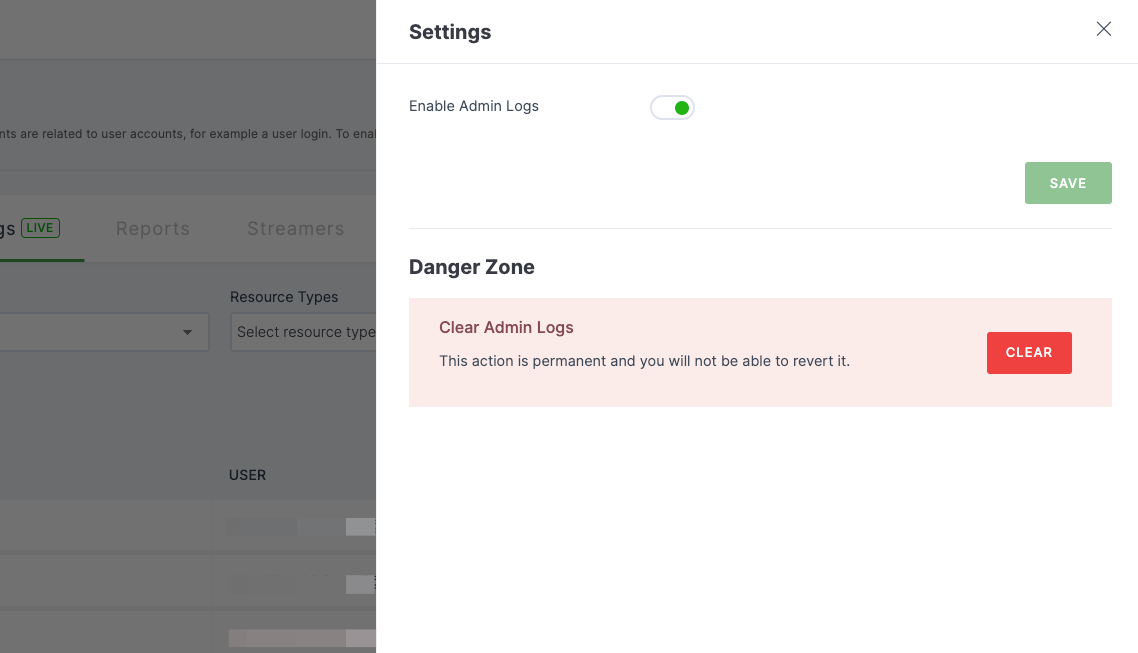
To access the Admin Logs, it is important that the admin logs are enabled.
4 Click on SETTINGS in the top right corner. Toggle the enable button and click on SAVE.
5 Once enabled, login events are recorded in the database, allowing these events to be accessible through the admin and account management consoles.
6 You can easily locate a specific log by entering the relevant details into the designated fields.

7 Simply provide details and click on FILTER.
8 To reset the fields and filters and click on RESET.
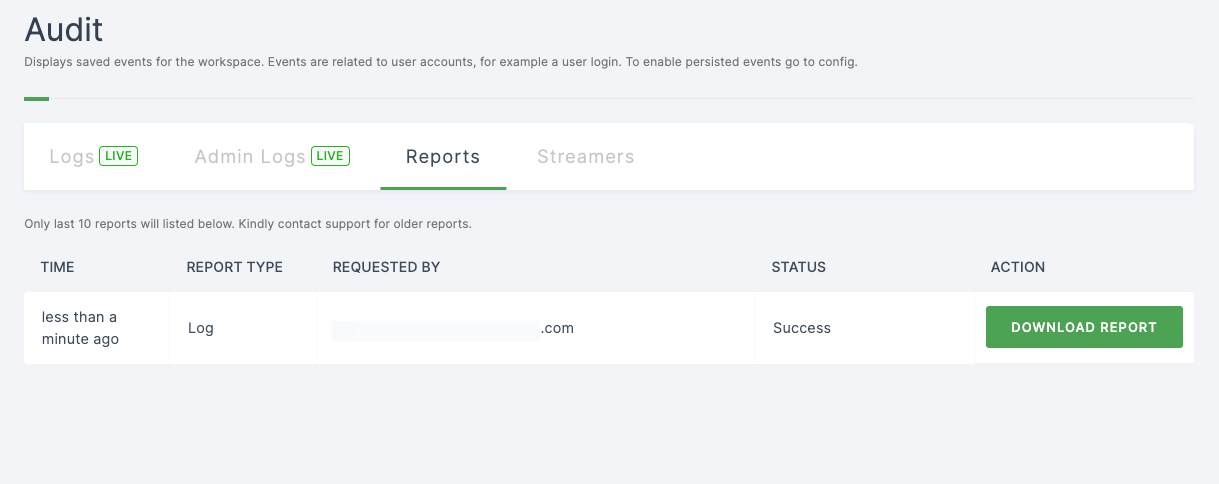
Generate Report
You can obtain all logs by generating and downloading the reports.
1 Go to Audit and click on GENERATE REPORTS
2 To access the report, simply click on the Reports tab.
3 All the generated report will be displayed here. Click on the DOWNLOAD REPORT.
4 The report will be downloaded to your system.
Streamers
All available events can be configured here.
1 Go to Dashboard > Audit > Streamers.
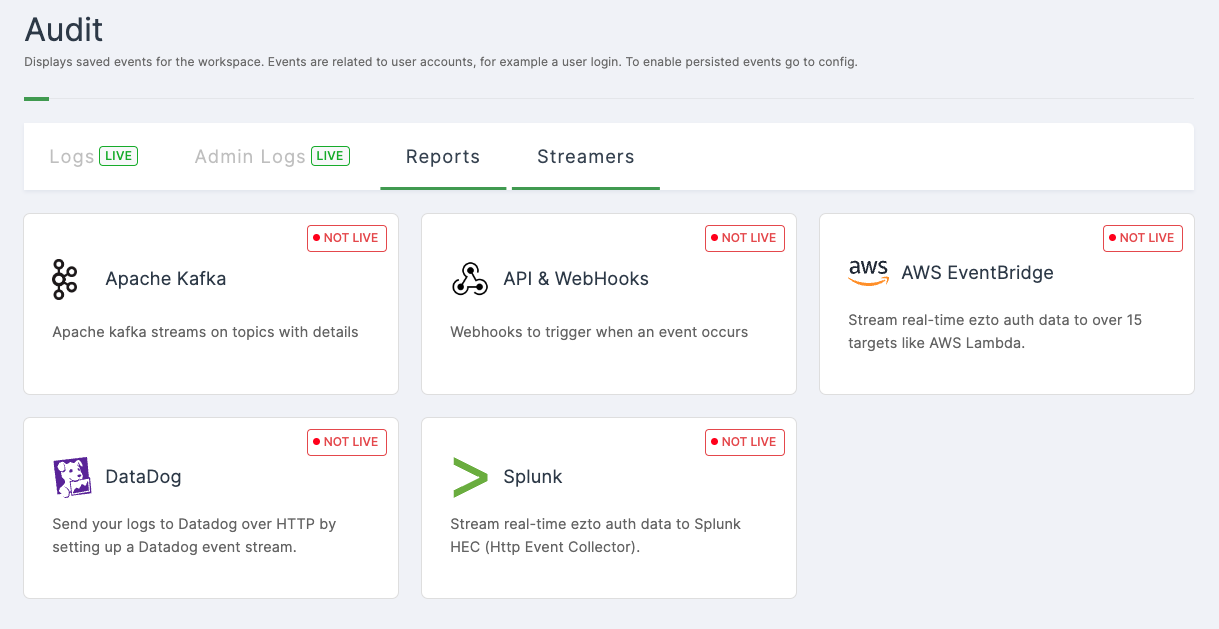
2 Configure all available event streamers in this section. To know how to configure streamers, see here.