iOS
Integrating the ezto verify's SDK into your Native project for iOS is a straightforward process. Follow our comprehensive documentation and sample code snippets to quickly implement user verification features.
1 Requirements
The minimum requirements needed in order to use the ezto verify SDK in your Native project. Ensure your development environment meets these prerequisites before proceeding with the integration.
- iOS 13 and above
2 Installation
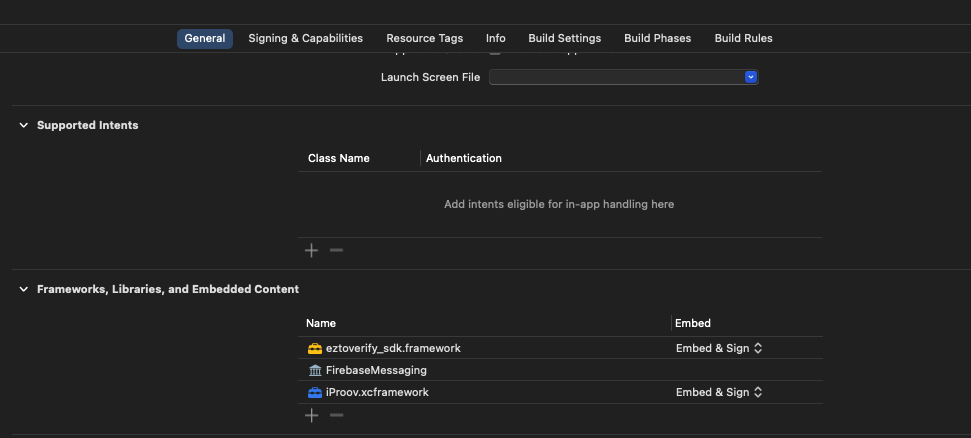
- Add the following path of the SDK to General frameworks section in your project. To obtain the SDK, navigate to the Dashboard > Downloads page, download the iOS (Native) SDK.
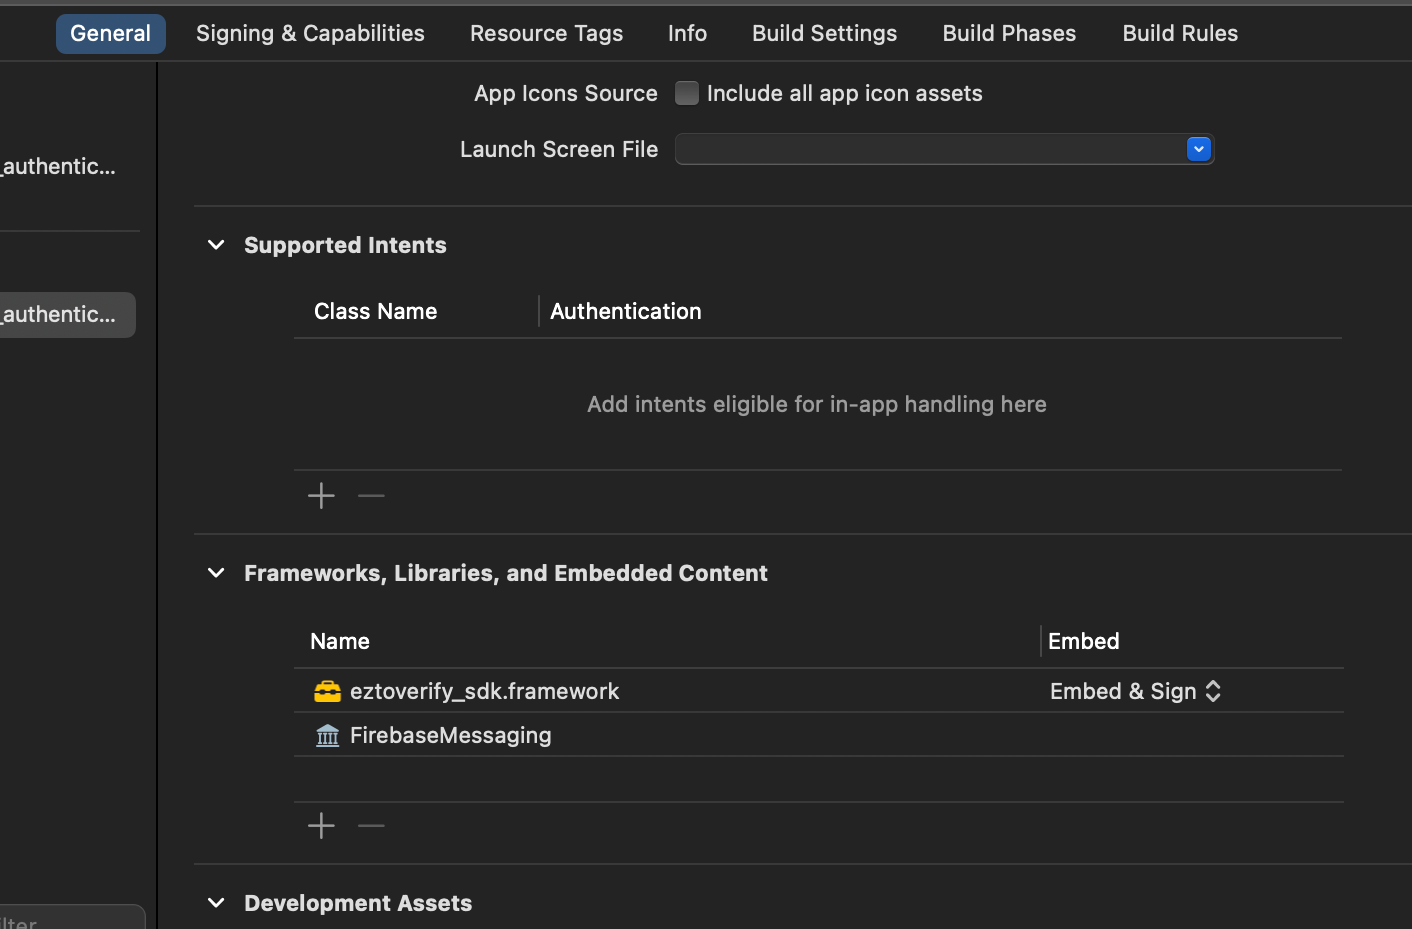
- Add the following path of the iProov SDK to General frameworks section in your project. Please refer to https://github.com/iProov/ios steps to download framework.
3 Permissions
This section lists the permissions that need to be declared in your info.plist file located in <PROJECT_DIR>\ios\Runner\info.plist. These permissions are required for the ezto verify SDK to function correctly, allowing it to access the necessary device features.
<key>NSFaceIDUsageDescription</key>
<string>FaceID is required for user authentication</string>
<key>NSMicrophoneUsageDescription</key>
<string>Mic access is required for user authentication</string>
<key>NSCameraUsageDescription</key>
<string>Camera access is required for user authentication</string>
<key>NSLocationAlwaysAndWhenInUseUsageDescription</key>
<string>Location access is required for user authentication</string>
<key>NSLocationWhenInUseUsageDescription</key>
<string>Location access is needed for user authentication.</string>
<key>NSAppTransportSecurity</key>
<dict>
    <key>NSAllowsArbitraryLoads</key>
    <true/>
</dict>
4 Setup
This section explains how to set up the ezto verify SDK for different verification methods available. Currently, we have iOS setup available for FIDO, UAE PASS Verification, and DeepLink.
FIDO / Passkeys
To setup FIDO or Passkeys, it is necessary to include the webcredentials along with your workspace URL to ios/Runner.entitlements:
<?xml version="1.0" encoding="UTF-8"?>
<!DOCTYPE plist PUBLIC "-//Apple//DTD PLIST 1.0//EN" "http://www.apple.com/DTDs/PropertyList-1.0.dtd">
<plist version="1.0">
<dict>
    <key>aps-environment</key>
    <string>development</string>
    <key>com.apple.developer.associated-domains</key>
    <array>
        <string>webcredentials:example.ezto.io</string>
        <!-- Replace example.ezto.io with your ezto verify workspace url -->
        <!-- Go to Dashboard > Settings > General, copy the URL. -->
    </array>
</dict>
</plist>
UAE PASS Verification
To enable UAE PASS Verification, it is required to add usage descriptions info.plist located in <PROJECT_DIR>\ios\Runner\info.plist:
<key>LSApplicationQueriesSchemes</key>
<array>
    <string>uaepass</string>
    <string>uaepassstg</string>
</array>
<key>CFBundleURLTypes</key>
<array>
    <dict>
        <key>CFBundleURLSchemes</key>
        // Add your bundle_id
        <array>
            <string>{{bundle_id}}</string>
        </array>
        <key>CFBundleURLName</key>
        <string>sdk_scheme</string>
    </dict>
</array>
DeepLink
To setup the DeepLink functionality, it is required to add the applinks with your workspace URL to ios/Runner.entitlements:
<?xml version="1.0" encoding="UTF-8"?>
<!DOCTYPE plist PUBLIC "-//Apple//DTD PLIST 1.0//EN" "http://www.apple.com/DTDs/PropertyList-1.0.dtd">
<plist version="1.0">
<dict>
    <key>aps-environment</key>
    <string>development</string>
    <key>com.apple.developer.associated-domains</key>
    <array>
        <string>applinks:example.ezto.io</string>
        <!-- Replace example.ezto.io with your ezto verify workspace url -->
        <!-- Go to Dashboard > Settings > General, copy the URL. -->
    </array>
</dict>
</plist>
5 Integration
Base Usage
Implement the EztoVerifyService interface and override its methods to enable communication between the SDK and your app. This setup allows the SDK to interact with your application, handling key events such as permissions, errors, and transaction updates.
class MyListener : UIViewController, EztoVerifyService {
    func onPushTokenRequest() -> String? {
        // SDK has requested a token
        // Get the token from Firebase and return it
       return "token";
    }

    func onResult(reqId: String, authReqId: String) {
        // This will be called if the Result Hook notification way in ezto verify dashboard is set to Mobile_Sdk
        // Only called if the authentication flow is completed successfully
    }

    func onError(error: String) {
        // This will be called in case of any errors during the flow
    }

    func onClosed(reason: String) {
       // This will be called if the SDK bottom sheet is closed
    }

    func onTransactionRequest(payload: Any) {
        //This will be get deeplink payload data
        //Pass encryption key if the the push payload is encrypted
        DispatchQueue.main.async {
            self.eztoVerifyApp.onPushReceived(data: payload as! [AnyHashable : Any], with: self, encryptionKey: encryptionKey)
        }
    }
}
Callback Functions
onPushTokenRequest- SDK has requested the token and push type. App should get the token, push type and return it.onResult- Called if the Result Hook notification way in Ezto dashboard is set to Mobile_Sdk. Only called if the authentication flow is completed successfully.onError- Called when the SDK encounters an error.onClose- Called when the transaction has completed.onTransactionRequest- This function is called to get the payload data.
Force Update
The forceUpdate function ensures that your app can enforce updates when necessary. By passing true to this function, the app will check for available updates and initiate a forced update if one is required, ensuring that you are always on the latest version.
The eztoInit function is required if you want to force update the app.
class AppDelegate: UIViewController, UIApplicationDelegate {
    let eztoVrfyApp = EztoVerifApp()

    func application(_ application: UIApplication, didFinishLaunchingWithOptions launchOptions: [UIApplication.LaunchOptionsKey: Any]?) -> Bool {

        DispatchQueue.main.async {
            self.eztoVrfyApp.eztoInit(with: self.myListener, forceUpdate: true)
        }

        // Override point for customization after application launch.
        return true
    }
}
Push Support
Integrate push notifications by configuring the SDK to handle messages in both foreground and background states.
Use onMessageReceived in AppDelegate to manage notifications when the app is active. To get the encryption key, check here.
class AppDelegate: UIViewController, UIApplicationDelegate {

    let myListener = MyListener()
    let eztoVrfyApp = EztoVerifyApp()
    //This method is overriden from FirebaseMessagingService and will be called if new push is received
    func userNotificationCenter(_ center: UNUserNotificationCenter,
                                willPresent notification: UNNotification) async
    -> UNNotificationPresentationOptions {
        let userInfo = notification.request.content.userInfo
        onMessageReceived(data: userInfo)
        return [[.alert, .sound]]
    }


    func onMessageReceived(data : [AnyHashable : Any]){
        eztoVrfyApp.onPushReceived(data: data, with: myListener, encryptionKey: {{encryption key}})
    }

}
Use onBackgroundPushReceived to process when the app is inactive or in the background. To get the encryption key, check here.
class AppDelegate: UIViewController, UIApplicationDelegate {

    func userNotificationCenter(_ center: UNUserNotificationCenter,
                                didReceive response: UNNotificationResponse) async {
        let userInfo = notification.request.content.userInfo
        onMessageReceived(data: userInfo)
    }


    func onMessageReceived(data : [AnyHashable : Any]){
        eztoVrfyApp.onPushReceived(data: data, with: myListener, encryptionKey: {{encryption key}})
    }

}
QR Support
Launch the QR scanner within your app using the launchQrScanner method. This functionality enables secure QR code scanning, allowing your app to read and process QR codes using the provided encryption key. To get the encryption key, check here.
eztoVrfyApp.launchQrScanner(with: myListener, encryptionKey: {{encryption key}})
DeepLink Support
This allows your app to handle and process deep links, which are URLs that direct users to specific content or features within your app.
Use the onDeeplinkRequest method to manage incoming deep link requests and handle them appropriately within your application.
class AppDelegate: UIViewController, UIApplicationDelegate {

   func application(_ application: UIApplication, continue userActivity: NSUserActivity, restorationHandler: @escaping ([UIUserActivityRestoring]?) -> Void) -> Bool {
            if userActivity.activityType == NSUserActivityTypeBrowsingWeb,
               let url = userActivity.webpageURL {
                    DispatchQueue.main.async {
                        self.eztoVrfyApp.onDeeplinkRequest(with: self.myListener, url: "\(url)")
                    }
                    return true
                }
            return false
    }

}

class SceneDelegate: UIResponder, UIWindowSceneDelegate {


    func scene(_ scene: UIScene, continue userActivity: NSUserActivity) {
        if userActivity.activityType == NSUserActivityTypeBrowsingWeb {
           if let url = userActivity.webpageURL {
               DispatchQueue.main.async {
                   self.eztoVrfyApp.onDeeplinkRequest(with: self.myListener, url: "\(url)")
               }
           }
        }
    }

    func scene(_scene: UIScene, openURLContextsURLContexts: Set<UIOpenURLContext>) {
            forcontext inURLContexts {
                DispatchQueue.main.async{
                    self.qlikVerifyApp.onDeeplinkRequest(with: self.myListener, url: "\(context.url)")
                }
            }
        }


}